
Written byMariaUpdated on May 28, 2025
How to Take a Screenshot on Mac?
Approved byGerhard Chou
PAGE CONTENT:
- Built-in Screenshot Shortcuts on Mac
- Using the Screenshot App (macOS Mojave and Later)
- Using Touch Bar to Take Screenshots (If Applicable)
- Changing the Default Screenshot Location
- Editing and Annotating Screenshots
- Third-Party Screenshot Tools (Optional Section)
- Troubleshooting Screenshot Issues on Mac
- Conclusion
Screenshots have become essential for everyday digital interactions. Whether you're capturing an error message, saving a snippet of a conversation, or documenting a web page, macOS makes it incredibly easy to take screenshots. If you're new to the Mac environment or just want to sharpen your skills, this guide will walk you through all the ways to take a screenshot on a Mac, from keyboard shortcuts to advanced tools and troubleshooting tips.
Apple's macOS is packed with powerful and intuitive tools, and screenshotting is no exception. Unlike Windows, where screenshotting often requires third-party tools, macOS offers several built-in methods that are both fast and flexible. From full-screen captures to precise selections and even timed recordings, your Mac has everything you need without installing extra software.
This article provides a comprehensive overview of every screenshot method available on a Mac, helping you choose the best technique for your needs - whether you're using a MacBook, iMac, or Mac Mini.
Built-in Screenshot Shortcuts on Mac
macOS includes several handy keyboard shortcuts for capturing screenshots. Here's a breakdown of the most common ones:
A. Capture the Entire Screen
Shortcut: Command (⌘) + Shift + 3
This is the quickest and most straightforward method to take a screenshot of your entire display.
Steps:
- Press Command (⌘) + Shift + 3.
- The sound of the camera shutter will be audible if your sound is activated.
- The screenshot will appear as a thumbnail in the lower-right corner of the screen in macOS Mojave and later versions.
- If you don't click the thumbnail, it will automatically save to your Desktop.
![all the ways to take a screenshot on a Mac]()

This is ideal for capturing everything visible on your screen in one go.
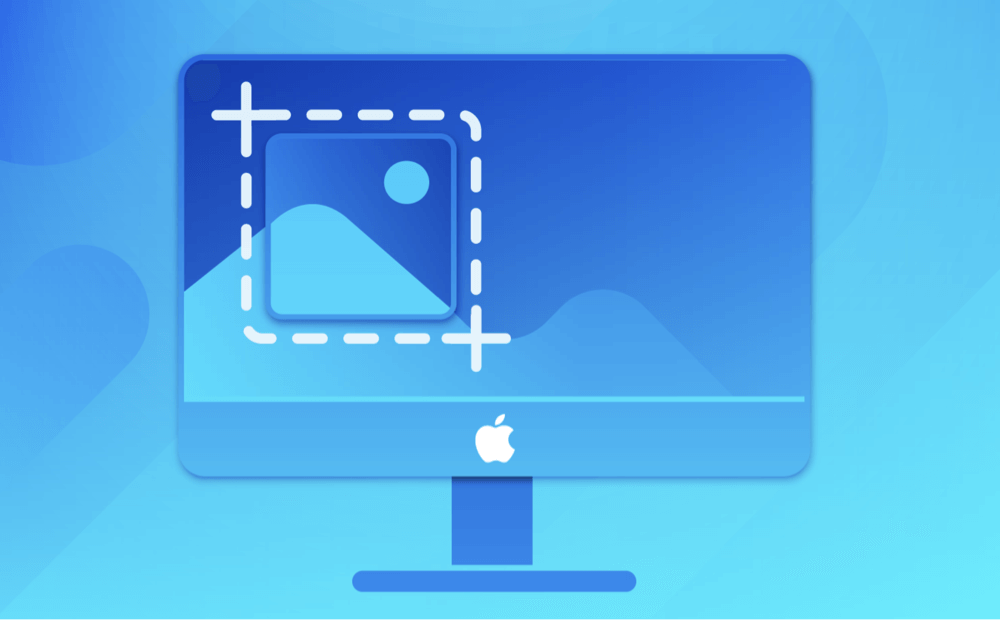
B. Capture a Selected Portion of the Screen
Shortcut: Command (⌘) + Shift + 4
This method lets you manually select the exact part of the screen you want to capture.
Steps:
- Press Command (⌘) + Shift + 4.
- A crosshair will appear in place of your cursor.
- To construct a box around the area you wish to capture, click and drag.
- To take a screenshot, let go of the mouse or trackpad.
Perfect for highlighting a small section of content like a paragraph or image.
C. Capture a Specific Window
Shortcut: Command (⌘) + Shift + 4, then press Spacebar
This is particularly useful for grabbing a screenshot of an application window with neat borders and shadows.
Steps:
- Prior to tapping the Spacebar, press Command (⌘) + Shift + 4.
- A camera symbol appears in place of your cursor.
- Hover over the window you want to capture.
- Click once to capture the window.
The resulting image includes a drop shadow, making it visually appealing for presentations or tutorials.
Using the Screenshot App (macOS Mojave and Later)
With the release of macOS Mojave (10.14), Apple introduced the Screenshot app, a GUI-based tool accessible with a single shortcut.
A. How to Launch the Screenshot Toolbar
Shortcut: Command (⌘) + Shift + 5
This opens the screenshot toolbar, a floating control panel that offers multiple options:
- Capture Entire Screen
- Capture Selected Window
- Capture Selected Portion
- Record Entire Screen (Video)
- Record Selected Portion (Video)
B. Customization Options
At the far-right side of the toolbar, clicking "Options" allows you to:
- Set a timer (5 or 10 seconds delay)
- Choose save location (Desktop, Documents, Clipboard, Preview, Mail, Messages)
- Enable/disable floating thumbnail
- Show/hide mouse pointer
The toolbar provides a user-friendly interface for those who prefer using a mouse or trackpad over keyboard shortcuts.
Using Touch Bar to Take Screenshots (If Applicable)
If you're using a MacBook Pro with a Touch Bar, you can customize it to include a screenshot button.
A. Add Screenshot Button to Touch Bar
- Go to System Settings > Keyboard.
- Click Customize Control Strip.
- Drag the Screenshot icon onto your Touch Bar.
B. Use It to Capture
Tap the Screenshot icon in the Touch Bar to:
- Capture the screen
- Select a portion
- Capture a window
- Save to clipboard or location
This feature streamlines screenshot-taking for Touch Bar users who prefer touch interaction.
Changing the Default Screenshot Location
By default, macOS saves screenshots to your Desktop, which can clutter your workspace quickly. Fortunately, you can change the destination.
A. Use the Screenshot Toolbar
- Press Command (⌘) + Shift + 5.
- Click Options.
- Choose a preferred save location or create a new folder.
B. Change Using Terminal
If you want more control, use the Terminal:
Steps:
- Open Terminal from Utilities via Applications.
- Type the below command:
defaults write com.apple.screencapture location ~/Pictures/Screenshots
- Press Enter.
- Then apply the changes:
killall SystemUIServer
To revert to Desktop:
defaults write com.apple.screencapture location ~/Desktop
killall SystemUIServer
Editing and Annotating Screenshots
Once you've taken a screenshot, macOS offers Markup tools for editing.
A. Accessing Markup Tools
On macOS Mojave (10.14) and later, a floating thumbnail of your screenshot appears in the lower-right corner of your screen right after you take it. This floating thumbnail gives you quick access to editing options:
To use Markup:
- Take a screenshot using any method (e.g., Command + Shift + 3).
- Wait for the floating thumbnail to appear.
- Click on the thumbnail before it disappears (after about 5 seconds).
- The screenshot opens in a Markup Preview window.
If you miss the thumbnail:
- Open the screenshot file in Preview, then click the Markup button (a toolbox icon).
B. Available Editing and Annotation Tools
Once the screenshot is open in the Markup editor, you have access to a toolbar of editing features along the top. Here’s what you can do:
1. Sketch and Draw
- Use the Sketch tool to draw freehand using your mouse or trackpad.
- If your sketch resembles a shape (like a circle), macOS will automatically offer to convert it to a perfect geometric figure.
- You can use the Draw tool for pressure-sensitive drawing if you're on a Force Touch trackpad or using an Apple Pencil (on iPad with Sidecar).
2. Add Shapes
- Quickly insert shapes like rectangles, circles, arrows, stars, and speech bubbles.
- Great for emphasizing buttons or areas of interest.
- Shapes can be resized, moved, and recolored.
3. Insert Text
- Use the Text tool ("T" icon) to add comments or labels.
- You can change the font, size, alignment, and color.
- Essential for explaining parts of a screenshot or creating callouts.
4. Highlight Content
- Use the Highlighter tool to draw attention to specific lines or text.
- You can choose from various highlight colors.
- Ideal for drawing attention to code snippets, document sections, or email content.
5. Add Signatures
- If you need to sign a document or screenshot:
- Click the Signature tool.
- Create a signature using your trackpad or import one using your iPhone or iPad.
- Insert it into the screenshot with one click.
6. Magnify Area
- Use the Magnifier tool (loop icon) to zoom in on part of your screenshot.
- Adjust the zoom level and size of the magnifier bubble.
- Excellent for focusing on UI elements or small text.
7. Crop and Resize
- Click and drag the blue dots at the edge of the image to crop your screenshot.
- Reduces file size and removes unnecessary background space.
C. Saving and Sharing Annotated Screenshots
Once your edits are complete, you have several options:
1. Save Changes
- Click Done to save the edited image to its original location.
- If opened in Preview, use File > Save or Save As to choose a new location or format.
2. Copy to Clipboard
- Click Edit > Copy to copy the edited image.
- Paste directly into apps like Notes, Mail, Pages, or chat windows.
3. Share Directly
- Click the Share icon (box with arrow) in the upper-right.
- Send your image via:
- AirDrop
- Messages
- Notes
- Or upload to iCloud Drive
This is incredibly useful for workflows where you need to quickly document an issue, annotate it, and send it to tech support or a colleague.
D. Use Cases: When and Why to Annotate Screenshots
1. Tech Support:
Circle the error message on a screen and add a brief explanation before sending it to IT.
2. Tutorials and How-Tos:
Use arrows and numbered steps to guide readers through a process visually.
3. Collaboration and Feedback:
Highlight issues in a design, document, or website mockup for team discussions.
4. Social Media or Blogging:
Make your screenshots more engaging and informative with text and highlights.
5. Forms and Applications:
Sign and annotate screenshots of online forms or invoices before submitting or printing.
E. Tips for Better Annotations
- Use contrasting colors so your annotations stand out against the background.
- Avoid clutter: Don’t overload the screenshot with too many notes or arrows.
- Be consistent: Use similar fonts, colors, and shapes if you're annotating multiple images for a project.
- Use the magnifier tool for tight UI elements or small text areas.
Third-Party Screenshot Tools (Optional Section)
While macOS's built-in tools are sufficient for most users, power users might need advanced features such as:
- Scrolling capture
- GIF creation
- OCR (text recognition)
Here are a few popular third-party options:
1. CleanShot X
- Offers clutter-free screenshots
- Built-in cloud storage
- Scrolling capture
- Great for professional content creators
2. Snagit
- Powerful annotation tools
- Video and image capture
- Templates for tutorials and workflows
3. Lightshot
- Lightweight and free
- Easy sharing via links
- Basic editing capabilities
These tools are ideal for users who take frequent or complex screenshots and need automation or integrations.
Troubleshooting Screenshot Issues on Mac
If screenshot functionality isn't working correctly, try the following solutions:
A. Screenshot Not Saving
- Check storage: Make sure your disk isn’t full.
- Wrong save location: Open the Screenshot app (Command + Shift + 5) and verify save location.
- Try saving to Desktop by running:
defaults write com.apple.screencapture location ~/Desktop
killall SystemUIServer
B. Keyboard Shortcuts Not Working
- Go to System Settings > Keyboard > Keyboard Shortcuts.
- Select Screenshots and verify the key mappings.
- Ensure no other app is overriding the shortcuts.
C. Permissions Issues
If you use third-party screenshot apps and nothing is captured:
- Go to System Settings > Privacy & Security > Screen Recording.
- Make sure the app has permission to record your screen.
D. Floating Thumbnail Not Appearing
- Go to Screenshot app > Options, and ensure "Show Floating Thumbnail" is enabled.
Conclusion
Taking a screenshot on a Mac is fast, flexible, and efficient, whether you're using simple shortcuts or diving into the full Screenshot app. The built-in tools provide everything from quick grabs to detailed recordings, and with the editing options, you can mark up your captures without ever leaving macOS.
With these tools and tips, you'll be able to handle any screenshot scenario - whether you're a student, professional, or casual user. Screenshot smarter, not harder!
If you have deleted important Screenshots and emptied trash, you can use Mac data recovery software - such as Donemax Data Recovery for Mac to recover the deleted Screenshots on Mac.
Donemax Data Recovery for Mac
Donemax Data Recovery for Mac is one of the best Mac data recovery software. It is easy-to-use and can help in recovering deleted, formatted, inaccessible or lost data from Mac HDD/SSD, external disk, USB drive, SD card, camera or other storage devices.
Related Articles
- Jul 19, 2025How to Disable Startup Items/Programs on Mac? [4 Methods]
- Jul 18, 2025Fix External Hard Drive Read-Only on macOS Tahoe 26
- Apr 10, 2025Fixed: MacBook Pro Won't Boot from Internal Disk
- Jul 15, 2025How to Enable and Disable Built-in Camera on Mac (Complete Guide)
- Jul 08, 2025How to Lock a Mac: Quick and Effective Ways to Secure Your Mac
- Apr 20, 2026How to Create a macOS Sierra Bootable USB Installer (2026 Guide)

Contributing Writer
Maria
Maria is one of the senior writers & editors of Donemax who lives and works in Sydney, Australia. She loves PC, Mac and Internet Technology. She has 6 years of writing articles about data recovery on PC/Mac, disk cloning solution, data eraser and computer OS optimization, etc. She is also interested in testing various software and digital products.

Editor in chief
Gerhard Chou
In order to effectively solve the problems for our customers, every article and troubleshooting solution published on our website has been strictly tested and practiced. Our editors love researching and using computers and testing software, and are willing to help computer users with their problems