Written byStevenUpdated on Apr 15, 2026
How to Clean SSD on Windows 11/10: 5 Proven Ways
Approved byGerhard Chou
Before we start: If you want to wipe a SSD clean on Windows 11/10/8/7, you can try Donemax Data Eraser, a powerful disk wipe program. It can securely and permanently erase all data from the SSD beyond the scope of data recovery. It also can help you reformat a SSD on Windows or repair a crashed SSD.
PAGE CONTENT:
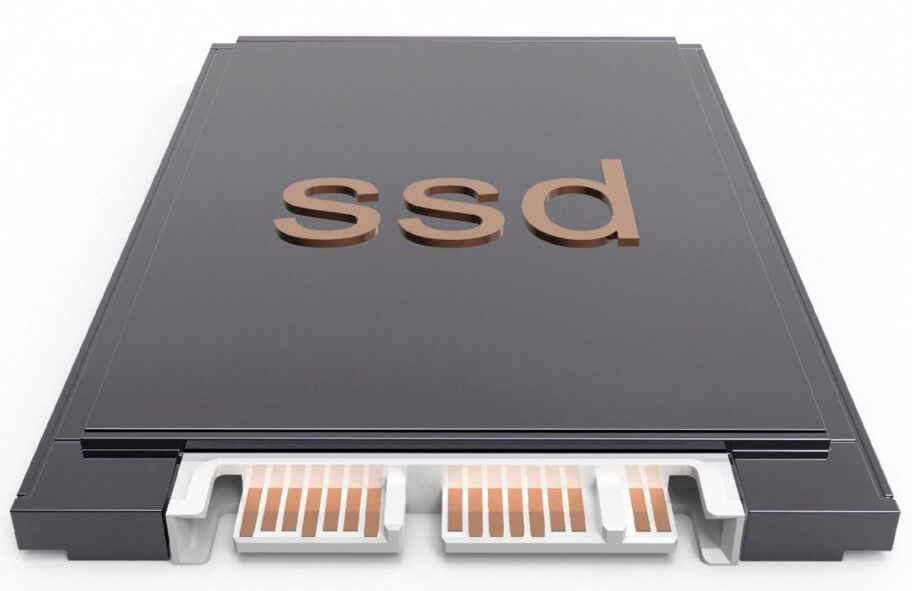
Solid State Drives (SSDs) have become the go-to storage solution for modern computers due to their speed, durability, and efficiency. However, just like traditional hard drives, SSDs can accumulate unnecessary files and data over time that can slow down performance and reduce their lifespan. If you're looking to keep your SSD in top shape, learning how to clean it properly is essential. This article will walk you through different methods to clean your SSD safely and effectively on Windows 11, 10, 8, and 7.
What Does "Cleaning an SSD" Mean?
Before diving into the methods, it's important to clarify what we mean by "cleaning" an SSD. Cleaning can take different forms depending on the context and the user's goal:
- Basic Cleaning: Removing temporary files, caches, and junk data.
- Deep Cleaning: Securely wiping all data for privacy or to prepare for resale.
- Maintenance: Ensuring the SSD's health by using TRIM commands and proper usage habits.
Each method serves a different purpose, and choosing the right one depends on whether you're freeing up space, improving performance, or preparing the drive for disposal.
Precautions Before Cleaning Your SSD
Before you start cleaning your SSD, keep the following precautions in mind:
- Back Up Important Files: Always back up essential data before using any cleaning tool or wiping process.
- Avoid Cleaning the Wrong Drive: Make sure you're targeting the SSD you intend to clean, especially when using command-line tools.
- Don't Defragment SSDs: SSDs do not benefit from defragmentation and doing so can reduce their lifespan.
Top 5 Methods to Clean or Wipe SSD on Windows
Method 1: Use Disk Cleanup Tool to Clean SSD
The Disk Cleanup utility is a built-in Windows tool that helps you delete temporary files, system cache, and other non-essential files.
Steps to Use Disk Cleanup:
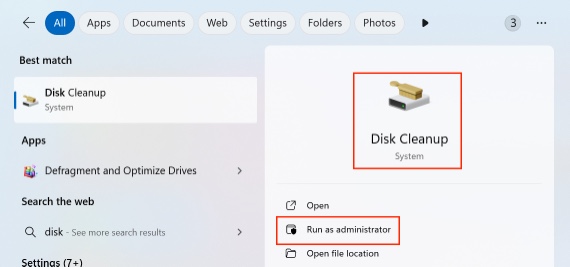
- Type Disk Cleanup in Windows search box, then open Disk Cleanup.
![clean your SSD]()
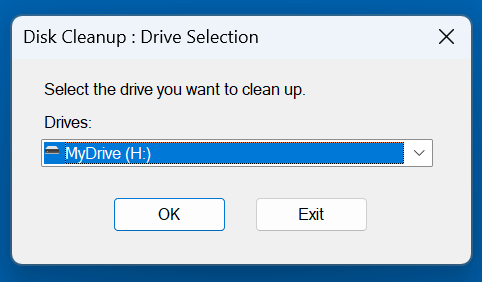
- Decide which SSD drive you wish to clean.
![clean your SSD]()
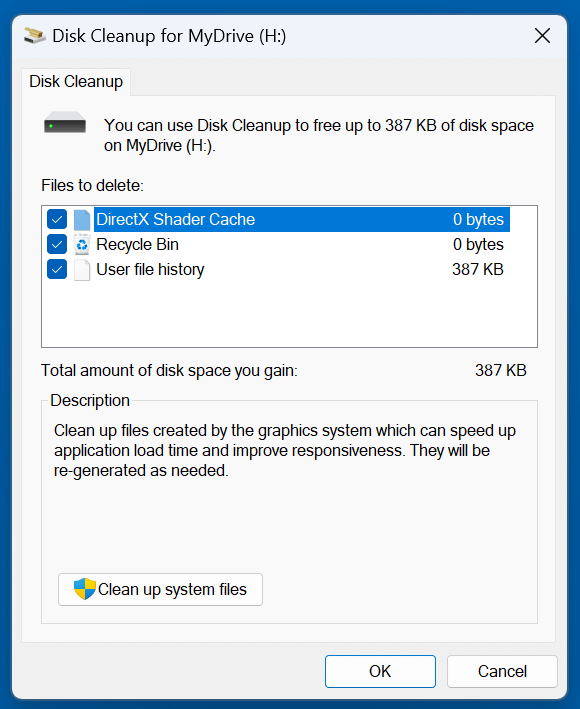
- Click OK and wait for the utility to calculate space.
- Check the boxes for files you want to delete, such as:
- Temporary files
- DirectX Shader Cache
- Recycle Bin
- User file history
![clean your SSD]()
- Click OK and then Delete Files to begin the cleaning process.
![clean your SSD]()
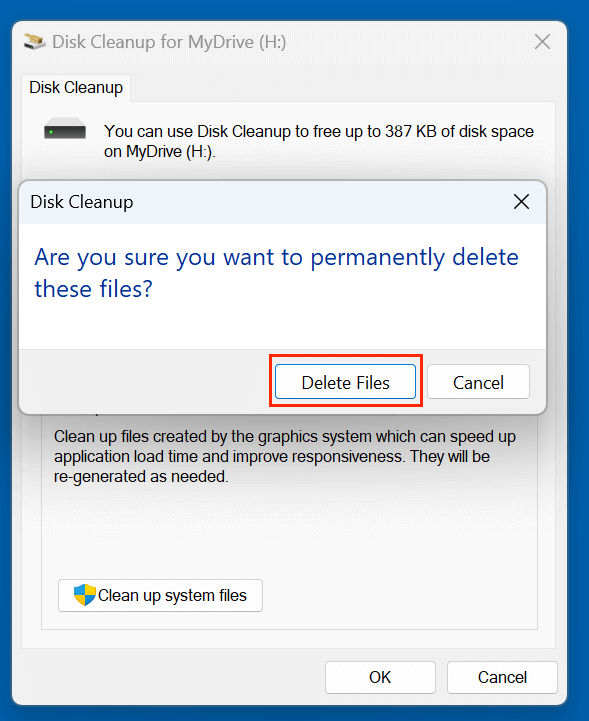
Disk Cleanup is safe and effective for routine maintenance.
Method 2: Use Storage Sense (Windows 11/10)
Storage Sense is a modern feature in Windows 10 and 11 that automatically removes unwanted files and manages storage intelligently.
How to Enable and Configure Storage Sense:
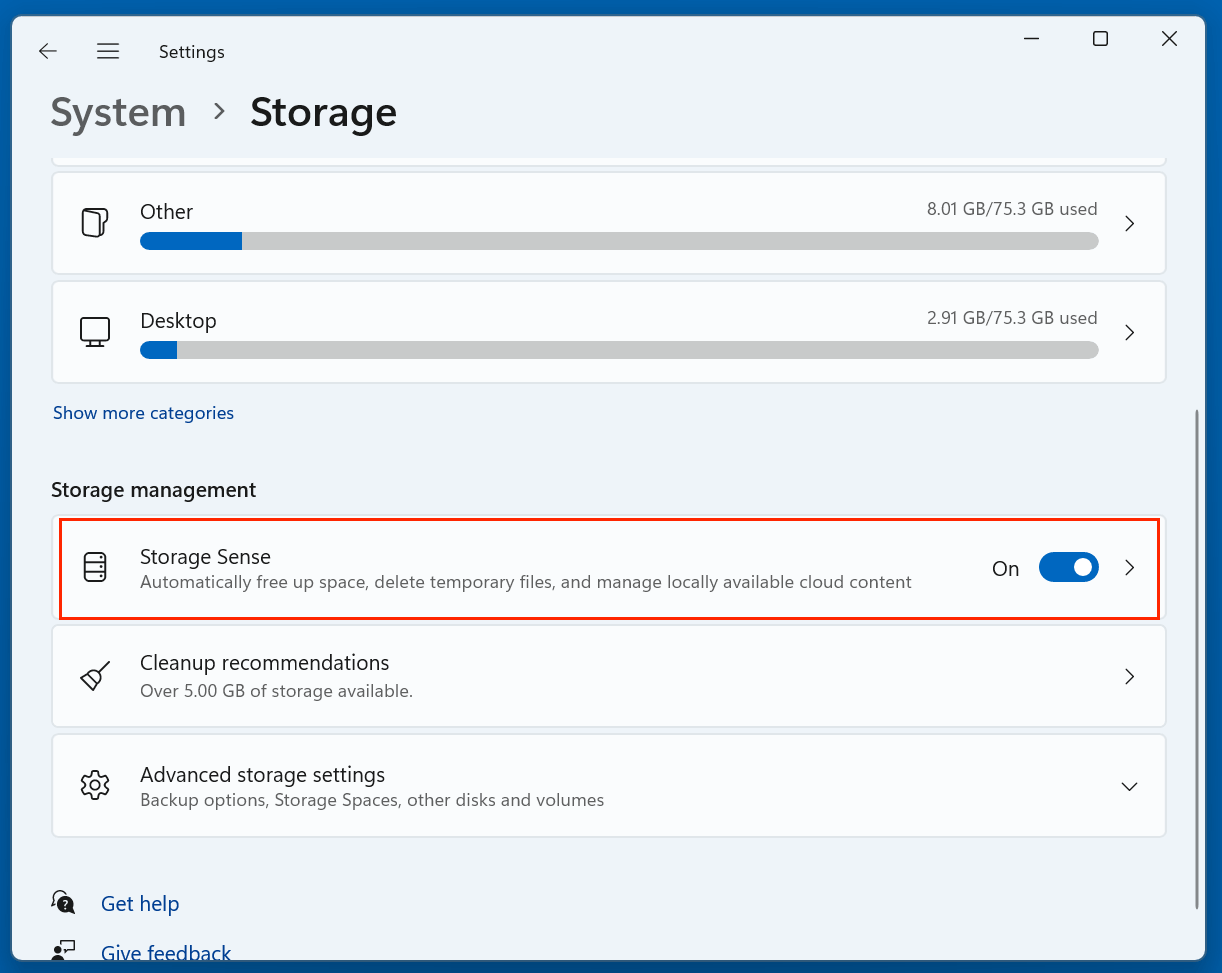
- Go to Settings > System > Storage.
- Turn on Storage Sense.
![clean your SSD]()
- Click on Run Storage Sense now.
![clean your SSD]()
- Customize:
- Frequency of automatic cleaning.
- Whether to delete temporary files.
- Recycle Bin file deletion thresholds.
- oOneDrive file handling.

Storage Sense is a set-it-and-forget-it option that works quietly in the background to keep your SSD free of clutter.
Method 3: Use Third-Party SSD Cleaning Software
Third-party applications can offer more granular control and advanced features for cleaning SSDs.
Recommended Tools:
- CCleaner: Known for its ability to clean registry entries, browser caches, and temporary files.
- BleachBit: A free and open-source tool that performs deep cleaning.
- Wise Disk Cleaner: Specifically designed to remove junk files quickly and safely.
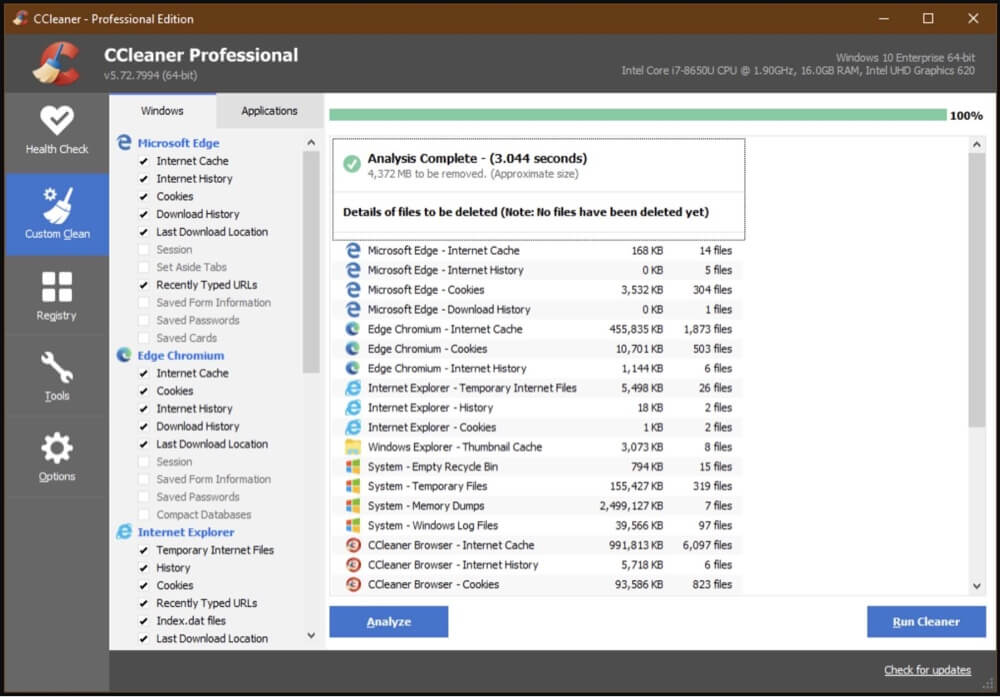
How to Use CCleaner:
- Download and install CCleaner.
- Open the application and go to the Custom Clean tab.
- Decide which file types you wish to delete.
- Click Analyze and then Run Cleaner.
![clean your SSD]()
💡 Note: Be cautious not to delete files or settings you don't fully understand. Always review what the software plans to remove.
Method 4: Secure Erase the SSD
Secure erasing an SSD is a method used to completely and permanently delete all data from the drive, leaving it in a "like-new" state. Unlike a normal file deletion or even formatting, which only removes file pointers (allowing data to be recoverable), secure erase ensures that data cannot be recovered even with advanced forensic tools.
This method is particularly useful in the following scenarios:
- You are selling or donating your SSD.
- You want to remove sensitive data permanently.
- You are troubleshooting an SSD with performance issues and want to reset it fully.
Important Warnings Before Proceeding:
- All data will be irretrievably lost. Be absolutely certain you've backed up everything you need.
- Secure Erase must be used cautiously. If used incorrectly, you could erase the wrong drive.
- Do not interrupt the process. Power loss during secure erase can corrupt the drive or make it unusable.
What Happens During a Secure Erase?
SSDs store data in NAND flash memory, and deleting a file doesn't immediately remove its data from memory blocks - it just marks the space as available. Secure Erase commands the SSD to:
- Overwrite all blocks, not just delete file tables.
- Trigger internal firmware functions to fully purge and reset memory cells.
- Reset the SSD to factory-fresh performance.
Secure Erase also ensures that data held in over-provisioned or hidden partitions is wiped - something that typical file deletion methods miss.
Methods to Perform Secure Erase
Depending on your SSD brand, different tools are available. Most manufacturers offer specialized software tailored for their SSDs. Below are some of the most commonly used tools.
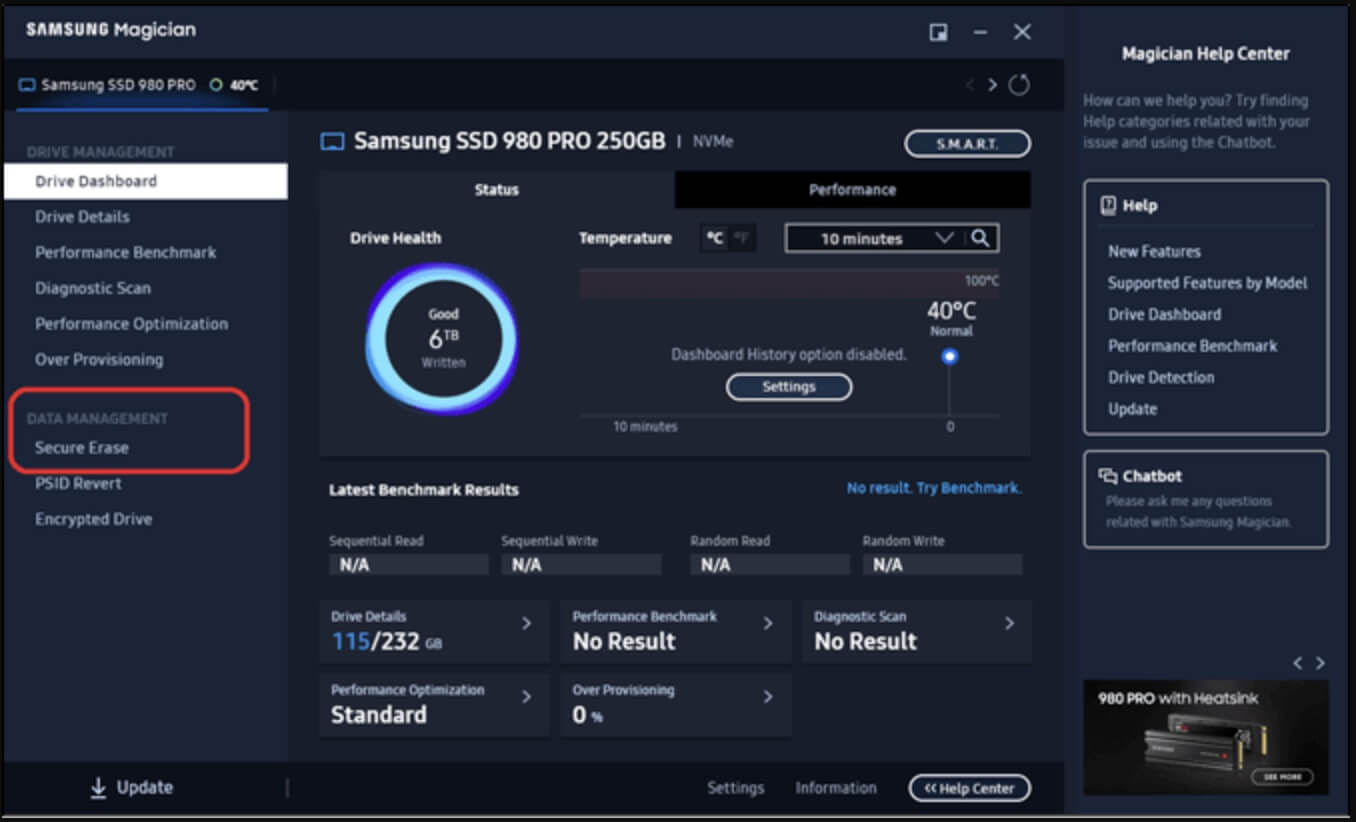
1. Samsung SSD - Samsung Magician Software
- Download Samsung Magician from the official Samsung website.
- Open the software and go to the Data Management or Secure Erase tab.
![clean your SSD]()
- You’ll be prompted to create a bootable USB.
- Boot your system from the USB to perform the secure erase.
💡 Note: Some NVMe drives may require disabling Secure Boot in BIOS for the tool to run properly.
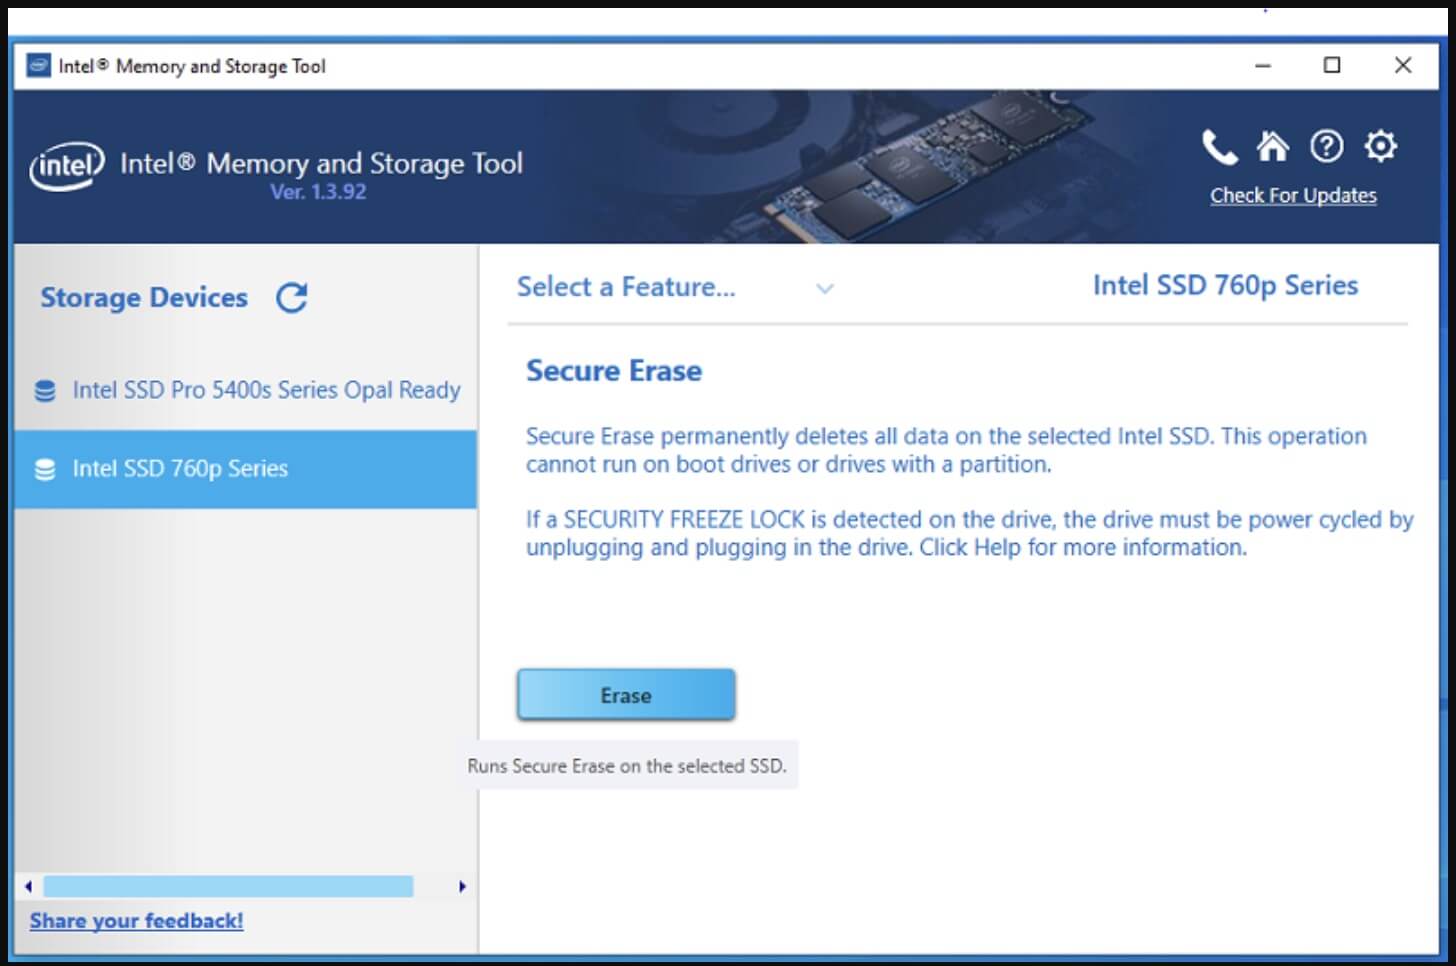
2. Intel SSD - Intel Memory and Storage Tool
- Download from Intel's official support page.
- The tool can perform a "Secure Erase" via its CLI (Command Line Interface) or GUI.
![clean your SSD]()
- Select the SSD, choose Secure Erase, and follow the on-screen prompts.
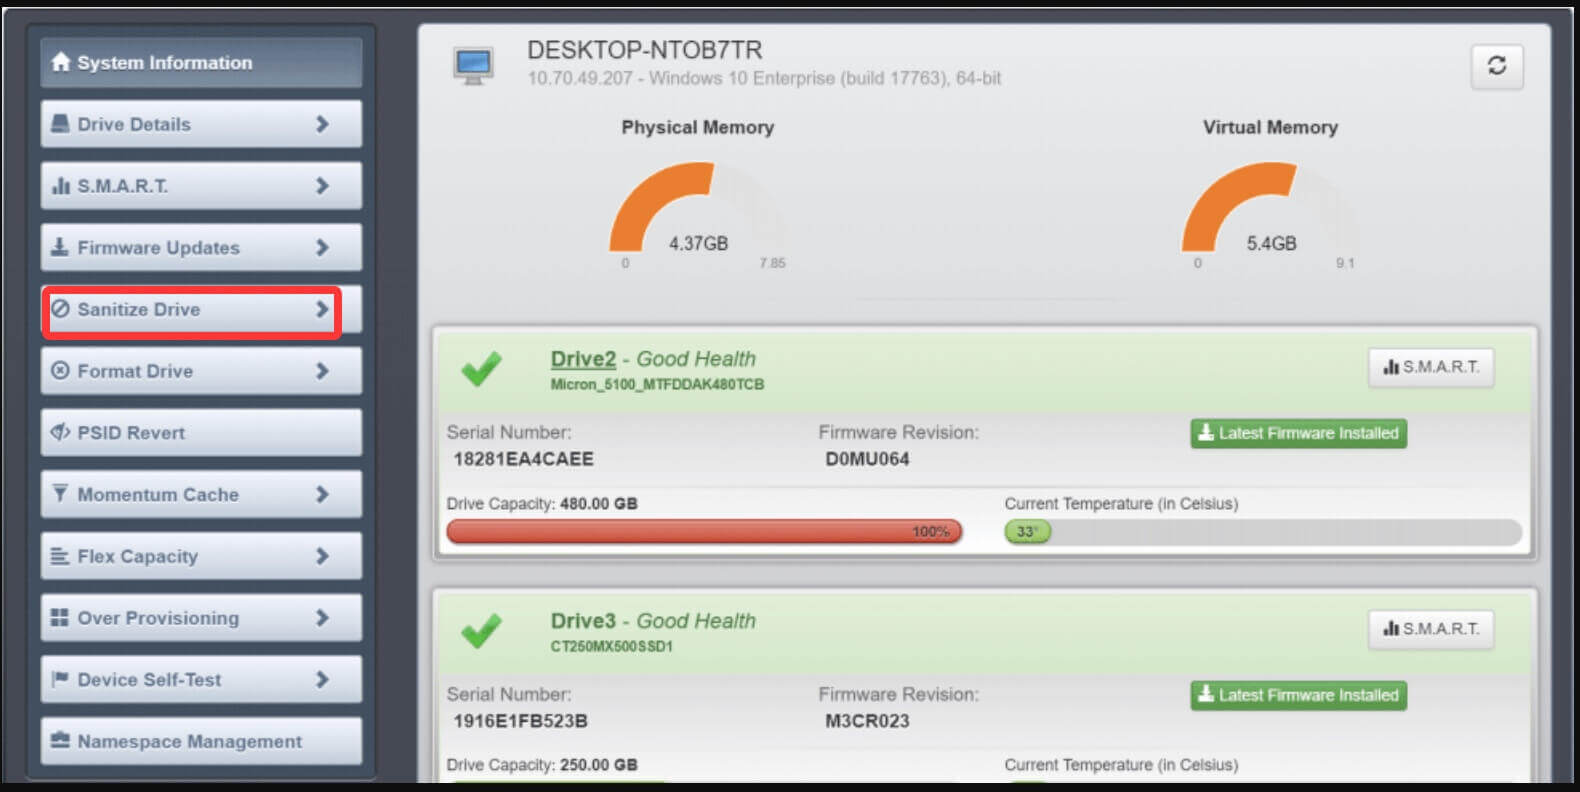
3. Crucial SSD - Storage Executive Tool
- Install Crucial's Storage Executive utility.
- Navigate to the "Sanitize Drive" section.
![clean your SSD]()
- Select your SSD and start the secure erase.
4. Kingston SSD - Kingston SSD Manager
- Available from Kingston’s website.
- Look for the Security tab and click on Secure Erase.
![clean your SSD]()
- May require ATA password removal or BIOS-level configuration first.

Alternative: Donemax Data Eraser (Universal Solution)
If your SSD's manufacturer doesn't provide a tool, or you're using a mix of SSD brands, Donemax Data Eraser is a powerful, universal tool that supports secure erasing on most SSDs.
Donemax Data Eraser
- Securely wipe any SSD on Windows.
- Permanently shred files or wipe deleted/formatted/lost data on SSD.
- Certified data erasure standards including NIST 800-88, Peter Gutmann's algorithm, DoD 5220.22-M, U.S. Army AR380-19, etc.
Follow the steps below to wipe a SSD clean on Windows:
Step 1. Download and install Donemax Data Eraser on your computer.
Step 2. Open Donemax Data Eraser, then choose Erase Hard Drive mode. Select the SSD, click on Erase Now button. It will securely and permanently erase all data from the SSD.

If Secure Erase Fails (Frozen State)
Some SSDs enter a "frozen" state to prevent unauthorized erasure. If your drive is frozen:
- Enter your BIOS.
- Put the PC to sleep for 10 - 15 seconds, then wake it.
- Retry the secure erase process. The frozen state should be cleared.
After Secure Erase - What's Next?
Once the secure erase is complete:
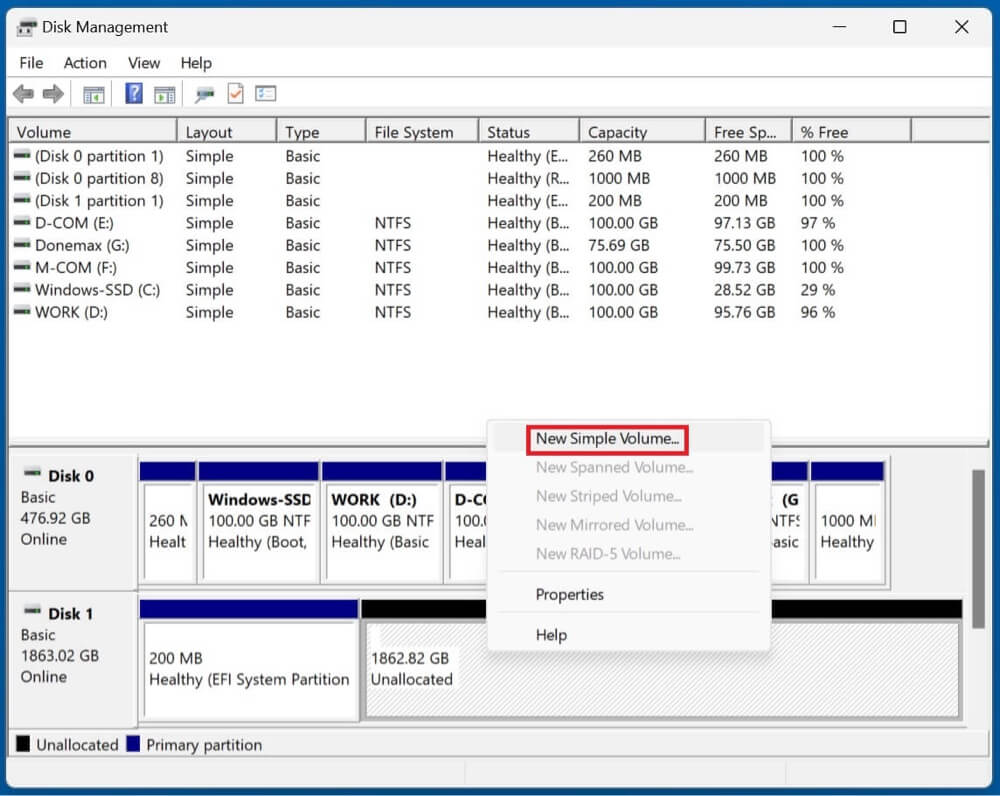
- The SSD is reset and will appear unallocated in Windows.
- You need to reinitialize it:
- Go to Disk Management.
- Select the unallocated space with a right-click.
- Choose New Simple Volume, then proceed with the wizard.
![clean your SSD]()
- You can now reuse, reinstall an OS, or safely dispose of the drive.
Method 5: Clean SSD Using Command Prompt
Using the diskpart command-line utility allows you to perform low-level operations on disks.
How to Use DiskPart to Clean SSD:
- Choose Command Prompt (Admin) or Windows PowerShell (Admin) by pressing Windows + X.
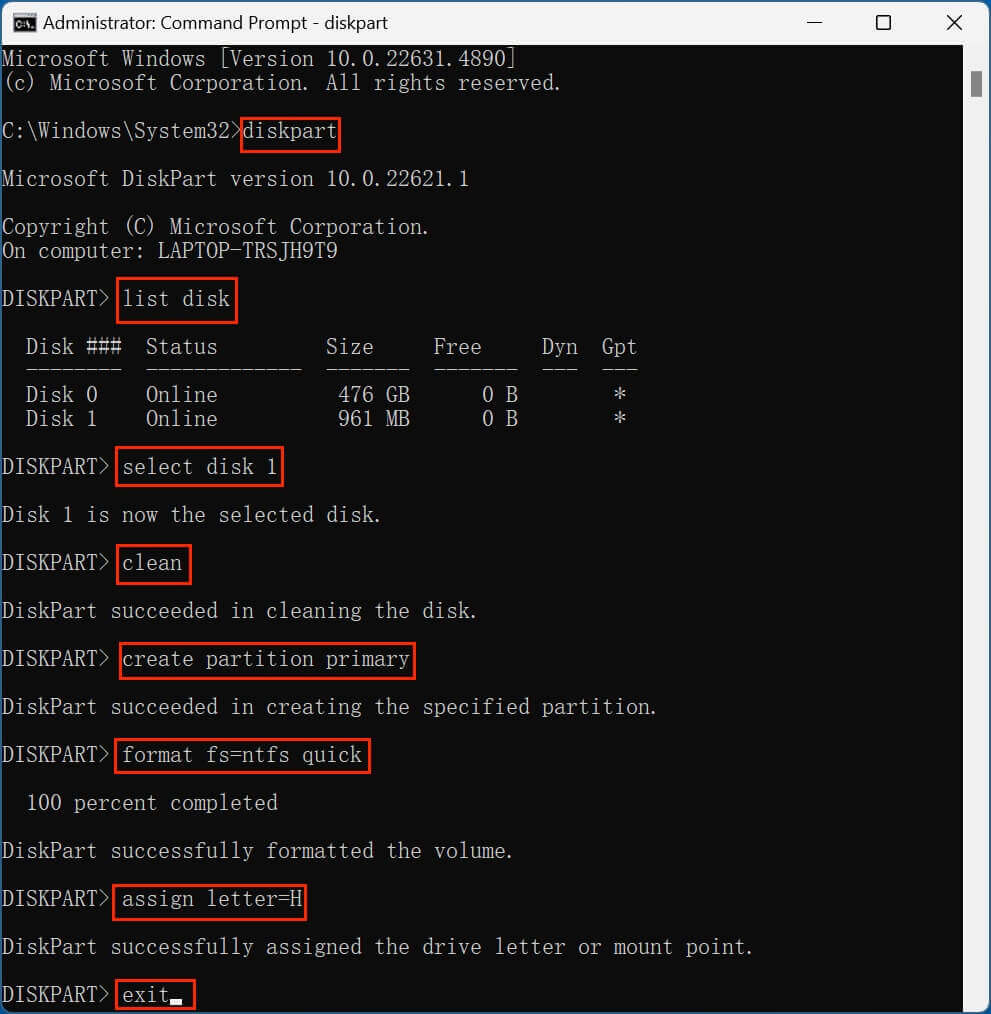
- Type the below commands one by one:
diskpart
list disk
select disk X (Replace X with your SSD number)
clean
create partition primary
format fs=ntfs quick
assign
exit
⚠️ Warning: The clean command erases all partitions and data. Do not use it on your system drive unless you're reinstalling Windows.
Cleaning SSD Before Disposal or Selling
If you're planning to sell or give away your computer or SSD, simply deleting files or formatting the drive isn't enough. Data can still be recovered with forensic tools.
Best Practices for SSD Disposal:
- Use Secure Erase as discussed above.
- Overwrite data multiple times with tools like Donemax Data Eraser, AweEraser.
- Physically destroy the SSD if it contains highly sensitive data and won’t be reused.
Always verify the data has been wiped with a tool like Donemax Data Recovery to ensure nothing is recoverable.
Do's and Don'ts When Cleaning an SSD
Keeping your SSD healthy goes beyond cleaning it once. Here are key do's and don'ts:
Do's:
- Enable TRIM: It helps the OS tell the SSD which blocks of data are no longer in use.
- Keep the Firmware Updated: Firmware updates often include performance improvements and bug fixes.
- Use Built-in Windows Tools: Disk Cleanup and Storage Sense are SSD-friendly.
Don'ts:
- Don't Defragment: SSDs don't benefit from defragmentation. In fact, it can wear out the flash memory faster.
- Don't Fill the Drive Completely: Keep at least 10 - 20% of the SSD free to allow wear leveling and maintain speed.
- Avoid Excessive Writes: Unnecessary writing operations can reduce the lifespan of an SSD.
FAQs About Cleaning SSD
Yes, removing junk files and temporary data can free up space and ensure optimal operation. However, SSDs naturally perform maintenance tasks like garbage collection and TRIM in the background.
Absolutely. Use Disk Cleanup, Storage Sense, or third-party cleaners to remove junk files without touching personal files.
Yes, it's built into Windows and optimized for both HDDs and SSDs.
Formatting is a more aggressive form of cleaning that removes all data. Use it only when necessary (e.g., OS reinstallation).
- clean: Deletes partition and volume info but not actual data.
- clean all: Writes zeros to every sector – more secure but takes longer.
Conclusion
Cleaning your SSD is an important part of keeping your system running smoothly and ensuring your data stays organized and secure. Whether you're doing basic maintenance using Disk Cleanup or Storage Sense, or performing a secure erase before disposal, understanding your options helps you make the right decision based on your needs.
Each Windows version - from 7 to 11 - offers native tools to manage your SSD, and third-party utilities can provide additional control when needed. Just remember to always back up important data, avoid defragmenting SSDs, and use secure erase methods if privacy is a concern.
With proper care, your SSD can serve you efficiently for many years. Clean smart, clean safe!
Donemax Data Eraser
One of the best data erasure programs for permanently erase data from PC, Mac, HDD, SSD, USB drive, digital camera and other devices. Once the data is erased, it is lost for good, cannot be recovered by any method.
Related Articles
- Apr 29, 2025How to Wipe Data – A Comprehensive Guide
- Apr 27, 2026Which Data Erasure Software Actually Works? We Put 6 Tools to the Test
- Jan 26, 2024How to Wipe Free Disk Space of A SSD?
- May 10, 2025Best 7 Free Hard Drive Wiper: A Comprehensive Guide
- Sep 10, 2025How to Wipe Everything but OS in Windows 11/10/8/7?
- Mar 05, 2024What to Do Before Selling A HP Laptop?

Contributing Writer
Steven
Steven has been a senior writer & editor of Donemax software since 2020. He's a super nerd and can't imagine the life without a computer. Over 6 years of experience of writing technical solutions and software tesing, he is passionate about providing solutions and tips for Windows and Mac users.

Editor in chief
Gerhard Chou
In order to effectively solve the problems for our customers, every article and troubleshooting solution published on our website has been strictly tested and practiced. Our editors love researching and using computers and testing software, and are willing to help computer users with their problems