
Written byLucienUpdated on Feb 27, 2024
Can't Erase A Drive to APFS On Mac? Fix It Now
Approved byGerhard Chou
PAGE CONTENT:
Are you having difficulty figuring out how to erase a drive to APFS on your beloved Mac? Imagine you're all set to go on a digital trip, but your plans are thwarted by a stubborn drive that won't work with you. Doesn't it seem frustrating? Don't worry, brave Mac traveler!
Even though there are problems in every directory in this digital desert, there is a way to win. Follow us as we go through the ups and downs of troubleshooting, armed with the information and tools to beat what seems impossible.
We'll give you the tools to defeat this enemy and come out on top, from figuring out compatibility problems to using powerful Terminal commands. Put on your seatbelt, brush up on your wits, and go on this exciting adventure to regain control of your digital kingdom!
About APFS
Apple introduced the Apple File System (APFS) in 2017, the main file system for macOS, iOS, watchOS, and tvOS. APFS was designed to take advantage of the latest storage technologies. Its strong encryption, smart space allocation, and faster speed stand out. When using APFS, formatting a drive is the only way to erase it so that it works with this advanced file system design.
When users adopt APFS, they get access to cutting-edge features that make managing data easier and the system more reliable. APFS is a huge step forward in digital storage because it makes working with files easier and protects data security better.
The fact that it works with different Apple environments shows how flexible it is and how important it is in modern computing. As the digital world changes, APFS offers Apple a commitment to new ideas and user-centered design to make the best computer experiences possible.
Erase A Drive to APFS On Mac
1. Check The Drive Compatibility
Ensure that APFS can be used on the drive you want to fix. Most new drives can use APFS, but some older drives or external drives may not be able to. Check the manufacturer's instructions to make sure they are compatible.
2. Check The Health Of The Drive
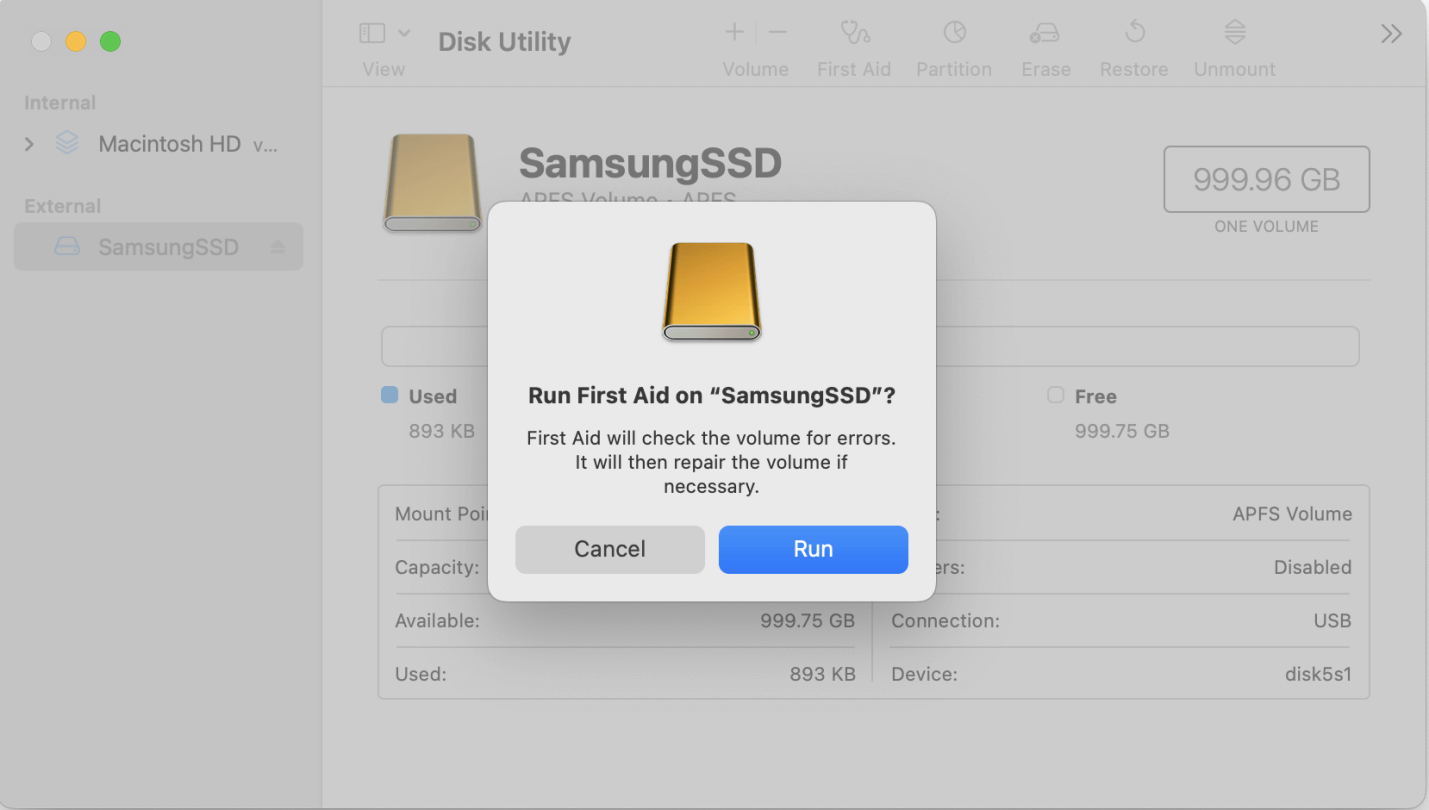
It's important to ensure the drive is healthy before you try to format it. Disk Utility can do a "First Aid" check on the drive. It will find any problems that might be stopping the erasure process.
Step 1. Go Launchpad > Other > Disk Utility, then open this app.
Step 2. Select the drive you want to erase to APFS, then click on First Aid button.
Step 3. Click on Run button to repair the drive.
3. Start-Up In Recovery Mode
If you have trouble cleaning a drive, you can fix the problem by starting your Mac in Recovery Mode. To do this, turn your Mac back on and hold down Power button (Command + R if you using Intel-based Mac) until you see the Apple sign. You can get to Disk Utility from the macOS Utilities window and try to erase the drive to APFS.
4. Type Commands In The Terminal
To format the drive to APFS by hand, if Disk Utility fails to erase it, you can use Terminal instructions. When you are in Recovery Mode, open Terminal from the Utilities menu, then use the diskutil command to erase and reset the drive. To avoid losing data by mistake, check the syntax twice and use the right disk identifier.
Step 1. Connect the drive to your Mac.
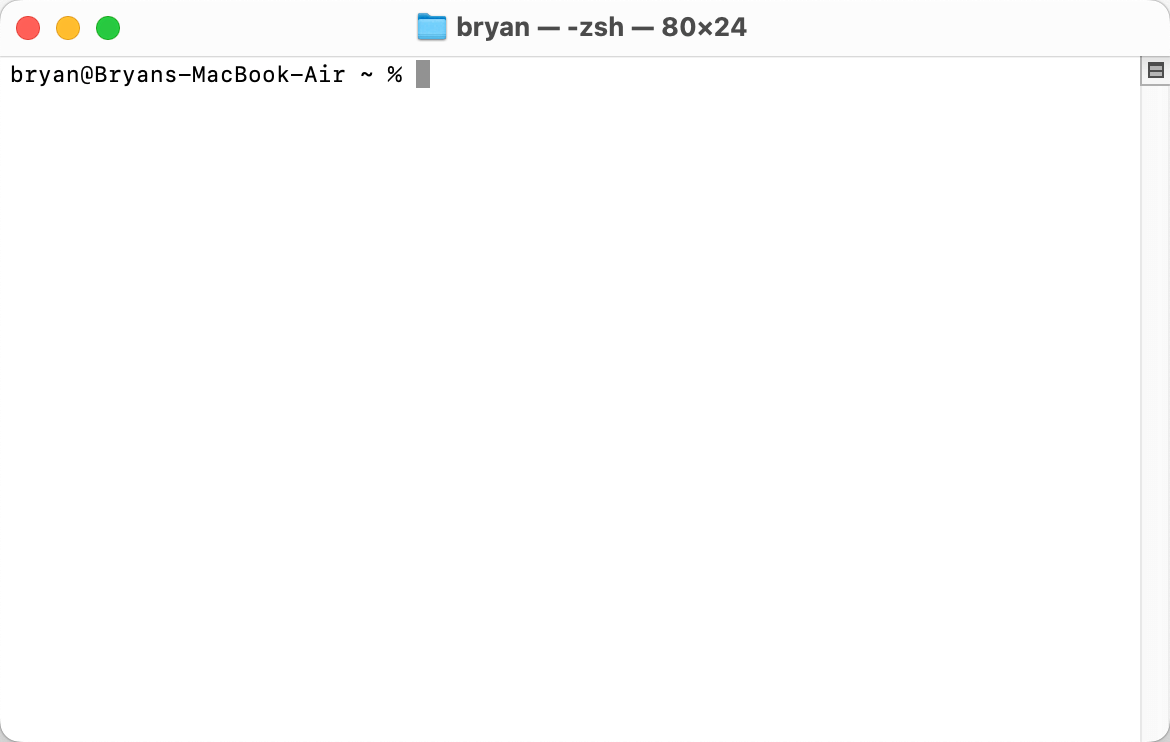
Step 2. Open Terminal on Mac. (Command+Space, type Terminal, open this app)

Open Terminal.
Step 3. In Terminal, type diskutil list and press Enter.
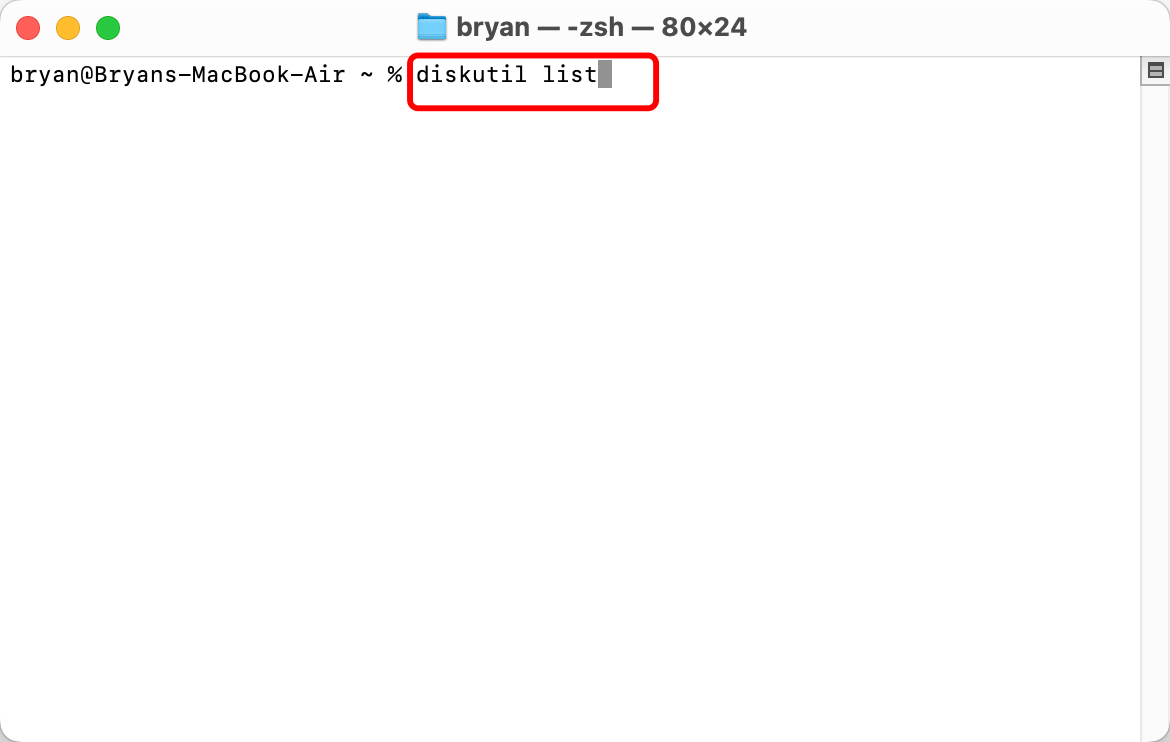
This command will list all volumes and drives on your Mac.
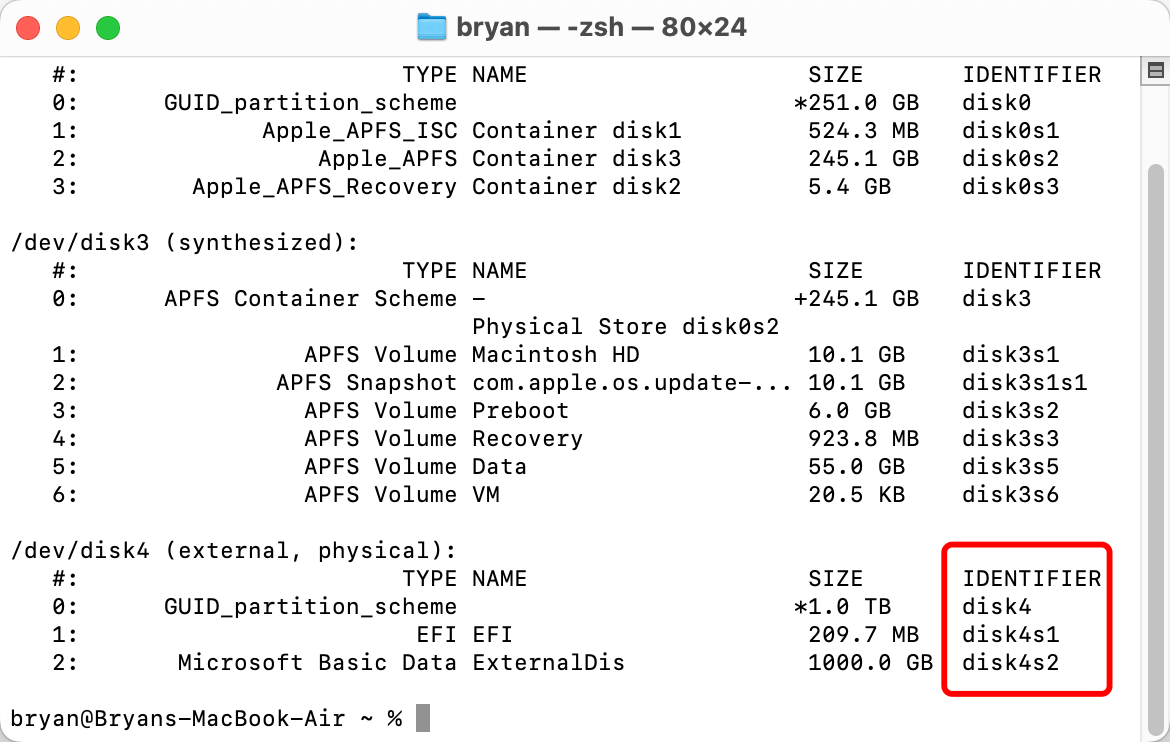
Find the drive you want to format and note down its identifier. It should be “/dev/diskX” (X is a number).
Step 4. Type the command diskutil eraseDisk APFS “DriveName" /dev/diskX.
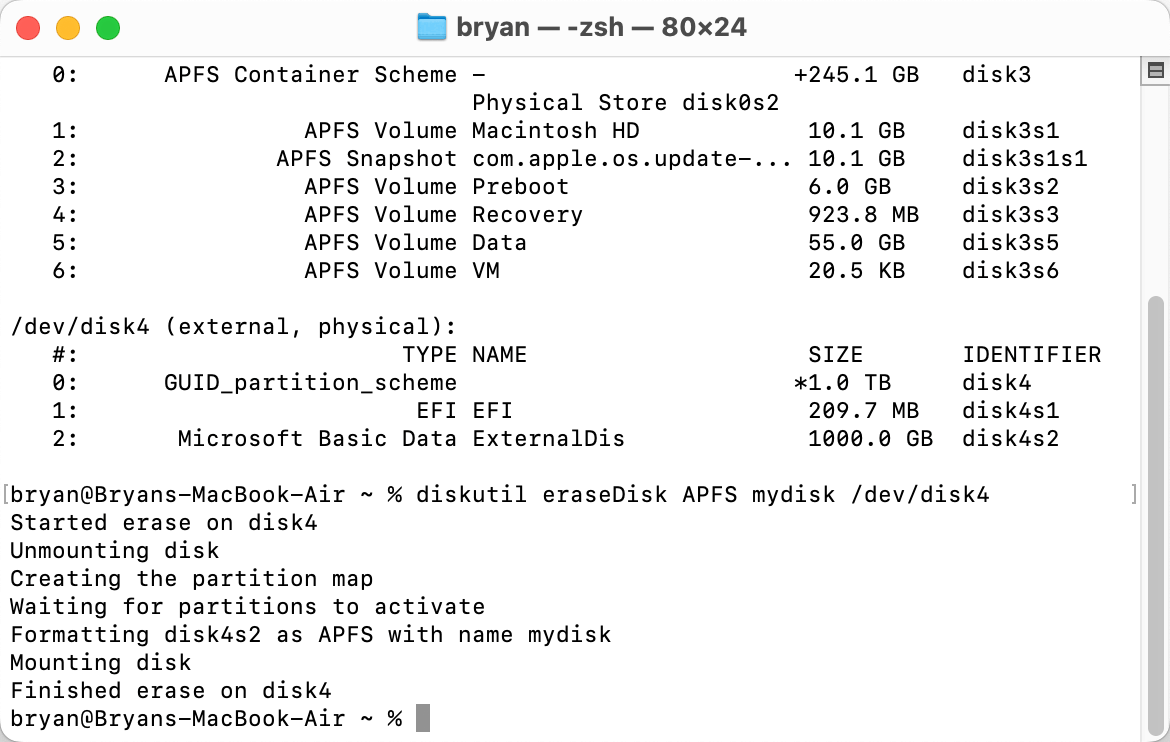
Replace “DriveName” with the name you want to give to the drive. Replace /dev/diskX with the exact drive identifier. Press Enter.
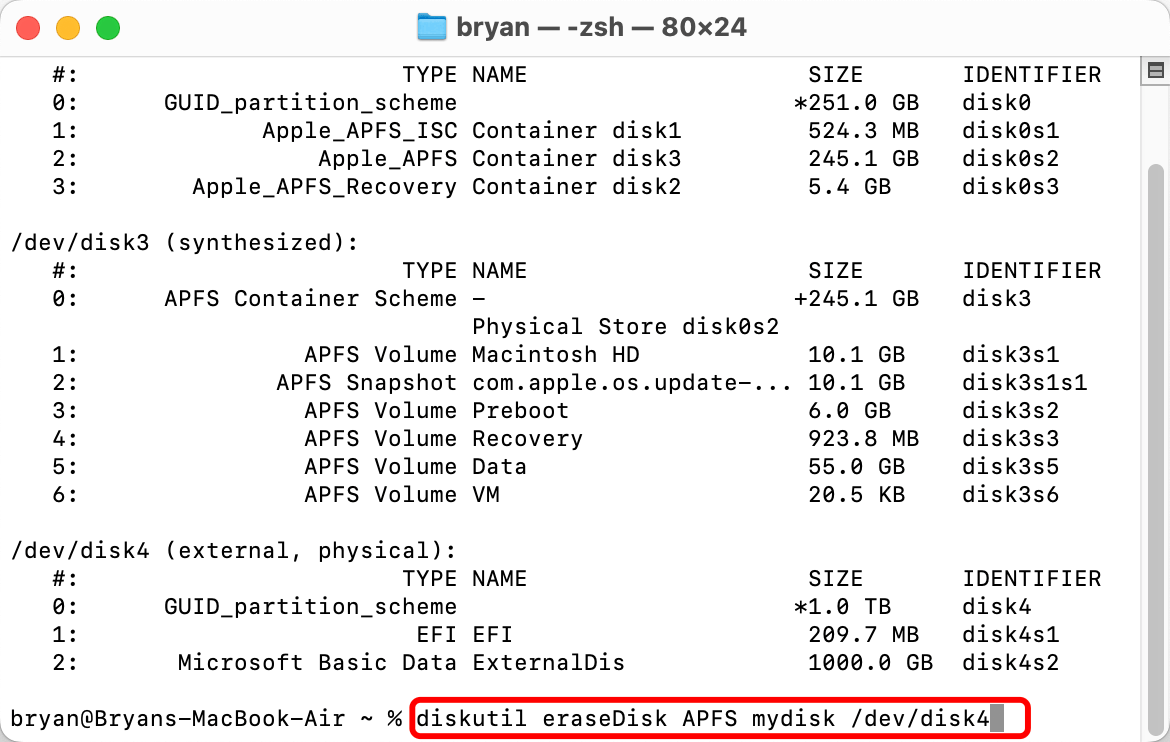
Allow it. Then it will securely erase the disk to APFS.
5. Clear The SMC And NVRAM
Problems with the disk can sometimes be fixed by resetting the SMC and Non-Volatile Random Access Memory (NVRAM). Put your Mac to sleep and press and hold the Shift, Control, Option, and Power buttons for 10 seconds. It will fix the SMC. You need to restart your Mac and hold down Command + Option + P + R until you hear the starting sound a second time. It will clear the NVRAM.
6. Connect On A Different Mac
If you have access to another Mac, connect the drive that gives you trouble to that one and try to erase it to APFS. It can help you determine if the problem is with your Mac or the drive.

7. Make Changes to Mac OS
Ensure the most recent version of macOS is installed on your Mac. Apple often offers updates that fix bugs and make things work better together, so trying the most current version might fix the issue.
8. Talk to Apple Support
If you've tried all the fixing steps and cannot erase the drive to APFS, you should contact Apple Support. They can give you personalized help, walk you through advanced fixing steps, or set up a repair if needed.
You also can try other disk formatting app such as Donemax Data Eraser for Mac, DMmenu for Mac, Donemax NTFS for Mac to help you force to format the drive to APFS.
Recover Lost Data from the Drive Which Is Erased to APFS
It is strongly recommended to make a full backup before you format the drive to APFS. But sometimes, you forgot it or you could not make a backup. Is the erased data lost forever? No, you still can use a data recovery app to unformat the drive and get all lost data back.
Step 1. Download and install the powerful Mac data recovery app - Donemax Data Recovery for Mac.
Step 2. Open Donemax Data Recovery for Mac and then select the erased hard drive to start data recovery.

Step 3. Once the drive is selected, click on Scan button to deeply scan the drive and find all recoverable files.

Step 4. Once the scan is completed, just check the files quality by preview. Then select the wanted files and save them.

Conclusion:
It can be annoying to have problems when you try to erase a drive to APFS on your Mac, but it's not impossible to get around. You can correctly identify and fix the problem by following the steps in this guide for healing, which will allow you to format the drive successfully to APFS.
You can try different things to solve this problem, like using Terminal instructions, checking for compatibility, or getting help from Apple Support. You can set your drive with the file system you want and continue with your computer tasks without problems if you are patient and persistent.
Related Articles
- Mar 08, 20256 Solutions to Fix WD External Hard Drive Not Recognized – A Complete Guide
- May 25, 2026Fix Kingston SSD Not Detected: Troubleshooting Guide
- Feb 20, 2024How to Fix External SSD Not Mounting on Mac?
- Jul 15, 2025[5 Methods] Repair NTFS Drive | Fix NTFS Errors
- Oct 14, 20246 Proven Methods to Fix Mac's USB Port Not Working
- Apr 30, 2025Mac Won't Start into Safe Mode? Here's How to Fix It

Contributing Writer
Lucien
Lucien is a writer and a chief programmer of Donemax software who has worked in the company for 5+ years. He has written much of the content on the site and devotes to providing troubleshooting and solution for Windows and Mac users including disk cloning, data recovery, migration, eraser, error fixes.

Editor in chief
Gerhard Chou
In order to effectively solve the problems for our customers, every article and troubleshooting solution published on our website has been strictly tested and practiced. Our editors love researching and using computers and testing software, and are willing to help computer users with their problems
Hot Donemax Products

Clone hard drive with advanced clone technology or create bootable clone for Windows/Mac OS.

Completely and easily recover deleted, formatted, hidden or lost files from hard drive and external storage device.

Certified data erasure software - permanently erase data before selling or donating your disk or any digital device.