
Written byStevenUpdated on Jun 16, 2026
Samsung SSD Not Detected on Mac, How to Fix It?
Approved byGerhard Chou
PAGE CONTENT:
Solid State Drives (SSDs) are much better than traditional Hard Disk Drives (HDDs). They make reaching data faster, using less power, and more reliable. Customers who use Macs often choose Samsung SSDs because they are known for being reliable and fast. On the other hand, it can be annoying and stressful when your Mac doesn't recognize your Samsung SSD (such as T3/T5/T7/X5/T9). To work on troubleshooting, you need to know the real problems.
These could be device connection issues, software conflicts, or issues with compatibility or firmware. This article explains in detail how to find and fix problems with your Samsung SSD when it detects on a Mac, including simple and complex fixes. By doing these steps, you can get your SSD working again and ensure your computer runs more smoothly.
Methods to Fix Samsung SSD Not Detected on Mac
Method 1. Check Finder Settings
Because of changes you've made to your settings, your Mac might not recognize your drive sometimes. This problem can be fixed by letting your Mac see other devices. How to do it:
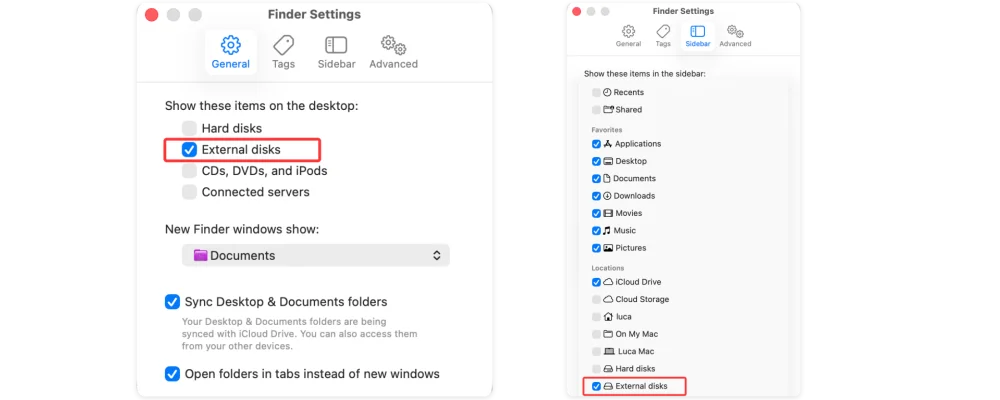
Step 1. Open a Finder, then click Finder on Apple menu. Then choose Settings.
Step 2. Click General and Sidebar, make sure External disks is selected. Then you can see all connected devices on desktop and Finder sidebar.
Method 2. Reboot Your Mac
Are many apps or processes in the background when you connect your Samsung Portable SSD to your Mac? These may have used up most of the memory on your Mac, making it impossible for your Mac to join.
Remove your SSD from the drive, close all your apps and background tasks, and restart your Mac. After that, connect your SSD again before you do anything else on your Mac. That will give it enough time to find the link.
Method 3. Try Another Cable
Each external SSD has a cable made for that type of SSD and its power needs. So, if you choose the wrong one, your external device might not have enough power to work right, and your Mac computer might not recognize it.
Check for these small problems before you try to fix them. Get a cable with connectors that work with your SSD and a power source that is right for it.
Method 4. Check/Update Your Drivers
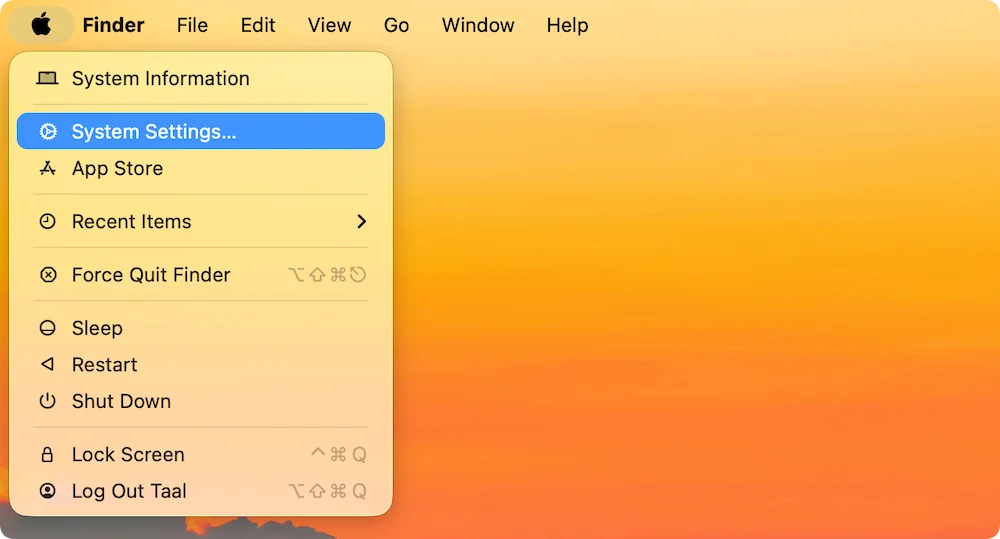
If your Mac's drivers are outdated, it might have trouble reading your SSD. As it turns out, users of macOS Big Sur often have trouble with the Samsung T7 not being recognized on M chip Mac. Firmware changes are part of the macOS changes, so you must update them. Click on System Settings in the Apple menu to do this.
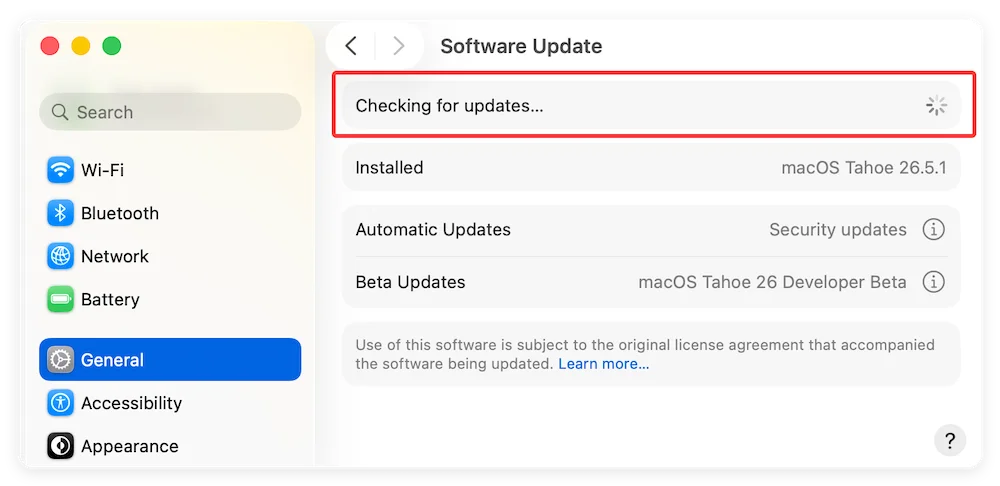
1. Choose General from the menu on the left, then click Software Update in the right pane. Then, do what it says on the screen.
2. You should also get the Samsung Portable SSD program that works with your macOS version. That will make your computer better at using the drive.
Method 5. Format the New SSD
If you bought a new SSD and your Mac won't recognize it, it could be because insufficient space was allocated. Most of the time, you'll need to format an SSD after buying it to work with macOS. How to set up a new SSD on a Mac:
- Use the right port (like USB, Thunderbolt, or USB-C) to connect the external SSD to your Mac.
- Ensure you've changed the Settings to show external drives.
- The Disk Utility can be opened by going to Finder > Applications > Utilities > Disk Utility.
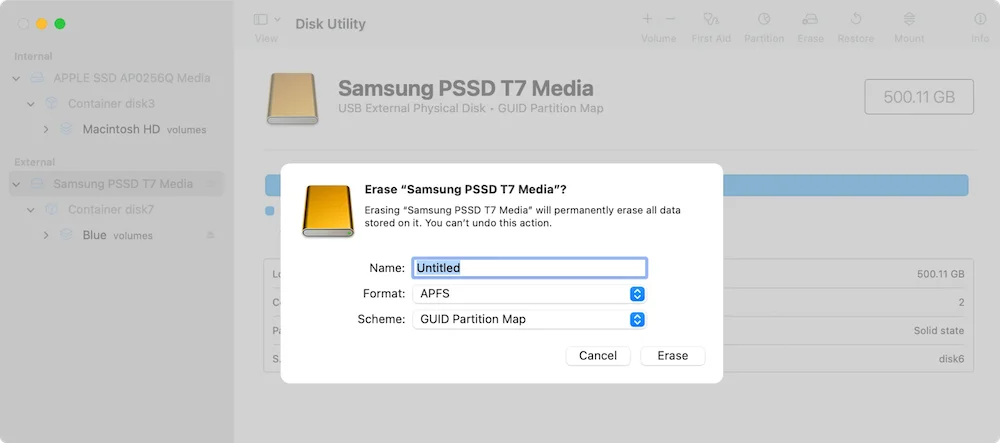
- You'll see a list of drives of Disk Utility. Go to the external SSD you want to format and click on it. It might look like a drive that hasn't been cleaned or set up yet.
![Format the New SSD]()
- Click Erase in the action pane.
- Configure format settings.
- Give the newly prepared SSD a name.
- To begin processing, click the "Erase" button.
Recover Lost Data from Unrecognized Samsung SSD on Mac
If there is important data on the SSD, before formatting the drive, you can use a data recovery tool to help export data from the inaccessible Samsung SSD to another drive. Donemax Data Recovery for Mac is one of the best Mac data recovery tools. It can deeply scan the Samsung SSD and find all recoverable files including existing files, inaccessible files, erased data and deleted files, etc.
Step 1. Download and install Donemax Data Recovery for Mac, then connect the Samsung SSD to your Mac.
Step 2. Open Donemax Data Recovery for Mac, then select the Samsung SSD to start data recovery.

Step 3. Click on Scan button to deeply scan the Samsung SSD and find all recoverable files.

Step 4. Once the scan is completed, you can preview all recoverable files. Then select the wanted files and save them.

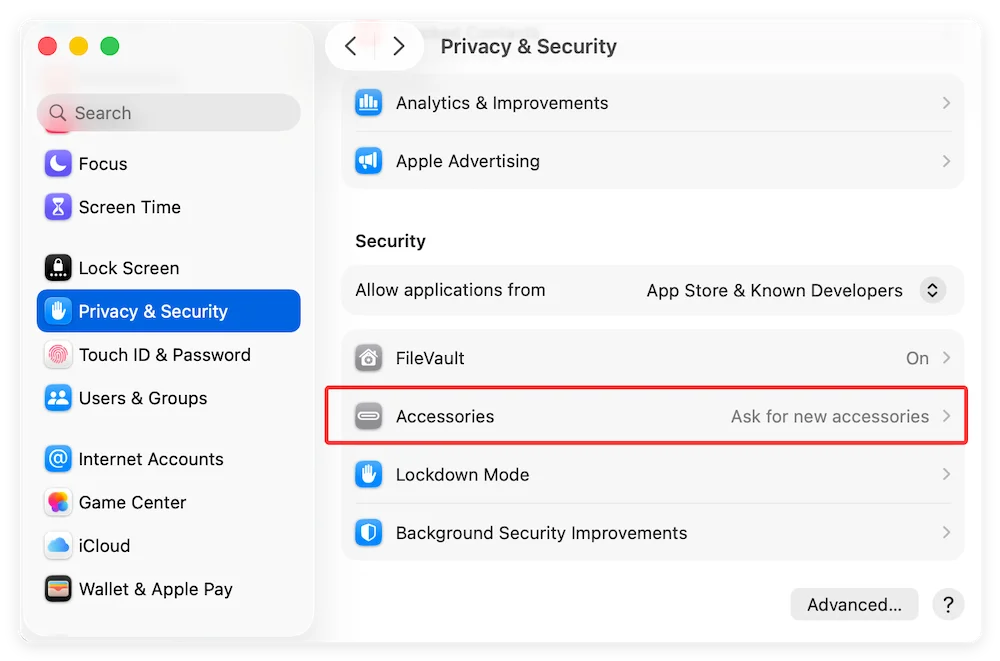
Method 6. Check Your Mac's Security Settings
To keep you safe, your Mac may block access to and from devices it doesn't know how to use. Using your Samsung Portable SSD with the Mac, check if your security settings halted the link. Click on System Settings in the Apple menu to do this.
Choose Privacy & Security from the menu, then scroll down the right side until you reach the Security area. The Allow Accessories to Join setting will let you know if it stops you from getting to your SSD.
Method 7. Run First Aid
There are a lot of self-help and fix tools that come with MacOS. One of the best is First Aid. It will look over the target drive and fix any disk problems.
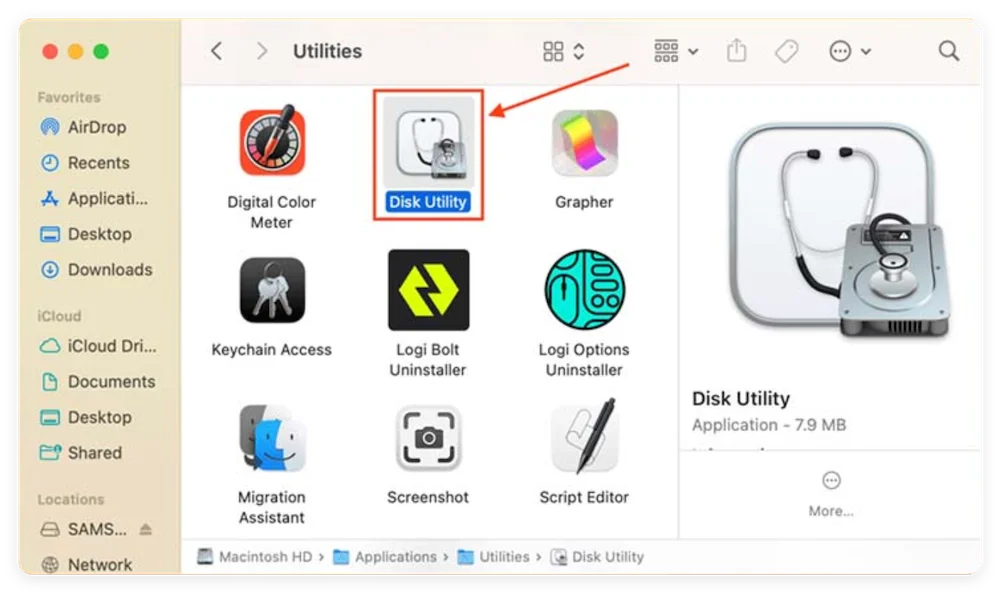
- Step 1: Go to Finder > Applications > Utilities and open Disk Utility to use First Aid.
![open Disk Utility]()
- Step 2: On the left, find your drive and click on it. At the top of the window, click on First Aid. When asked, confirm.
![click on First Aid]()

Preventative Measures for Samsung SSD Not Detected
To prevent the issue in the future and protect your important files on the Samsung SSD, take the following measures:
- Regular Backups: No matter what kind of storage device you use, it's a good idea to back up your files regularly. Time Machine is an easy-to-use choice for automatic backups that comes with macOS.
- Safe Ejection: Always properly eject the SSD using the Finder option before disconnecting it to keep your files safe.
Conclusion:
It can be hard to deal with a Samsung SSD that your Mac doesn't recognize, but most problems can be fixed by following a plan. Start with easy fixes like checking your connections and restarting your Mac. Then, move on to more complex ones, like using Terminal tools and updating your firmware. If you follow these steps and take these precautions, you should have a better and more reliable time using your Samsung SSD on macOS.
Donemax Data Recovery for Mac
Donemax Data Recovery for Mac is one of the best Mac data recovery software. It is easy-to-use and can help in recovering deleted, formatted, inaccessible or lost data from Mac HDD/SSD, external disk, USB drive, SD card, camera or other storage devices.
FAQs about Samsung SSD Not Detected on Mac
This usually happens due to minor connection issues, outdated firmware, or macOS security settings. If you recently updated your macOS, your Mac might be blocking the drive under its new accessory privacy settings, or your older Samsung Portable SSD software might be incompatible with newer Apple Silicon chips.
Yes. Basic troubleshooting steps—like changing your Finder preferences to show external disks, swapping cables, running First Aid in Disk Utility, or enabling NTFS write support—will not touch your files. If the drive is corrupted and requires a reformat, you should use a trusted tool like Donemax Data Recovery for Mac to extract your files before wiping the drive.
If your Samsung SSD is visible but "Read-Only," it is formatted in the Windows NTFS file system. macOS can natively read NTFS files but cannot write to them. To fix this without formatting your drive and erasing your files, use Donemax NTFS for Mac to instantly grant full read/write access.
Newer macOS versions require user permission before connecting to external USB-C accessories. To change this:
- Open the Apple Menu and click System Settings.
- Select Privacy & Security from the sidebar.
- Scroll down to the Security section.
- Look for "Allow accessories to connect" and set it to "Ask for new accessories" or "Always".
Related Articles
- Mar 13, 2025How to Format Seagate Game Drive: A Step-by-Step Guide
- Oct 17, 2024How to Format a RAW Drive to NTFS on Mac?
- Jul 03, 2025How to Reformat Time Machine Drive?
- Jan 12, 2025How to Fix Uninitialized USB Flash Drive on Mac?
- Sep 15, 2023How to Wipe An NTFS Hard Drive on Windows or Mac?
- Sep 23, 2025What to Do If An USB Drive Not Detected on Mac? [macOS Tahoe, Apple silicon Supported]

Contributing Writer
Steven
Steven has been a senior writer & editor of Donemax software since 2020. He's a super nerd and can't imagine the life without a computer. Over 6 years of experience of writing technical solutions and software tesing, he is passionate about providing solutions and tips for Windows and Mac users.

Editor in chief
Gerhard Chou
In order to effectively solve the problems for our customers, every article and troubleshooting solution published on our website has been strictly tested and practiced. Our editors love researching and using computers and testing software, and are willing to help computer users with their problems