Donemax Data Recovery for Mac User Guide
Donemax Data Recovery for Mac is a Professional Mac Data Recovery Software with Free Scan. It provides 3-step data recovery for mac users to recover unlimited data from various Macs and external devices, such as SSD, HDD, USB external hard drive, SD card, memory card, etc. Download and scan your Mac for free immediately to preview your lost files.Here is the user guide.
Install and activate Donemax Data Recovery for Mac
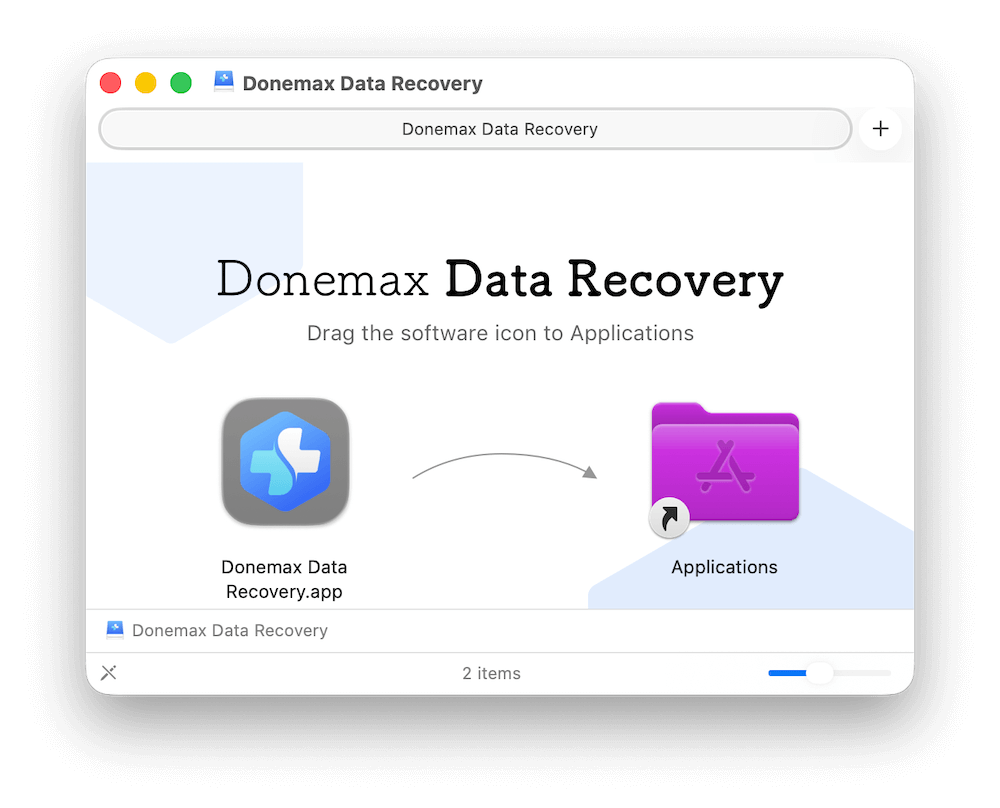
Step 1. Download Donemax Data Recovery for Mac, then open Downloads folder find and double click the .dmg file. Drag the software icon to Applications box to install it on Mac.
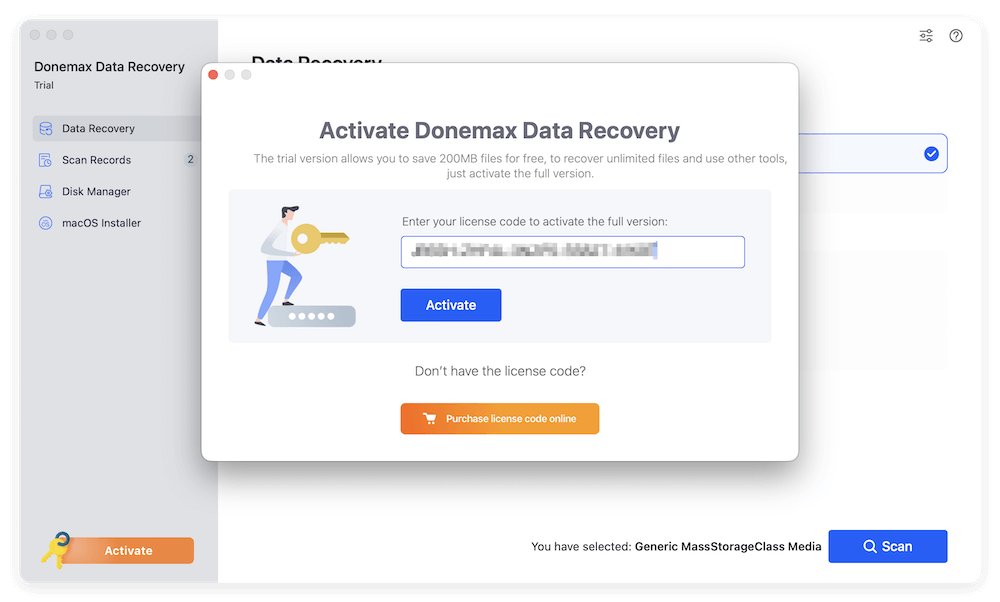
Step 2. Run the software from launchpad. Click Activate icon, enter your license code and click the Activatebutton to unlock it to full version.
Enable Full Disk Access for Donemax Data Recovery for Mac
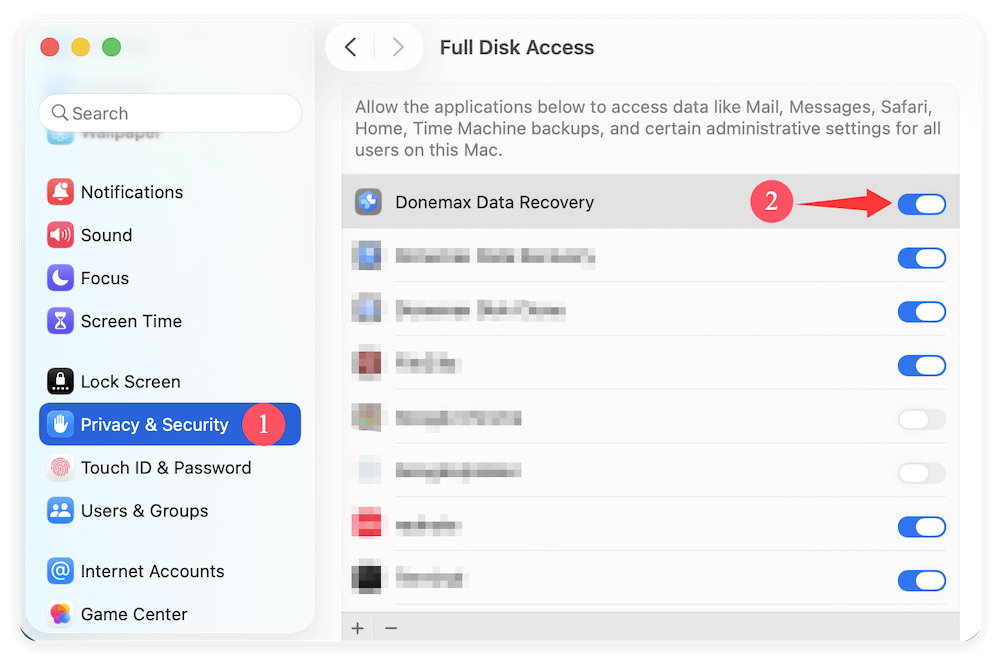
Before you can use the software to recover data on Mac, it's essential to allow the full disk access permission for the software. Here is how:- Click the Apple menu and select System Settings.
- Select Privacy & Security from the left sidebar and click Full Disk Access at the right side.
- Toggle the switch after "Donemax Data Recovery" to turn it on. If you cannot find the item of the software, click plus (+) button to add it manually first and then turn the switch on.
Three Steps to Recover Lost Data
Donemax Data Recovery for Mac is able to easily and completely recover deleted, formatted or inaccessible data from any type of hard drive or external storage device (download it). Just follow the steps below to easily recover lost data.
Step 1. Select the hard drive.
Run Donemax Data Recovery for Mac on your Mac computer, then select the hard drive where you lose your data. (The 'hard drive' could be Mac HDD, SSD, portable hard drive, memory card, USB flash drive, digital camera, digital device, etc.)

💡 Note:
- If your drive is locked, just enter the password (or Mac login password) to unlock the drive. It it does not work, just click Skip.
- If your Mac can't recognize an external device, check this guide: fix unrecognized external device and recover data.
Step 2. Scan the hard drive.
Donemax Data Recovery for Mac offers deep scan mode to ensure finding every recoverable file on the hard drive. Just click on Scan button to scan the hard drive and find the lost files you want to recover.

Step 3. Preview and recover lost files.
Once the scan is completed, you can preview all recoverable files (actually, this software will find all existing files, deleted files, lost files on the hard drive). Then select the wanted files and click on Recover button to save them.

💡 Note:
- You can pause, stop the scan to recover data. However, we recommend you recover data till the scan is completed.
- The trial version allows you to recover 200MB files for free, if you want to recover unlimited files, just enter a valid license code to upgrade to full version.
- To prevent overwriting, you'd better not save the recovered files to the hard drive where you lose them.
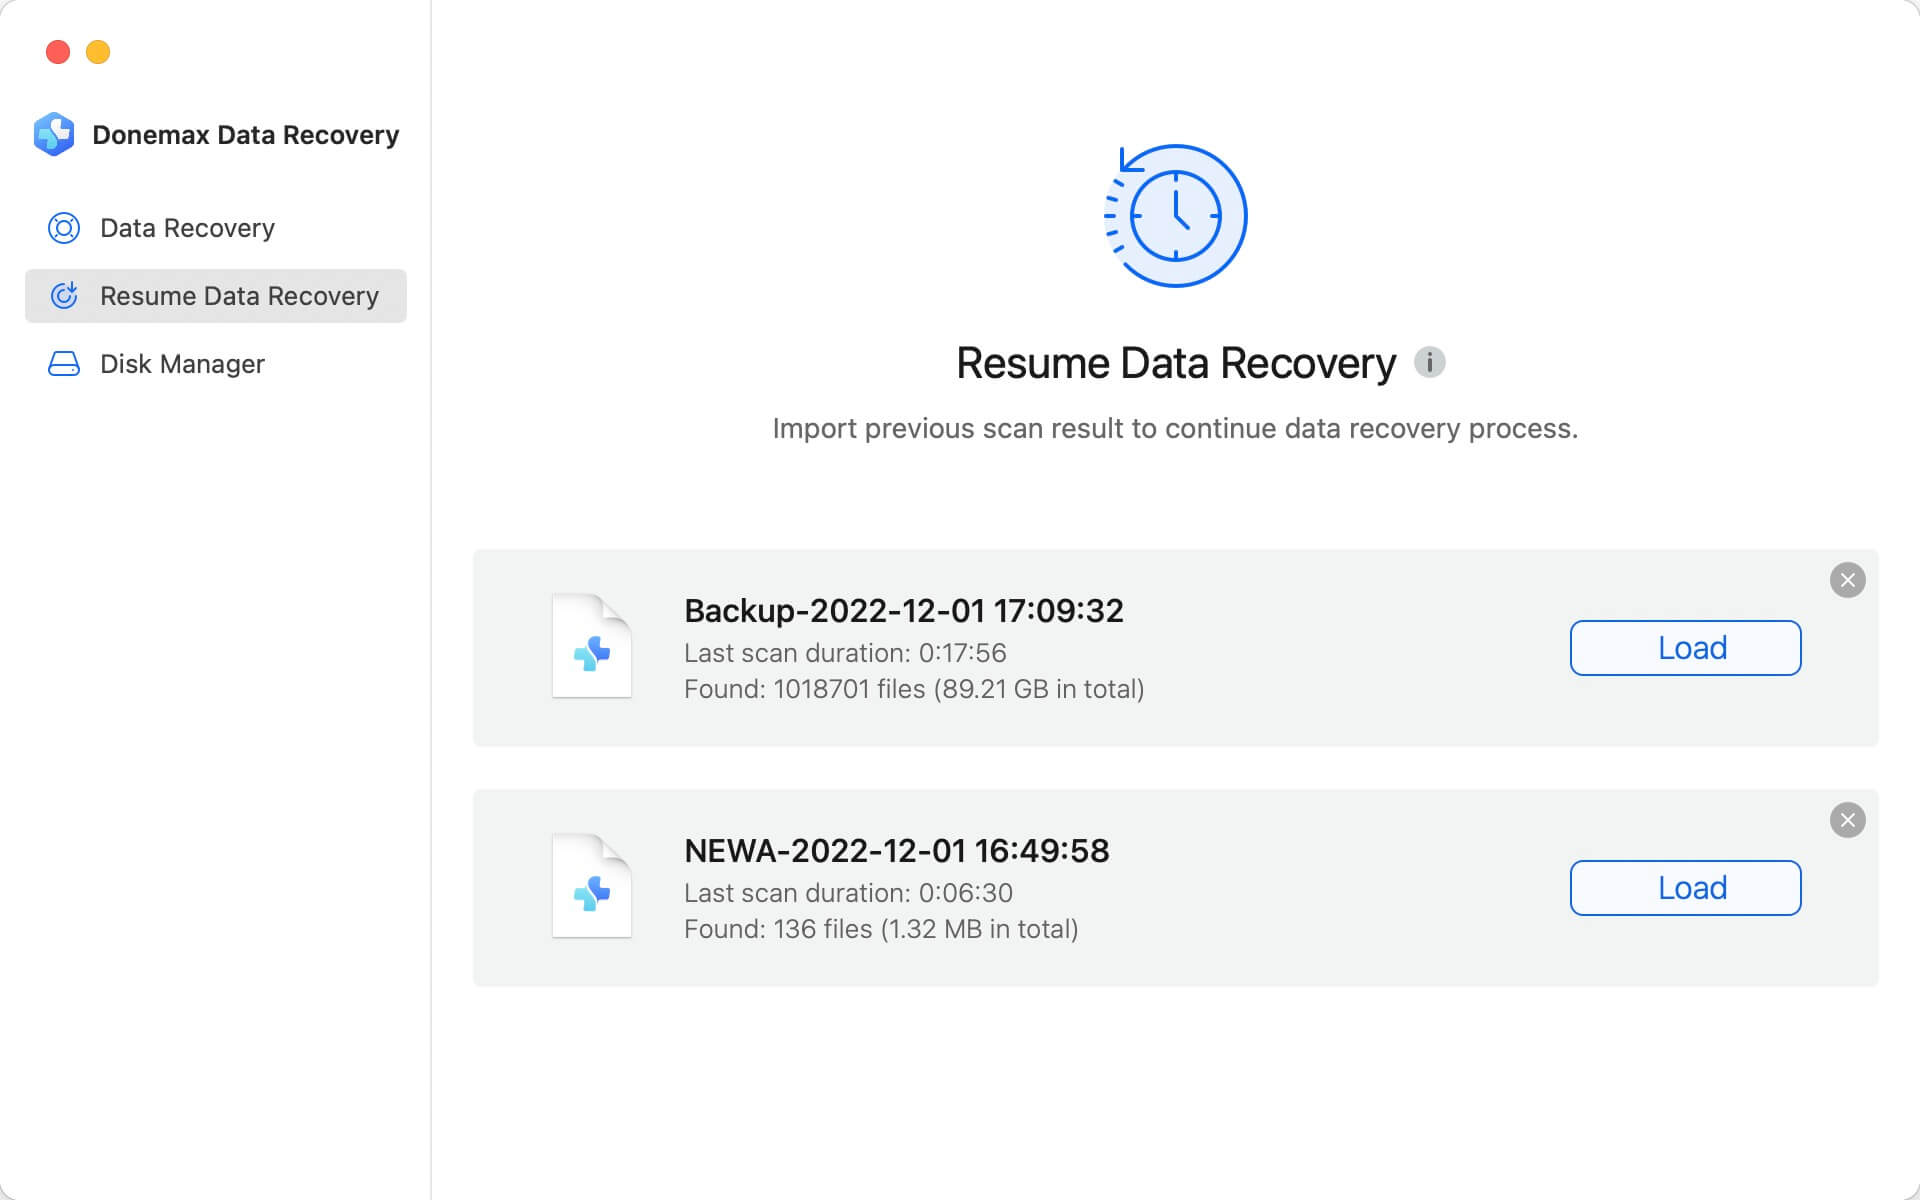
Export and Import Scan Result
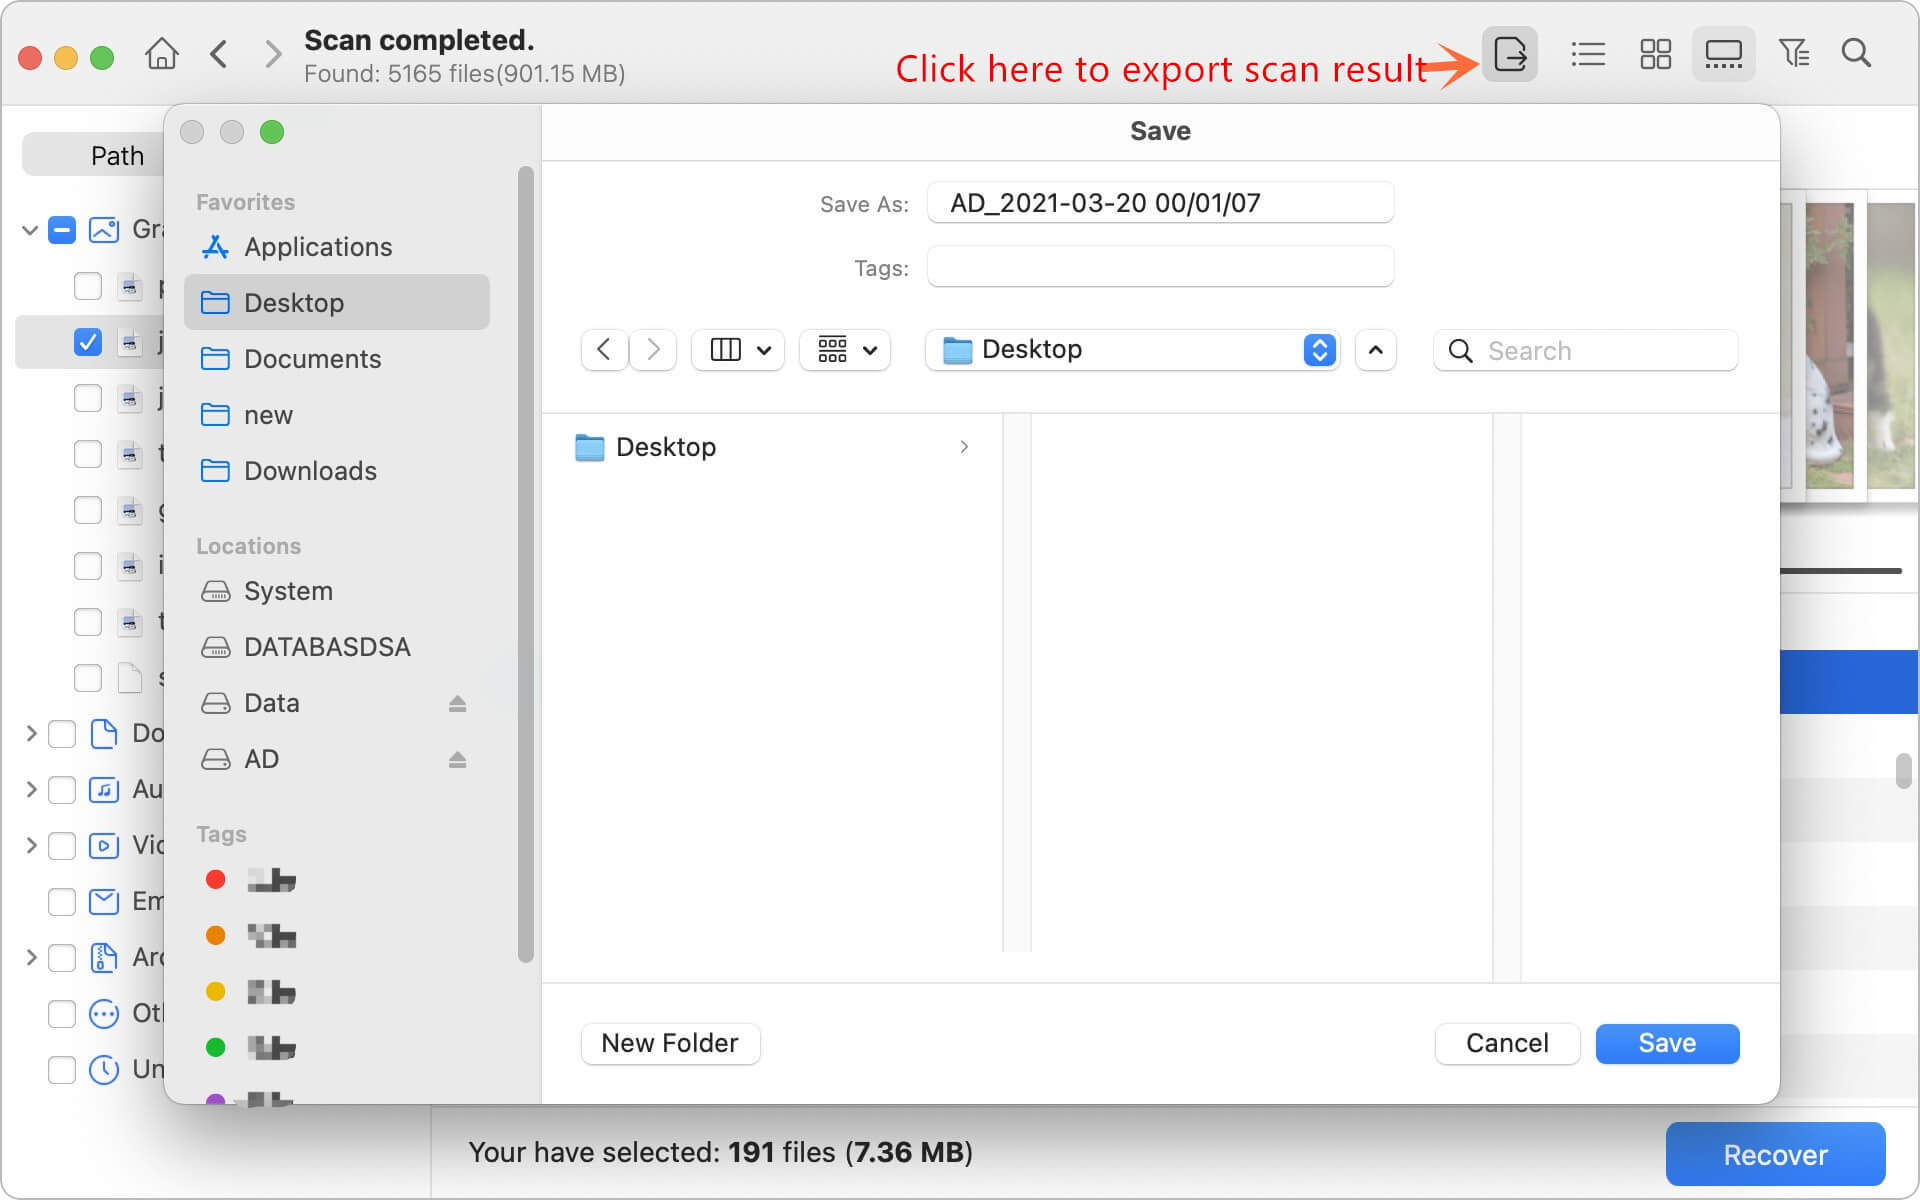
Once a scan is completed, you can immediately recover the files you want or you can save the scan result and use the scan result file to recover lost data later.
Export scan result - just click the Export scan result icon, and save the scan result file (.dmef).
Import can result - Choose Resume Recovery, then import the previous scan result file to recover data without scanning your hard drive again.
Donemax Data Recovery for Mac is 100% safe & clean software. It will help you recover deleted or lost data due to deletion, format, hard drive crash, virus attacking, human mistake, logical error, etc.

Need some help?
Please feel free to contact our support team if you can't find your answer.