Record once. It edits itself.
Donemax Recorder captures your screen, camera and audio in one take — then automatically adds smooth zooms, polished cursor animations and picture-in-picture camera layout, so your recording comes out looking edited.
1Introduction
Donemax Recorder is an all-in-one screen recorder and automatic video editor. Instead of manually cutting and zooming your footage, the built-in AI editor does it for you:
- Record everything at once — your screen, a connected camera, your microphone and system sound.
- Auto zoom — the editor detects where you click and automatically generates zoom-in effects that follow the action.
- Automatic polish — smooth cursor animations, a beautiful background canvas, rounded corners and padding are applied to your recording.
- AI captions — spoken audio is transcribed into subtitles that can be burned into the video or exported as an .srt file.
The typical workflow is: Record → Review auto-generated zooms → Fine-tune (optional) → Export.
2System Requirements
| Item | Requirement |
|---|---|
| Operating system | Windows 10 or Windows 11 (64-bit) |
| CPU | Intel i5 or better recommended. AI features (auto zoom, captions) run faster on modern multi-core CPUs. |
| Memory | 8 GB RAM minimum, 16 GB recommended |
| Disk space | 2 GB for the app, plus space for recordings and AI models (see File Locations) |
| Optional devices | Webcam (USB or built-in), microphone, speakers/headphones for system audio capture |
| Internet | Required for activation and first-time AI model download |
3Upgrade & Activation
Click the orange Upgrade button on the launcher bar to see plans. The free version allows one export; the professional version removes the limit and unlocks unlimited recording and export.
| Plan | Price | Devices | Notes |
|---|---|---|---|
| Monthly | $19.99/mo | 1 PC | Unlimited recording & export |
| Yearly | $59.99/yr | 3 PCs | Unlimited recording & export |
| Lifetime Best Value | $99.99 | 3 PCs | Unlimited recording & export, one-time payment |
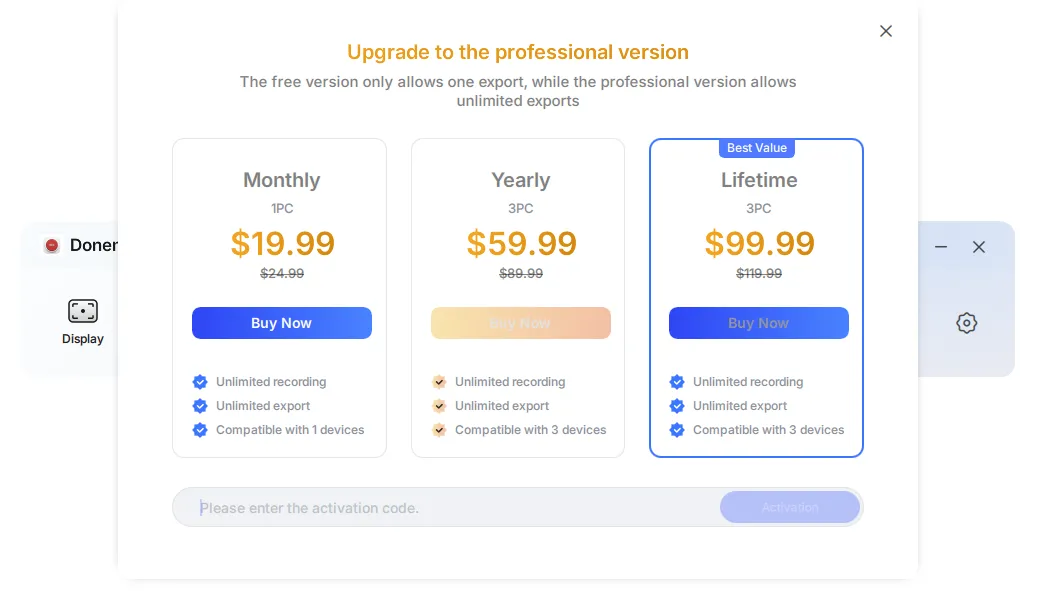
Activating with a license code
- Click Upgrade on the launcher bar.
- Enter your activation code in the field at the bottom of the dialog.
- Click Activation.
- When you see "Congratulations! You have successfully activated Donemax Recorder.", click I Know — all professional features are unlocked.
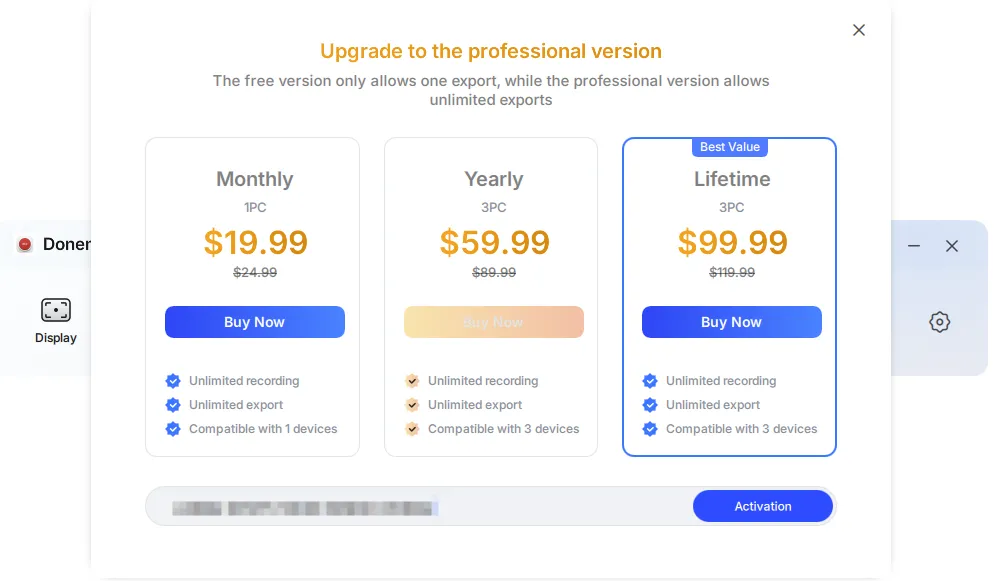
4Quick Start
New to Donemax Recorder? These four steps take you from zero to a finished video.
- Choose what to record. On the launcher bar, pick Display (full screen), Custom (drag a region) or Window (a single app window).
- Pick your camera & audio. Select your webcam, microphone and system sound from the drop-downs — or turn any of them off.
- Record. Press the record button. A countdown appears, then everything on the selected area is captured.
- Export. When recording stops, the editor opens with zoom effects already generated. Click Export to save your MP4.
5Recording
5.1 Recording Modes
The launcher bar offers three recording modes:
| Mode | What it does | Best for |
|---|---|---|
| Display | Captures the entire screen (or all of a chosen monitor). | Full-screen demos, courses, presentations |
| Custom | Drag to draw any rectangular region; only that area is recorded. | Isolating a specific app area or widget |
| Window | Captures a single application window, even if other windows overlap it. | Clean recordings of one app |

5.2 Camera & Audio Sources
Camera
Click the Camera drop-down to choose a webcam:
- USB Camera (or any detected camera) — your camera feed is recorded as a picture-in-picture layer.
- Don't record Camera — records the screen only.
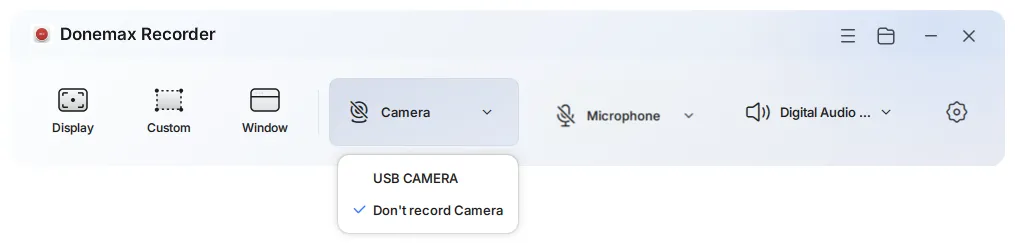
Microphone
Click the Microphone drop-down to choose your voice input:
- USB Microphone (or any detected microphone) — your voice is recorded on its own track.
- Don't record Microphone — no voice-over.

System Sound
Click the Digital Audio drop-down to capture what your computer plays (app audio, meeting audio, music):
- Speakers or Digital Audio (S/PDIF) — records the audio output of the selected device.
- Don't record System Sound — records microphone only.
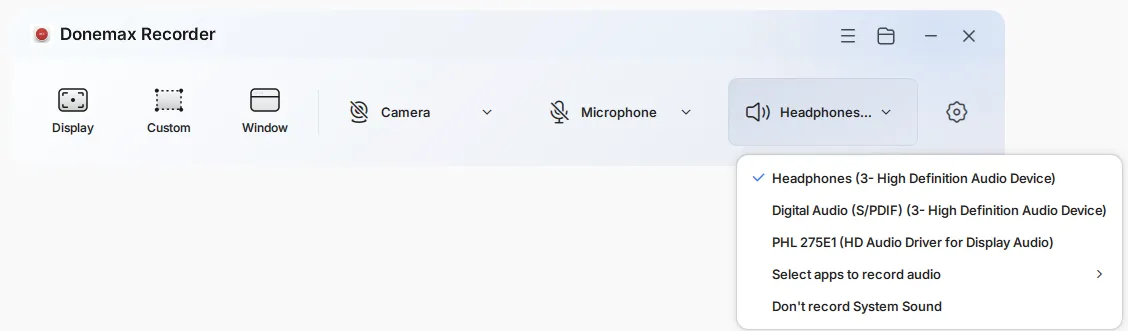
5.3 Quick Settings
Click the gear icon on the launcher bar for two presentation-friendly toggles:
- Hide desktop icons during recording — gives a clean desktop look without moving your files.
- Hide taskbar during recording — hides the Windows taskbar in the captured area.

5.4 Start, Pause & Stop
- Select the recording mode and your camera/audio sources.
- Press the red record button on the launcher bar. A countdown appears (3 seconds by default — configurable in Settings, see Section 7).
- While recording, a floating control bar shows the elapsed time and lets you pause/resume, restart, or stop the recording.
- Click Stop (or the square button) when finished. The recording is saved automatically and the editor opens.
6The Editor
6.1 Interface Overview
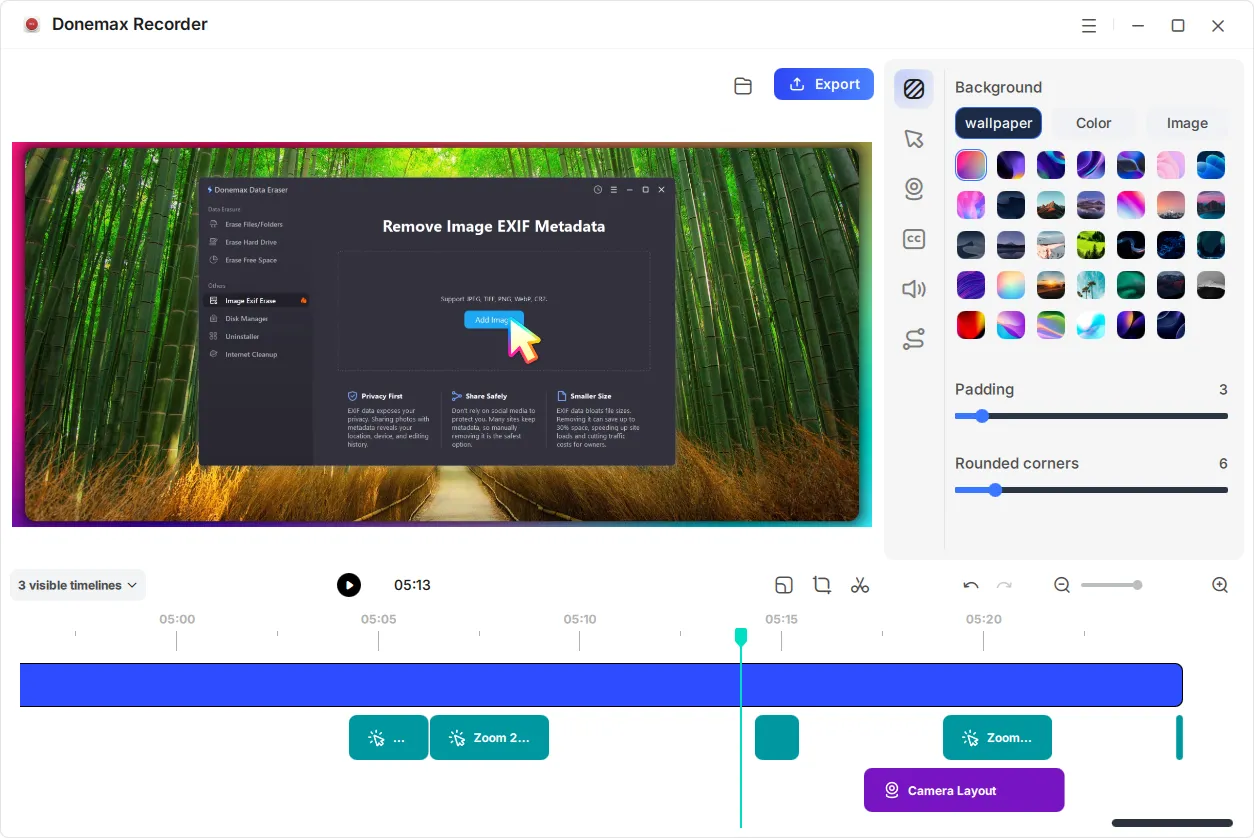
When a recording stops, the Donemax Editor opens. By this point the AI has already analyzed your video and generated zoom effects. The window has four areas:
- Preview canvas (left) — shows how the final video will look, including background, camera overlay and zoom framing.
- Tool rail (right edge) — six panels: Background, Cursor, Camera, Captions (CC), Audio and Motion.
- Timeline (bottom) — the screen track, auto-generated Zoom effects and Camera Layout segments.
- Top bar — open file location and the blue Export button.
6.2 Background Panel
The Background panel styles the canvas around your recording. It is especially effective when the recording is a window or custom region smaller than the canvas.
- Background — three tabs: wallpaper (curated gradient/photo wallpapers), Color (solid colors) and Image (use your own picture).
- Padding — adds space between the recording and the canvas edge (default 3).
- Rounded corners — softens the corners of the recorded frame (default 6).
6.3 Cursor Panel
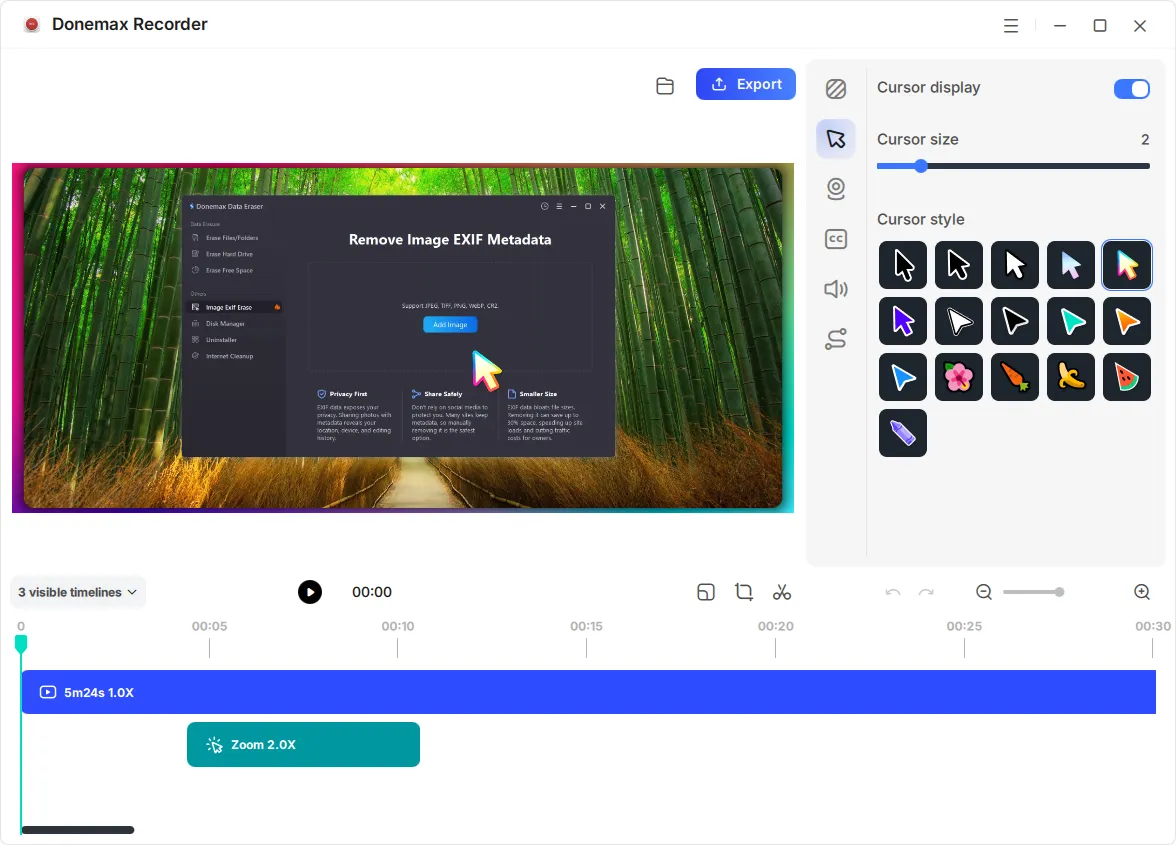
Make your pointer easy to follow:
- Cursor display — show or hide the cursor in the final video.
- Cursor size — enlarge the pointer for better visibility (default 2).
- Cursor style — pick from a gallery of pointer designs: classic arrows, colorful pointers and fun styles (flower, carrot, banana, watermelon and more).
6.4 Camera Panel
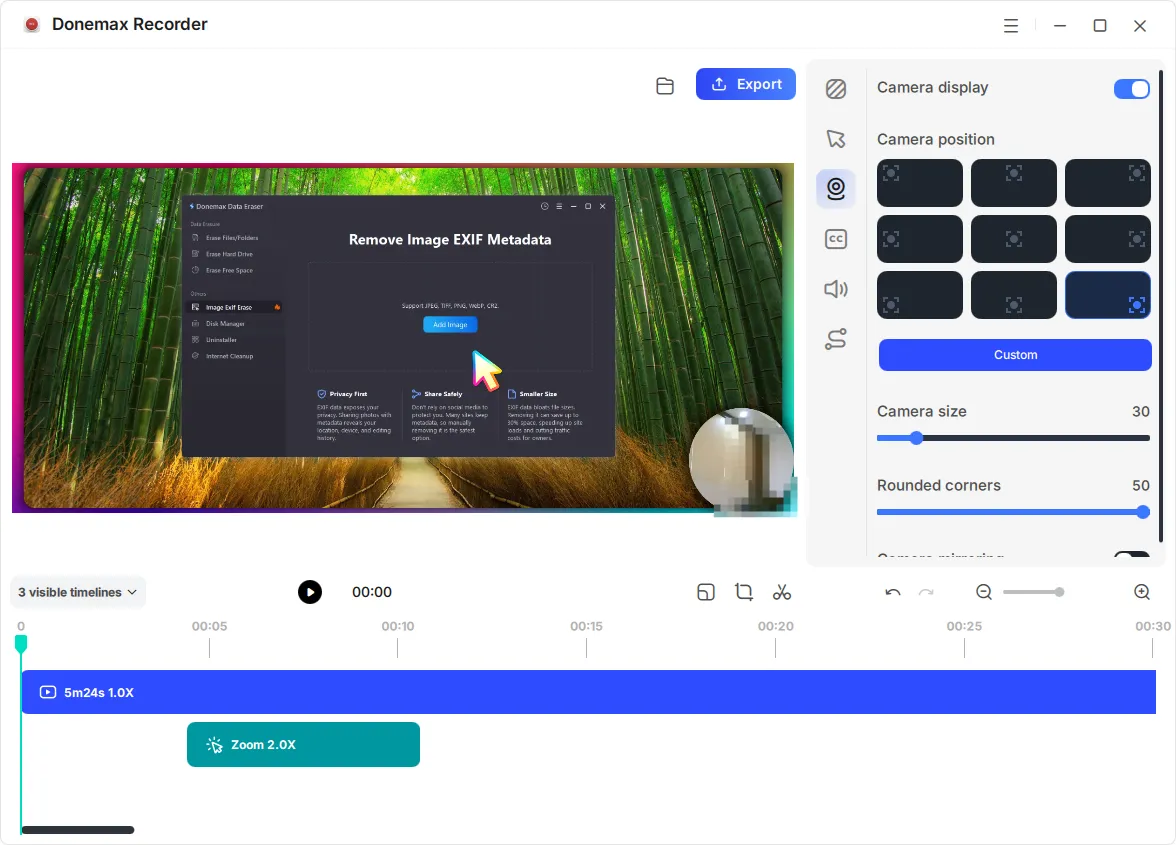
Control the picture-in-picture camera layer recorded in Section 4.2:
- Camera display — show or hide the camera overlay.
- Camera position — snap the overlay to any corner or edge using the 3×3 grid, or choose Custom to drag it anywhere on the canvas.
- Camera size — scale the overlay (default 30).
- Rounded corners — round the corners of the camera bubble (default 50).
- Camera shadow — add a soft shadow around the camera bubble.
6.5 Captions Panel
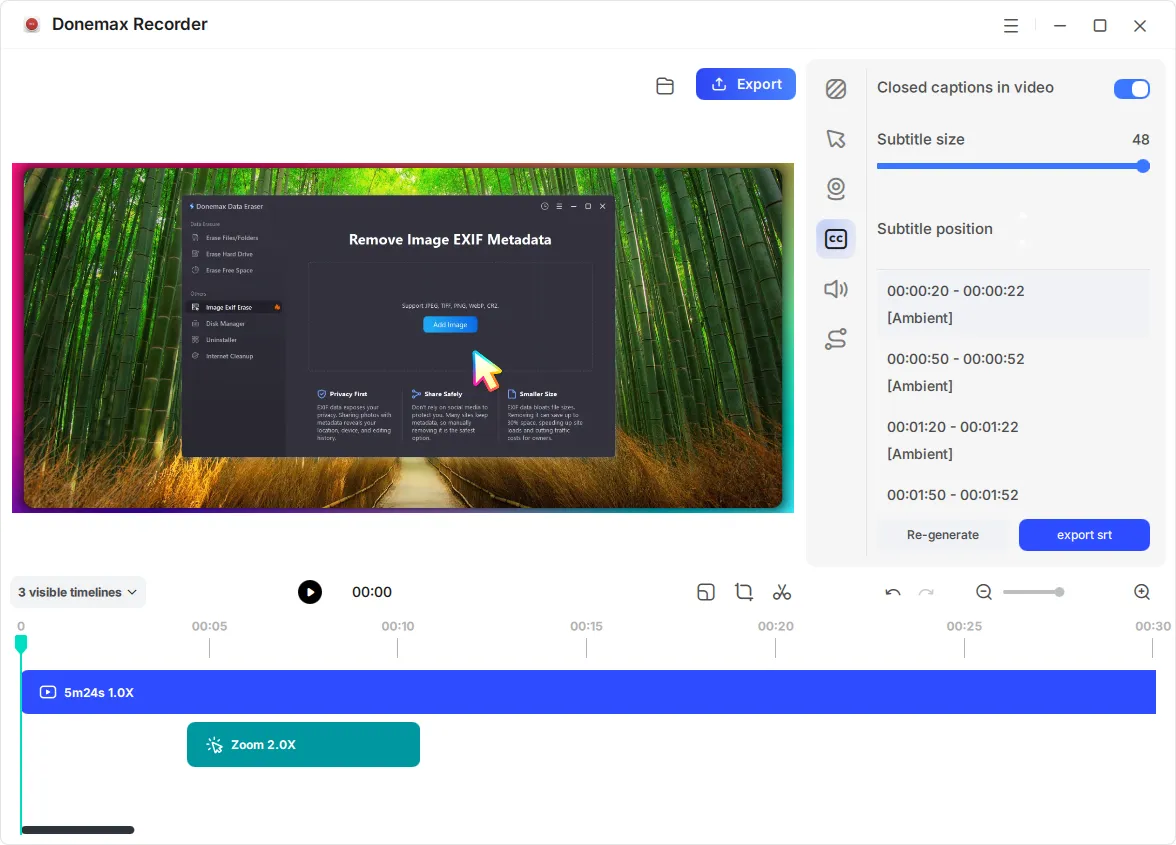
Donemax Recorder transcribes your voice-over into captions automatically.
- Closed captions in video — toggle captions on or off in the exported video.
- Subtitle size — adjust caption font size (default 48).
- Subtitle position — move captions up or down.
- Caption list — every transcribed segment with its time range (e.g. 00:00:20 - 00:00:22 [Ambient]). Click a segment to jump to it and edit its text.
- Re-generate — re-run the AI transcription.
- Export .srt — save captions as a standard SubRip subtitle file for YouTube, Vimeo or any player.
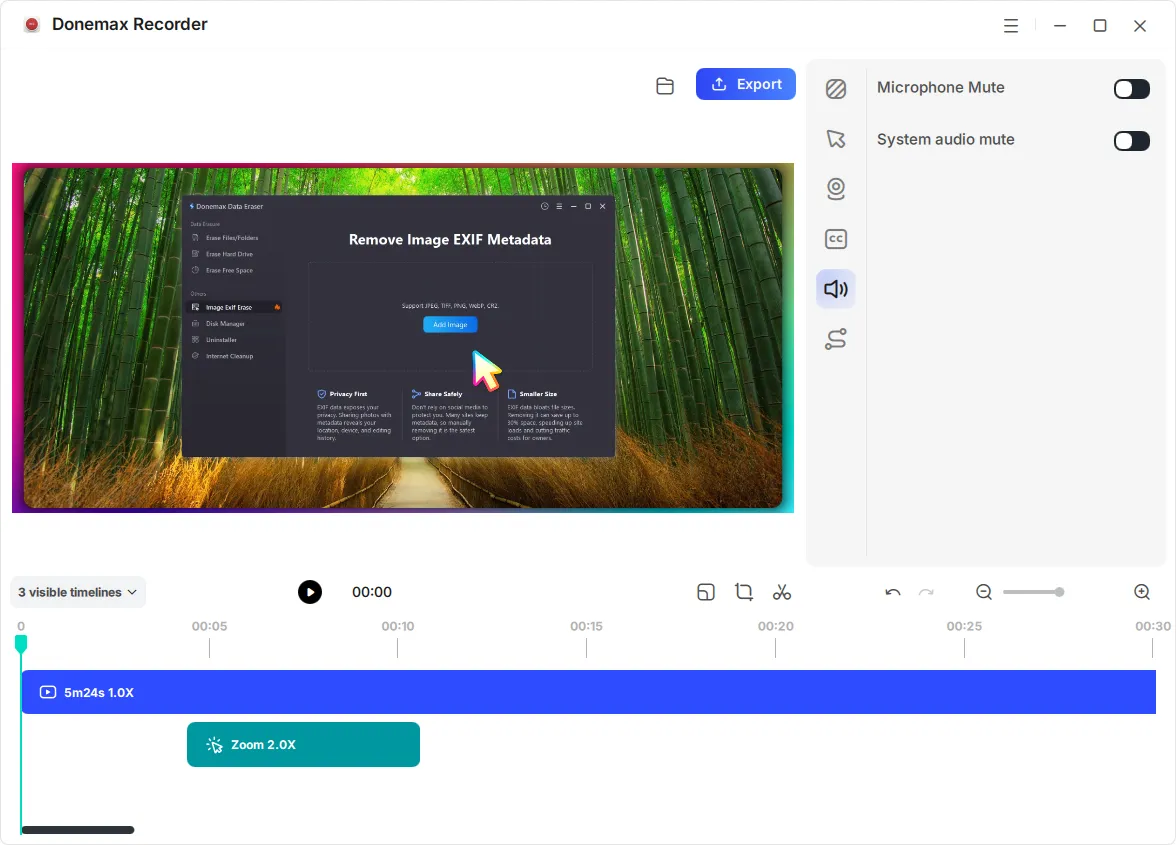
6.6 Audio Panel
Mute either audio track of the finished recording without re-recording:
- Microphone Mute — silence your voice track.
- System audio mute — silence the computer's audio track.
6.7 Motion Panel
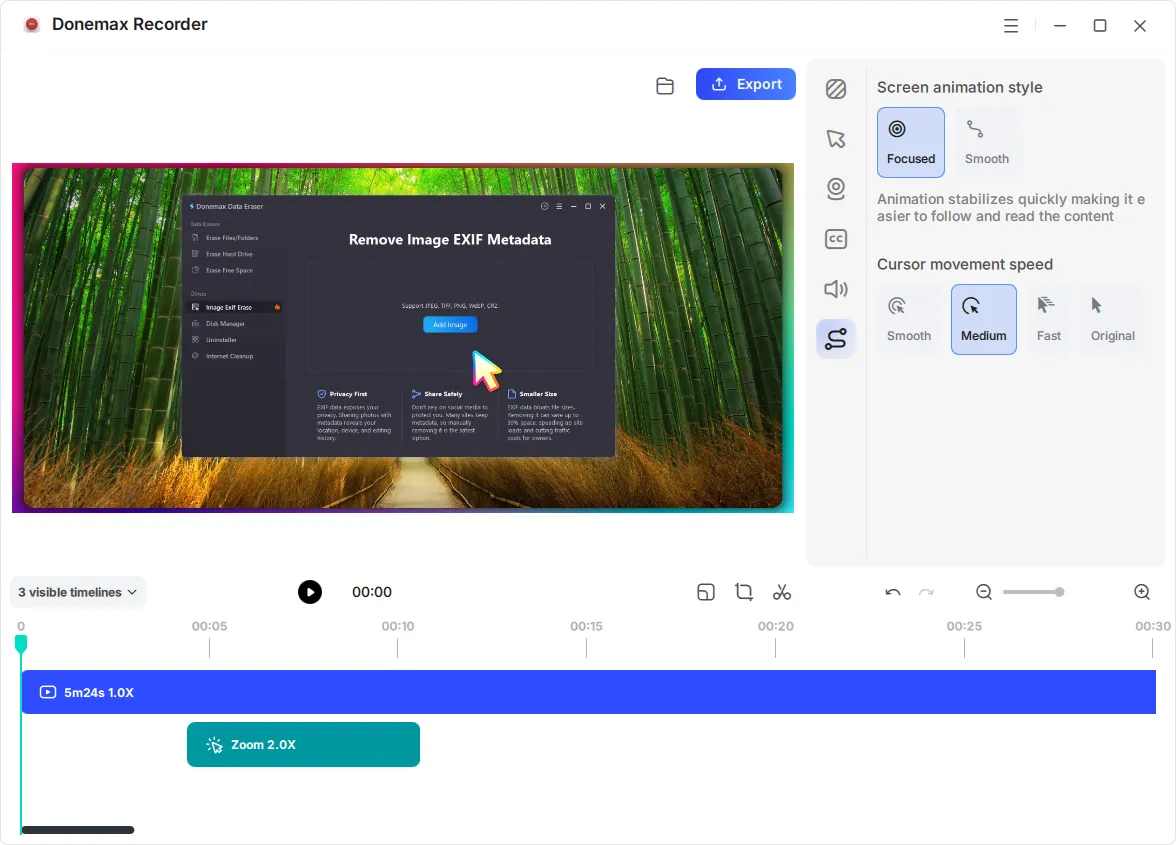
Fine-tune how the automatic animation feels:
- Screen animation style
- Focused — animation stabilizes quickly, making it easier to follow and read the content (recommended for tutorials).
- Smooth — gentler, cinematic camera motion.
- Cursor movement speed — how fast the animated cursor travels between clicks: Smooth, Medium (default), Fast or Original (real speed).
6.8 Timeline & Auto Zoom
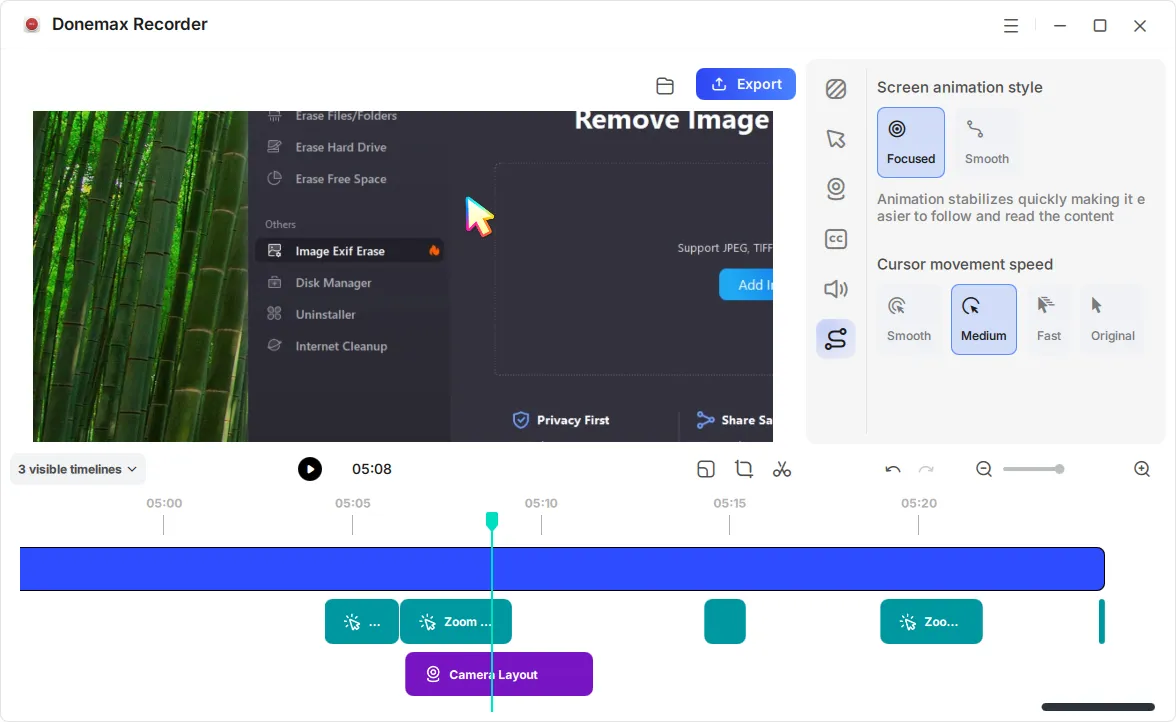
The timeline at the bottom shows the main screen track (e.g. 5m24s 1.0X) with the AI-generated effects placed on it:
- Zoom segments (teal chips, e.g. Zoom 2.0X) — automatically created zoom-ins that follow your clicks. Click a chip to preview or adjust it.
- Camera Layout segments (purple chips) — moments where the camera overlay changes position or size.
- Playhead — drag the teal line to scrub; press the Play button to preview.
- Visible timelines — the drop-down at the bottom-left (e.g. 3 visible timelines) filters which tracks are shown.
- Toolbar icons — snapshot the current frame, remove a zoom effect, and split the track at the playhead (scissors icon). Undo/redo and timeline zoom are on the right.
7Exporting Your Video
- Preview the video and adjust any panel settings.
- Click the blue Export button at the top of the editor.
- The video is rendered using your default export settings (see Section 7): MP4 · Original resolution · 60 FPS · Best quality by default.
- Find the finished file in your Exported File Save Location (default Videos\Donemax Recorder\Exported), or click the folder icon in the editor to open it directly.
8Settings
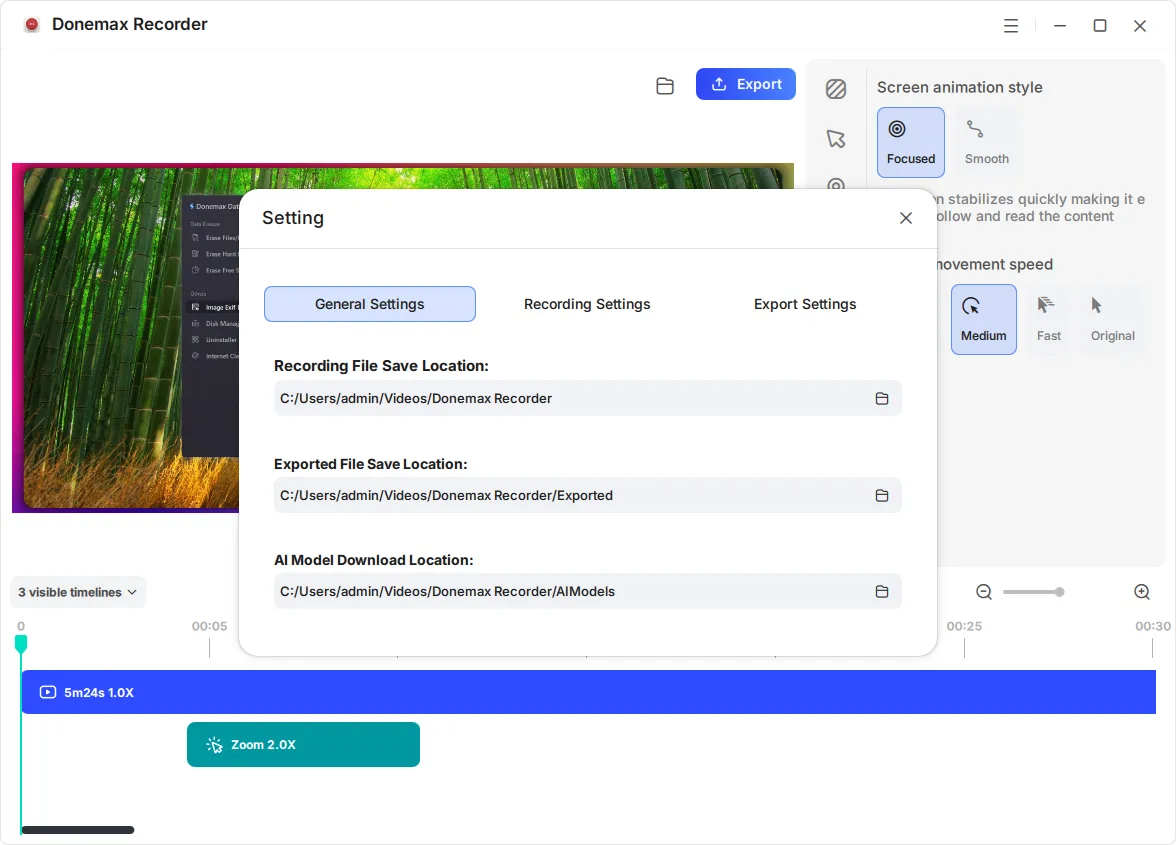
Open Settings from the editor (or the launcher) to configure the app. It has three tabs.
8.1 General Settings
- Recording File Save Location — where raw recordings are stored (default C:\Users\…\Videos\Donemax Recorder).
- Exported File Save Location — where finished videos are stored (default …\Videos\Donemax Recorder\Exported).
- AI Model Download Location — where AI models for zoom detection and captions are stored (default …\Videos\Donemax Recorder\AIModels).
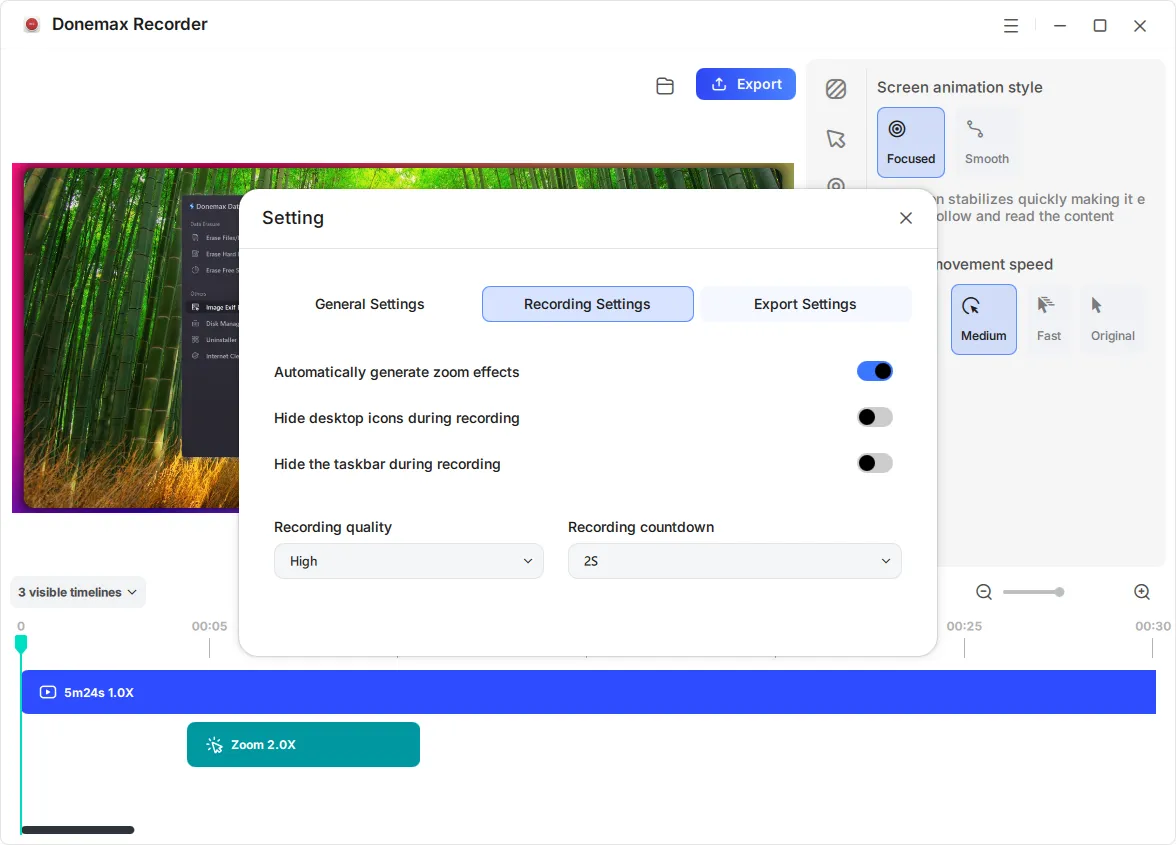
8.2 Recording Settings
- Automatically generate zoom effects — on by default; turns auto-zoom on or off for new recordings.
- Hide desktop icons during recording / Hide the taskbar during recording — same toggles as the launcher quick settings.
- Recording quality — e.g. High.
- Recording countdown — delay before capture starts (e.g. 2S).
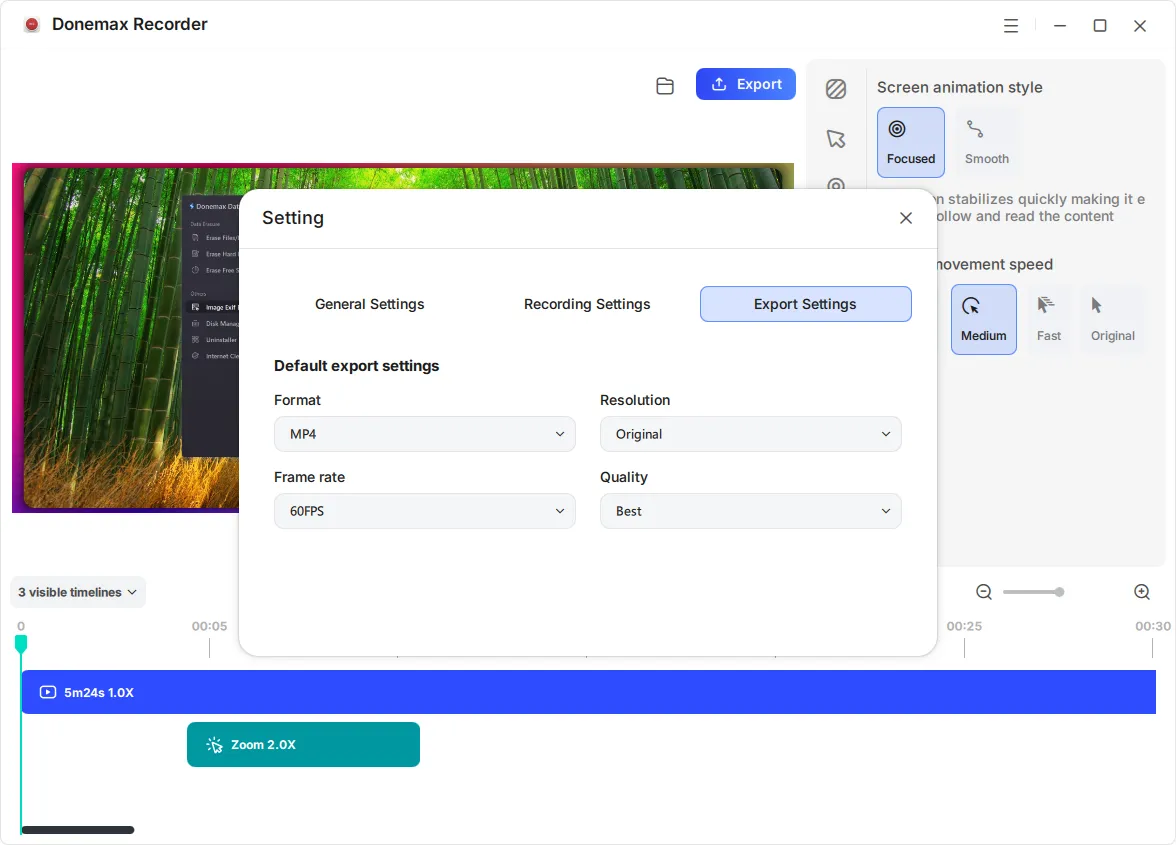
8.3 Export Settings
| Option | Default | Description |
|---|---|---|
| Format | MP4 | Output container for the finished video |
| Resolution | Original | Keep the recording's native resolution or scale down |
| Frame rate | 60FPS | Frames per second of the exported video |
| Quality | Best | Encoding quality / file size trade-off |
9File Locations
| Content | Default location |
|---|---|
| Raw recordings | C:\Users\<you>\Videos\Donemax Recorder |
| Exported videos | C:\Users\<you>\Videos\Donemax Recorder\Exported |
| AI models | C:\Users\<you>\Videos\Donemax Recorder\AIModels |
All three paths can be changed in Settings → General Settings. If your system drive is low on space, move the AI models folder to a larger drive.
10Tips & Best Practices
- Record in a window or custom region and use the Background panel — the wallpaper + padding + rounded corners combo makes even simple recordings look designed.
- Click deliberately. Auto zoom follows your clicks; clear, intentional clicks produce the cleanest zoom effects.
- Use the 3-second countdown to switch to the right window before capture starts.
- Hide desktop icons and taskbar before recording product demos for a cleaner frame.
- Export .srt alongside MP4 when uploading to YouTube — searchable captions improve accessibility and SEO.
- Keep the original recording. Raw files stay in the recording folder, so you can always re-edit and re-export.
11FAQ & Troubleshooting
My exported video has no sound.
Check three things: (1) a microphone or system sound source was selected before recording (Section 4.2); (2) neither Microphone Mute nor System audio mute is switched on in the Audio panel (Section 5.6); (3) the correct output device was chosen if you intended to record system sound.
The camera doesn't appear in my video.
Make sure a camera (not Don't record Camera) was selected before recording, and that Camera display is on in the Camera panel (Section 5.4). Close other apps that may be using the webcam.
Zoom effects were not generated.
Open Settings → Recording Settings and make sure Automatically generate zoom effects is on. Auto zoom is driven by mouse clicks — recordings without clicks produce few or no zoom segments.
Captions are missing or inaccurate.
Captions require the AI model (downloaded on first use) and reasonably clear audio. Re-record with a better microphone, or click Re-generate in the Captions panel. You can also edit each segment's text manually.
I can't export more than once.
The free version allows one export. Activate the professional version with your license code for unlimited exports — see Section 11.
Where did my recording go?
Open the folder icon in the editor, or check Settings → General Settings → Recording File Save Location (Section 8).
The app is slow or the preview stutters.
AI processing (zoom detection, transcription) is CPU-intensive. Close other heavy apps, record at the original resolution instead of scaling up, and make sure at least 8 GB of RAM is available.