
Written byStevenUpdated on May 20, 2026
How to Use iPhone Mirroring on Mac: Step-by-Step Guide
Approved byGerhard Chou
PAGE CONTENT:
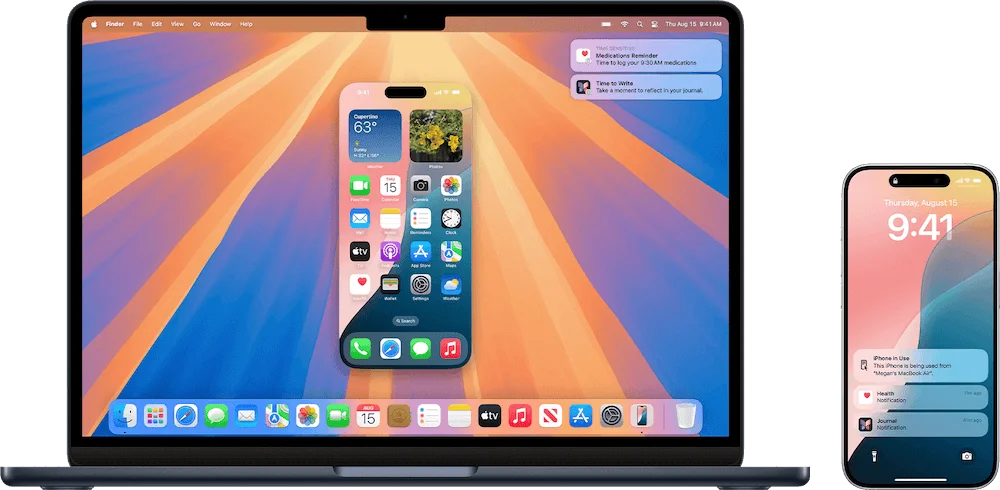
Imagine sitting at your desk, fully focused on your Mac, when an important text or a mobile-only app notification pops up on your iPhone. Instead of breaking your workflow, diving into your pocket, or looking away from your computer screen, what if you could open your phone directly on your desktop?
With Apple's ecosystem updates, you can. The native iPhone Mirroring feature bridges the gap between iOS and macOS completely.
Whether you are a professional trying to streamline your daily tasks, a creator recording mobile app tutorials, or a home user looking to manage your phone without picking it up, this guide will show you exactly how to use iPhone mirroring on Mac using native tools, classic wireless setups, and wired workarounds.
What Is iPhone Mirroring on Mac?
iPhone mirroring is a continuity feature that projects your iPhone's live screen onto your Mac. However, it isn't just a passive display. It creates an interactive window on your desktop, allowing you to control your phone using your Mac's keyboard, mouse, or trackpad.
For regular home users, this opens up incredible multitasking possibilities:
- Complete App Control: Open and use mobile-exclusive apps (like home automation tools, mobile banking, or social media) right from your desk.
- Seamless Typing: Use your Mac's physical keyboard to reply to texts, WhatsApp messages, or edit notes inside iOS apps.
- Intuitive Integration: Move items like photos or documents smoothly between your computer and phone.
- Uninterrupted Workspace: Access your mobile device even if it's across the room or charging in your bag.
System Requirements: What You Need to Get Started
To use the seamless, fully interactive native mirroring experience, your devices must meet specific hardware and software prerequisites introduced by Apple.
Hardware Requirements
- For your Mac: You need a Mac powered by Apple Silicon (M1, M2, M3, M4, or later) or an Intel-based Mac equipped with an Apple T2 Security Chip (generally models from 2018 or newer).
- For your iPhone: An iPhone capable of handling modern operational loads smoothly.
Software Requirements
- The Mac must be running macOS Sequoia (15.0) or later.
- The iPhone must be running iOS 18 or later.
Account & Connection Settings
- Apple ID: Both devices must be logged into the exact same Apple ID.
- Security: Your Apple ID must have Two-Factor Authentication (2FA) enabled.
- Proximity & Wireless: Both Bluetooth and Wi-Fi must be enabled on both devices, and they should be physically close to each other.
3 Methods to Use iPhone Mirroring on Mac
Method 1: Using Apple's Native iPhone Mirroring (Recommended)
If your hardware is compatible, the native continuity application provides the absolute best experience. It lets you fully interact with your phone's interface wirelessly.
Step 1: Initial Setup on Your Mac
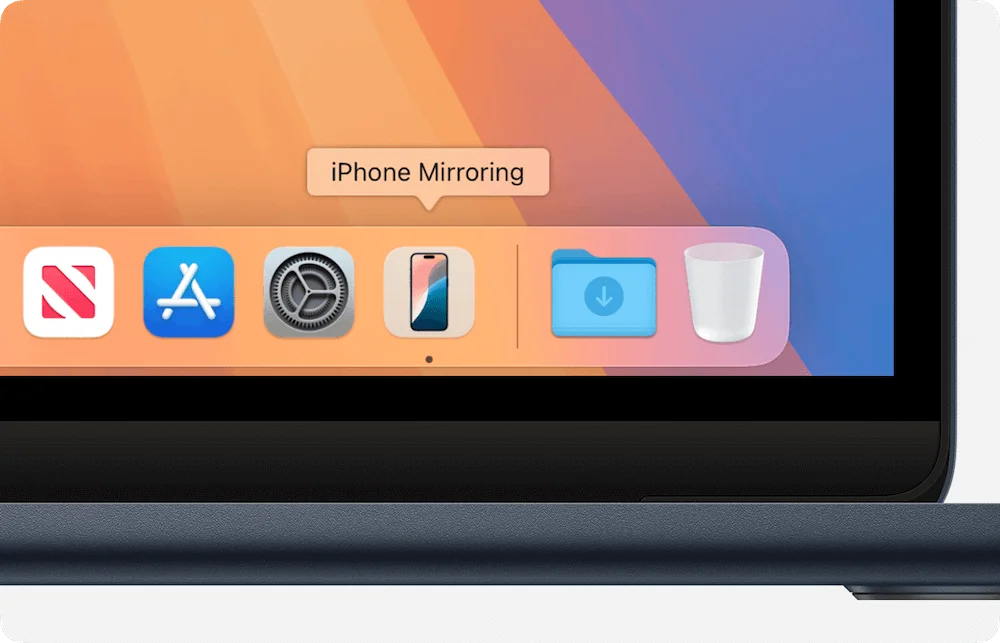
- Locate the iPhone Mirroring app icon in your Mac's Dock, or open Finder, go to your Applications folder, and launch it from there.
![use iPhone Mirroring on Mac]()
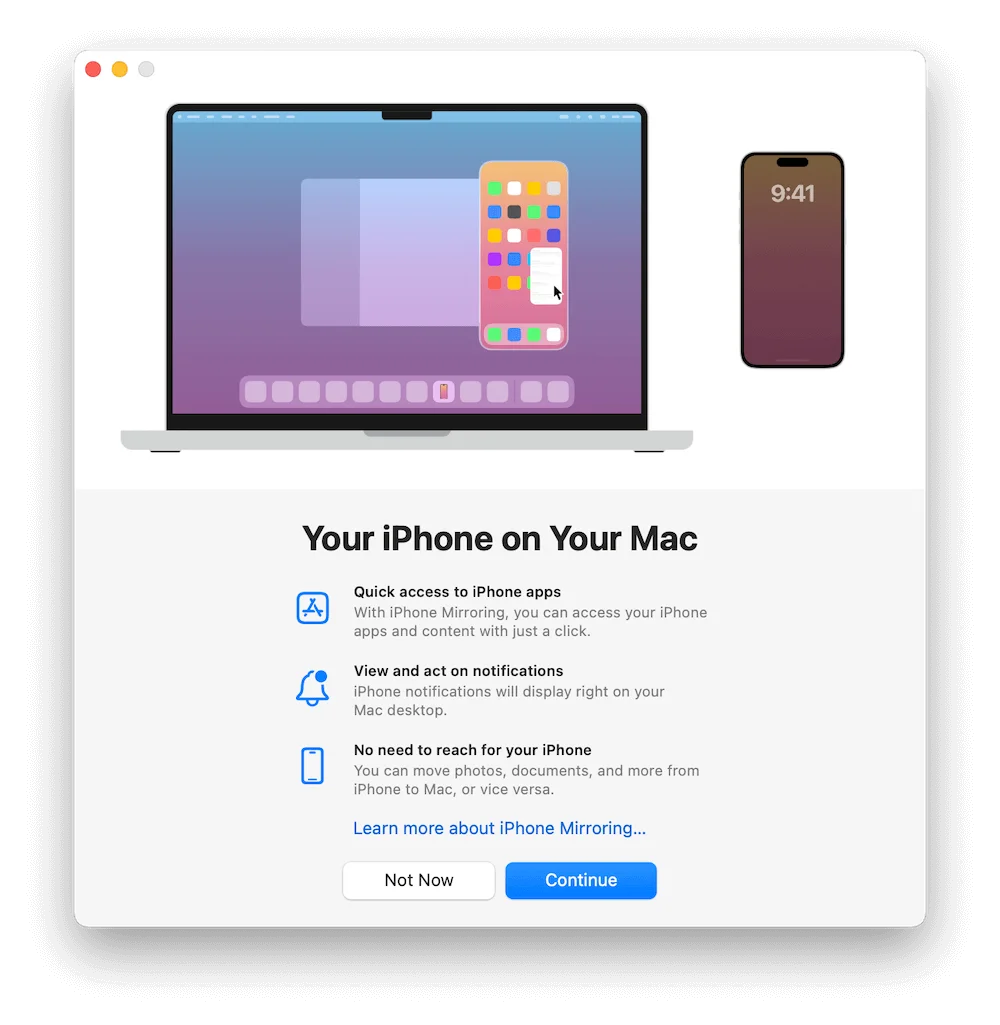
- An introductory screen will appear explaining the capabilities of the tool. Click Continue.
![use iPhone Mirroring on Mac]()
Step 2: Authenticate and Pair
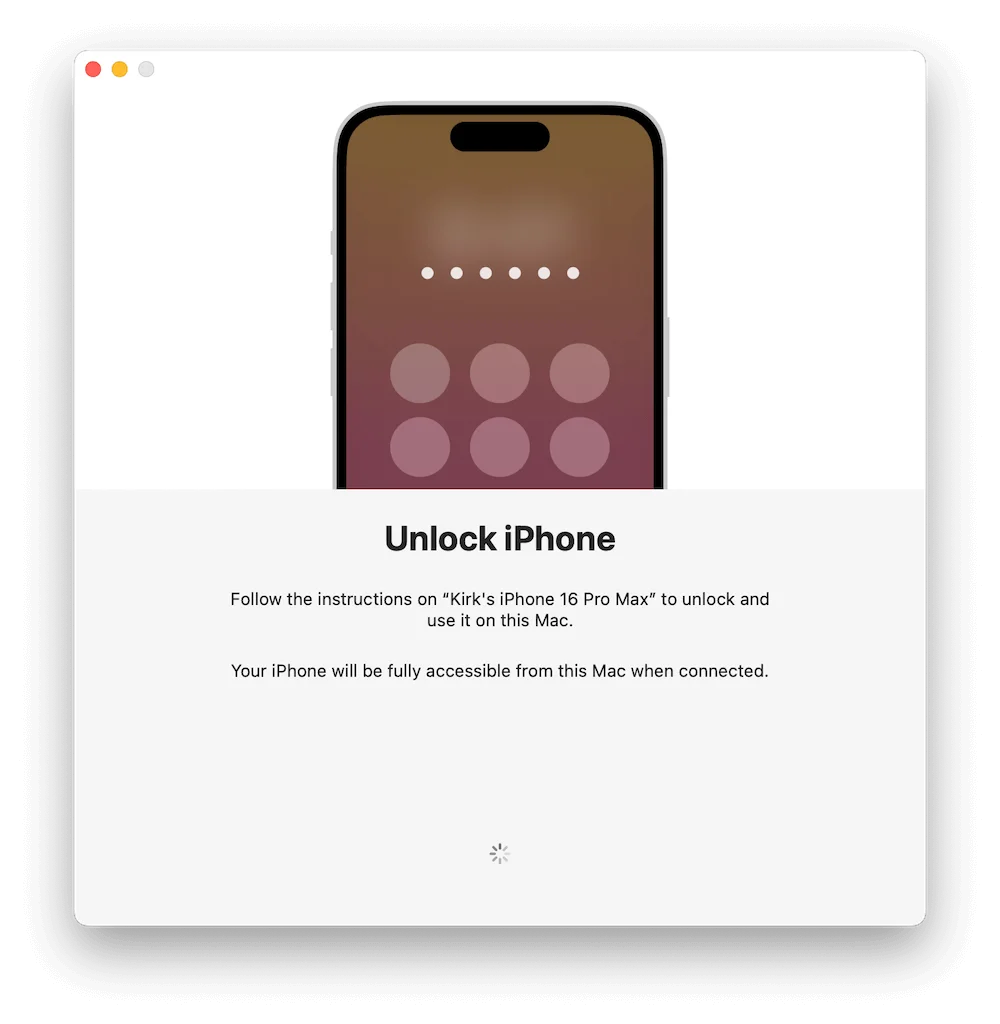
- Ensure your iPhone is unlocked nearby. Your Mac will prompt you to wake or authorize the device.
![use iPhone Mirroring on Mac]()
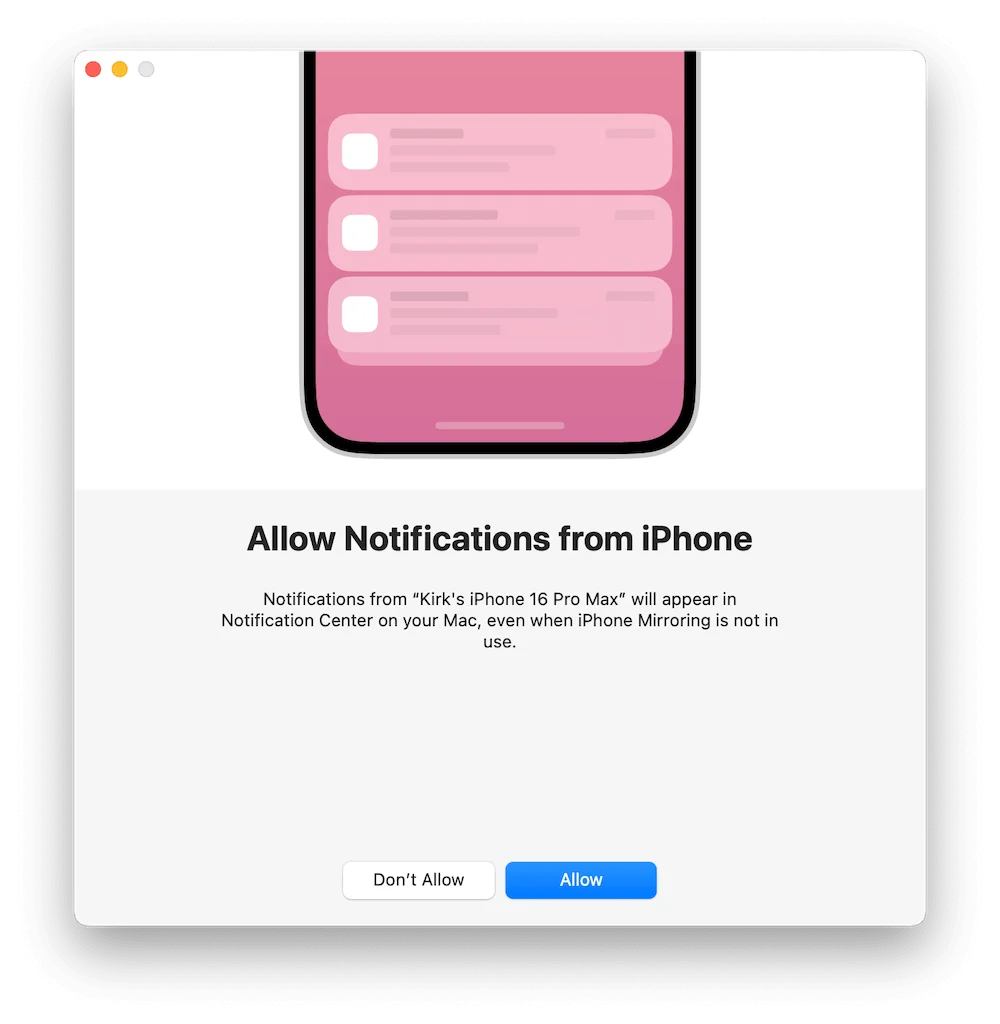
- A prompt on your Mac will ask if you want to allow notifications from your iPhone to show up on your Mac. Click Allow—this makes handling incoming messages incredibly convenient.
![use iPhone Mirroring on Mac]()
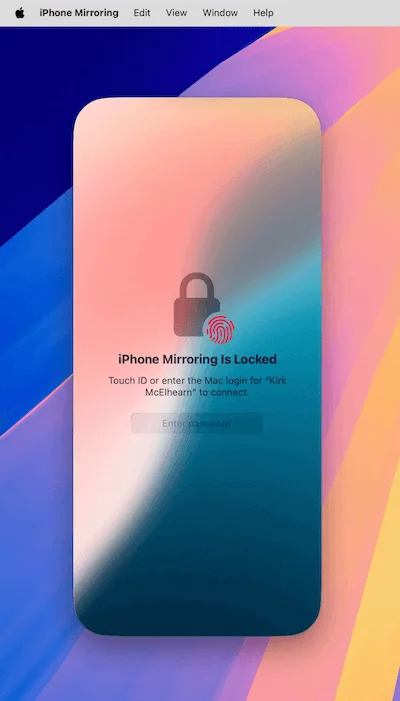
- Click Get Started and authorize the final connection on your Mac using Touch ID or your system password.
![use iPhone Mirroring on Mac]()
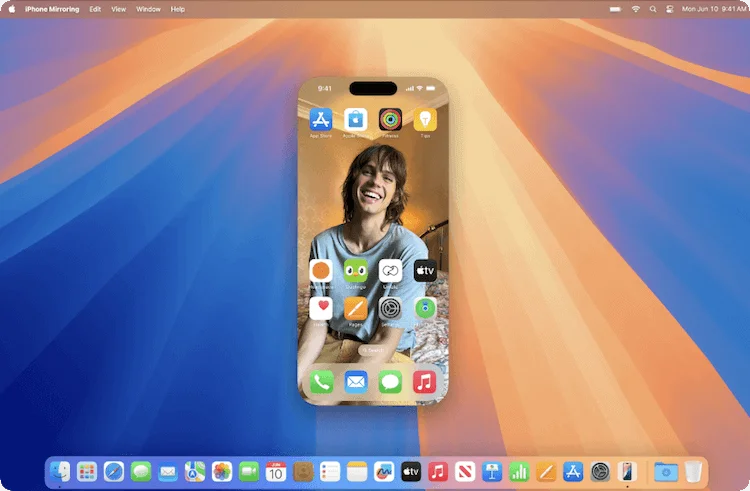
Step 3: Start Controlling Your Phone
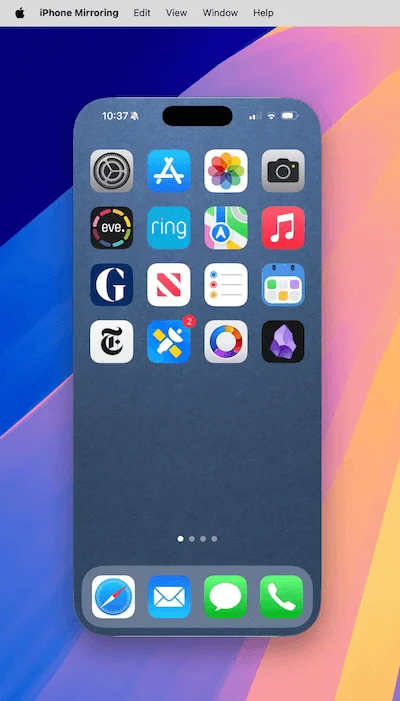
Your iPhone's home screen will appear in a dedicated window on your Mac. You can click to open apps, scroll with your trackpad, and use your Mac keyboard to type instantly. To maintain absolute privacy, your physical iPhone screen remains securely locked while you are accessing it via your Mac.
Method 2: Mirroring with AirPlay (For Older macOS Versions)
If you are running a slightly older operating system (like macOS Sonoma or Ventura), you won't have access to interactive native mirroring, but you can still stream your screen wirelessly using AirPlay.
Step 1: Configure Your iPhone
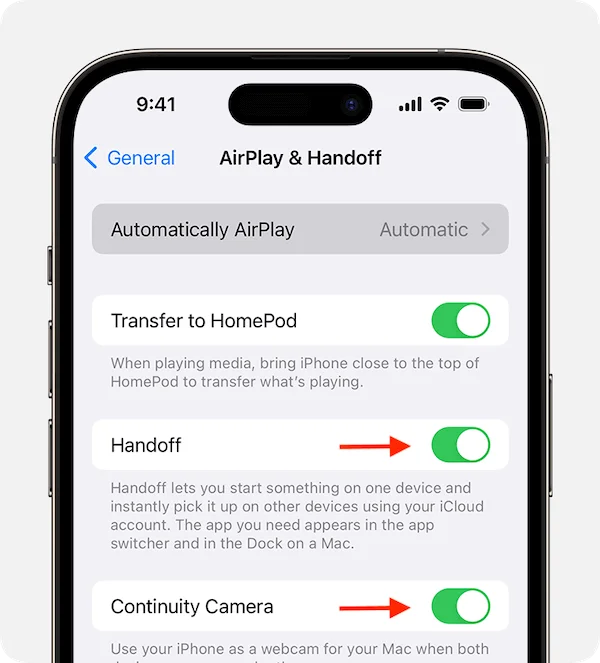
- Open Settings on your phone.
- Navigate to General > AirPlay & Handoff.
- Ensure that Handoff and Continuity Camera are toggled ON.
Step 2: Configure Your Mac
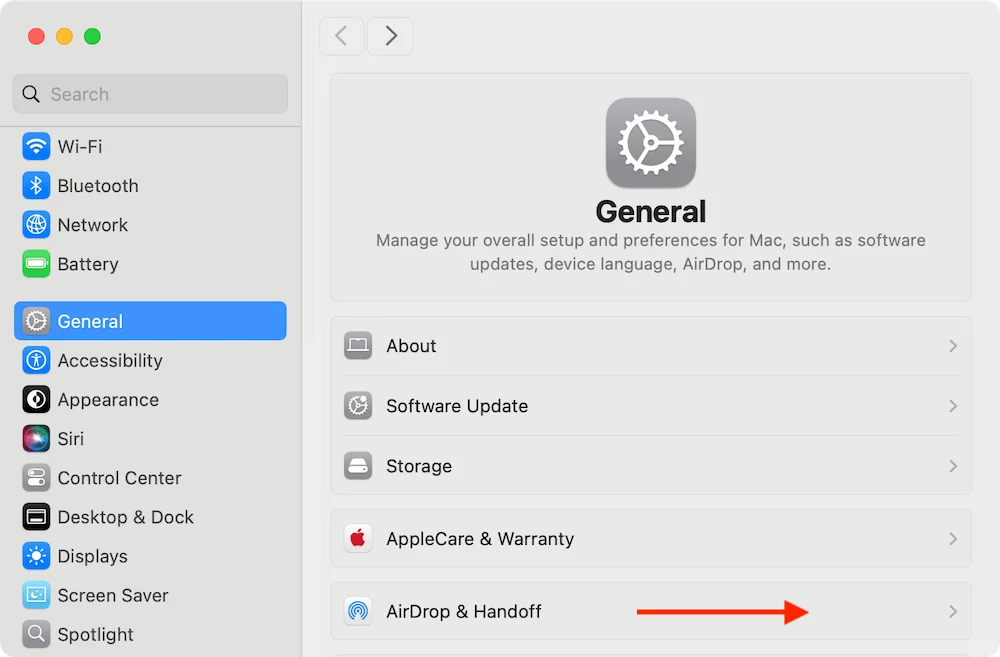
- Open System Settings on your Mac.
- Click on General in the sidebar, then select AirPlay & Handoff.
![use iPhone Mirroring on Mac]()
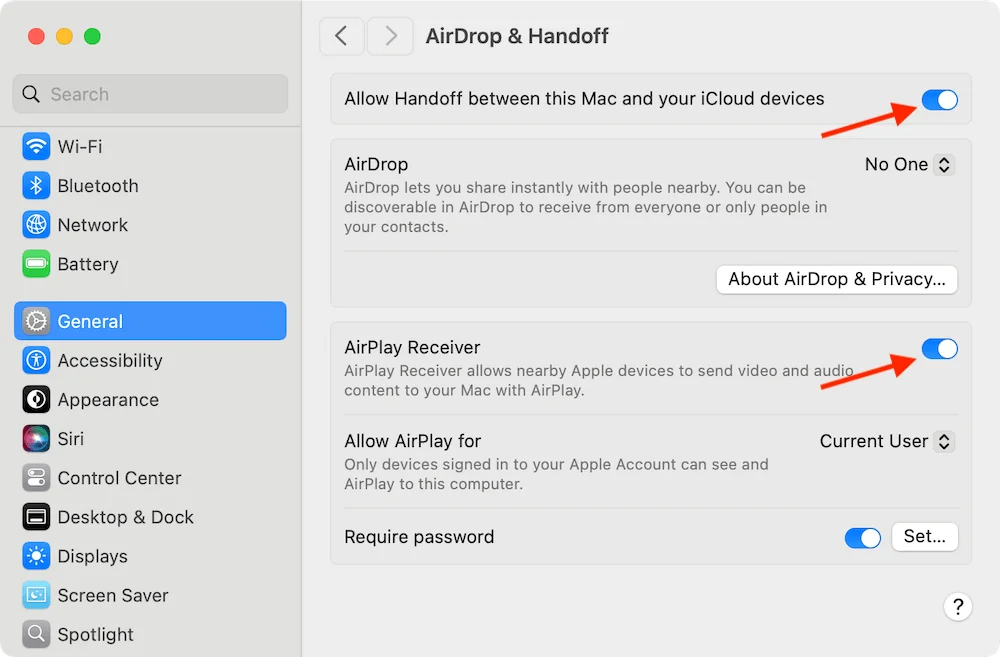
- Turn on the AirPlay Receiver switch. Set it to allow access for "Current User" to keep the connection secure within your Apple ID.
![use iPhone Mirroring on Mac]()
Step 3: Cast Your Screen
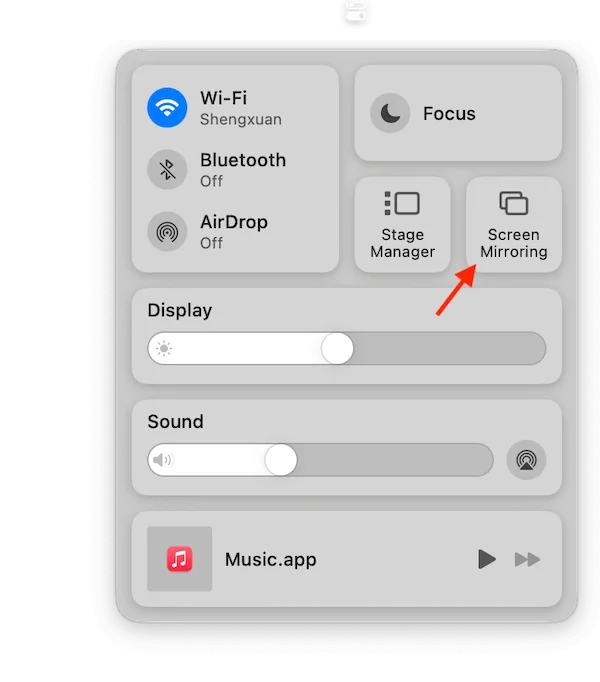
- Swipe down from the top right of your iPhone to pull down the Control Center.
- Tap the Screen Mirroring icon (represented by two overlapping rectangles).
![use iPhone Mirroring on Mac]()
- Select your Mac from the list of available receivers. Your phone's screen will display on your Mac. Note that this method is view-only; you cannot click or control the phone from your computer screen.
![use iPhone Mirroring on Mac]()
Method 3: Using QuickTime Player (Reliable Wired Connection)
If your Wi-Fi network is unstable, or if you are using older Mac models that don't support wireless streaming features, using a simple USB cable with QuickTime Player is an excellent, zero-lag alternative.
- Connect your iPhone directly to your Mac using a certified USB-to-Lightning or USB-C cable.
- Unlock your iPhone. If a popup asks to Trust This Computer, tap Trust and enter your passcode.
- Launch QuickTime Player on your Mac (found in Applications).
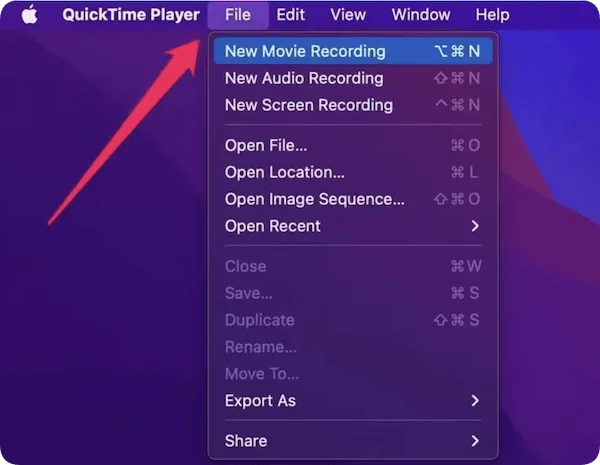
- Go to the top menu bar and select File > New Movie Recording.
![use iPhone Mirroring on Mac]()
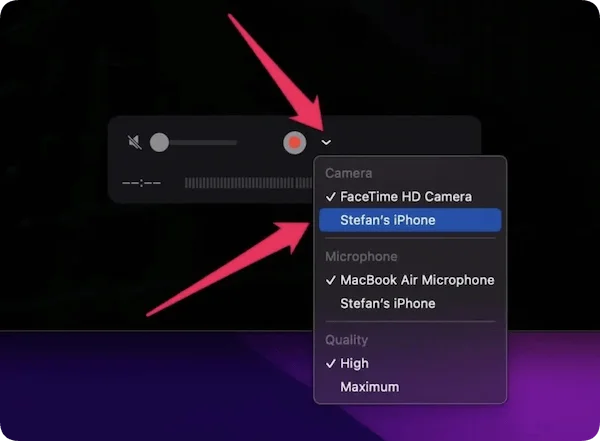
- A camera window will open. Click the small arrow icon next to the red Record button.
- Under the "Camera" section, select your iPhone from the dropdown menu. Your live phone screen will display inside the QuickTime window instantly.
![use iPhone Mirroring on Mac]()
Troubleshooting Common iPhone Mirroring Problems
Sometimes technology hits a snag. If you run into issues while trying to connect, try these quick, effective troubleshooting solutions:
1. iPhone is Not Appearing on the Mac
- Double-Check Wireless Settings: Make sure both Bluetooth and Wi-Fi are actively turned on for both devices. They must be on the same local network.
- Verify Apple ID: Go to settings on both devices to verify they are logged into the same iCloud account.
- Proximity: Move your phone closer to your Mac; they typically need to be within a few feet for initial pairing.
2. High Screen Delay or Choppy Video
- Switch Wi-Fi Bands: If your home router supports it, connect both your Mac and phone to a faster 5GHz Wi-Fi band instead of a crowded 2.4GHz band.
- Close Extra Apps: Free up processing memory by closing heavy resource apps running in the background on your Mac.
- Power Management: Turn off Low Power Mode on your iPhone, as it can occasionally throttle wireless transmission speeds to save battery life.
3. Blank Screen Inside Streaming Windows
- DRM Restrictions: Copyright-protected streaming applications like Netflix, Disney+, or Apple TV+ will intentionally display a black screen over mirroring connections due to strict media licensing. You will need to watch these services directly on the device itself.
FAQs about Using iPhone Mirroring on Mac
Yes! In fact, for native mirroring on macOS Sequoia, your iPhone must remain locked or idle. This ensures that if someone walks past your physical phone, they won't see what you are working on through your Mac.
Yes. The native implementation supports dragging items like photos from your Mac desktop directly into supported iOS apps (like Photos, Files, or Messages) inside the mirrored window.
Yes, native mirroring automatically routes your phone's audio outputs directly through your Mac's audio system. However, classic AirPlay or older setups may require you to listen directly from your phone.
Because wireless screen casting handles continuous data exchange, it can use more power than normal standby mode. If you plan to use it for hours at your desk, keeping your phone plugged into a charger is highly recommended.
Apple's native interactive iPhone Mirroring is exclusive to the macOS ecosystem. If you are using a Windows PC, you will need to rely on specialized third-party software applications to mirror your phone screen.
Conclusion
Learning how to use iPhone mirroring on Mac is one of the easiest ways to optimize your desk productivity. For everyday home users, it means less time dividing attention between multiple screens and a far more unified digital setup.
If your hardware supports it, stick to the native app in macOS for complete control. If you are using legacy systems, QuickTime or AirPlay will still give you great visual access. Pick the method that matches your setup, configure your settings, and enjoy a truly connected Apple workspace!
DMcleaner for Mac
Donemax DMcleaner for Mac is an award-winning Mac cleanup & maintenance tool. It offers over 10 tools to help Mac users clean junk data. It helps speed up a slow Mac. Additionally, it includes a smart switch manager and disk manager for Mac.
Related Articles
- Apr 25, 2025Format a BitLocker Encrypted USB Drive
- Mar 01, 2025How to Safely Eject/Remove an SD Card from Windows PC, Mac, and Mobile Phone?
- Jan 17, 2025How to Format an SD Card to ExFAT or FAT32 on Mac?
- Nov 12, 2024How to Manage iCloud Drive on Mac?
- Jul 27, 2025Best 8 Fixes for USB Drive Not Detected on Mac
- Nov 20, 2023How to show & hide files/folders on Mac?

Contributing Writer
Steven
Steven has been a senior writer & editor of Donemax software since 2020. He's a super nerd and can't imagine the life without a computer. Over 6 years of experience of writing technical solutions and software tesing, he is passionate about providing solutions and tips for Windows and Mac users.

Editor in chief
Gerhard Chou
In order to effectively solve the problems for our customers, every article and troubleshooting solution published on our website has been strictly tested and practiced. Our editors love researching and using computers and testing software, and are willing to help computer users with their problems