
Written byCharlesUpdated on May 20, 2025
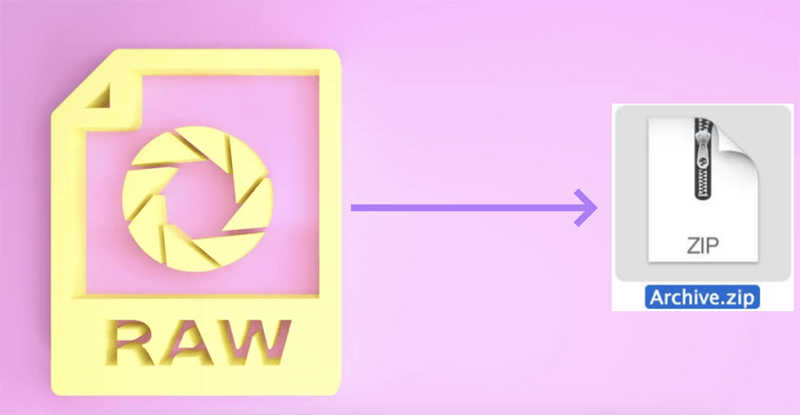
Convert RAW to ZIP on Mac: A Complete Guide
Approved byGerhard Chou
In the age of digital storage and media sharing, efficient file management is key. Whether you're a professional photographer, a software developer, or a casual Mac user dealing with large files, you've likely encountered RAW files. These uncompressed and often bulky files can quickly eat up disk space or become cumbersome to share. One effective solution? Compressing RAW files into ZIP format.
This article provides a step-by-step guide to convert RAW to ZIP on macOS. From using built-in tools to exploring third-party options, we'll walk you through everything you need to know - complete with tips, troubleshooting advice, and answers to common questions.
PAGE CONTENT:
What Is a RAW File?
A RAW file is typically an unprocessed, uncompressed file that retains all the data from its source. Depending on the context, RAW files may refer to:
- Camera image files from DSLR or mirrorless cameras (e.g., .CR2, .NEF, .ARW).
- Disk image files, often used in data recovery or forensic analysis.
- Generic binary dumps or low-level data captures.
RAW files are prized for their quality and fidelity. For photographers, RAW image files contain every bit of detail captured by the sensor, enabling greater control during post-processing. However, they are large and often incompatible with common viewing software without conversion or special tools.
Why Convert RAW to ZIP?
While RAW files are rich in detail, they are also hefty in size and not always convenient to handle. Converting them to ZIP format can offer several advantages:
1. Compression
ZIP files reduce file size without altering the content. This is ideal for archiving and saving storage space.
2. Easy Sharing
Email platforms and cloud storage services often have file size limits. ZIP compression helps meet these constraints.
3. File Organization
Zipping multiple RAW files into a single archive makes transferring and managing them easier.
4. Compatibility
ZIP is universally supported across operating systems, whereas RAW formats may require specialized software.
Built-in Methods to Convert RAW Files to ZIP on Mac
macOS comes with built-in utilities that make converting RAW files to ZIP format a breeze. Here's how to use them:
Method 1: Using Finder - The Graphical Way
Finder is the default file manager in macOS, and it includes a simple compression feature that allows users to create ZIP archives with just a few clicks.
Why Use Finder Compression?
- Ease of use: Perfect for users who prefer visual interfaces.
- Quick: No need to open additional applications.
- Multiple files: Supports compressing multiple files or entire folders.
- No commands: Ideal for beginners or occasional users.
How to Compress RAW Files Using Finder:
- Locate Your RAW Files
Open Finder and navigate to the folder containing the RAW file(s). RAW files might have extensions like .CR2, .NEF, .ARW, or simply .raw.
- Select the Files or Folder
- To compress a single RAW file, click it once.
- To compress multiple files, hold down the Command (⌘) key and click each RAW file you want to include. Alternatively, select a folder containing RAW files.
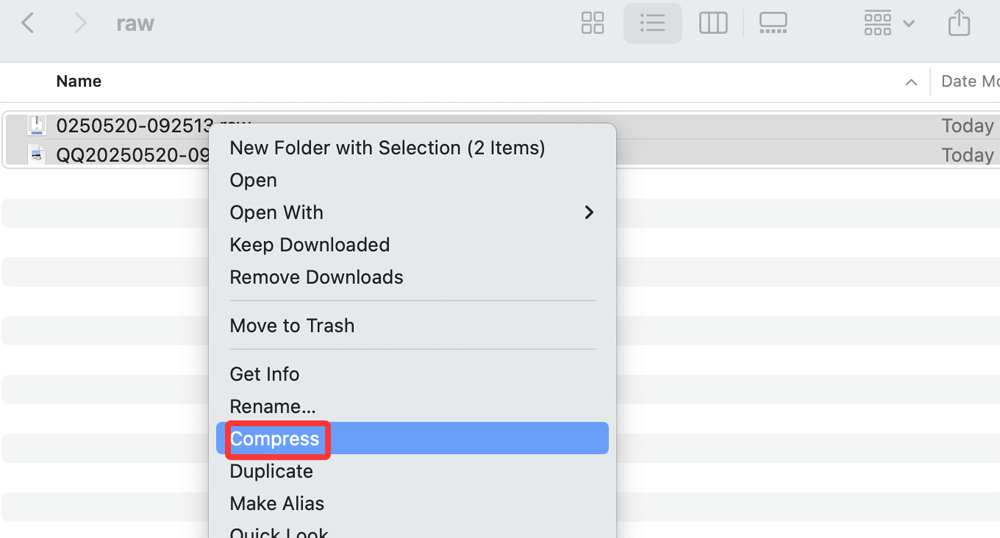
- Right-click (Control-click) on the Selection
If you are using a trackpad or one-button mouse, press Control while clicking.
- Choose "Compress" from the Context Menu
The option will say either:
- "Compress [filename]" if one file is selected.
- "Compress X Items" if multiple files are selected.
![Choose 'Compress' from the Context Menu]()
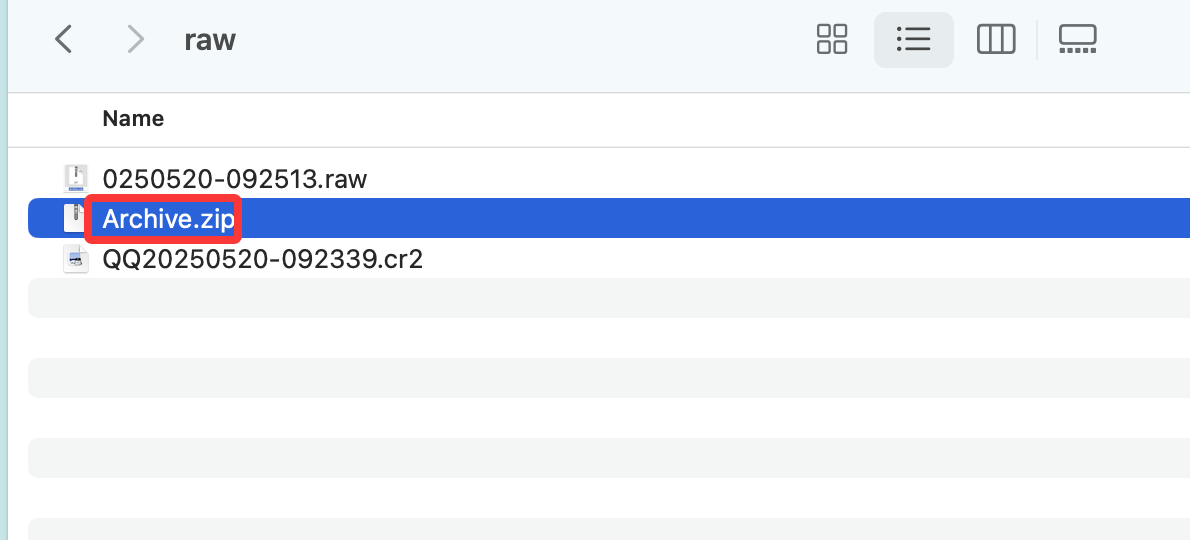
- Wait for Compression to Finish
Finder will generate a ZIP archive named filename.zip or Archive.zip (if multiple files were selected). The archive will appear in the same folder as the original files.
![Wait for Compression to Finish]()
- Verify the ZIP File
It's always good practice to double-click the ZIP archive to unzip it and check that your RAW files open correctly.
Tips for Using Finder Compression:
- If compressing many large RAW files, compression time may be noticeable. Let the Mac complete the process without interruption.
- Finder's compression uses the standard ZIP algorithm, which is lossless but may not provide the best compression ratio compared to third-party tools.
- Finder automatically chooses the archive name, but you can rename the ZIP file afterward for clarity.
- When compressing folders, all subfolders and files inside will be included recursively in the ZIP archive.
Method 2: Using Terminal - The Power Users Tool
For users comfortable with the command line, macOS includes a robust zip utility accessible through Terminal. This method provides flexibility and control, making it ideal for automating compression tasks, scripting, or batch processing.
Why Use Terminal for ZIP Compression?
- Automation: Easily incorporate into scripts and workflows.
- Batch processing: Compress many files quickly.
- Customization: Choose compression levels and split archives.
- Remote use: Can be executed via SSH or on headless Macs.
Basic zip Command Syntax
The general syntax for compressing files is:
zip [options] archive_name.zip file1 file2 file3 ...
- archive_name.zip: The name of the resulting ZIP file.
- file1 file2 file3: One or more files to be compressed.
Compressing a Single RAW File
Suppose you have a RAW file named photo.raw in your current directory. To compress it:
zip photo.zip photo.raw
This creates a compressed file called photo.zip containing photo.raw.
Compressing Multiple RAW Files
To compress all RAW files in the current directory (assuming the .raw extension):
zip photos.zip *.raw
The wildcard *.raw tells the zip command to include all files ending with .raw.
You can also specify multiple file extensions:
zip archive.zip *.CR2 *.NEF *.ARW
This command includes RAW files from different camera manufacturers.
Compressing a Folder Recursively
If your RAW files are organized into folders, you can compress an entire folder with the -r option:
zip -r raw_photos.zip /path/to/folder
The -r (recursive) flag includes all files and subdirectories inside the folder.
Adjusting Compression Levels
The zip command allows you to control the compression level from 0 (no compression) to 9 (maximum compression):
zip -9 compressed.zip *.raw
- -0 is fastest, no compression (just archive).
- -9 is slowest but gives the smallest file size.
By default, zip uses level 6.
Splitting Large ZIP Files
When compressing very large RAW files or collections, the resulting ZIP may be too large for some services (e.g., email limits). Use the -s option to split archives into chunks:
zip -s 100m split_archive.zip *.raw
This splits the archive into 100MB segments, creating multiple smaller ZIP files.
Viewing Contents of a ZIP Archive
Before extracting, you can list the contents of a ZIP file without unzipping:
unzip -l archive.zip
Extracting ZIP Archives in Terminal
To unzip a ZIP archive to the current directory:
unzip archive.zip
To unzip to a specific folder:
unzip archive.zip -d /path/to/destination
Troubleshooting Terminal ZIP Commands
- Permission denied: If you get a permission error, prefix the command with sudo or run in a directory you have write access to.
- File not found: Ensure you're in the correct directory or provide full file paths.
- Wildcard not working: Use quotes if your shell is interpreting the wildcard incorrectly, e.g., "*.raw".
Combining Finder and Terminal for Efficiency
You can combine the strengths of both tools:
- Use Finder for quick zipping of a few files.
- Use Terminal for batch jobs or automation.
- Use Terminal to script zipping tasks that Finder cannot automate.
Using Third-Party Tools to Convert RAW to ZIP
While macOS provides basic ZIP functionality, third-party apps often offer advanced features like password protection, encryption, and better compression ratios.
1. Keka
Keka is a lightweight, open-source compression tool for Mac.
How to Use Keka:
- Download and install Keka.
- Open Keka and set the archive format to ZIP.
- Drag and drop your RAW files into the app.
- Choose the destination folder and click Compress.
Keka also allows splitting large archives into smaller parts and setting passwords.
2. The Unarchiver
While primarily used for extracting files, The Unarchiver supports compression and can handle a wide range of formats.
3. BetterZip
BetterZip is a premium tool that offers encryption, file preview, and scripting support.
Pros
- Custom compression settings.
- Integration with Finder via Services menu.
- Preview contents without extracting.
Tips Before You ZIP RAW Files
Before you start compressing RAW files, keep these best practices in mind:
1. Check File Integrity
Ensure your RAW files are not corrupted. Compressing already-damaged files can complicate recovery later.
2. Avoid Active Files
Do not compress RAW files that are currently open in another application. This can result in incomplete or corrupt ZIP archives.
3. Group and Organize Files
If you're compressing multiple RAW files, consider organizing them into folders by project, date, or camera type.
4. Use Descriptive Names
Name your ZIP files clearly to avoid confusion, especially when archiving or sharing.
How to Unzip Files on Mac?
Once you've zipped your RAW files, you'll likely need to extract them at some point. macOS makes unzipping just as easy.
Method 1: Using Finder
- Double-click the .zip file.
- macOS will automatically extract the contents to the same directory.
Method 2: Using Terminal
unzip filename.zip
You can specify a target folder:
unzip filename.zip -d /desired/directory
Method 3: Using Third-Party Tools
Apps like Keka and BetterZip offer more control over the extraction process, including:
- Selective file extraction.
- Repairing broken ZIP files.
- Viewing contents without decompressing.
Common Issues and Fixes
While ZIP is a stable format, some users may run into problems. Here are common issues and how to resolve them:
1. ZIP File Not Compressing Properly
- Cause: File in use or permissions error.
- Fix: Ensure the RAW file is not open in another app. Check permissions via Get Info in Finder.
2. Permission Denied Error in Terminal
- Cause: Lack of write access to the folder.
- Fix: Use sudo or switch to a writable directory:
sudo zip compressed.zip filename.raw
3. ZIP File Too Large to Email
- Fix: Split the archive using Terminal or a tool like Keka:
zip -s 100m split.zip filename.raw
4. Archive Fails to Open
- Cause: Corrupt ZIP file.
- Fix: Try extracting with a different tool like The Unarchiver or BetterZip, or re-create the archive if possible.
FAQs About Converting RAW to ZIP
Yes. Select all the RAW files in Finder, right-click, and choose Compress X Items. This will create a single ZIP archive.
No. ZIP compression is lossless, meaning the contents of the RAW file are not altered - only compressed.
Yes. Finder provides basic ZIP compression. Third-party tools may offer:
- Better compression ratios.
- Encryption and password protection.
- Archive splitting and previewing.
Yes. You can use Automator or write shell scripts with Terminal to batch-process RAW files.
You can still zip them together. Use a wildcard command in Terminal like:
zip archive.zip *.CR2 *.NEF *.ARW
Or select them all in Finder and compress normally.
Conclusion
Converting RAW to ZIP on a Mac is a practical way to manage large and often unwieldy files. Whether you're organizing camera shots, archiving forensic disk images, or transferring massive datasets, ZIP compression makes it easier to store, share, and secure your data.
For basic use, macOS Finder is sufficient. For power users, Terminal and third-party tools like Keka or BetterZip offer advanced capabilities such as encryption and automation.
Before zipping, always check file integrity and permissions, and make sure you’re not working with actively open files. After compression, you can confidently store or share your RAW files knowing they're safely and efficiently packed in a universally supported format.
By following the steps outlined in this guide, you'll streamline your file management workflow on macOS and ensure your RAW files are handled with care and efficiency.
Related Articles
- Apr 07, 2025[6 Fixes] Fix Macintosh HD Greyed Out in Disk Utility: Step-by-Step Guide
- Oct 16, 2024Can't Open Trash on Mac? Here's How to Fix It
- May 18, 2026Troubleshoot and Fix common macOS Tahoe 26 Beta Issues
- Sep 02, 2025MacBook Pro Not Charging? Fix It with Easy Solutions
- Jun 20, 2025How to Download and Create ISO Image File for macos Sonoma?
- May 11, 2026How to Create Bootable USB Installer for macOS Sequoia?

Contributing Writer
Charles
Charles, who lives in Sydney, Australia, is an editor & writer of Donemax Team. He is good at writing articles related with Apple Mac computers, Windows operating systems, data recovery, data erasure, disk clone and data backup, etc. He loves reading and playing tennis in his spare time and is interested in testing new digital devices such as mobile phones, Macs, HDDs, SSDs, digital cameras, etc.

Editor in chief
Gerhard Chou
In order to effectively solve the problems for our customers, every article and troubleshooting solution published on our website has been strictly tested and practiced. Our editors love researching and using computers and testing software, and are willing to help computer users with their problems