
Written byStevenUpdated on Apr 17, 2026
7 Ways to Fix XProtectService High CPU Usage on Mac (2026)
Approved byGerhard Chou
Before we start: Following the guide can help you fix XprotectService high CPU usage issue. Fixing the issue is useful to speed up the slow Mac. Another power Mac cleanup tool DMcleaner for Mac offers more options to optimize and improve macOS performance.
PAGE CONTENT:
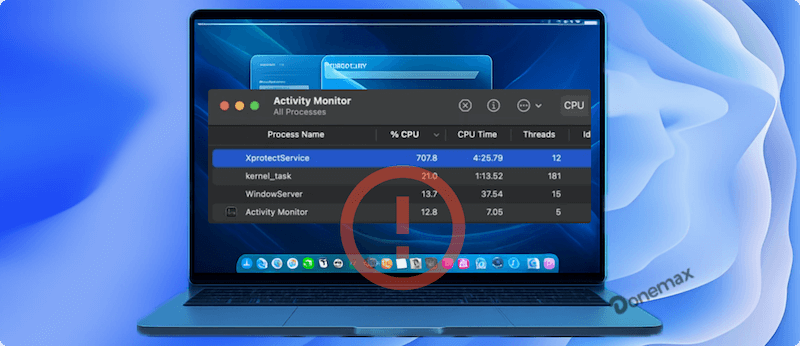
The XprotectService is a critical part of macOS, designed to protect your system from malware by scanning files and ensuring security protocols are in place. It is a feature that runs in the background as part of Apple's built-in security system. However, sometimes, users report issues where xprotectservice high cpu usage, leading to system slowdowns, unresponsiveness, and battery drain.
This article will delve into what XprotectService is, why it sometimes consumes excessive CPU resources, and how to troubleshoot and fix the problem to maintain your Mac's performance.
What Is XprotectService?
XprotectService is a built-in component of macOS that belongs to the XProtect security system. It works by scanning apps and files for known malware or other harmful threats. Apple regularly updates XProtect's definitions to identify new malware strains and automatically quarantine or prevent the execution of harmful software. This background service is an essential part of the overall macOS security framework, designed to keep users safe without requiring any manual intervention.
Typically, XprotectService runs silently and efficiently. However, in certain cases, it can end up consuming high CPU usage, causing performance issues on your Mac.
Fix Slow Mac Due to XprotectService High CPU Usage
If you've identified that XprotectService is indeed the cause of high CPU usage, you can follow these steps to fix the issue.
Method 1. Restart Your Mac
The simplest solution is often the most effective one. Restarting your Mac can reset XprotectService and clear any temporary glitches or issues causing high CPU usage. To do this:
- Press the Apple emblem located in the upper-left corner of your display.
- Choose "Restart" from the option that drops down.
![Restart Your Mac]()
- After your Mac has rebooted, see if XprotectService's Activity Monitor CPU consumption has stabilized.

Method 2. Update macOS and Security Definitions
XprotectService relies on up-to-date security definitions to function properly. If your macOS or security definitions are outdated, XprotectService may overwork itself trying to scan files.
- Update macOS:
○ Click on the Apple logo.
○ Go to System Settings > General > Software Update.
○ If an update is available, download and install it. Afterward, restart your Mac.
![Update macOS]()
- Update XProtect Definitions. macOS updates XProtect definitions automatically, but you can manually trigger updates by following these steps:
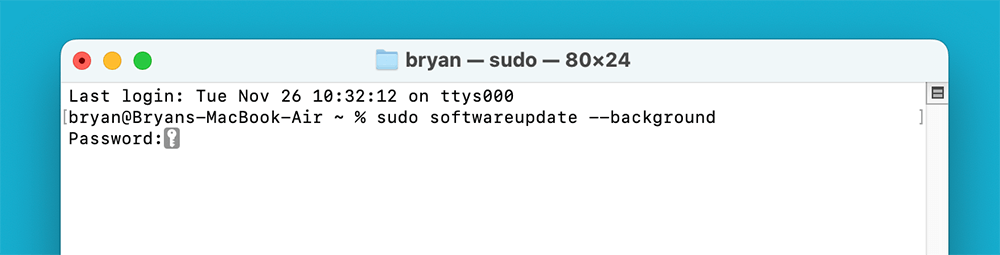
○ Open "Terminal" from Applications > Utilities.
○ Type sudo softwareupdate --background and press Enter.
![Update XProtect Definitions]()
○ Enter your password and allow the update to run in the background.

Once the updates are complete, check Activity Monitor to see if the issue persists.
Method 3. Reset NVRAM and SMC
Resetting your Mac's NVRAM and SMC (for Macs with Intel processors) can resolve various performance-related issues, including those caused by system services like XprotectService.
- Reset NVRAM: Turn off your Mac. Holding Option + Command + P + R, turn it back on. Release these keys after holding them for around 20 seconds. The NVRAM will be reset and your Mac will restart.
- Reset SMC:
○ For desktop Macs (iMac, Mac mini, Mac Pro): Take off the power cable and give it a 15-second wait. Re-plug the power cable and let it to run for five seconds. Turn your Mac back on.
○ For MacBooks that don't have detachable batteries: Turn off your computer. Press Shift + Control + Option on the left side of the keyboard, then press the power button. After holding down all keys for ten seconds, switch on your Mac. After resetting the NVRAM and SMC, check if XprotectService's CPU usage has decreased.
Method 4. Run Disk Utility to Repair Corrupted Files
If corrupted system files are causing XprotectService to misbehave, using macOS's built-in Disk Utility can help fix the problem.
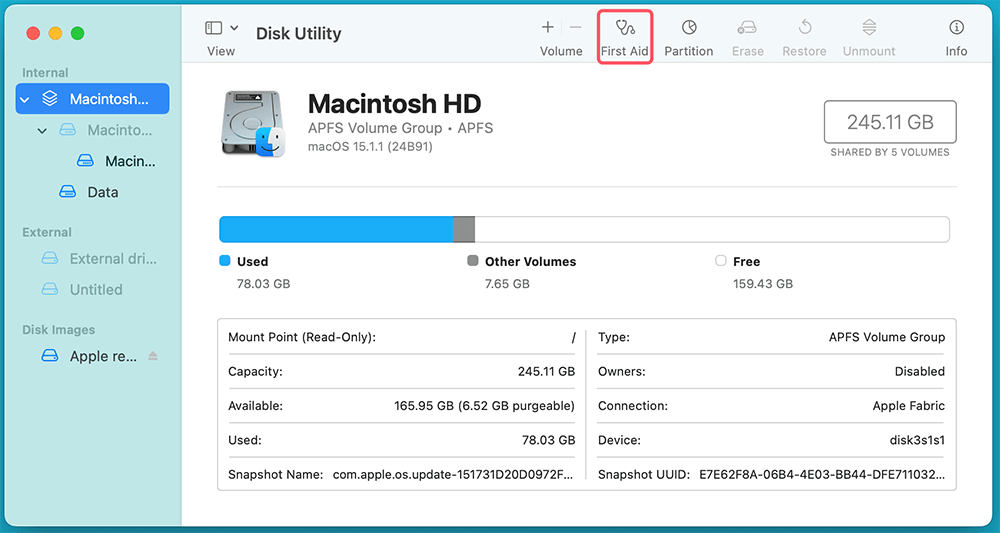
- Open "Disk Utility" from Utilities via Applications.
- Select your Mac’s startup disk (typically labeled "Macintosh HD").
- Click on "First Aid" in the toolbar, then click "Run."
![Run Disk Utility to Repair Corrupted Files]()
- Wait for the process to complete, then restart your Mac.
Disk Utility will repair any corrupted files it finds, which may resolve the high CPU usage issue.
Method 5. Remove Conflicting Third-Party Software
If you're using third-party antivirus or system optimization software, it may be conflicting with XprotectService. Try temporarily disabling or uninstalling these programs to see if it resolves the issue.
- Go to "Applications" and locate the third-party software.
- Drag it to the Trash, or use its uninstaller if provided.
- Empty the Trash and restart your Mac.
![Empty the Trash and restart your Mac]()

After removing the software, check Activity Monitor to see if XprotectService's CPU usage has normalized.
Method 6. Scan for Malware
Although XprotectService is designed to protect your system, certain types of malware can still sneak through, causing XprotectService to use excessive CPU resources. Use macOS's built-in malware scanner or third-party security tools to scan for infections.
- Use macOS's Built-in Scanner: XProtect will automatically scan for known malware, but if you suspect a new or undetected strain, using a third-party tool may help.
- Use a Trusted Third-Party Antivirus: Download and install a reputable antivirus program. Run a full system scan and remove any detected threats.
After the scan, restart your Mac and monitor XprotectService's CPU usage.
Method 7. Reinstall macOS
If none of the above methods work, reinstalling macOS may be the best course of action. This will ensure that all system files, including XprotectService, are restored to their original state without affecting your data.
- Backup your data using Time Machine or another backup solution.
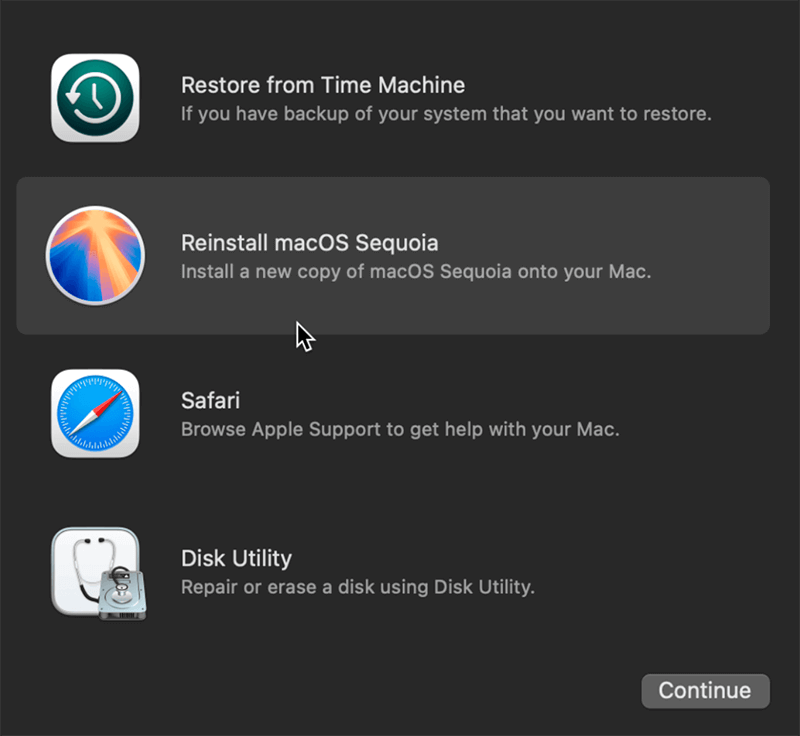
- Restart your Mac and hold down Power button (for Apple silicon Mac) or (Command + R (for Intel-based Mac)) to enter Recovery Mode.
![Reinstall macOS]()
- Select Reinstall macOS and follow the on-screen instructions.
- Once the installation is complete, check if XprotectService is back to normal.
How to Prevent XprotectService High CPU Usage?
To avoid recurring high CPU usage by XprotectService, follow these best practices:
- Keep macOS Updated: Regularly check for and install macOS updates to ensure you're running the latest version with updated XProtect definitions.
- Avoid Unnecessary Third-Party Antivirus Software: macOS's built-in security features are robust and often work better without the interference of third-party programs.
- Practice Safe Computing: Be cautious when downloading software from unknown sources, and avoid opening suspicious email attachments. XprotectService will have less to scan if you keep your system free of risky files.
- Monitor Activity: Regularly check Activity Monitor to ensure no system processes, including XprotectService, are consuming more CPU than necessary.
Conclusion
XprotectService is an integral part of macOS's security system, designed to run efficiently in the background. However, when it begins consuming excessive CPU resources, it can hinder your Mac's performance. By complying the process described in this guide article, including updating macOS, resetting system components, repairing disk errors, and removing conflicting software, you can resolve the issue and restore your system's normal performance.
If you continue to face problems, a fresh installation of macOS may be required. Regardless, maintaining a proactive approach to system updates and security will help ensure that XprotectService - and your Mac - run smoothly and efficiently. Should you need to optimize macOS deeply, try the tool Donemax DMcleaner for Mac.
Donemax DMcleaner for Mac
Donemax DMcleaner for Mac is an award-winning Mac cleanup & maintenance application. It offers 10+ tools to help Mac users clean up junk data on Mac, uninstall unwanted apps & delete leftovers, shred files, delete duplicate files, free up disk space, speed up slow Mac, etc. It is also a smart switch manager for Mac, a powerful disk manager for Mac.
Related Articles
- Jul 01, 2025[7 Fixes] Fix 'Your Computer Was Restarted Because of a Problem' on Mac
- Dec 23, 2024Fix LaCie External Hard Drive Read-Only on Mac: Comprehensive Guide
- Apr 15, 2025Accidentally Deleted Macintosh HD? Fix It Now
- Jul 02, 2025Why Can't Select Time Machine Backup Disk?
- Sep 26, 2025macOS Tahoe Won't Boot, How to Fix?
- Jan 02, 2025Fix AppleAPFSMedia Uninitialized Without Losing Data on Mac

Contributing Writer
Steven
Steven has been a senior writer & editor of Donemax software since 2020. He's a super nerd and can't imagine the life without a computer. Over 6 years of experience of writing technical solutions and software tesing, he is passionate about providing solutions and tips for Windows and Mac users.

Editor in chief
Gerhard Chou
In order to effectively solve the problems for our customers, every article and troubleshooting solution published on our website has been strictly tested and practiced. Our editors love researching and using computers and testing software, and are willing to help computer users with their problems