
Written byChristinaUpdated on Jul 08, 2025
How to Lock a Mac: Quick and Effective Ways to Secure Your Mac
Approved byGerhard Chou
PAGE CONTENT:
Locking your Mac is one of the simplest yet most effective ways to protect your personal files, sensitive information, and prevent unauthorized access. Whether you're stepping away from your desk for a few minutes or securing your Mac remotely, knowing how to lock your Mac properly ensures your privacy and keeps your data safe.
In this comprehensive guide, we'll walk you through various methods to lock your Mac manually, automatically, and remotely. From handy keyboard shortcuts to system preferences, you'll learn multiple ways to secure your Mac with ease.
1. Quick Ways to Manually Lock Your Mac
If you need to lock your Mac instantly before leaving your desk, there are quick manual methods that let you do this in seconds.
1.1 Using Keyboard Shortcuts
Keyboard shortcuts are the fastest way to lock your Mac without navigating through menus.
Lock Screen Shortcut
- Control + Command + Q
This shortcut instantly locks your screen, taking you to the login window. Your apps and files remain open in the background, but your Mac requires a password or authentication to access them again.
Put Mac to Sleep Shortcut
- Command + Option + Power (for Macs with a dedicated Power button)
- Command + Option + Eject (for older Macs with an Eject key)
Putting your Mac to sleep effectively locks it while also conserving power. When you wake it up, you'll need to enter your password if you've configured the system accordingly (we'll cover this in section 2).
💡 Pro Tip: Make using the lock screen shortcut a habit whenever you leave your Mac unattended to prevent unauthorized access.
1.2 Using the Apple Menu
If you prefer using your mouse or trackpad:
- In the upper-left corner of the screen, click the Apple logo.
- From the drop-down menu, choose Lock Screen.
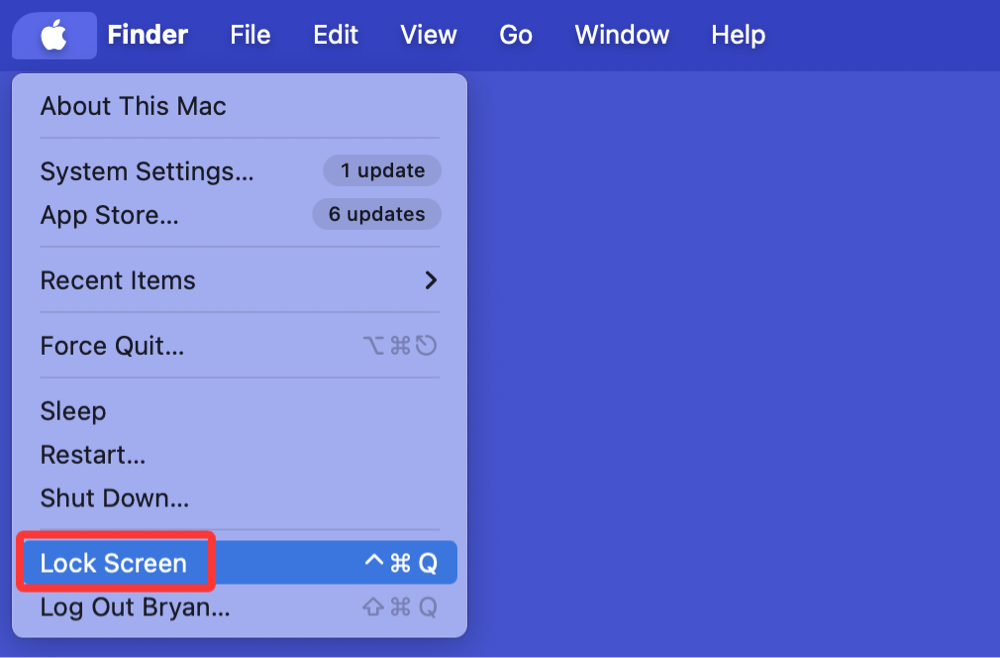
This achieves the same result as the keyboard shortcut, locking your Mac and requiring authentication to regain access.
💡 Note: If you don't see "Lock Screen," your macOS version might be outdated. Consider updating to the latest macOS for enhanced security features.
2. Setting Up Automatic Lock on Your Mac
Even the most security-conscious users can forget to manually lock their Mac. Setting up automatic lock ensures your Mac locks itself after inactivity, reducing the risk of unauthorized access.
2.1 Enable Screen Saver with Password
The screen saver can double as a security feature by automatically activating after a set time and requiring a password to dismiss it.
Steps to Enable Screen Saver Lock:
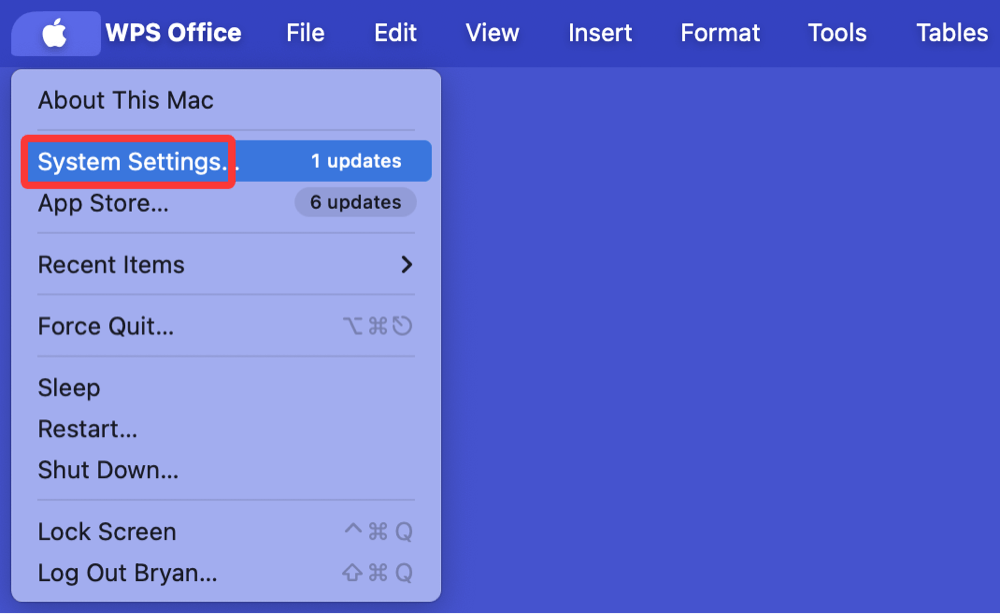
- Open System Settings
![lock a Mac]()
- Go to Lock Screen from the sidebar.
![lock a Mac]()
- Set a preferred time interval for the screen saver to start (e.g., 5 minutes of inactivity).
- Enable Require Password Immediately after screen saver or sleep begins.
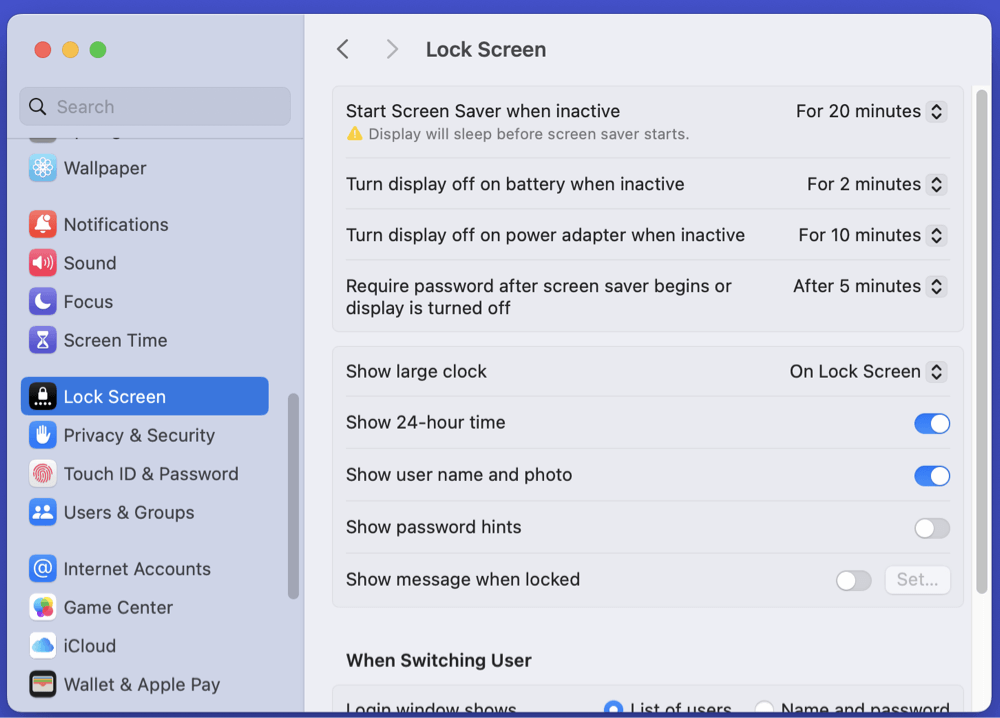
With this setup, your Mac will activate the screen saver after inactivity and lock the screen simultaneously, requiring a password to regain access.
2.2 Set Automatic Lock After Sleep or Screen Saver Begins
To make sure your Mac locks itself as soon as it sleeps or the screen saver starts:
- Go to System Settings > Lock Screen.
- Look for Require Password after Sleep or Screen Saver begins.
- Choose Immediately for maximum security.
![lock a Mac]()

This ensures that whether your Mac sleeps automatically or you close the lid (for MacBooks), the device locks and requires your password or Touch ID to wake up.
💡 Optional Tip: Combine this with Hot Corners (discussed below) for an instant lock with just a flick of your mouse.
3. Using Hot Corners to Lock Your Mac
Hot Corners is a macOS feature that lets you trigger actions by moving your mouse to the corners of the screen. You can set a corner to start the screen saver, effectively locking your Mac.
How to Set Up Hot Corners for Locking:
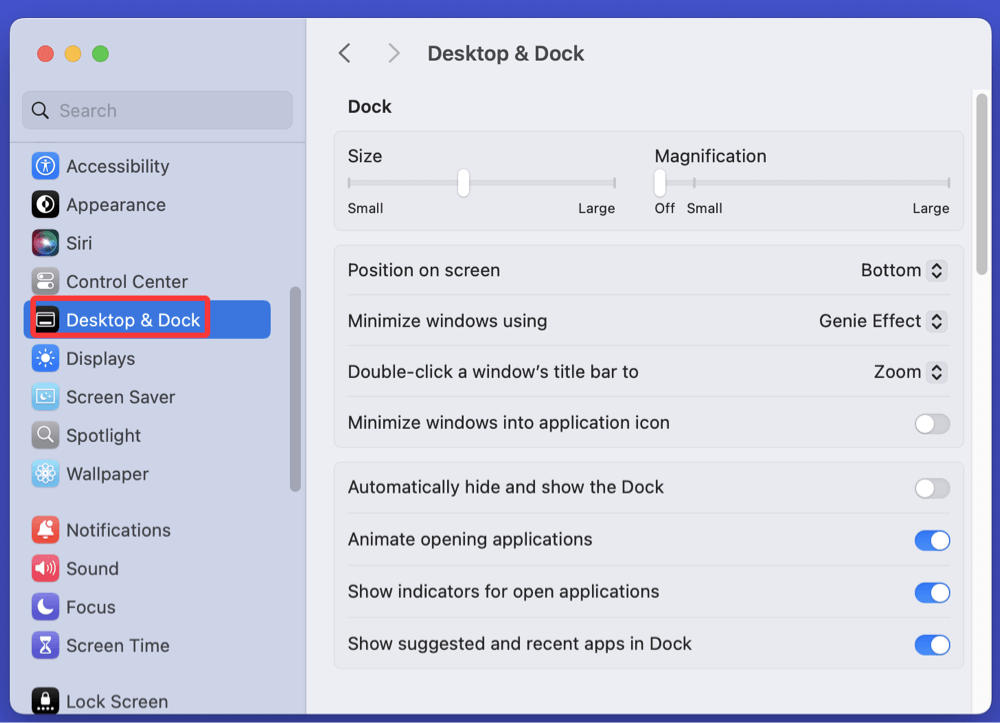
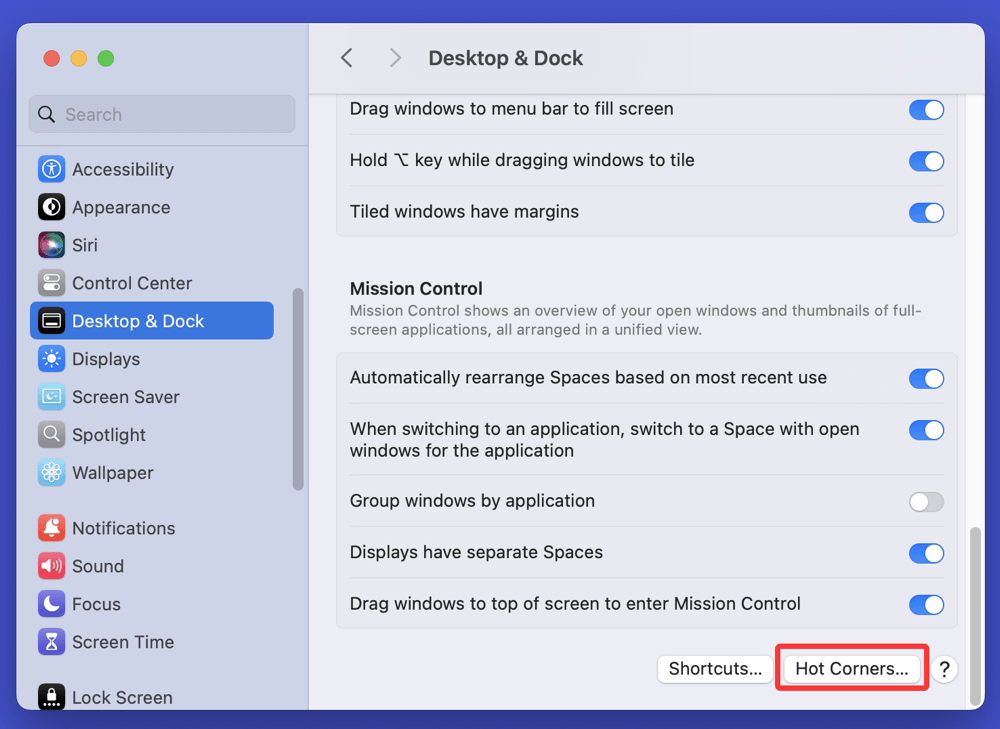
- Open System Settings.
- Go to Desktop & Dock.
![lock a Mac]()
- Scroll down and click Hot Corners.
![lock a Mac]()
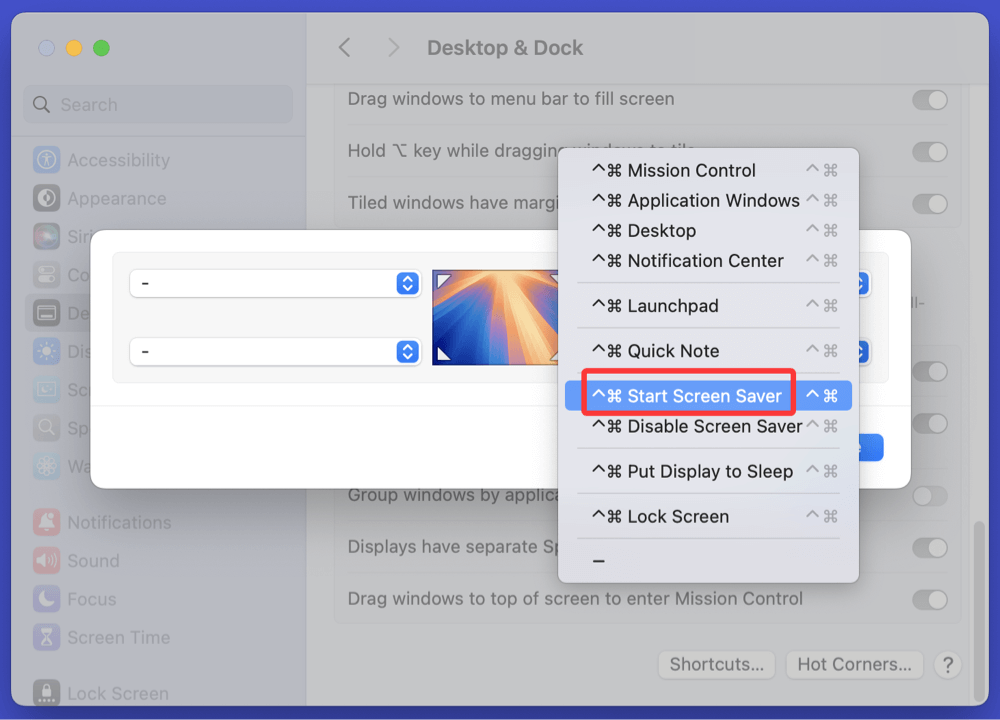
- Choose a corner (e.g., bottom-right) and set it to Start Screen Saver.
![lock a Mac]()
- Click Done to save.
Now, when you move your cursor to that corner, the screen saver starts. If you've set up the screen saver to require a password, your Mac locks instantly.
Benefits of Hot Corners:
- One-motion lock with your mouse
- Convenient for quick departures
- Avoids relying solely on keyboard shortcuts
4. Locking Your Mac Remotely with Find My Mac
In situations where your Mac is lost, stolen, or left behind, you can lock it remotely using Find My Mac, provided the feature is enabled beforehand.
4.1 What is Find My Mac?
Find My Mac is part of Apple's broader Find My network - a security and tracking feature built into macOS, iOS, and iPadOS. It allows you to locate, lock, or erase your Apple devices remotely using iCloud. The feature uses a combination of Wi-Fi signals, Bluetooth beacons, and Apple's vast network of devices to track lost or misplaced products, even when they are offline (if you've enabled the Find My network).
When you lock your Mac remotely with Find My Mac:
- The Mac becomes inaccessible to unauthorized users
- Your personalized lock screen message is displayed
- You can track its location through iCloud
- You have peace of mind knowing your data is protected
4.2 Enable Find My Mac
To use this feature, ensure it’s active:
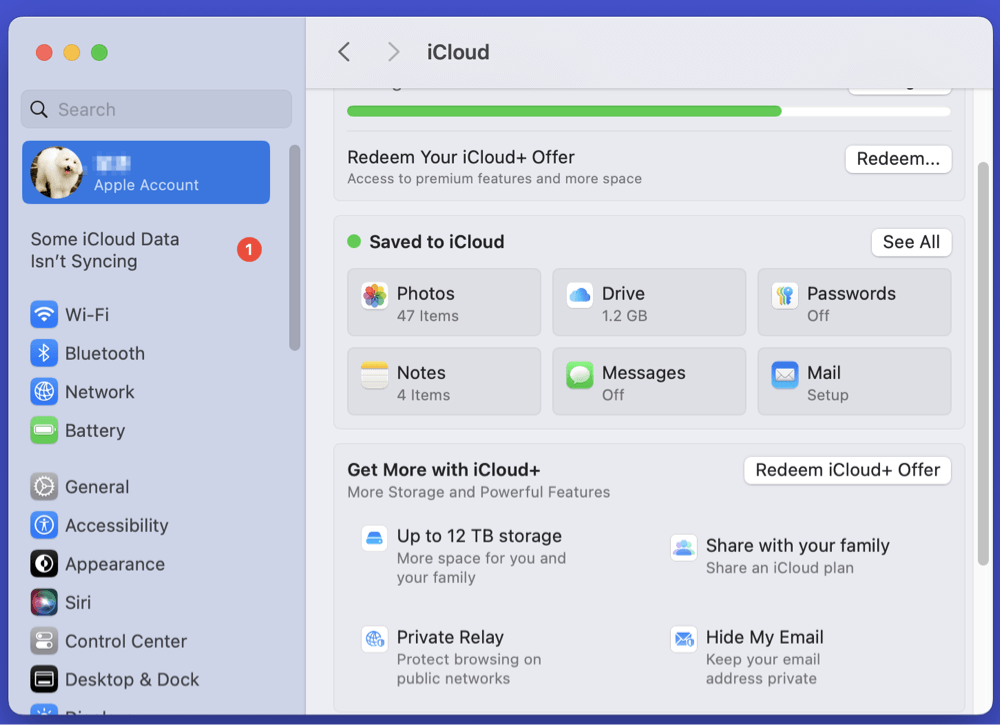
- Go to System Settings > Apple ID > iCloud > See All.
![lock a Mac]()
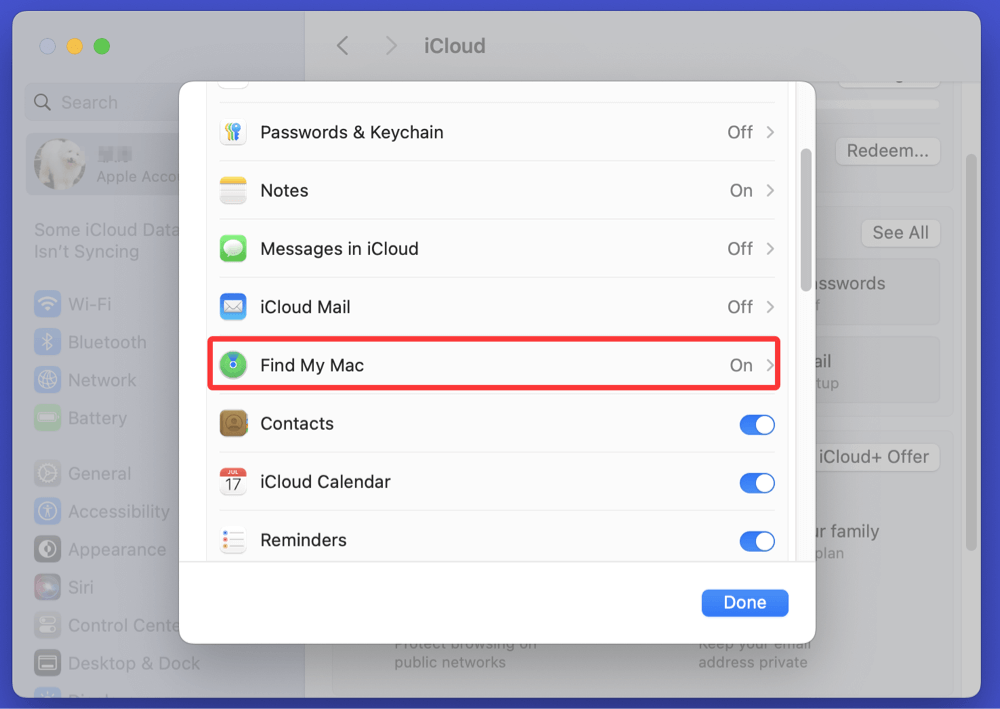
- Click Sell All. Enable Find My Mac.
![lock a Mac]()
- Allow Find My network for offline tracking (optional but recommended).
4.3 How to Lock Your Mac Remotely
- Visit iCloud.com and log in with your Apple ID.
- Click Find My.
- Select your Mac from the device list.
- Click Lock.
- Follow the prompts to set a passcode and optional message.
![lock a Mac]()
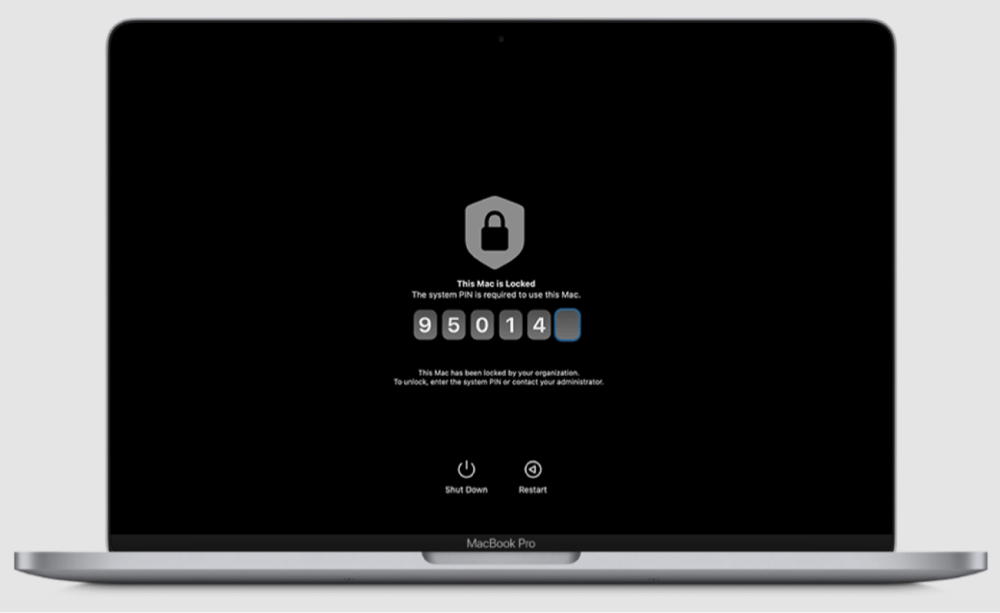
Your Mac will lock itself remotely, and the person in possession of it won't be able to access your data without the passcode.
💡 Note: Even if your Mac is offline, the lock command will activate as soon as the device connects to the internet.
💡 Extra Security Tip: If you suspect theft, also report the incident to local authorities and provide the Mac's serial number.
5. Locking MacBook Lid - Does It Lock Automatically?
When you close your MacBook's lid, the device typically enters sleep mode. However, whether it locks depends on your system settings.
How to Ensure Lid Closing Locks Your Mac:
- Open System Settings > Lock Screen.
- Ensure Require Password after Sleep or Screen Saver begins is set to Immediately.
With this configuration, closing the lid locks your Mac, requiring a password or Touch ID when you open it again.
Important Consideration:
- If your Mac is connected to an external display and in Clamshell Mode, closing the lid may not lock the system. Always manually lock the screen in such setups.
6. Best Practices for Mac Security
Locking your Mac is just one layer of protection. Strengthen your Mac's security with these essential tips:
6.1 Use a Strong Password
- Avoid simple passwords or common phrases.
- Include uppercase, lowercase, numbers, and symbols.
- Update your password periodically.
6.2 Enable FileVault Encryption
FileVault encrypts your entire disk, preventing unauthorized access even if the Mac's storage is removed.
To Enable FileVault:
- Go to System Settings > Privacy & Security > FileVault.
![lock a Mac]()
- Turn on FileVault and follow the prompts.
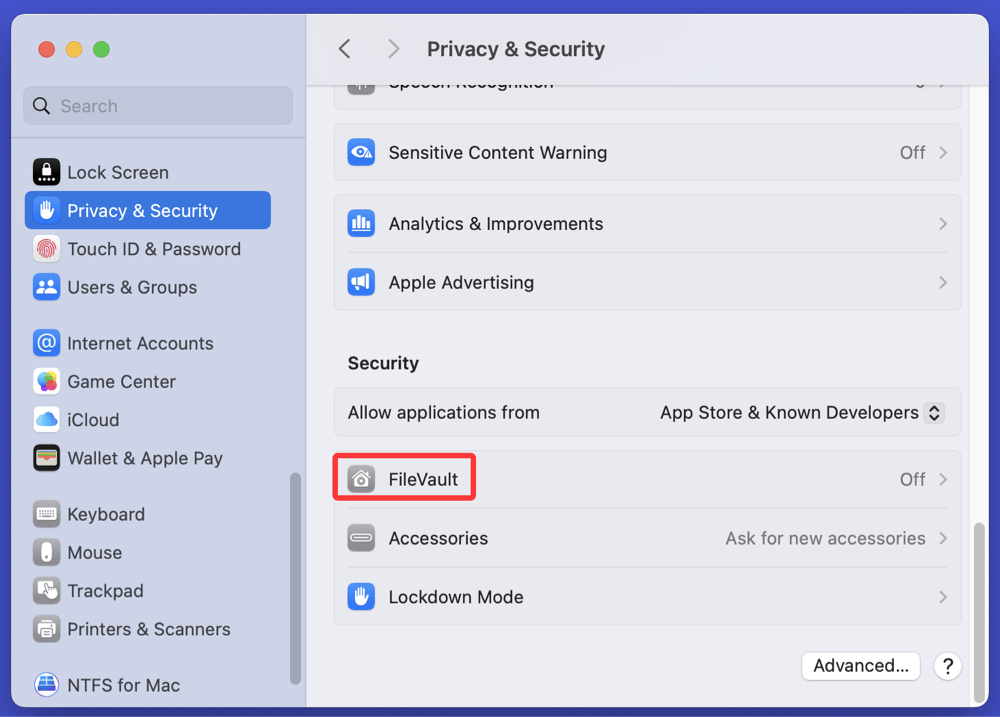
This adds an extra layer of security, especially useful if your Mac is lost or stolen.
6.3 Keep Your Software Updated
Regular macOS updates include critical security patches. Always:
- Enable automatic updates.
- Manually check for updates via System Settings > General > Software Update.
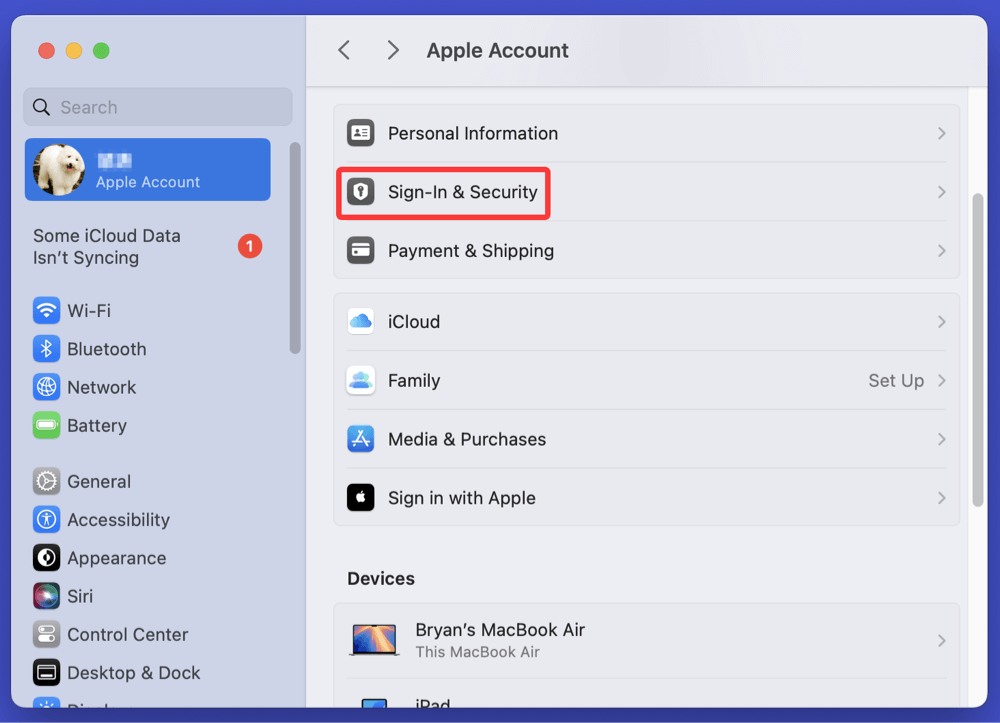
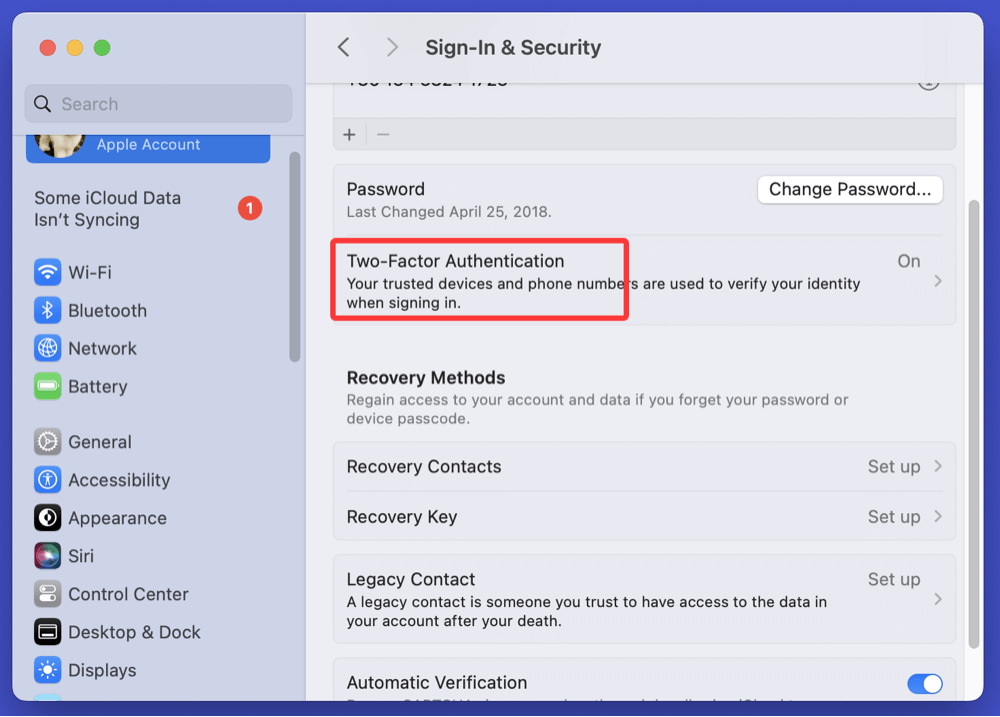
6.4 Use Two-Factor Authentication for Apple ID
Two-factor authentication (2FA) prevents unauthorized access to your iCloud and Apple ID, safeguarding features like Find My Mac.
Set Up 2FA:
- Go to System Settings > Apple ID > Sign-in & Security.
![lock a Mac]()
- Enable Two-Factor Authentication.
![lock a Mac]()
6.5 Be Cautious on Public Networks
- Avoid logging into sensitive accounts on public Wi-Fi.
- Use a VPN for enhanced privacy.
- Always lock your Mac before stepping away in public spaces.
Conclusion
Locking your Mac is a simple yet vital habit to protect your personal data, work files, and system from prying eyes. With multiple options - keyboard shortcuts, Apple menu, Hot Corners, automatic settings, and remote locking via Find My Mac - macOS provides everything you need to secure your device effectively.
By implementing both manual and automatic locking methods, combined with strong passwords and encryption, you significantly reduce the risk of unauthorized access.
Quick Recap of How to Lock a Mac:
- Control + Command + Q for instant lock
- Apple menu > Lock Screen option
- Automatic lock via screen saver and sleep settings
- Hot Corners for one-motion locking
- Remote locking with Find My Mac
Prioritize your security today - lock your Mac whenever you step away and set up preventive measures to protect your device, whether at home, work, or on the go.
DMcleaner for Mac
Donemax DMcleaner for Mac is an award-winning Mac cleanup & maintenance application. It offers 10+ tools to help Mac users clean up junk data on Mac, uninstall unwanted apps & delete leftovers, shred files, delete duplicate files, free up disk space, speed up slow Mac, etc. It is also a smart switch manager for Mac, a powerful disk manager for Mac.
Related Articles
- Mar 21, 2025Run Wireless Diagnostics on Mac: A Complete Guide
- Mar 19, 2025Fix The Disk You Attached Was Not Readable by This Computer on Mac
- Oct 14, 2024Fix Error Code 100006 on Mac: A Complete Guide to Solving the Issue
- Oct 11, 2024What is First Aid? How to Run First Aid to Repair Disk on Mac?
- Jan 12, 2025How to Bypass Trash When Deleting Files on Mac?
- Apr 13, 2026How to Show and Access the opt Folder on Mac

Contributing Writer
Christina
Christina is the senior editor of Donemax software who has worked in the company for 4+ years. She mainly writes the guides and solutions about data erasure, data transferring, data recovery and disk cloning to help users get the most out of their Windows and Mac. She likes to travel, enjoy country music and play games in her spare time.

Editor in chief
Gerhard Chou
In order to effectively solve the problems for our customers, every article and troubleshooting solution published on our website has been strictly tested and practiced. Our editors love researching and using computers and testing software, and are willing to help computer users with their problems