Written byMariaUpdated on Mar 13, 2024
Samsung Portable SSD Not Mounting on Mac, Fix It Now
Approved byGerhard Chou
PAGE CONTENT:
It happens more often than you might think: your Samsung Portable SSD won't appear on your Mac. And it's not just with Samsung drives. This annoying situation can happen for many reasons, making it hard for non-technical people to figure out what's wrong and how to fix it.
We've covered you with useful tips in this complete guide to deal with this problem immediately. There is more than one thing we can do to help you fix your broken SSD. If your Mac won't see your Samsung portable SSD, keep reading to find out what you need to do to get back on track!
Why Won't My Samsung SSD Mount on My Mac?
When you add an external SSD to your Mac, macOS starts a very important mounting process. Doing this makes a directory entry for the SSD, which lets the operating system reach the file system on the SSD. Mounting makes it easier for users and apps on the Mac to get to the SSD's contents.
macOS usually puts the directory record for the mounted storage device in the /Volumes directory. The mounted SSD often appears on the desktop and Finder to make things easier for users. However, if the SSD doesn't mount, it might not be in these places.

Methods to Fix Samsung Portable SSD Not Mounting on Mac
1. Fix Connectivity Problems
You must ensure the connections are solid to fix connectivity problems with your Samsung Portable SSD. To start, disconnect the SSD from your Mac. Then, safely connect it to your Mac's USB port and the SSD itself.
This step is very important because loose connections can often make it hard to put the drive correctly. By checking the links and setting them up again, you can rule out this possible cause of the problem and, if needed, move on to a more detailed diagnosis.
2. Update Firmware
To keep your macOS and Samsung Portable SSD software compatible, you must keep them both up to date. First, use System Preferences to ensure your Mac runs the most recent macOS version. In the same way, go to the Samsung website to see if there are any firmware changes for your Portable SSD model.
You can fix compatibility problems and ensure the devices work well together by getting the latest updates for your Mac's operating system and the SSD's firmware. By taking this proactive step, you lower the chance of having mounting issues and improve the general stability and functionality of your SSD on your Mac.
3. Try Different USB Ports and Cables
Since your SSD is still not mounting, you should use different USB ports and cords as the next step. By testing different USB ports on your Mac, you can find any problems that might be happening with a certain port and figure out if the issue is with the port itself.
Also, switching the USB cord can help you determine if the cable or the SSD is the problem. This organized method helps you find the main reason the setup failed so you can fix the problem quickly and get your Samsung Portable SSD working again.
4. Check Disk Utility
Disk Utility is an important part of macOS for handling disks and connected storage devices. To check on the state of your Samsung Portable SSD, go to the "Utilities" folder in the "Applications" directory and find Disk Utility. You can use Disk Utility's "First Aid" feature to try to fix the disk if the SSD is mentioned but won't mount.

This feature helps find and fix any root problems stopping the proper mounting. The Disk Utility has many useful tools to help you quickly fix mounting problems and get your Samsung Portable SSD working again on your Mac.
5. Restart Your Mac
An easy but effective way to fix problems is to restart your Mac. It can often fix small software bugs that stop your Samsung Portable SSD from mounting properly. After restarting your Mac, try to connect the SSD again to see if it mounts properly.
This simple step can restart the system and fix any short-term problems, which could allow the link between your Mac and the SSD to be restored. You can quickly fix the mounting problem and get back to using your Samsung Portable SSD on your Mac by using this quick fix as part of your fixing process.
Mount and Read-Write NTFS Samsung Portable SSD on Mac
NTFS is a native file system of Windows operating systems. This file system is read-only on Mac and may not be mounted. To fix a NTFS Samsung Portable SSD not mounting on Mac, just try NTFS for Mac tool.
Step 1. Download and install one of the best NTFS for Mac tools - Donemax NTFS for mac.
Step 2. Connect the Samsung Portable SSD to your Mac, open Donemax NTFS for Mac, select the Samsung Portable SSD. Click on Mount button.
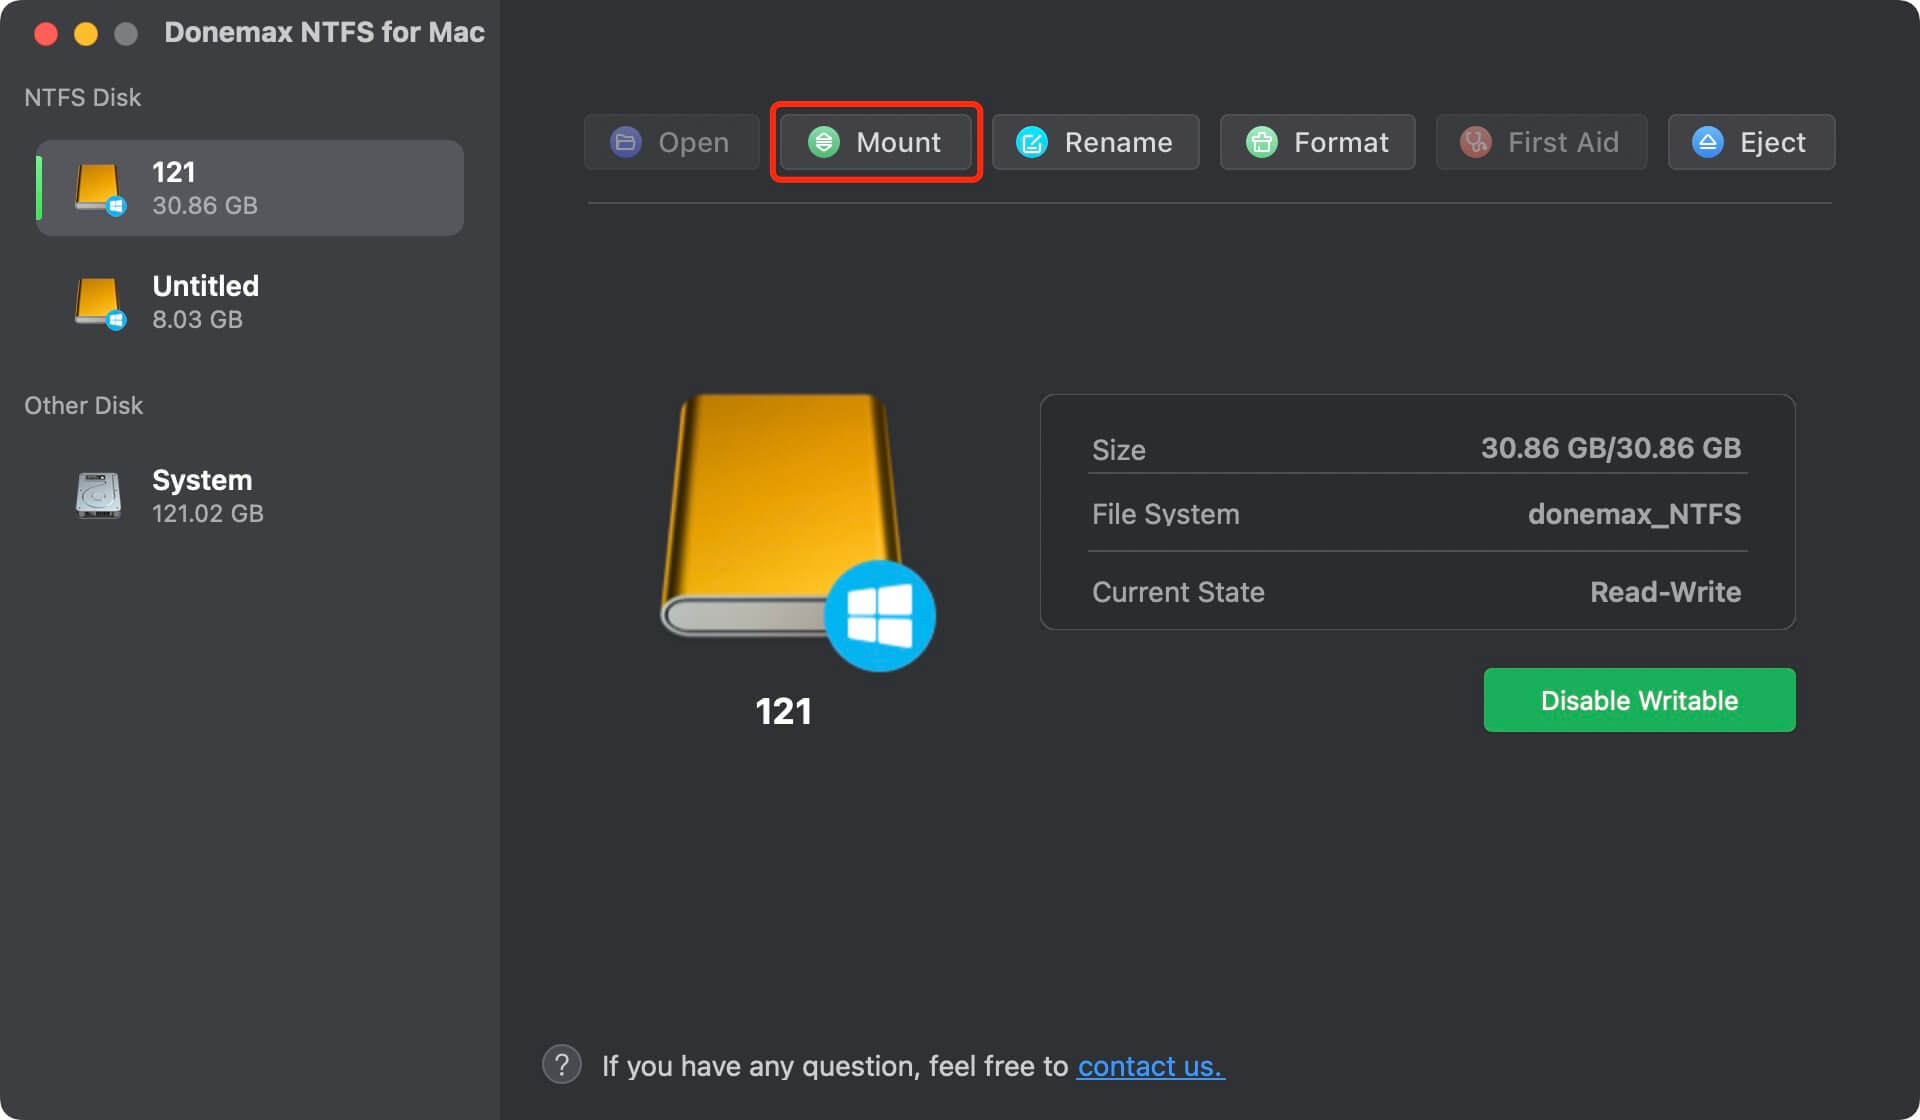
Step 3. To read-write the NTFS Samsung Portable SSD on Mac, click Enable Writable to add NTFS read-write support on Mac.

Conclusion:
Unfortunately, it's common and annoying to have problems where your Samsung Portable SSD won't mount on your Mac. The thorough troubleshooting steps in this guide, on the other hand, will help you fix the issue.
Problems with software can be fixed quickly by using tools like Disk Utility and restarting your Mac. If you follow these steps, you'll be able to get back to your important files and make sure that your Samsung Portable SSD works perfectly on your Mac.
FAQs About Fixing Samsung Portable SSD Not Mounting on Mac
1. How to fix unmounted Samsung portable SSD on Mac?
Make sure the Samsung portable SSD is connected to your Mac correctly. Then open Disk Utility, select the SSD, click on Mount button. If the Mount button is grayed out, click on First Aid button to repair the Samsung portable SSD so that it could mount on your mac.
2. How to recover lost data after repairing the Samsung portable SSD?
The data which is erased by Disk Utility is not lost forever. With a data recovery program, you can recover lost data from the erased Samsung portable SSD.
Step 1. Download and install Donemax Data Recovery for Mac, then connect the Samsung portable SSD to your Mac.
Step 2. Open Donemax Data Recovery for Mac, then select the Samsung portable SSD to start data recovery.

Step 3. Once the Samsung portable SSD is selected, then click on Scan button to deeply scan the Samsung portable SSD.

Step 4. The deep scan will find all recoverable files from the Samsung portable SSD. After scanning, you can preview all recoverable files. Just select the wanted files and save them.

3. How to force mount Samsung portable SSD on Mac with Terminal?
- Go to Launchpad > Other > Terminal, open this app.
- Type in diskutil list, press Enter, then it lists all drives, find the Samsung portable SSD.
- Type in diskutil mountDisk /dev/diskX, press Enter (X is the Samsung portable SSD’s number).
4. How to mount a NTFS Samsung portable SSD on Mac?
NTFS for Mac tool - Donemax NTFS for Mac can help you mount any NTFS drive on Mac. Open this tool on your Mac, then select the Samsung portable SSD and click on Mount button.
To read-write the NTFS Samsung portable SSD on Mac, click on Enable Writable button to allow your Mac to read-write NTFS drives on Mac.
Related Articles
- Feb 08, 2025Fix 'APFS Volume/Container Superblock is Invalid' Error on Mac
- Dec 24, 2024Fix MacBook Bluetooth Won't Turn On
- May 20, 2026Stuck on "Starting Internet Recovery: This May Take a While"? Here's the Fix!
- May 28, 2025Fix Common USB Drive Issues and Errors
- Dec 28, 2024(Solved) Delete Many Files on Mac, But Can't Free Up Disk Space
- Jun 23, 2026Fix: Disk Utility Partition Button Greyed Out (macOS Guide)

Contributing Writer
Maria
Maria is one of the senior writers & editors of Donemax who lives and works in Sydney, Australia. She loves PC, Mac and Internet Technology. She has 6 years of writing articles about data recovery on PC/Mac, disk cloning solution, data eraser and computer OS optimization, etc. She is also interested in testing various software and digital products.

Editor in chief
Gerhard Chou
In order to effectively solve the problems for our customers, every article and troubleshooting solution published on our website has been strictly tested and practiced. Our editors love researching and using computers and testing software, and are willing to help computer users with their problems
Hot Donemax Products

Clone hard drive with advanced clone technology or create bootable clone for Windows/Mac OS.

Completely and easily recover deleted, formatted, hidden or lost files from hard drive and external storage device.

Certified data erasure software - permanently erase data before selling or donating your disk or any digital device.