
Written byMariaUpdated on Apr 07, 2025
[6 Fixes] Fix Hard Drive Partition Shows 0 Bytes Error on Windows 11/10/8/7
Approved byGerhard Chou
Before we start: Before fixing hard drive partition shows 0 bytes error, you can use data recovery software - such as Donemax Data Recovery to recover deleted/formatted and inaccessible files from the partition. Then use built-in tools or third-party tools to fix this issue without losing data.
PAGE CONTENT:
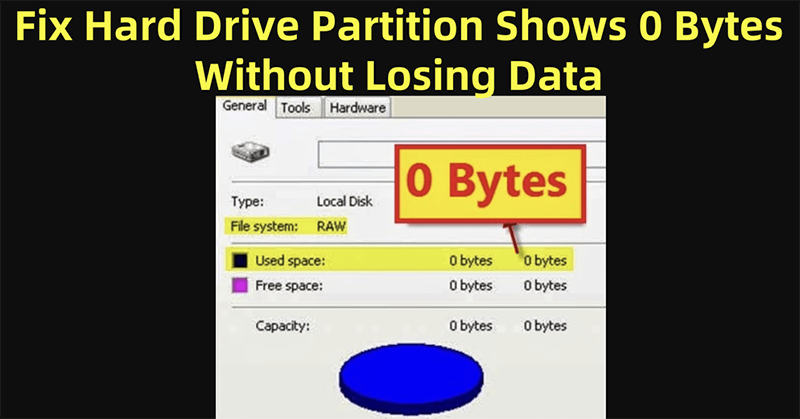
Have you ever plugged in a hard drive or USB flash drive only to find that its partition shows 0 bytes of used and free space? It's a frustrating and alarming issue, especially if the drive contains important data. Fortunately, in many cases, this error is recoverable with the right steps.
In this guide, we'll explore what causes the "hard drive partition shows 0 bytes" error, how to diagnose it, and how to fix it using proven methods - without losing your data.
What Does "0 Bytes" Mean on a Hard Drive Partition?
When a hard drive or USB partition shows 0 bytes of used and free space, it means the operating system cannot access the file system on that drive. You may see this error in File Explorer, and the drive may appear as RAW in Disk Management. This often prevents access to stored files and applications.
Common Causes of the 0 Bytes Error
Understanding the root cause of this error is key to applying the right fix. Here are the most common reasons:
1. File System Corruption
Improper shutdowns, sudden ejections, or interrupted write processes can corrupt the file system, rendering the partition unreadable.
2. Partition Table Damage
The partition table is critical for mapping file storage. If it's damaged, the OS may not recognize the partition structure, showing 0 bytes.
3. Bad Sectors
Bad sectors - physically damaged storage blocks - can disrupt the partition's structure and file access.
4. RAW File System
Sometimes, the file system becomes RAW, a state where Windows cannot recognize or read it due to corruption.
5. Virus or Malware Attacks
Malware can infect boot sectors or corrupt file systems, leading to unreadable or 0-byte drives.
6. Hardware Failures
Damaged USB ports, cables, or internal components can interfere with communication between the drive and the OS.
Initial Checks Before Troubleshooting
Before jumping into recovery or formatting, try the following:
- Reconnect the Drive: Unplug and replug into a different USB port or try another computer.
- Swap the Cable or Enclosure: For external hard drives, faulty cables or enclosures can mimic 0-byte errors.
- Open Disk Management: Press Win + X → Select Disk Management → Locate the drive to see if it's RAW, Unallocated, or Healthy.
- Listen for Unusual Noises: Clicking or grinding sounds may indicate physical failure.
How to Fix "Hard Drive Partition Shows 0 Bytes" Error?
Here's a breakdown of methods - starting from least destructive to more advanced solutions.
Fix 1. Run CHKDSK to Fix File System Errors
CHKDSK (Check Disk) scans and repairs file system errors.
Steps:
- Open Command Prompt as Administrator
- Type the following and press Enter:
chkdsk X: /f /r
![Run CHKDSK to Fix File System Errors]()
(Replace X: with the affected drive letter)
- /f fixes errors on the disk.
- /r locates bad sectors and recovers readable data.

When to Use:
- When the drive is still visible with a drive letter but unreadable.
- Avoid using CHKDSK on RAW drives; it may result in data loss.
Fix 2. Recover Data from RAW or 0-Byte Drives (Without Formatting)
When your drive shows 0 bytes, your first instinct might be to format it. But hold off -formatting can overwrite existing data, making it even harder to recover. If your files are valuable, data recovery should be your first priority.
Most 0-byte partition errors occur because the file system is corrupted or unreadable, not because the data itself is gone. This is why using professional data recovery software gives you a good chance to retrieve your files before doing anything irreversible.
Why Recovery Works in RAW/0-Byte Scenarios?
Even if Windows reports the drive as having no space, the actual data clusters may still exist on the disk. Recovery software doesn't rely on the file system the same way Windows does - it scans the drive sector by sector for known file signatures or fragments, reconstructing files without needing a healthy file system.
Step-by-Step Recovery Using Donemax Data Recovery:
Step 1. Download and Install the Tool
Click Download button below to download Donemax Data Recovery - a reliable data recovery program. Install the software on a healthy internal drive, not the faulty one.
Step 2. Launch the Application
Upon launch, all connected drives will be listed. Look for the RAW or 0-byte drive - it may not show a file system or may be labeled as "Unknown."

Step 3. Select and Scan the Drive
Click the target drive and press Scan. The software will perform a Quick Scan followed by a Deep Scan. The deep scan may take longer but recovers more files, especially if the file system is broken.

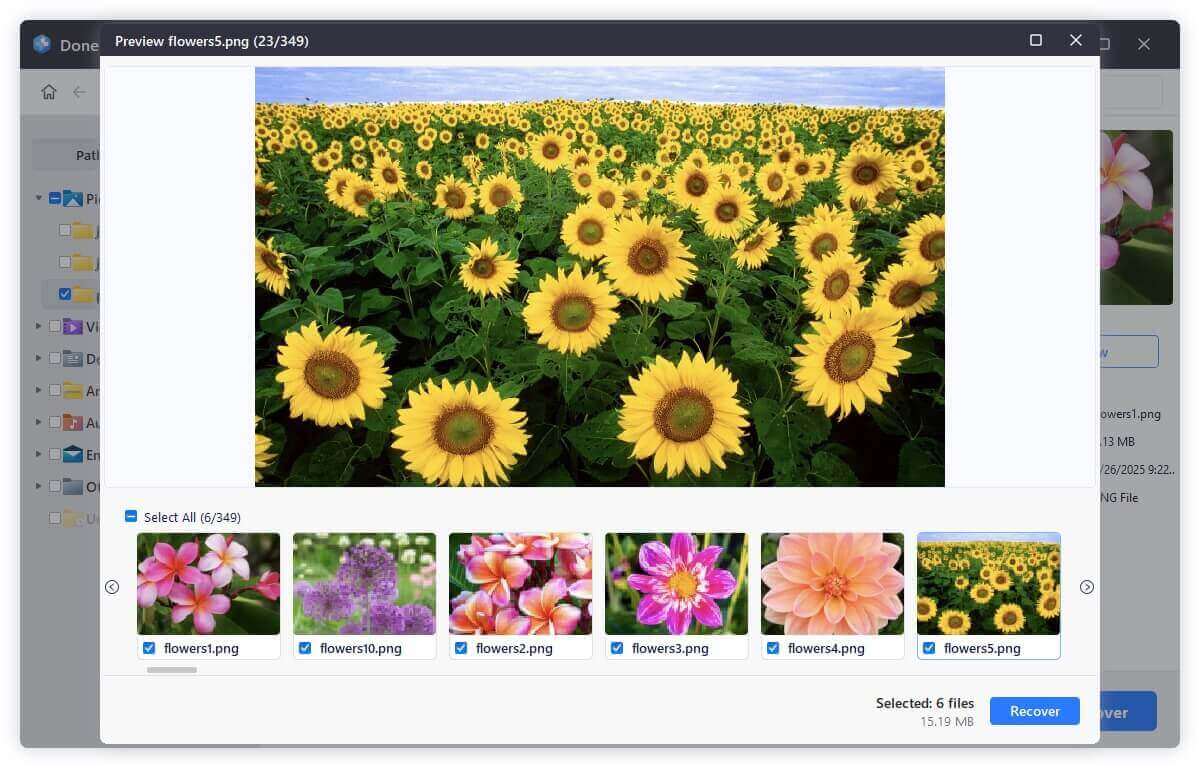
Step 4. Preview and Select Files
You can filter by file type (e.g., documents, videos, images). Preview critical files before selecting them for recovery.
Step 5. Recover and Save Files
Select the wanted files, click on Recover button. Choose a different drive (not the affected one) to save recovered files. Avoid writing any data back to the corrupted disk.

Recovery Tips:
- Don't interrupt the scan: Let it run even if it takes hours. Interrupting can reduce the chance of full recovery.
- Avoid DIY repairs before recovery: Running DiskPart, formatting, or initializing the disk before attempting recovery can overwrite existing data.
- Be patient: Recovery software might find thousands of files. Use filters or search by filename if you remember it.
What If the Drive Isn't Detected?
If the software doesn't detect the drive:
- Try plugging it into a different port or computer.
- Use a SATA-to-USB adapter for internal drives.
- If still undetectable, the issue might be hardware-related - skip to the section on Professional Help.
Fix 3. Format the Partition (After Recovering Data)
Formatting recreates the file system and can fix the 0-byte issue if recovery is successful.
Steps to Format via Disk Management:
- Press Win + X → Select Disk Management.
![Select Disk Management]()
- Right-click the affected partition → Click Format.
![Click Format]()
- Choose file system (NTFS or exFAT).
![Choose file system]()
- Uncheck "Quick Format" if you want a thorough format (optional).


Warning: This will erase all data, so use only after recovery.
Fix 4. Use DiskPart to Clean and Recreate the Partition
When Disk Management fails to format or detect the file system, DiskPart - a powerful command-line tool - can help.
Steps:
- Open Command Prompt as Administrator
- Launch DiskPart:
diskpart
- List connected disks:
list disk
- Select the faulty disk:
select disk X
- Clean the disk:
clean
- Create a new partition:
create partition primary
format fs=ntfs quick
Assign

This process erases everything but often resolves severe partition issues.
Fix 5. Rebuild the Partition Table with Recovery Tools
Sometimes, the issue lies in a corrupted partition table. Partition recovery tools can detect lost or deleted partitions and rebuild them.
Recommended Tools:
- Donemax Data Recovery
- TestDisk (free, open-source)
- MiniTool Partition Wizard
- AOMEI Partition Assistant
Using TestDisk:
- Download and launch TestDisk.
- Select the affected disk.
- Choose Analyse → Let it scan for lost partitions.
![Rebuild the Partition Table with Recovery Tools]()
- Follow prompts to recover and write partition table changes.

Tip: TestDisk doesn't have a GUI but is very powerful once mastered.
Fix 6. Check Drive Health and SMART Status
A failing drive often shows signs via SMART (Self-Monitoring, Analysis, and Reporting Technology) indicators.
Tools:
- CrystalDiskInfo
- HD Tune
- GSmartControl
What to Look For:
- Reallocated sector count
- Current pending sector count
- Uncorrectable sectors
If these values are high, the drive is physically deteriorating and may not be recoverable. Backup data and replace the drive immediately.
Prevent the 0 Bytes Partition Error in the Future
Data loss can be stressful. These best practices can help you avoid similar issues down the road:
- Always Use "Safely Remove Hardware": Improper ejection is a common cause of file system corruption.
- Back Up Important Data Regularly: Use cloud storage, external drives, or backup tools like Donemax Disk Clone.
- Scan for Malware: Install and update antivirus software. Run periodic scans, especially on USB devices.
- Avoid Physical Shocks: External drives are sensitive to drops and vibration. Store them securely.
- Monitor Drive Health: Use tools like CrystalDiskInfo monthly to check SMART status.
When to Seek Professional Help
Sometimes, DIY recovery isn't enough. You should consider contacting a data recovery service when:
- The drive makes clicking or beeping noises.
- The drive isn't detected at all in BIOS or Disk Management.
- Recovery software can't locate files.
- You suspect hardware-level damage.
Professional services like DriveSavers, Ontrack, and Secure Data Recovery have cleanroom environments and specialized tools to retrieve data safely.
Conclusion
A hard drive partition showing 0 bytes doesn't always mean your data is gone forever. In most cases, file system corruption, bad sectors, or RAW partitions are the culprits. By performing diagnostics, running CHKDSK, using recovery software, or rebuilding the partition table, you can often recover both your data and the drive's usability.
However, always prioritize data recovery before attempting any destructive actions like formatting or cleaning the drive. And to avoid future problems, back up regularly and treat your storage devices with care.
If you've followed the steps above and still face issues, don't hesitate to consult a data recovery professional. The earlier you act, the better your chances of a full recovery.
Donemax Data Recovery
Donemax Data Recovery offers advanced scan technology to ensure finding every recoverable file from your computer hard drive or external storage device. It supports to recover lost data or inaccessible data due to deletion, emptying recycle bin, format, OS upgrade, partition loss, hard drive crash, device damage, logical error, etc.
Related Articles
- Feb 06, 2024Lexar Portable SSD Is Not Showing Up on Windows PC, Fix It Now
- Dec 18, 2024How to Fix a USB Drive Read-Only on Mac? [8 Solutions]
- Feb 17, 2025External Hard Drive Freezes My Computer: How to Fix This Issue
- May 13, 2026Troubleshooting Guide: How to Fix ExFAT Drive Issues on Mac
- Apr 15, 20259 Methods to Fix Apple Support 2002F on Mac
- Mar 11, 2024Fix External Hard Drive Not Mounting on Mac Studio

Contributing Writer
Maria
Maria is one of the senior writers & editors of Donemax who lives and works in Sydney, Australia. She loves PC, Mac and Internet Technology. She has 6 years of writing articles about data recovery on PC/Mac, disk cloning solution, data eraser and computer OS optimization, etc. She is also interested in testing various software and digital products.

Editor in chief
Gerhard Chou
In order to effectively solve the problems for our customers, every article and troubleshooting solution published on our website has been strictly tested and practiced. Our editors love researching and using computers and testing software, and are willing to help computer users with their problems
Hot Donemax Products

Clone hard drive with advanced clone technology or create bootable clone for Windows/Mac OS.

Completely and easily recover deleted, formatted, hidden or lost files from hard drive and external storage device.

Certified data erasure software - permanently erase data before selling or donating your disk or any digital device.