
Written byStevenUpdated on Jun 02, 2024
Fix Your PC Ran Into A Problem and Needs to Restart
Approved byGerhard Chou
PAGE CONTENT:
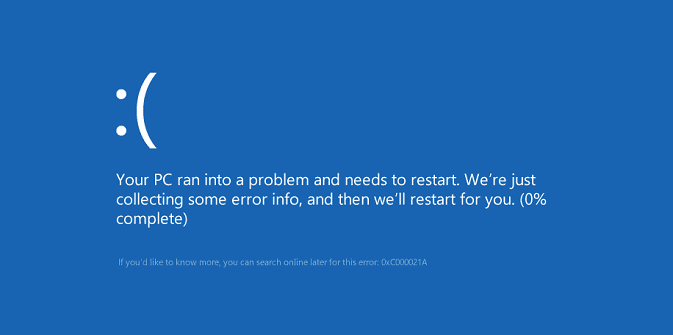
In the middle of a big project or playing your favorite game, suddenly, your computer freezes, and a scary blue screen appears, saying Your PC ran into a problem. Dealing with a technology glitch angers you because you'll lose your progress and valuable time.
Are you scared? Don't be! This guide will explain this scary mistake and give you the necessary information and tools to deal with it. Join us as we try to figure out and fix common Windows problems. Whether you're a tech expert or just someone who likes to use computers occasionally, this will improve the whole experience. Get your PC back on track with this guide!
Scenario 1: If You Can Boot Your PC Into Safe Mode
Method 1: Remove Problematic Windows Update
To access Windows Update, go to Settings > Update & Security > Windows Update > See the list of updates. Find the most recent updates you loaded, especially the ones that happened before the error. To remove the bad update, go to Control Panel > Programs > Programs and Features > Installed Updates.
To remove the update, right-click on it and choose "Uninstall." Turn your PC back on and see if the problem still exists. This method may fix problems caused by bad updates without the need for more research.
Method 2: Update The Device Drivers
To access Device Manager, right-click the Start button and select "Device Manager." Look for devices with a yellow question mark next to them. These devices have driver issues.
To update the driver, right-click on the device and choose "Update driver." You can also have the computer look for updated driver software independently. Alternatively, you can go to the manufacturer's website, grab the latest drivers, and install them by hand. Then, start up your computer again and see if the problem is fixed.

Method 3: Revert, Disable, Or Remove Drivers
Click the Start button and choose Device Manager to get to it in Safe Mode. Find the device drivers linked to the hardware parts that trouble you. Right-click on the driver that is giving you trouble and choose Properties. If the Roll Back Driver choice exists, select it to return to the old driver version.
If not, choose Disable Device to turn off the driver and see if the problem still happens. You can also choose "Uninstall Device" to eliminate the driver. Turn your PC back on and see if the mistake shows up again.
Method 4: Remove Any Third-Party Software Or Apps
If you are in Safe Mode, go to Control Panel > Programs > Programs and Features. Find the third-party programs or apps you just loaded that might be causing problems. Right-click on the software giving you trouble and choose "Uninstall."
To finish the removal process, follow the steps shown on the screen. Start up your computer again and see if the mistake still shows up. Review and remove software that isn't needed or giving you problems regularly to keep your system stable and running well.
Method 5: Change Memory Dump Settings
Go to Control Panel, System, and Security > System > Advanced system settings in Safe Mode. From the Startup and Recovery section of the "Advanced" tab, click on "Settings." Find the drop-down menu next to "Write debugging information" in the "System failure" section and click on it.
"Small memory dump (256 KB)" or "Automatic memory dump" are some other options you can choose from. Then click "OK" to save your changes. Turn your PC back on to see if the problem still exists.
Method 6: Run SFC
If you are in Safe Mode, press and hold the Start button and select "Command Prompt (Admin)." If you do this, the Command Prompt will start as an administrator. Type "sfc /scannow" (without the marks) and hit "Enter."
The System File Checker will look through your system for lost or damaged system files and try to fix them independently. You may have to wait a while for the process to finish. After you're done, restart your computer and see if the problem still exists.
Scenario 2: If You Can’t Boot Into Safe Mode
Method 1: Startup Repair
Start your computer with a USB or DVD with Windows on it. Pick the language you want to use, then click "Repair your computer." Select "Startup Repair" from the "Advanced" menu under Troubleshoot.
The tool will find and fix problems stopping Windows from starting up correctly. After the repair, turn your PC back on and see if it starts properly.
Method 2: System Restore
Go to Troubleshoot > Advanced choices on the Windows installation disc. Go to System Restore to choose a restore point made before the mistake. Restart your PC when the repair is done. System Restore can fix problems caused by recent changes to system files, drivers, or software installs. It is a safe way to get the system back to stability.
Method 3: Restart This Computer
You can access the Windows Recovery Environment from a Windows installation disc. Pick the language you want to use, then click "Repair your computer." Select Fix Issues > Reset this PC. Choose between keeping your files or removing everything.
If you choose, resetting your PC will reinstall Windows while leaving your files alone. It will also eliminate any apps or settings that might be causing the problem. Your PC will restart after the reset, and you can check to see if the mistake is still there.
Method 4: Install Windows again
Reinstalling Windows is the last option if none of the other solutions work. Use a Windows startup disc to start up your computer. Keep going with the installation. Choose your main drive and click "Format" to remove the Windows software that is already there.
To finish the process, follow the steps shown on the screen. When you reinstall Windows, it deletes all the files on your system drive and loads a new copy of the operating system. It removes any problems that might be causing the error.
Recover Lost Data after Fixing Windows Issues
Windows data recovery software can help you recover deleted, formatted or lost data on Windows PC.
Step 1. Download and install the best Windows data recovery program - Donemax Data Recovery.
Step 2. Open Donemax Data Recovery, then select the drive where you lose your files.

Step 3. Click on Scan button so that Donemax Data Recovery can deeply scan the drive and find all lost files.

Step 4. Once the scan is completed, you can preview all recoverable files. Then select the wanted files and save them by clicking on Recover button.

Conclusion:
Getting the annoying "Your PC ran into a problem and needs to restart" message can prevent you from doing the things you want to do or the work you need to do. However, with the information and step-by-step solutions in this guide, you can successfully troubleshoot and fix common Windows errors. Using these steps to fix problems will make your PC stable again so you can enjoy a better working experience. Bugs in technology shouldn't stop you; give yourself the tools to fix them.
Related Articles
- Feb 06, 20254 Solutions to Fix Pen Drive (or USB drive/flash drive) Shows Empty Although It Has Data
- Dec 23, 20247 Solutions to Fix 'APFS Object Map is Invalid' on Mac Without Losing Data
- Jun 12, 2026Solved: Mac Error Code -100092 | Quick Troubleshooting Guide
- Apr 29, 2025Bad Sectors Repair Solutions
- May 20, 2026Stuck on "Starting Internet Recovery: This May Take a While"? Here's the Fix!
- Dec 24, 20246 Solutions to Fix Sabrent External Hard Drive Not Working on Mac

Contributing Writer
Steven
Steven has been a senior writer & editor of Donemax software since 2020. He's a super nerd and can't imagine the life without a computer. Over 6 years of experience of writing technical solutions and software tesing, he is passionate about providing solutions and tips for Windows and Mac users.

Editor in chief
Gerhard Chou
In order to effectively solve the problems for our customers, every article and troubleshooting solution published on our website has been strictly tested and practiced. Our editors love researching and using computers and testing software, and are willing to help computer users with their problems
Hot Donemax Products

Clone hard drive with advanced clone technology or create bootable clone for Windows/Mac OS.

Completely and easily recover deleted, formatted, hidden or lost files from hard drive and external storage device.

Certified data erasure software - permanently erase data before selling or donating your disk or any digital device.