
Written byMariaUpdated on Apr 30, 2025
Mac Won't Start into Safe Mode? Here's How to Fix It
Approved byGerhard Chou
Tip: Donemax DMcleaner for Mac is an all-in-one Mac optimizing tool. It can help you quickly delete all junk data from your Mac, fix system issues, remove useless files, repair damaged drives, etc. If your Mac won't start into macOS Recovery mode, you can use this tool to help you optimize the operating system and fix issues.
PAGE CONTENT:
Mac's Safe Mode is a useful troubleshooting tool that helps diagnose and resolve system issues by loading only essential macOS components. However, sometimes a Mac refuses to boot into Safe Mode, leaving users frustrated and unsure of how to proceed.
If you're facing this issue, don't worry. This comprehensive guide explains why your Mac might not be entering Safe Mode and provides step-by-step solutions to fix it.
Introduction: What Is Mac Safe Mode and Why Is It Useful?
Safe Mode is a macOS diagnostic mode designed to help users troubleshoot system problems. When booted into Safe Mode, the Mac:
- Loads only essential system files and drivers.
- Prevents third-party startup items from running.
- Runs a basic disk check and attempts to repair directory issues.
- Deletes system caches that could be causing problems.
By using Safe Mode, users can diagnose issues related to software conflicts, app crashes, and performance slowdowns. However, if your Mac won't start into Safe Mode, there may be several underlying causes, which we'll explore in this guide.
How to Start a Mac in Safe Mode (Quick Recap)?
Before troubleshooting, ensure you are following the correct method to enter Safe Mode, as the steps differ between Intel-based Macs and Apple Silicon (M-chip) Macs.
For Intel-Based Macs:
- Turn off your Mac completely.
- As soon as you turn it back on, press and hold the Shift key.
- After you see the login screen, let go of the Shift key.
![Mac refuses to boot into Safe Mode]()

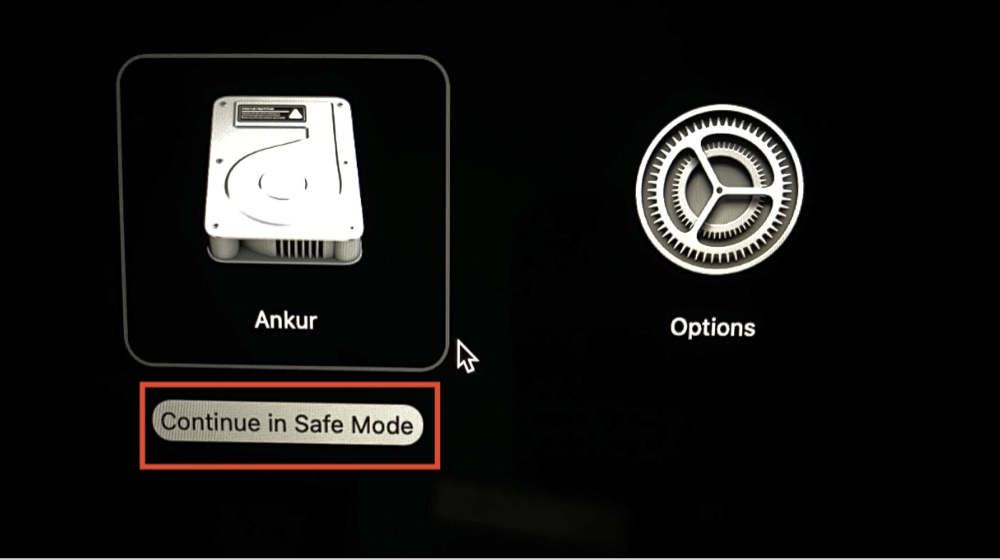
For Apple Silicon (M-chip) Macs:
- Turn off your Mac completely.
- Hold down the power button until the screen that reads "Loading startup options" shows up.
![Mac refuses to boot into Safe Mode]()
- After choosing your startup disk, hold down the Shift key.
- After selecting Continue in Safe Mode, let go of the Shift key.
![Mac refuses to boot into Safe Mode]()

If your Mac won't boot into Safe Mode using these methods, proceed with troubleshooting.
Why Won't My Mac Boot Into Safe Mode?
Several reasons may prevent your Mac from entering Safe Mode, including:
- Faulty or stuck keyboard keys – The Shift key might not be registering.
- Corrupt macOS system files – Essential files needed for booting into Safe Mode may be damaged.
- Hardware issues – Problems with the SSD, RAM, or logic board can interfere with startup.
- macOS software bugs – Certain macOS updates may cause Safe Mode to malfunction.
- Firmware or security settings – System Integrity Protection (SIP) or startup security settings might block Safe Mode.
Now, let's go through the steps to fix these issues.
Troubleshooting Steps to Fix Mac Safe Mode Issues
#1 Check Keyboard and Key Combinations
If Safe Mode isn't working, your keyboard might be the issue.
Try an External Keyboard
- If your built-in keyboard isn't working properly, plug in an external USB or Bluetooth keyboard and try booting into Safe Mode again.
Use an Alternate Shift Key
- Try using both the left and right Shift keys. One might be faulty.
Clean the Keyboard
- Dust or debris can cause keys to get stuck. Use compressed air or a soft brush to clean around the Shift key.
#2 Restart and Try Again
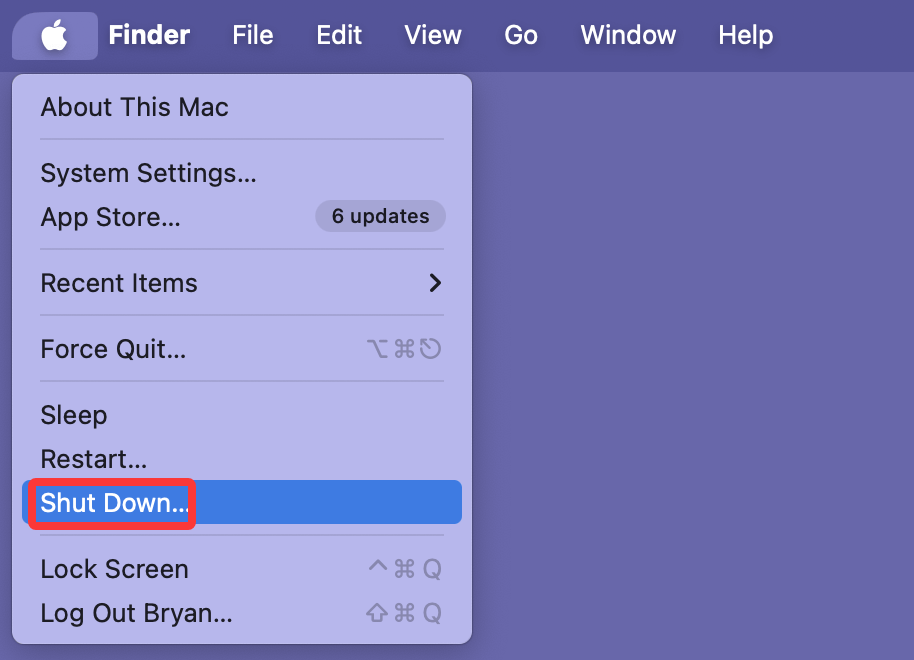
Sometimes, a simple restart can resolve the issue.
- Shut down your Mac completely.
![Mac refuses to boot into Safe Mode]()
- Wait for 10-15 seconds before turning it back on.
- Follow the correct Safe Mode steps (based on your Mac type).
If this doesn't work, proceed to the next step.
#3 Reset NVRAM and SMC (For Intel Macs Only)
Reset NVRAM:
NVRAM stores startup settings. Resetting it can help fix boot issues.
- Turn Off your Mac.
- To activate it right away, hit and hold the Option + Command + P + R keys.
- Hold for another 20 seconds, then let go.
Reset SMC:
SMC controls power-related settings. Resetting it can fix boot problems.
For MacBooks (with non-removable battery):
- Shut Down the Mac.
- For ten seconds, press and hold the Shift + Control + Option (left) + Power buttons.
- Turn the Mac back on after releasing the keys.
#4 Check for macOS Updates or Reinstall macOS
Checking for macOS Updates
macOS updates frequently contain fixes for boot-related issues. If your Mac isn't entering Safe Mode, updating to the latest version of macOS might resolve the problem.
How to Check for Updates on macOS Ventura, Sonoma, or Later?
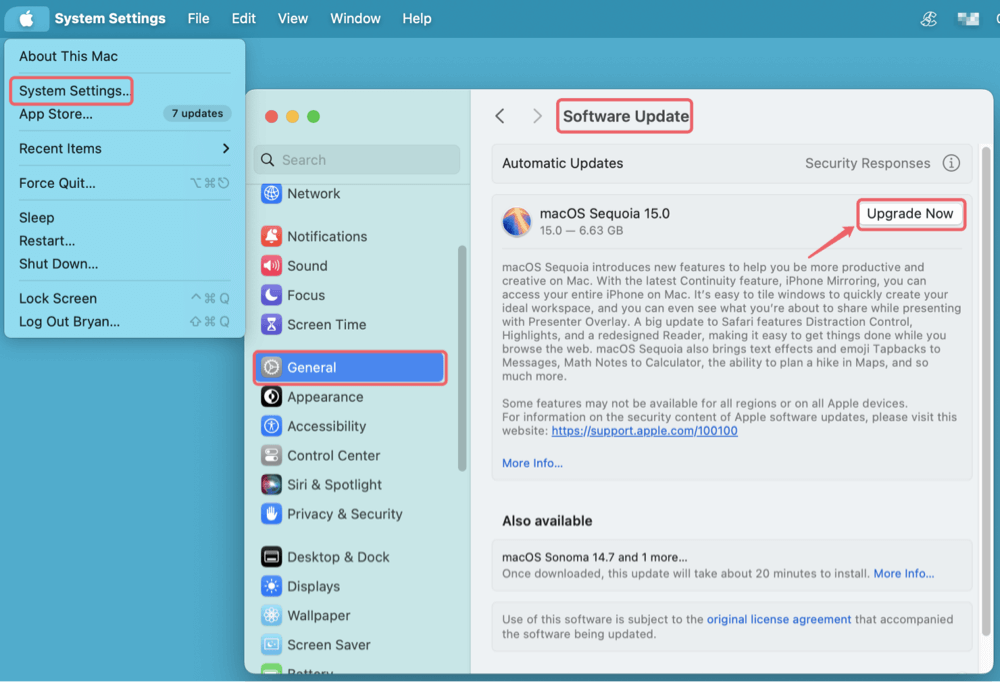
- In the upper-left corner, click the Apple menu.
- Choose General > Software Update under System Settings.
- Click Update Now or Upgrade Now, depending on the macOS version, if an update is available.
![Mac refuses to boot into Safe Mode]()
- Restart your Mac after the update completes and try entering Safe Mode again.
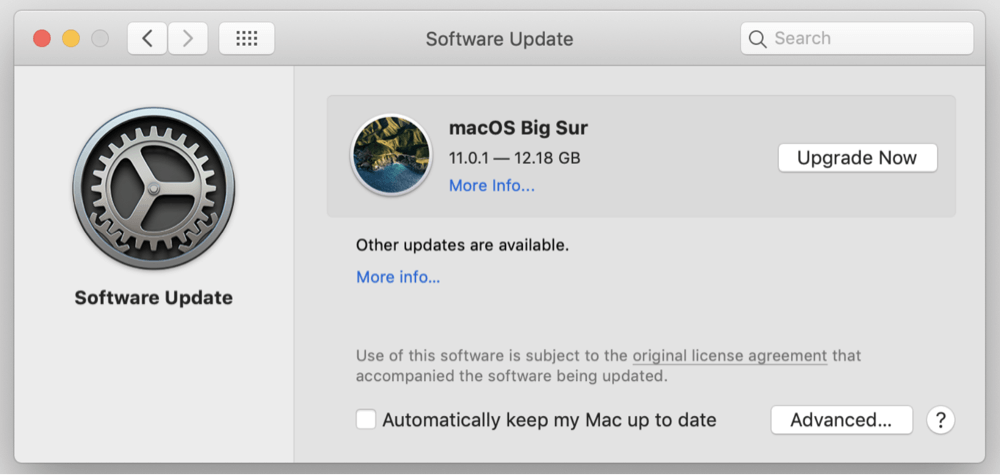
How to Check for Updates on macOS Monterey or Earlier?
- Select System Preferences by clicking on the Apple menu.
- Launch the software update.
- Click Upgrade Now and adhere to the on-screen directions if there is an update available.
![Mac refuses to boot into Safe Mode]()
- Restart your Mac after updating and try Safe Mode again.
💡 Tip: If your Mac says "No updates available," but you're experiencing issues, try reinstalling macOS using the methods below.
What If You Can't Update Normally?
If your Mac won't boot normally or enter Safe Mode, updating macOS through normal settings may not be possible. In this case, you can update or reinstall macOS using macOS Recovery Mode.
Reinstalling macOS Without Losing Data
Reinstalling macOS is an effective way to fix system corruption without erasing personal files. This process replaces the system files while keeping your apps, documents, and settings intact.
Steps to Reinstall macOS Using Recovery Mode
For Intel-Based Macs:
- Turn Off your Mac completely.
- Press and hold Command (⌘) + R as soon as you turn it on.
- When the spinning globe or Apple logo displays, let go of the keys.
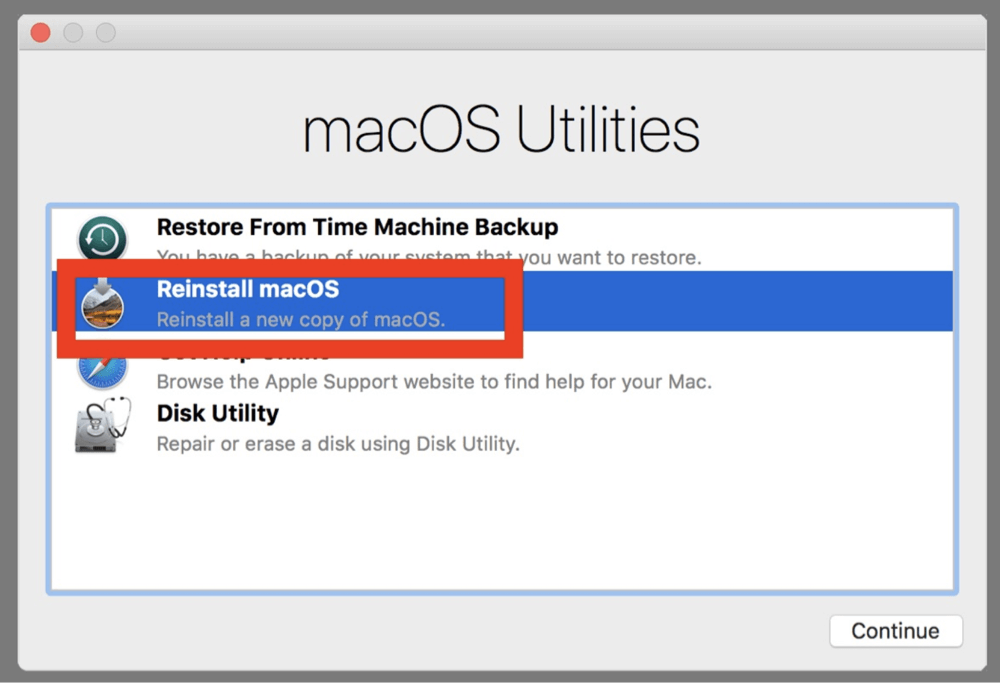
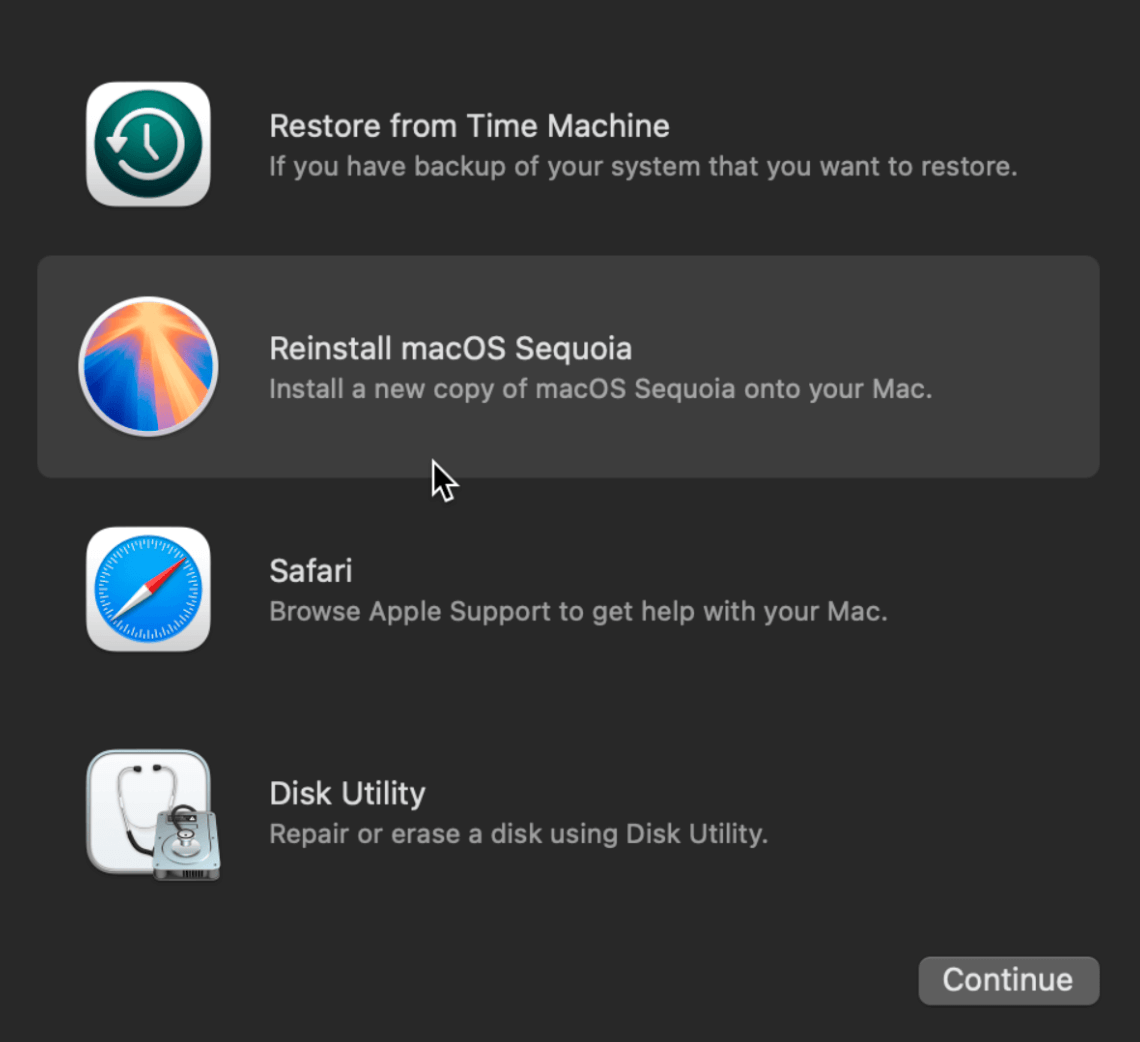
- Click Continue after choosing Reinstall macOS under macOS Utilities.
![Mac refuses to boot into Safe Mode]()
- Follow the on-screen instructions to complete the reinstallation.
For Apple Silicon (M-chip) Macs:
- Turn off your Mac.
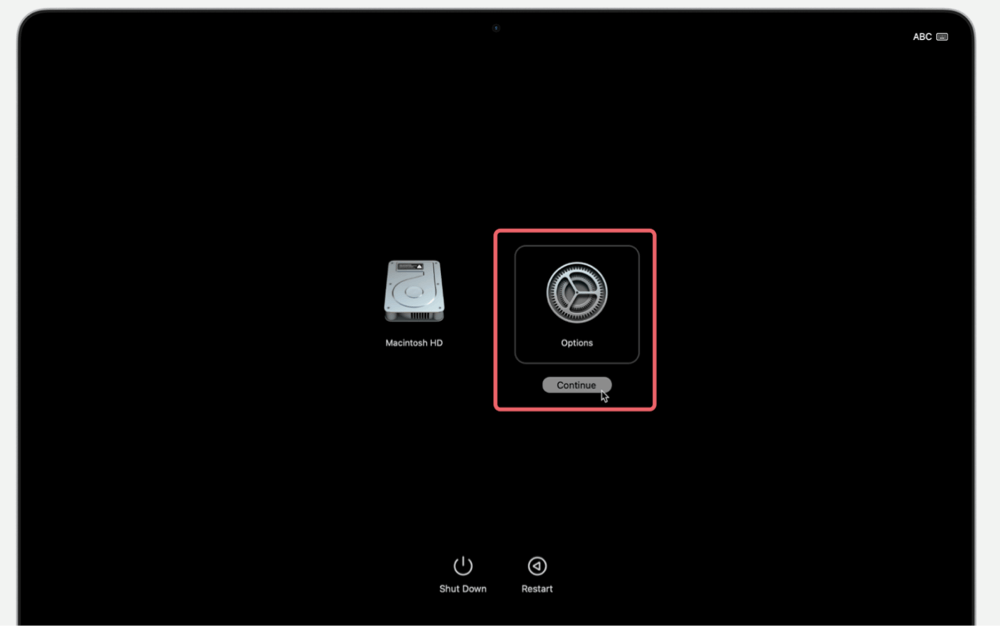
- Hold down the power button until the startup options begin to load.
- To go inside macOS Utilities, select Options > Continue.
![Mac refuses to boot into Safe Mode]()
- Click Continue after selecting Reinstall macOS.
![Mac refuses to boot into Safe Mode]()
- Follow the on-screen instructions to reinstall macOS.
What Happens During a Reinstallation?
- macOS will reinstall over your existing system.
- Your apps and files remain untouched.
- Only the system files and core software get refreshed.
After reinstalling, restart your Mac and attempt to enter Safe Mode again.
Erase and Reinstall macOS (If Necessary)
If Safe Mode still doesn't work after a standard macOS reinstallation, you might need to erase your Mac and perform a clean install. This is recommended if your system files are severely corrupted.
Steps for a Clean Install of macOS
- Boot into macOS Recovery Mode (refer to previous section).
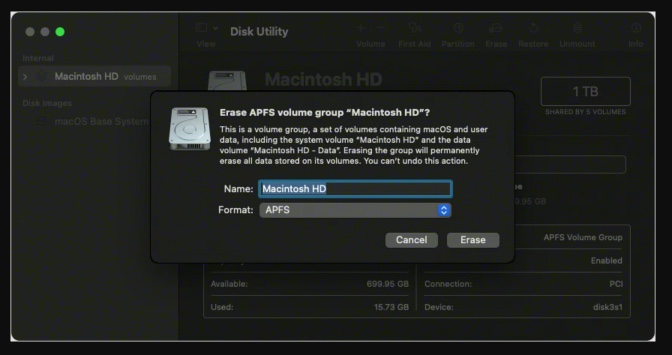
- Open Disk Utility and select Macintosh HD.
- Select the Mac OS Extended (Journaled) or APFS format by clicking Erase, then confirm.
![Mac refuses to boot into Safe Mode]()
- Close Disk Utility and return to macOS Utilities.
- Select Reinstall macOS and follow the installation steps.
⚠️ Warning: A clean install erases all data. Make sure to back up your files using Time Machine or an external drive before proceeding.
What If macOS Reinstallation Fails?
If macOS installation fails or Safe Mode still doesn't work after reinstalling, consider these advanced options:
- Try a Different macOS Version – If your Mac has issues with a specific version, you can install an older version of macOS using a bootable installer.
- Check for Hardware Issues – A failing SSD, RAM issues, or a damaged logic board may be causing the problem. Running Apple Diagnostics can help detect hardware issues.
- Visit an Apple Store or Authorized Repair Center – If none of the solutions work, professional diagnostics may be necessary.
#5 Run Disk Utility in Recovery Mode
Disk errors can prevent Safe Mode from working. Use Disk Utility to fix them.
- Boot into macOS Recovery Mode (see instructions above).
- Select Disk Utility and click Continue.
- Choose Macintosh HD and click First Aid to repair disk errors.
![Mac refuses to boot into Safe Mode]()
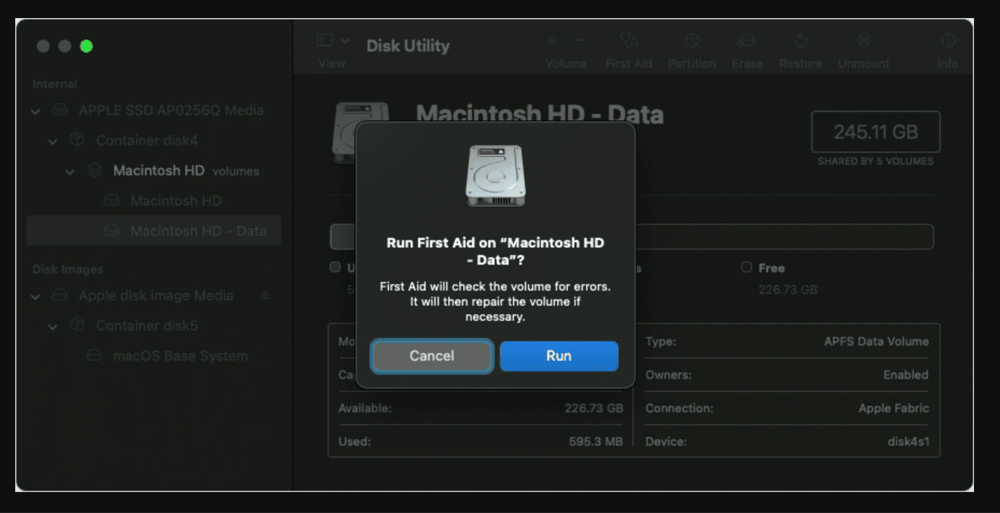
If First Aid finds and fixes issues, try booting into Safe Mode again.
#6 Boot Into Verbose Mode to Identify Errors
Verbose Mode allows you to see system logs that can reveal boot problems.
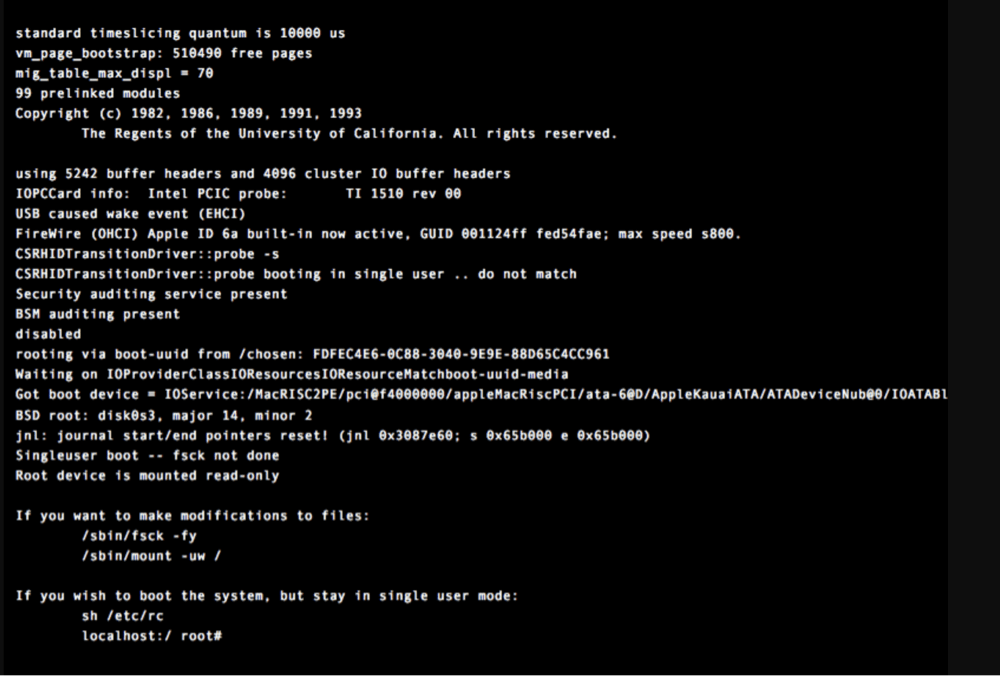
- Restart your Mac and immediately press Command (⌘) + V.
- If errors appear, take note of the error codes.
![Mac refuses to boot into Safe Mode]()
- Use online resources or Apple Support to interpret the logs.
Alternative Solutions If Safe Mode Still Won't Work
If none of the above steps resolve the issue, consider the following options:
1. Use macOS Recovery Mode for Troubleshooting
Recovery Mode provides access to Terminal, Disk Utility, and macOS Reinstallation, which can help fix Safe Mode issues.
- Boot into Recovery Mode (see Section 4.5).
- Try running fsck -fy in Terminal to check and repair disk issues.
![Mac refuses to boot into Safe Mode]()

2. Create a Bootable macOS Installer
If your Mac still won't enter Safe Mode, you can create a bootable macOS USB drive and reinstall the OS:
- Use another Mac to download macOS from the App Store.
- Create a bootable USB installer using Terminal (createinstallmedia command).
- Boot from the USB drive and reinstall macOS.
🔗 Related link: how to create bootable installer for macOS and use it to install macOS.
3. Contact Apple Support or Visit an Apple Store
If hardware damage (e.g., a failing SSD or logic board issue) is preventing Safe Mode from working, you may need professional assistance.
Conclusion
Safe Mode is a powerful tool for troubleshooting macOS issues, but if your Mac refuses to boot into it, there are multiple ways to resolve the problem.
Key Takeaways:
- Check your keyboard and try an external one.
- Restart and reset NVRAM/SMC (for Intel Macs).
- Run Disk Utility and check for macOS updates.
- Use Recovery Mode for deeper troubleshooting.
- Consider a macOS reinstall or professional support if necessary.
By complying these steps, you should be able to diagnose and fix the issue preventing your Mac from entering Safe Mode. If problems persist, Apple Support can provide further assistance. If you have lost data due to fix Safe Mode issues or reinstalling macOS, you can use Mac data recovery software - such as Donemax Data Recovery for Mac to get the lost data back.
Donemax Data Recovery for Mac
Donemax Data Recovery for Mac is one of the best Mac data recovery software. It is easy-to-use and can help in recovering deleted, formatted, inaccessible or lost data from Mac HDD/SSD, external disk, USB drive, SD card, camera or other storage devices.
Related Articles
- Feb 20, 2024How to Fix External SSD Not Mounting on Mac?
- Feb 11, 2025Fix RAW SD Card: A Complete Guide to Repair & Recover Data
- Dec 12, 2025Unable to Install Microsoft Office on Mac, Fix It
- Nov 04, 2024Fix Error Code 43 on Mac
- Apr 11, 2025Word Cannot Open the Document: User Does Not Have Access Privileges – How to Fix It on Mac?
- Feb 11, 2025Mac Can't Recognize the Connected SD Card? Fix It Now

Contributing Writer
Maria
Maria is one of the senior writers & editors of Donemax who lives and works in Sydney, Australia. She loves PC, Mac and Internet Technology. She has 6 years of writing articles about data recovery on PC/Mac, disk cloning solution, data eraser and computer OS optimization, etc. She is also interested in testing various software and digital products.

Editor in chief
Gerhard Chou
In order to effectively solve the problems for our customers, every article and troubleshooting solution published on our website has been strictly tested and practiced. Our editors love researching and using computers and testing software, and are willing to help computer users with their problems
Hot Donemax Products

Clone hard drive with advanced clone technology or create bootable clone for Windows/Mac OS.

Completely and easily recover deleted, formatted, hidden or lost files from hard drive and external storage device.

Certified data erasure software - permanently erase data before selling or donating your disk or any digital device.