
Written byMariaUpdated on Sep 17, 2026

Before we start: If your internal or external drive becomes damaged, corrupted, or unreadable on macOS 27 Golden Gate, always recover your essential files first using Donemax Data Recovery for Mac. Once your data is safe, repair the drive using macOS Disk Utility First Aid, Terminal FSCK commands, or reformatting.
PAGE CONTENT:
Storage issues can happen regardless of how modern your system is. Seeing an error message like 'Disk Not Readable', 'The disk inserted was not readable by this computer', or experiencing drive mounting failures can be alarming.
External hard drives, SSDs, SD cards, and USB flash drives can become damaged due to sudden ejection, file system corruption, power surges, or bad sectors. When this happens on macOS 27 Golden Gate, jumping straight into repair tools without a plan could cause permanent file loss.
In this guide, we will show you step-by-step how to fix damaged drive on macOS 27 Golden Gate safely. Crucially, we will explain how to extract your files first using Donemax Data Recovery for Mac before attempting any disk repair methods.
How do you know if your hard drive or SSD is damaged? Here are the most common signs Mac users encounter:
When a drive is damaged, its underlying catalog structure is unstable. Repair commands like Disk Utility First Aid or Terminal FSCK attempt to fix directory structures by deleting unreadable file references. This means repairing a drive can permanently erase your valuable photos, documents, and projects.
To avoid permanent data loss, always perform data recovery first. As long as your Mac can physically recognize the drive, Donemax Data Recovery for Mac can scan and extract your files safely.
Donemax Data Recovery for Mac is fully optimized for macOS 27 Golden Gate and Apple Silicon chips (M1/M2/M3/M4/M5/M6 series). It offers an easy, read-only scanning process that leaves your damaged drive intact while salvaging your data.
Follow these simple steps to salvage your critical files before fixing the disk on macOS 27 Golden Gate:
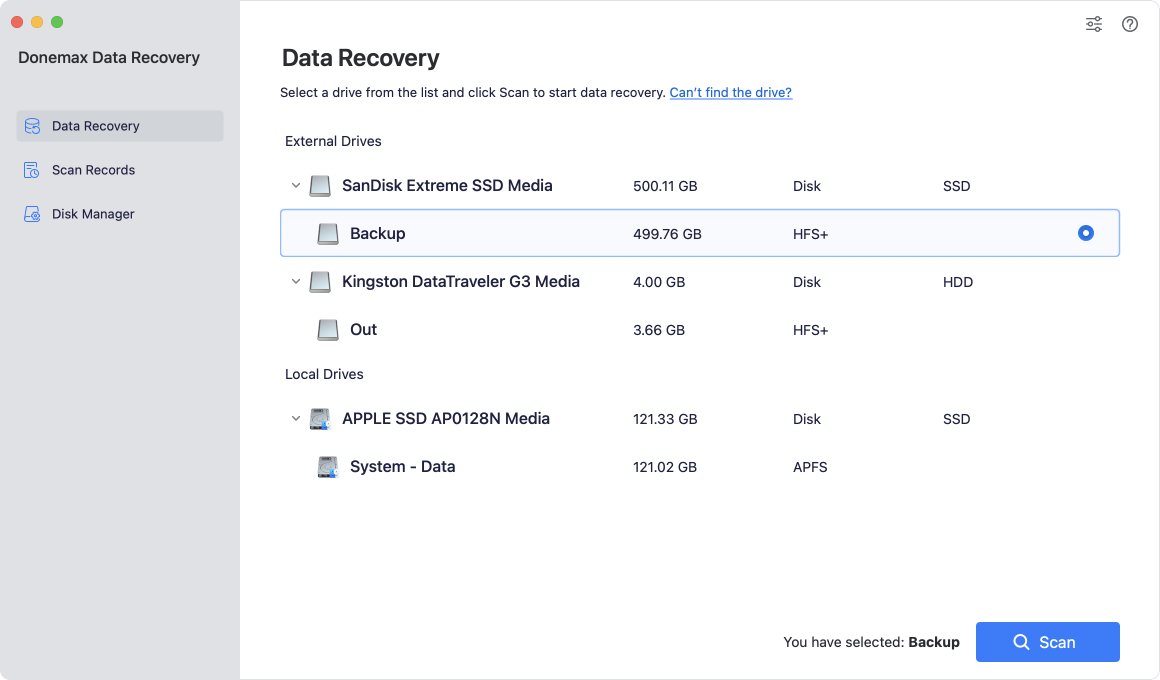
Step 1: Select the Damaged Drive and Start Scan
Launch Donemax Data Recovery. On the main menu, select the damaged or unreadable drive from the drive list. Click the Scan button to start deep sector scanning.
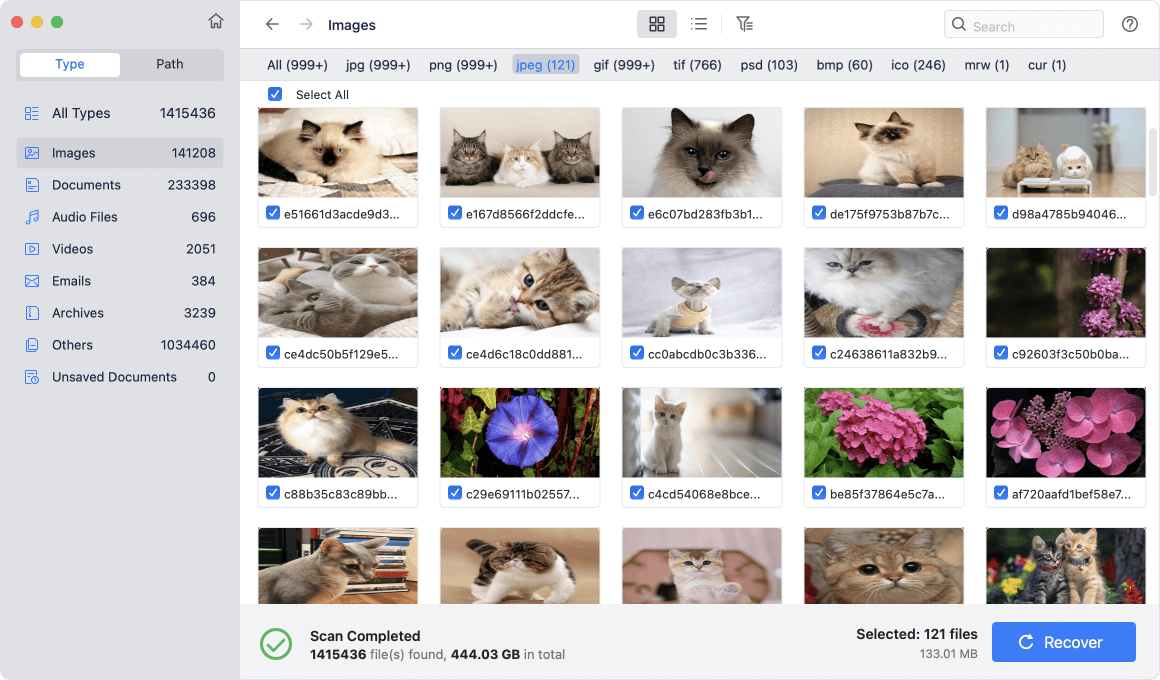
Step 2: Preview and Save Your Recovered Files
Once the scan is finished, browse through the categorized folders. You can double-click files to preview photos, videos, or documents. Select the files you need, click Recover, and save them to a different, healthy drive (like your Mac's internal storage).
Now that your important files are safely backed up, you can fix the damaged drive without worrying about data loss. Here are the top tested methods for macOS 27 Golden Gate:
Sometimes a drive appears corrupted due to bad hardware connections or low power supply. Try these simple troubleshooting checks:
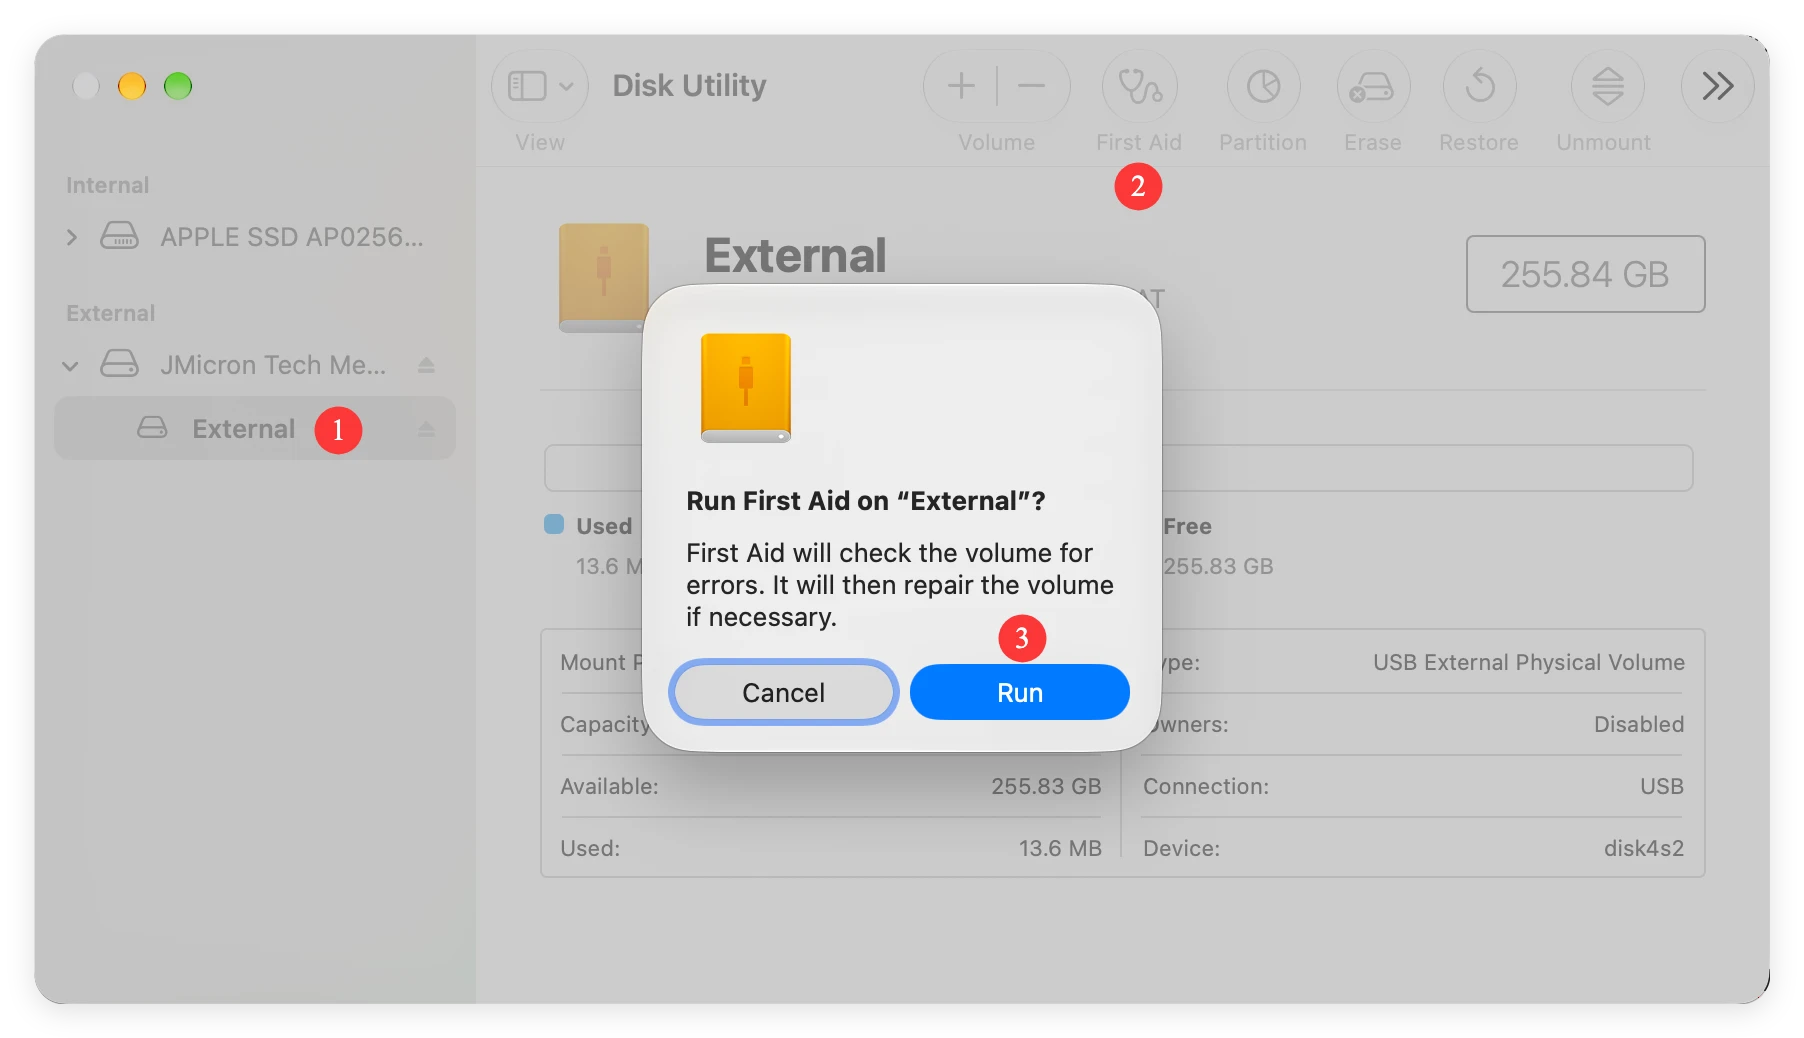
macOS 27 Golden Gate includes Disk Utility, a built-in storage management tool equipped with First Aid to detect and repair volume structure errors.
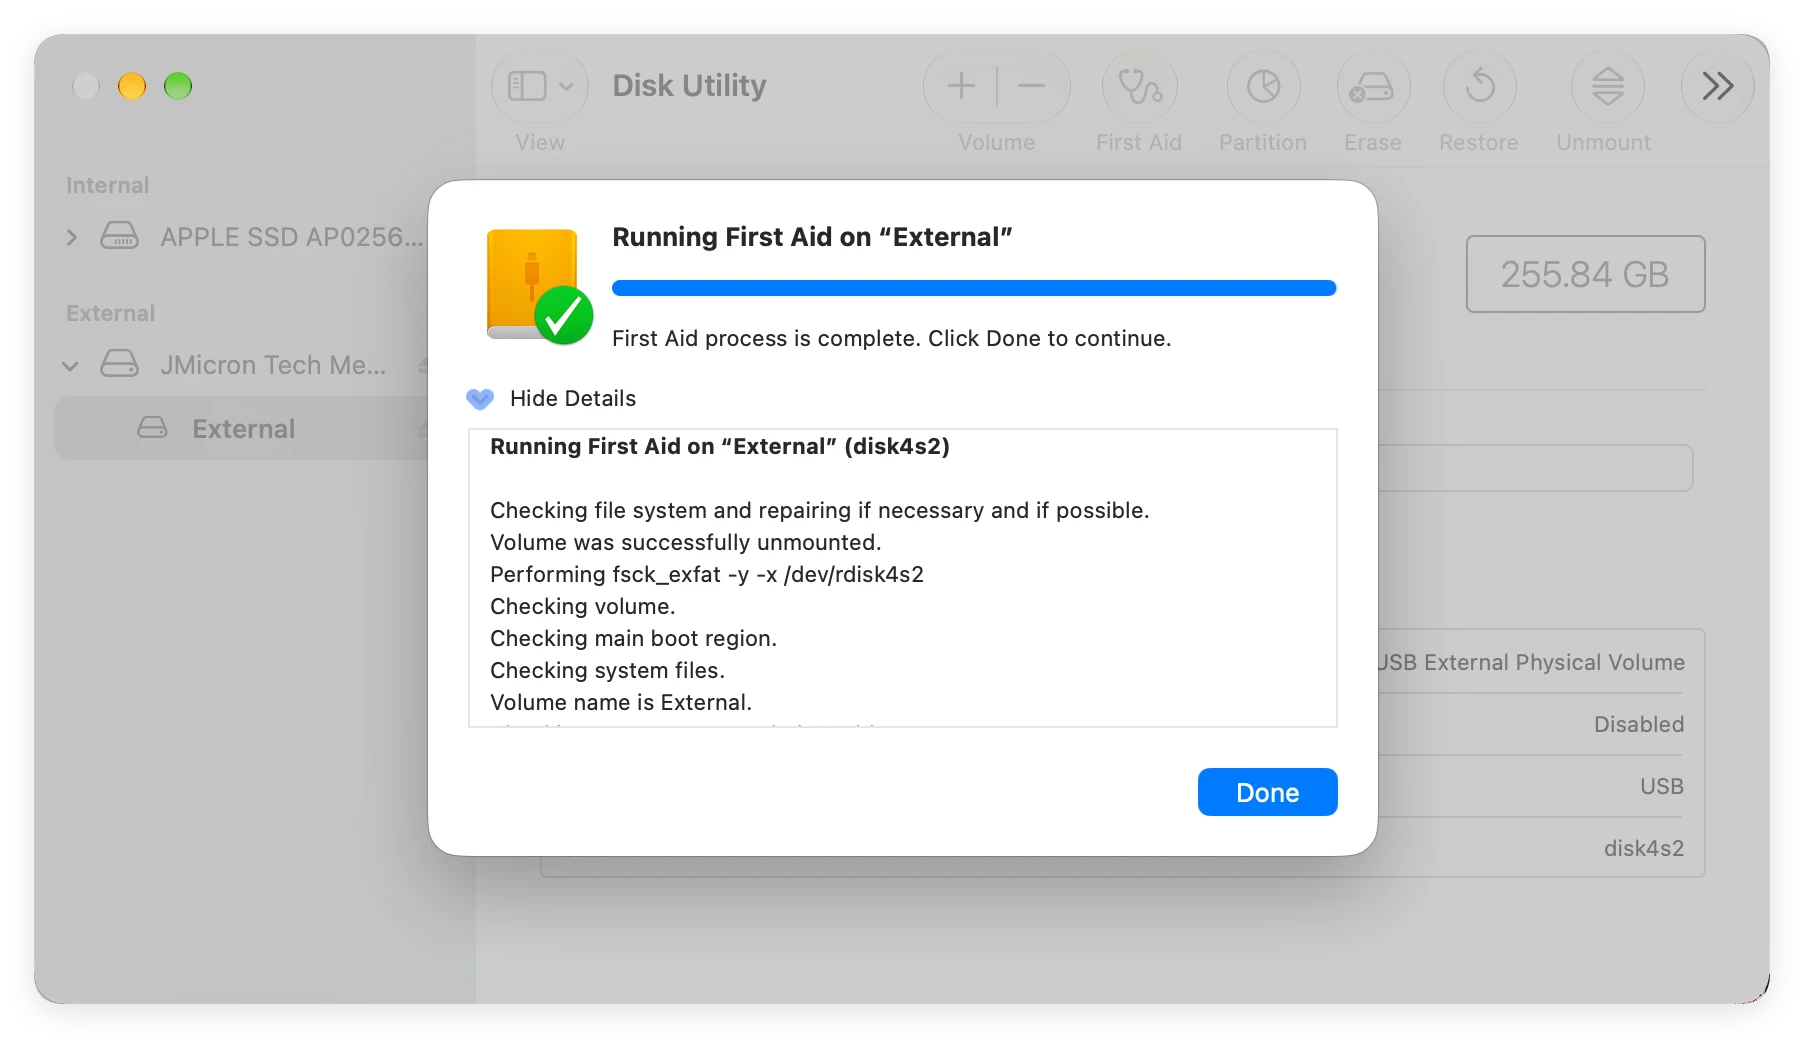
If Disk Utility First Aid fails or grays out, the File System Consistency Check (FSCK) tool in Terminal can force repair deeply corrupted file systems.
If the drive is physically healthy but fails to mount in Finder on macOS 27 Golden Gate, you can force mount it via Terminal commands.
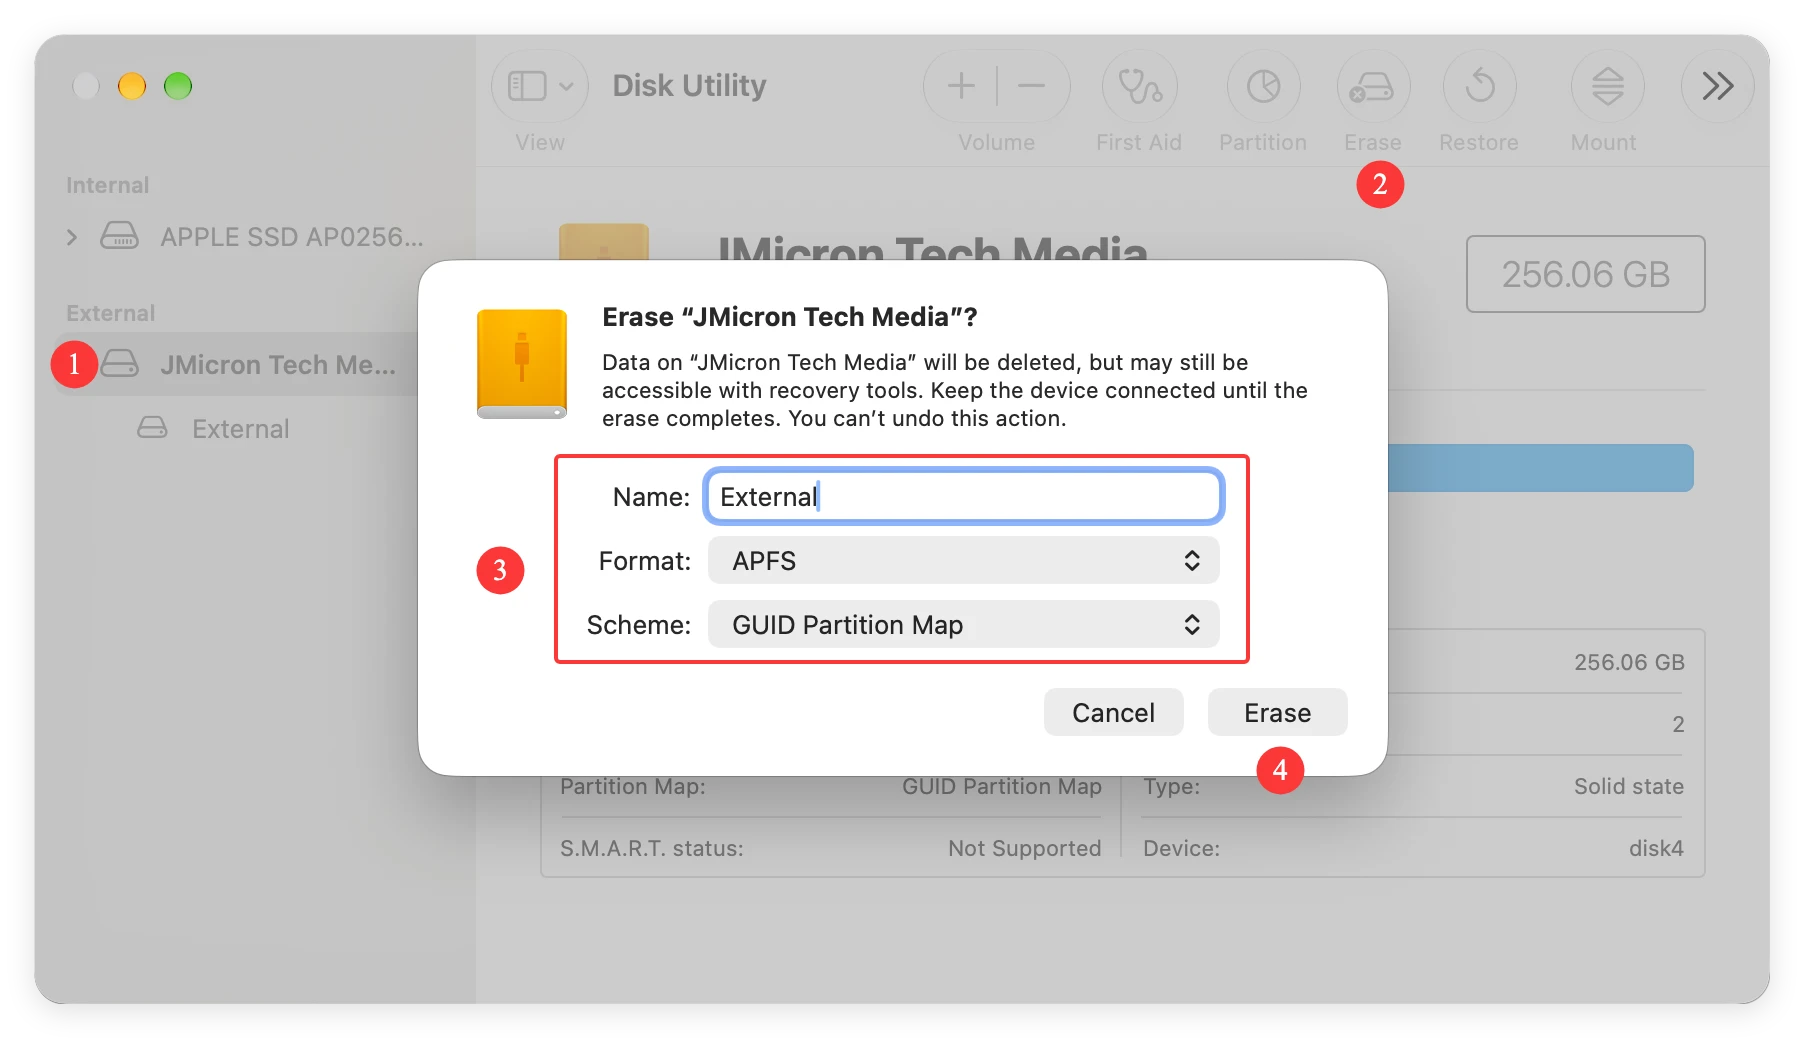
If all repair utilities fail, the drive's file system is severely damaged. Reformatting builds a fresh, healthy file system structure, making the drive fully usable again.
Here is a quick breakdown of how these repair solutions compare in terms of difficulty and effectiveness:
| Repair Method | Difficulty Level | Data Risk | Best Suited For |
|---|---|---|---|
| Cable & Port Check | Very Easy | No Risk | Connection & Power glitch |
| Disk Utility First Aid | Easy | Low Risk | Minor directory corruption |
| Terminal FSCK Command | Moderate | Medium Risk | First Aid failure/unmountable |
| Terminal Force Mount | Moderate | No Risk | System mounting delay |
| Erase & Reformat | Easy | High (Wipes Data) | Severe corruption / RAW |
To avoid future drive corruption on macOS 27 Golden Gate, keep these simple habits in mind:
A damaged or unreadable drive on macOS 27 Golden Gate can be intimidating, but it doesn't mean your valuable files are lost forever. By following the golden rule―recovering data first―you protect your photos, videos, and work documents from accidental erasure.
Download Donemax Data Recovery for Mac to rescue your files safely, then use macOS Disk Utility First Aid, Terminal FSCK, or reformatting to get your drive back to perfect working order.
Donemax Data Recovery for Mac
Donemax Data Recovery for Mac is one of the best Mac data recovery software. It is easy-to-use and can help in recovering deleted, formatted, inaccessible or lost data from Mac HDD/SSD, external disk, USB drive, SD card, camera or other storage devices.
Maria
Maria is one of the senior writers & editors of Donemax who lives and works in Sydney, Australia. She loves PC, Mac and Internet Technology. She has 6 years of writing articles about data recovery on PC/Mac, disk cloning solution, data eraser and computer OS optimization, etc. She is also interested in testing various software and digital products.
Gerhard Chou
In order to effectively solve the problems for our customers, every article and troubleshooting solution published on our website has been strictly tested and practiced. Our editors love researching and using computers and testing software, and are willing to help computer users with their problems