Written byStevenUpdated on Feb 06, 2024
How to Format Lexar Portable SSD for Mac?
Approved byGerhard Chou
PAGE CONTENT:
A Lexar Portable SSD, or Solid State Drive, is a small storage device known for being fast, reliable, and easy to carry around. These SSDs keep data using flash memory technology, which makes them faster to read and write than regular hard disk drives (HDDs).
Preparing a Lexar Portable SSD before using it with a Mac is essential to ensure it works well and is compatible. This guide will discuss the formatting process, the problems users might face, and the different ways to format the SSD so it works with Macs.
Format Lexar Portable SSD for Mac Using Disk Utility
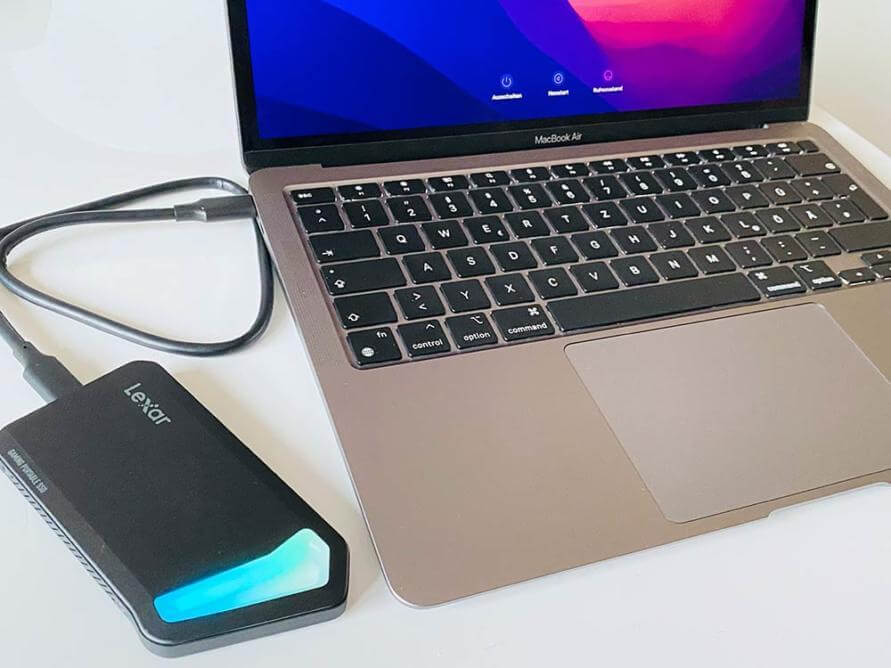
Start by using a USB-C or Thunderbolt cable that works with your Mac to connect your Lexar Portable SSD. Before you go any further, ensure the SSD is fully connected, and your Mac can see it.
Open the "Utilities" folder by going to the "Applications" folder. Finally, open "Disk Utility" from the list of tools. Disk Utility is a tool with every Mac that lets users control disks and other storage devices. Now, follow the steps below to format Lexar portable SSD.
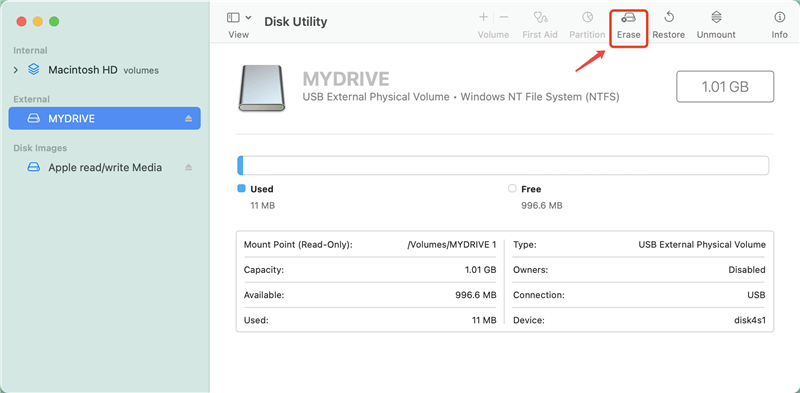
Step 1. Choose Lexar SSD.
It is the Disk Utility window. It shows a list of all the linked drives and storage devices. Find your Lexar Portable SSD in the toolbar and click on it to make it stand out. It will allow Disk Utility to work on the chosen SSD.
Step 2. Erase the Lexar SSD.
Click the "Erase" button in the menu at the top of the Disk Utility window while the Lexar Portable SSD is marked. There will be a new window open where you can change the style.
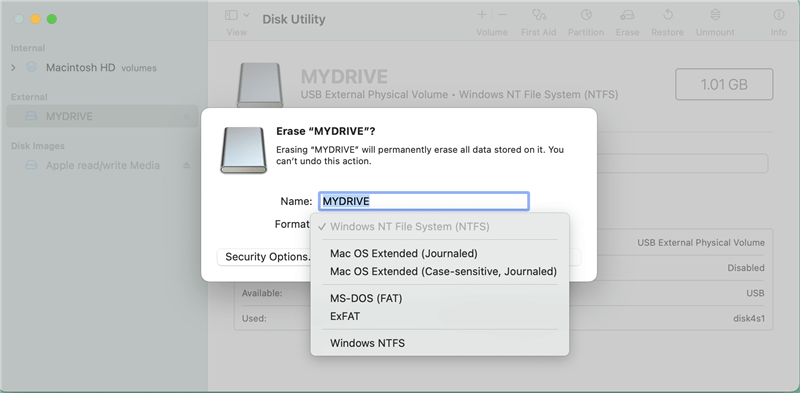
Step 3. Select a File System and Give It a Name.
Pick the file system type for the SSD in the Erase window. For example, you could choose Mac OS Extended (Journaled) or APFS for macOS. If you want to use it on both Windows and macOS, just choose ExFAT or MS-DOS (FAT). In the "Name" field, give the SSD a name to help you find it on your Mac.
Step 4. Start The Process Of Formatting.
Make sure that your formatting choices are still the way you want them. After that, click the "Erase" button to start the processing. Disk Utility will start formatting the Lexar Portable SSD based on your settings.
Step 5. Wait Until The Formatting Is Done.
Let Disk Utility finish formatting the process. How long it takes depends on your chosen file system and SSD size. In the Disk Utility box, you can see how things are going.
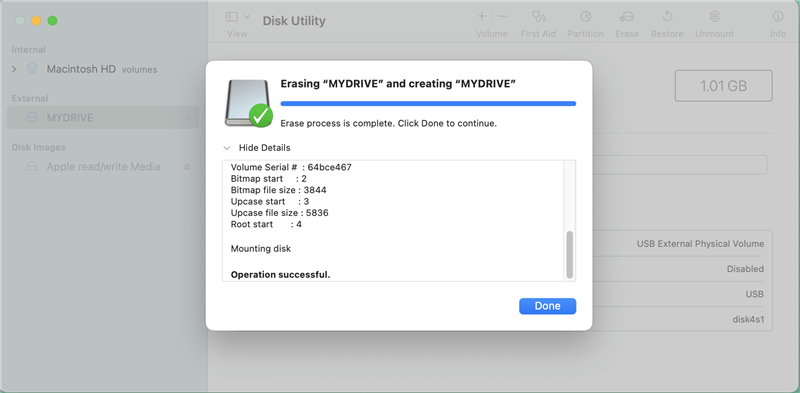
Once the formatting is done, Disk Utility will show a message letting you know. It's now safe to close Disk Utility and remove the Lexar Portable SSD from your Mac.
Other Methods to Format SSD For Mac
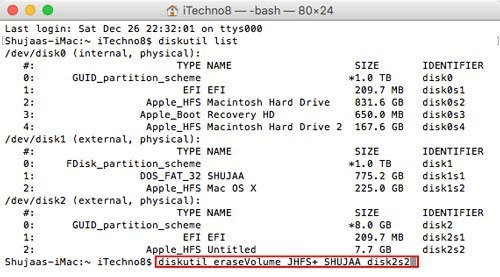
1. Terminal Command Line Formatting
For more advanced users, formatting their Lexar Portable SSD may be more accessible when they use Terminal instructions. This way gives you more freedom and options for making it your own.
To format an SSD through Terminal, users must first open Terminal, use the diskutil list command to find the SSD, the diskutil unmountDisk command to unmount the SSD, and then the diskutil eraseDisk command with the file system format and name they want. You need to know how to use command-line tools to use Terminal, which gives you fine-grained control over the formatting process.
2. Using Third-Party Software
Instead, users can use third-party disk formatting software made just for Macs. These programs have easy-to-use menus and extra features for formatting storage devices. To format the Lexar Portable SSD, download and install any third-party software, connect it, select it within the program, pick the file system format and choices you want, and start the formatting process. For users who would instead do things more naturally, third-party software can make the editing process more accessible.
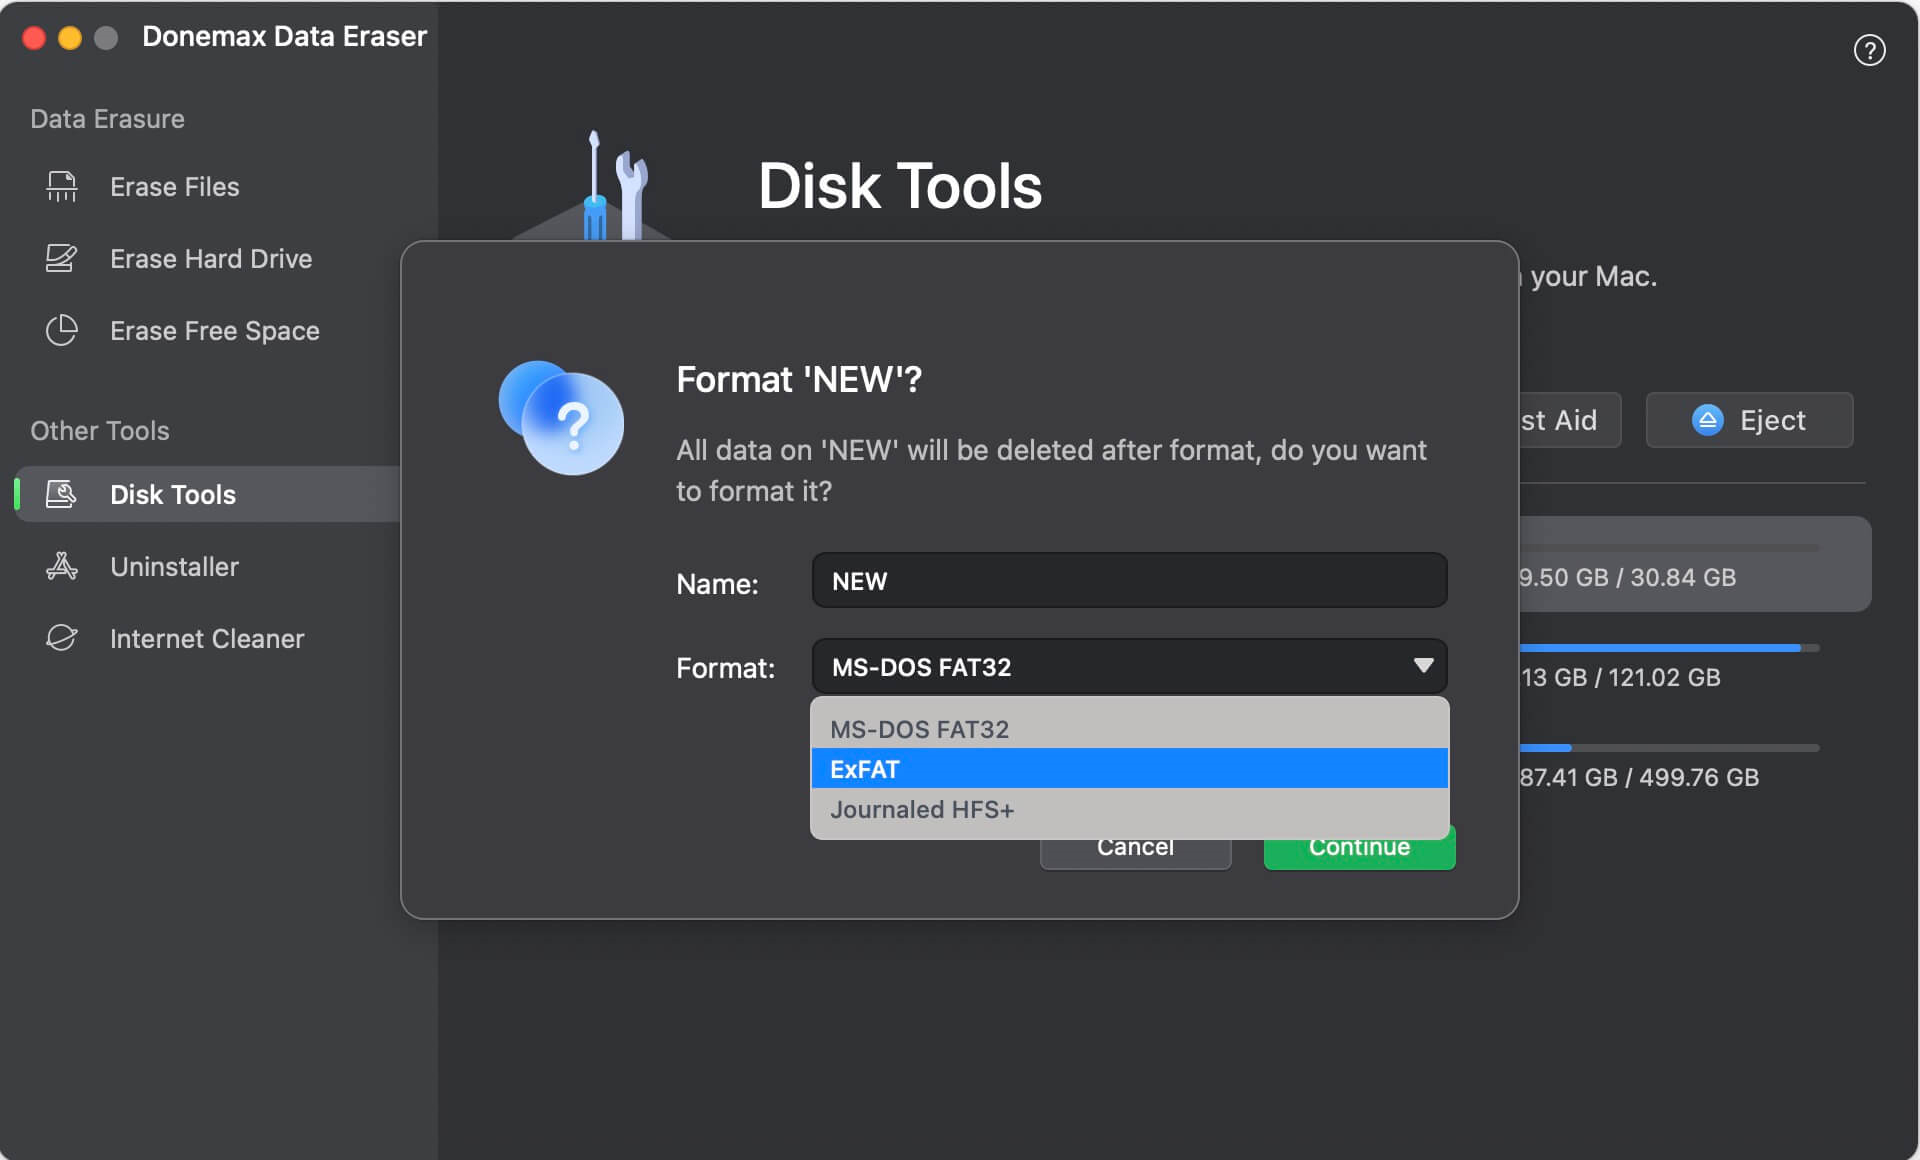
For example, Donemax Data Eraser for Mac, can help you securely format Lexar portable SSD for Mac:
Step 1. Download and install Donemax Data Eraser for Mac, then open it on your Mac.
Step 2. Connect the Lexar portable SSD to your Mac, then open Donemax Data Eraser, choose tool - Disk Tools. Then select the Lexar SSD, click on Format button. Select a file system, enter a new name, click on Format button again.
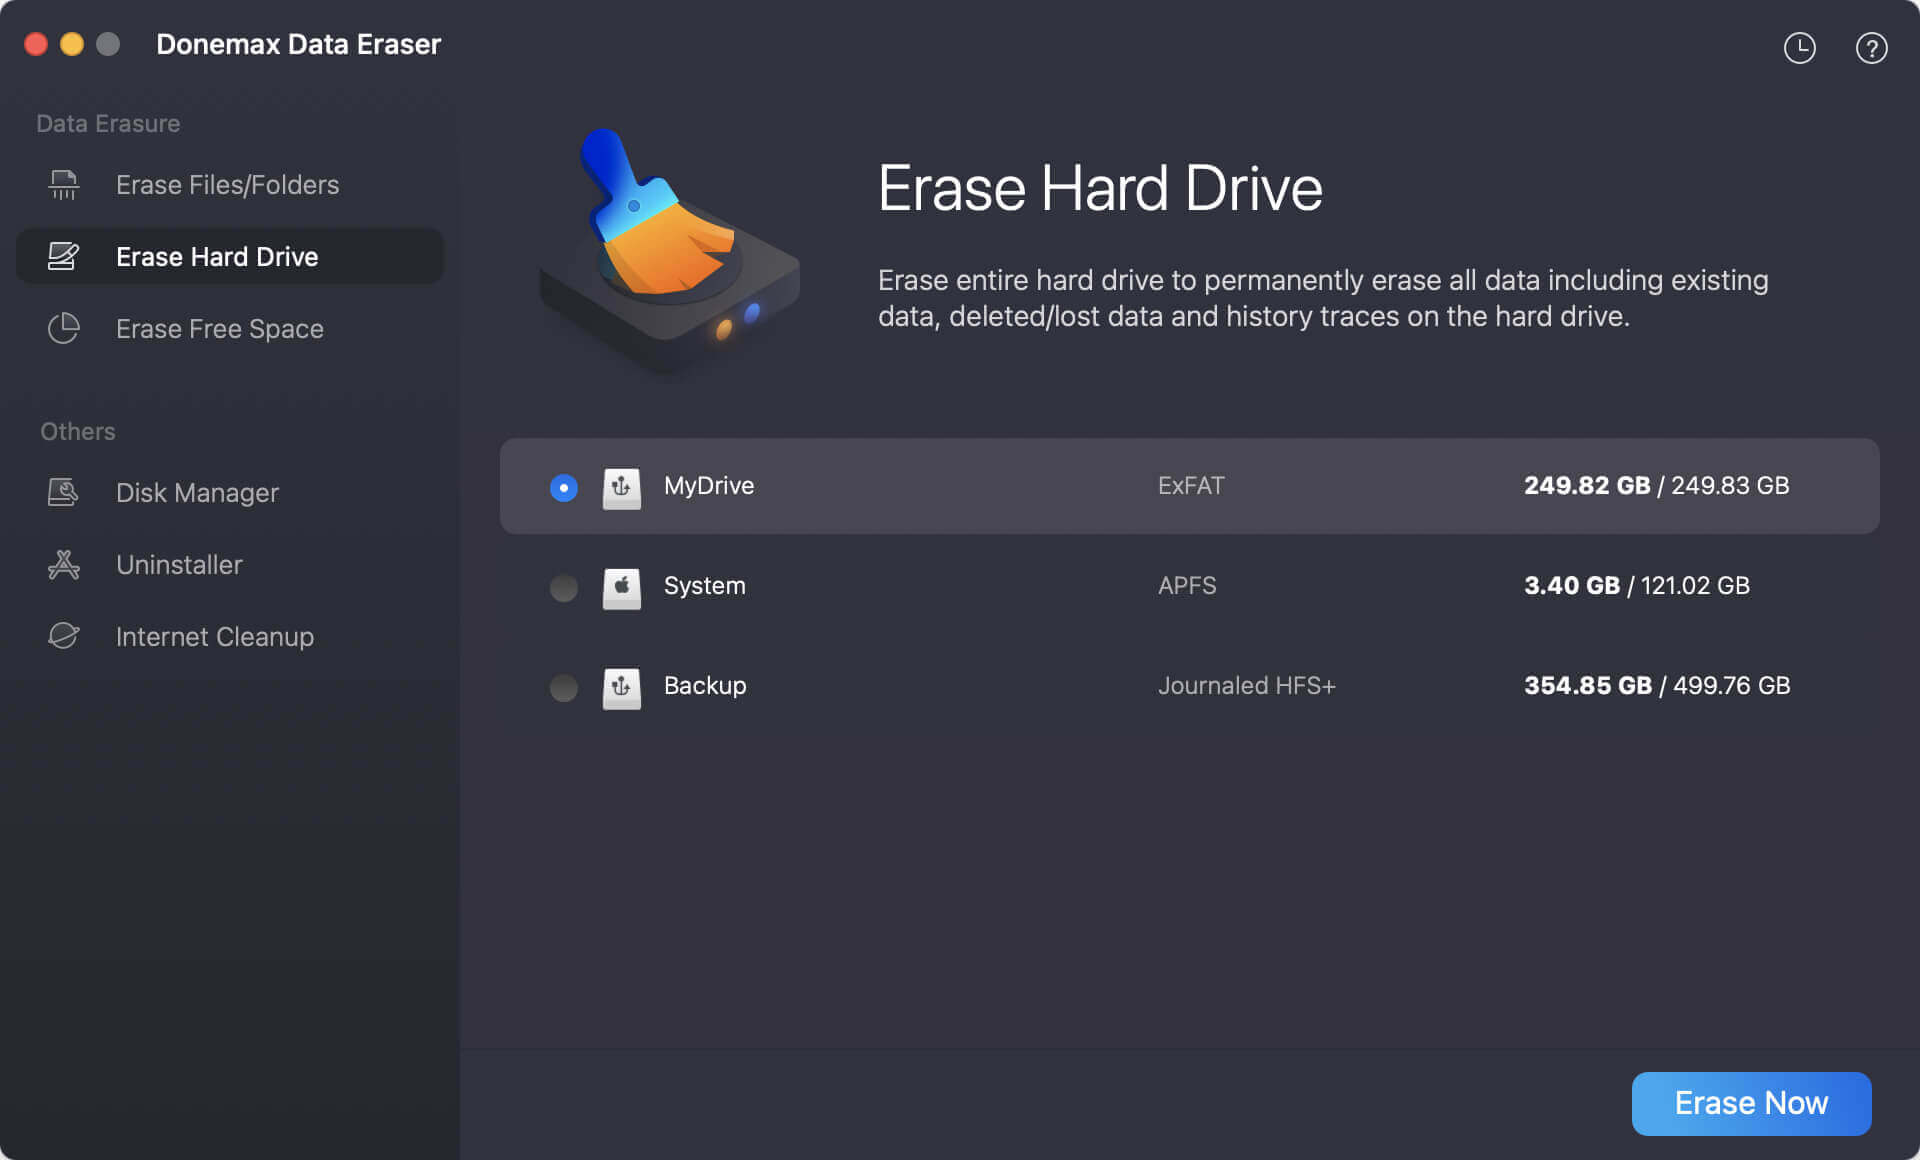
If you will sell or donate your Lexar portable SSD to other people, just choose Erase Hard Drive mode to help you format and wipe the Lexar portable SSD. All data stored on the Lexar portable SSD will be permanently erased.
Formatting Lexar portable SSD can help you fix disk read-only on Mac, quickly remove all data from the SSD or fix logical errors. You can follow this guide to format a Lexar portable SSD for Mac. If you will sell or donate your Mac, just try data erasure tool, it can help you wipe all sensitive data from the SSD, beyond the scope of data recovery.
FAQs About Formatting Lexar Portable SSD on Mac
1. How to format a Lexar portable SSD for both Windows and macOS?
- Open Disk Utility on Mac.
- Select the Lexar portable SSD, click Erase.
- Select ExFAT as the file system.
- Click Erase again.
- When it gets finished, click Done.
2. Can I use a NTFS Lexar portable SSD on Mac without formatting?
Yes, you can download and install a NTFS for Mac tool on your Mac. It can help you quickly enable read-write for NTFS drive on your Mac. Then you can read-write the NTFS Lexar portable SSD on Mac without any limitation.

3. Can I recover lost data from a formatted Lexar portable SSD on Mac?
Yes, the formatted data is not lost forever. Just follow the steps below:
- Download and install Donemax Data Recovery for Mac.
- Open this data recovery app, then select the formatted Lexar portable SSD.
- Click on Scan button to deeply scan the Lexar portable SSD.
- Preview and recover lost files.
4. I will sell my Lexar portable SSD, how to wipe it?
To permanently erase data from the Lexar portable SSD before you sell or donate it, you can use data erasure software - Donemax Data Eraser for Mac to wipe the Lexar portable SSD. All data stored on the Lexar portable SSD will be erased permanently, can’t be recovered by any data recovery software.
Conclusion:
For best speed and compatibility, you must format your Lexar Portable SSD to be used with a Mac. There is a way that works for everyone, whether you like Disk Utility, Terminal commands, third-party tools. Following the steps in this guide ensures that your Lexar SSD works well with your Mac and safely stores your files and data. Pick the best way for you and your technical knowledge to speed up the formatting process.
Related Articles
- Jun 25, 2026How to Format a MBR Disk to GPT or GPM on Mac?
- Oct 09, 2024How to Format and Unformat an ExFAT Drive on Mac?
- Apr 25, 2025Fix ADATA External Hard Drive Not Working (such as not mounting, not detected, being read-only) on Mac
- Jan 29, 2024How to Fix Toshiba External Hard Drive Not Showing Up on Mac?
- Dec 05, 2024How to Add an APFS Volume on Mac: A Comprehensive Guide
- Dec 12, 20244 Methods to Fix Seagate External Hard Drive Read-Only on Mac

Contributing Writer
Steven
Steven has been a senior writer & editor of Donemax software since 2020. He's a super nerd and can't imagine the life without a computer. Over 6 years of experience of writing technical solutions and software tesing, he is passionate about providing solutions and tips for Windows and Mac users.

Editor in chief
Gerhard Chou
In order to effectively solve the problems for our customers, every article and troubleshooting solution published on our website has been strictly tested and practiced. Our editors love researching and using computers and testing software, and are willing to help computer users with their problems