
Written byCoco LinUpdated on Feb 25, 2024
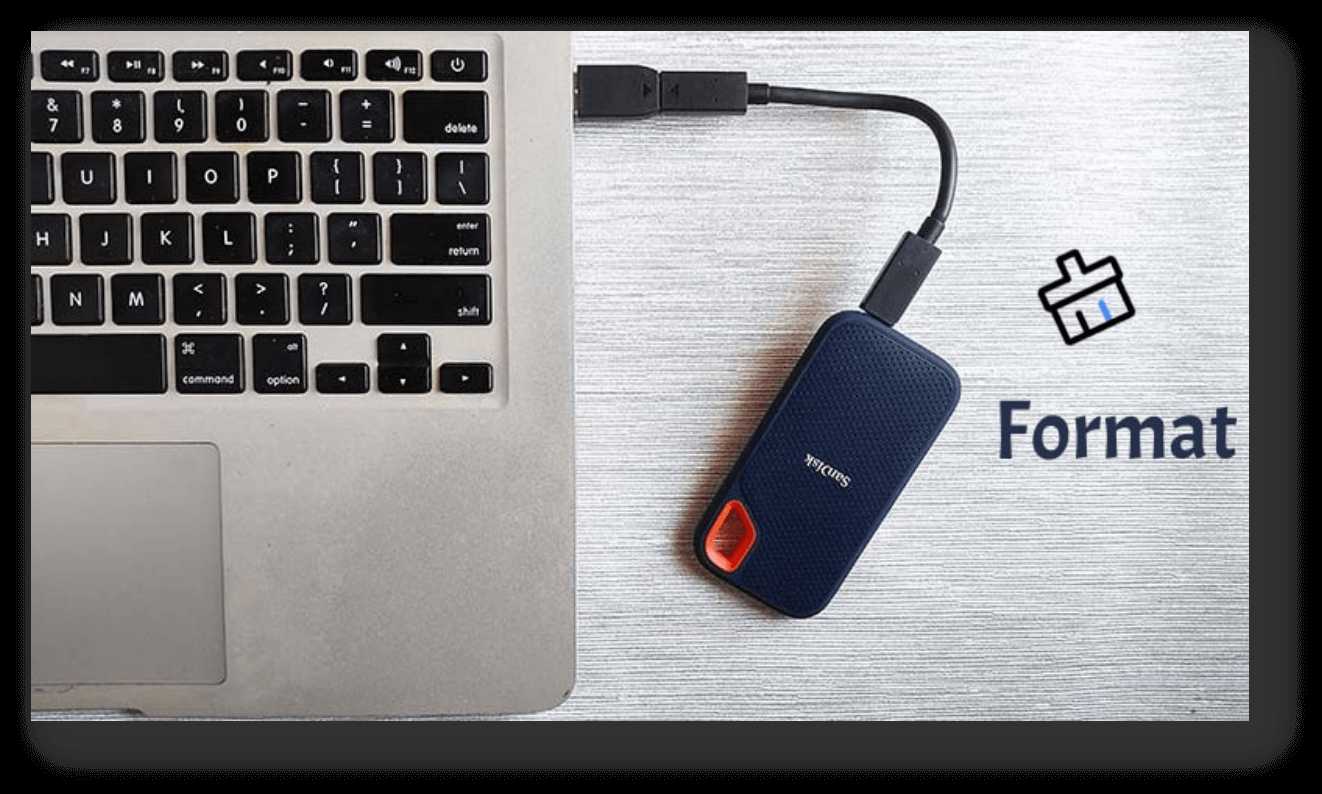
How to Format SanDisk Extreme Portable SSD for Mac?
Approved byGerhard Chou
PAGE CONTENT:
Are you ready to fully use your SanDisk Extreme Portable SSD with your Mac? Formatting your SSD is the key to making the switch from a PC to a Mac go smoothly, whether you're having problems with connectivity. Formatting your SanDisk SSD for Mac is the only way to fix connectivity problems and ensure it works perfectly. Let's look at how to format your SanDisk Extreme Portable SSD on a Mac.

Format SanDisk Extreme Portable SSD for Mac Using Disk Utility
Please make a backup of the data on the SanDisk Extreme Portable SSD. Formatting will erase all contents stored on the SanDisk Extreme Portable SSD.
Step 1: Connect SSD With Mac.
To connect your SanDisk Extreme Portable SSD to a USB-C or Thunderbolt port on your Mac, use the USB-C cable that came with it.
Step 2: Open Disk Utility.
Disk Utility is a tool with macOS that lets you handle disks and disk volumes. You can get to it by going to "Applications" > "Utilities" > "Disk Utility" or by typing "Disk Utility" into Spotlight (Command + Space).

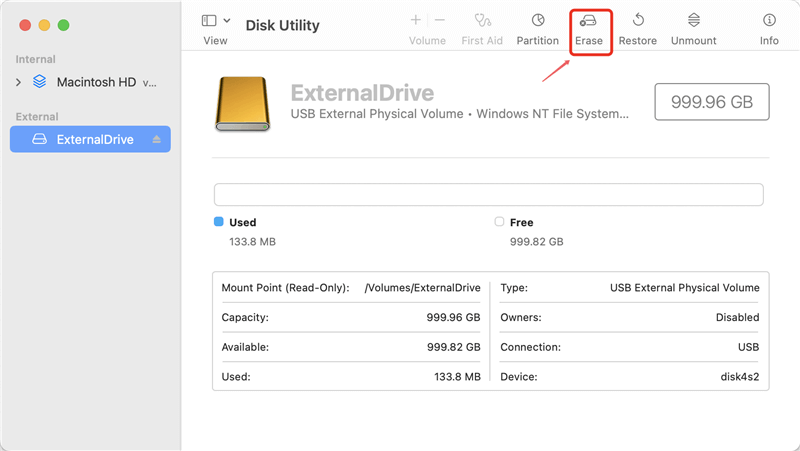
Step 3: Choose the SanDisk SSD You Want.
From Disk Utility, you can see a list of all the attached drives on the left. In the list, find and click on your SanDisk Extreme Portable SSD.
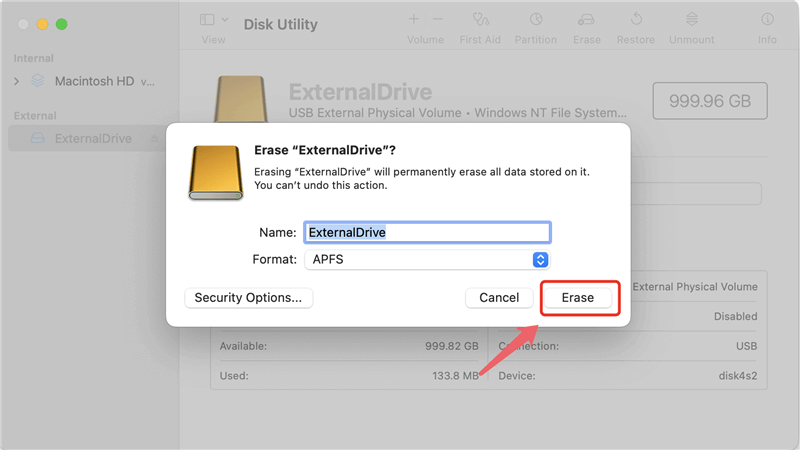
Step 4: Select Erase.
Select the "Erase" button at the top of the Disk Utility window once your SanDisk SSD is chosen.
Step 5: Pick A File System Format.
You will be asked to choose the format for your SSD in a new window. Choose Mac OS Extended or APFS from the Format dropdown menu to make it work with macOS. If you want to use the SanDisk Extreme Portable SSD on both Windows and macOS, choose ExFAT.
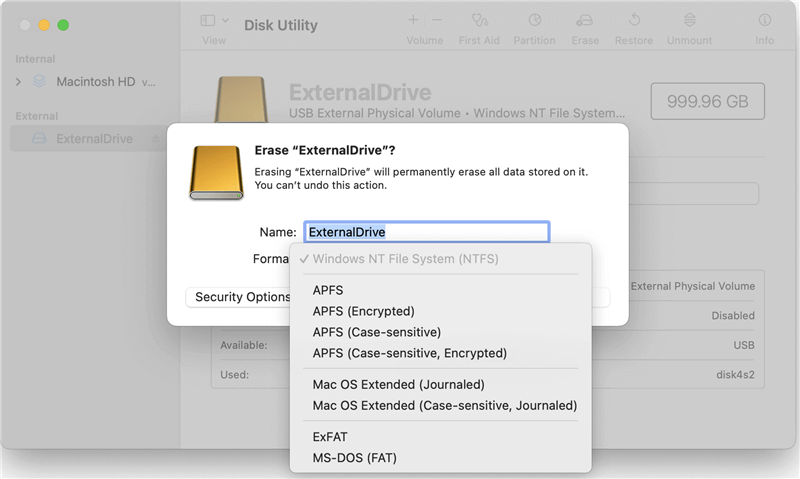
In the "Name" box, name your SanDisk Extreme Portable SSD. The name will show up on your Mac for the drive.
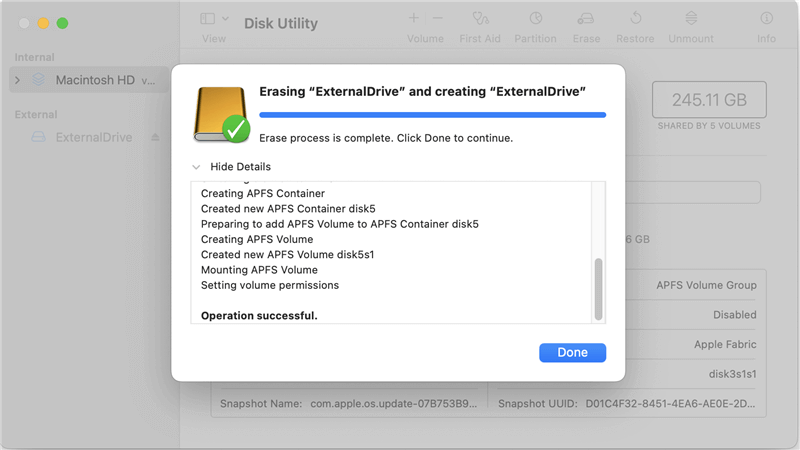
Step 6: Erase the SSD.
Click on Erase button. Depending on your SSD size, the formatting could take a few minutes. Disk Utility will let you know when it's done, and then your SanDisk Extreme Portable SSD can be used with your Mac.
Once you've formatted your SanDisk Extreme Portable SSD, you can divide it into several parts to organize the room and use it better. Partitioning lets you divide the SSD into multiple volumes, each with its file system and room. To divide your SanDisk SSD into parts, do the following:
Step 1: Open Disk Utility.
If Disk Utility isn't already open on your Mac, go to the Utilities folder inside the Applications folder and open it.
Step 2: Choose The SanDisk SSD.
Find the SanDisk SSD on the left of Disk Utility and click on it.
Step 3: Select The Partition Tab.
Select the "Partition" tab at the top of the Disk Utility window.
Step 4: Adding A New Partition.
Press and hold the "+" button to add a new disc. You can change the size of the new section by moving the slider or typing in a number. Choose the type you want and give the partition a good name.
Step 5: Change The Structure Of The Partitions.
If you want to make more than one split, return to the last step and add more partitions. You can change the size of the sections to fit your needs by turning the handle in the middle.
Step 6: Make Changes.
Make sure you're happy with the shape and settings of each partition before you continue with the partitioning process. If you're happy with the changes, click the "Apply" button to make them official.
Step 7: Wait For The Dividing Process.
Disk Utility will make the SanDisk Extreme Portable SSD partitions based on your chosen settings. How long it takes may depend on how many and significant the sections are.
Step 8: Check The Newly Made Partitions.
When the partitioning process is complete, the newly made sections will be shown in the sidebar of Disk Utility. It will be possible to handle each partition independently because it will have its volume.
How to Recover Lost Data after Formatting SanDisk Extreme Portable SSD on Mac?
If you have lost data from the SanDisk Extreme Portable SSD and don’t have a backup, you can use data recovery app to scan the erased SanDisk Extreme Portable SSD and get lost data back.
Step 1. Download and install Donemax Data Recovery for Mac. This Mac recovery app is able to recover lost data from any HDD, SSD and storage device.
Step 2. Connect SanDisk Extreme Portable SSD to your Mac, and then open Donemax Data Recovery for Mac, select the SanDisk Extreme Portable SSD to start data recovery.

Step 3. Once the SanDisk Extreme Portable SSD is selected, just click on Scan to deeply scan the SanDisk Extreme Portable SSD and find all deleted, formatted data.

Step 4. Once the scan is completed, select the wanted files and save them by clicking on Recover button.

FAQs About Using SanDisk Extreme Portable SSD on Mac
1. How to format SanDisk Extreme Portable SSD for Mac?
- Just open Disk Utility.
- Select the SanDisk Extreme Portable SSD.
- Click Erase and select a file system.
- Click Erase again.
- Click Done.
If you only need to use SanDisk Extreme Portable SSD on your Mac, select APFS as the file system. If you want to use SanDisk Extreme Portable SSD on both Windows and macOS, select ExFAT as the file system.
2. How to use a NTFS SanDisk Extreme Portable SSD on Mac without formatting?
NTFS is a Windows-based file system and it is not compatible with macOS, to fix SanDisk Extreme Portable SSD read-only on Mac without formatting, you can install a NTFS for Mac tool.
Step 1. Download and install Donemax NTFS for Mac tool on your Mac, then open it.
Step 2. Select the SanDisk Extreme Portable SSD, click Enable Writable. Then you can read-write any NTFS drive on Mac without any limitation.

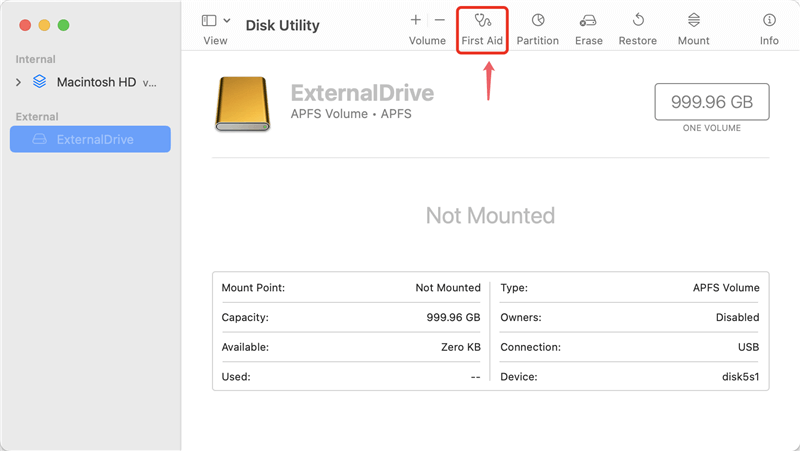
3. How to fix SanDisk Extreme Portable SSD not mounting on Mac?
Just open Disk Utility, select the SanDisk Extreme Portable SSD, click on Mount button.
If Mount button is not available, click on First Aid button to repair the SanDisk Extreme Portable SSD.
4. How to fix SanDisk Extreme Portable SSD not showing up on Mac?
Just click Finder on Apple menu, then choose Settings, open Finder Settings.
Click General and Sidebar, select External disks.
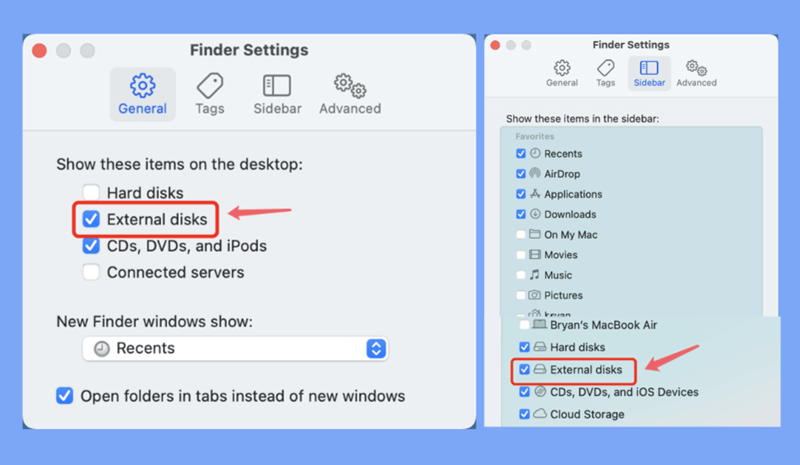
If the SanDisk Extreme Portable SSD is not mounting on Mac, open Disk Utility, select the SSD and click on Mount button.
Conclusion:
Formatting your SanDisk Extreme Portable SSD for Mac ensures it works well with your Apple computer and is compatible. Following the steps in this guide, you can quickly and easily get your SSD ready to work with macOS. It will allow for smooth data sharing and safe storage for your projects and files. To keep your digital process safe and efficient, remember to back up your data regularly and keep your storage devices formatted.
Related Articles
- Jul 08, 2024APFS Drive Not Mounting on Mac, Fix It Now
- Sep 12, 2025Does Format Remove BitLocker?
- Jul 17, 2023What to Do If An USB Flash Drive Not Working on Mac?
- Nov 11, 2024How to Repair Startup Disk on Apple Silicon Mac (such as M1/M2/M3/M4 Mac)?
- Sep 15, 2023How to Wipe An NTFS Hard Drive on Windows or Mac?
- Aug 03, 2023How to Fix A Corrupted Hard Drive on Mac?

Contributing Writer
Coco Lin
Coco has been a writer and a chief programmer at Donemax software since 2018. Over 10 years of experience of writing troubleshooting articles in the software industry, she is passionate about programming and loves to providing solutions to Windows and Mac users. Also she enjoys music and palying tennis in her free time.

Editor in chief
Gerhard Chou
In order to effectively solve the problems for our customers, every article and troubleshooting solution published on our website has been strictly tested and practiced. Our editors love researching and using computers and testing software, and are willing to help computer users with their problems