
Written byStevenUpdated on Jun 18, 2025
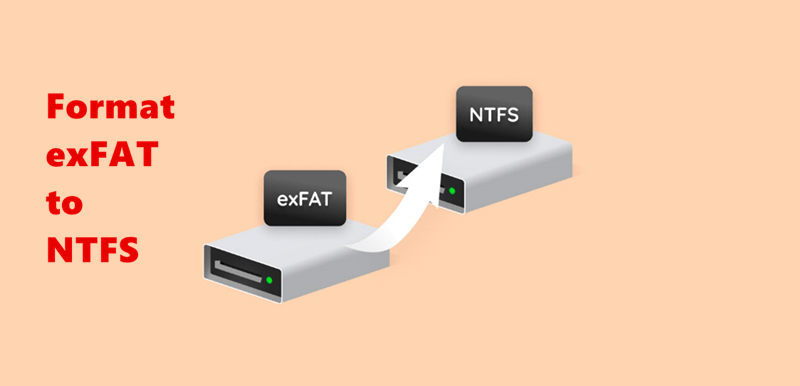
3 Methods to Format ExFAT to NTFS?
Approved byGerhard Chou
Before we start: Different methods and tools are available to format a drive from ExFAT to NTFS. If you formatted a drive by mistake and lost data, use the recovery tool Donemax Data Recovery to get back the missing files.
PAGE CONTENT:
It's important to manage our storage devices well so that we can easily move and view data between platforms. Picking the right file system is an important part of this. Many people use both ExFAT and NTFS as file systems, and each has its benefits.
ExFAT works with many devices and operating systems, but NTFS has more advanced features, like securing and comping files. If you want to convert ExFAT drive to NTFS, you've come to the right place. This detailed guide will examine easy-to-use ways to make the change go smoothly. Let's get started and make the most of your storage devices!
Solution 1: Format ExFAT to NTFS Using Command Prompt
The Command Prompt (CMD) makes changing a storage drive from ExFAT to NTFS, FAT, or FAT32 easy. It's easy to do; follow these steps:
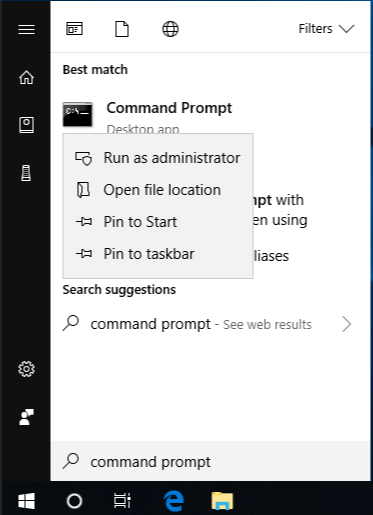
Step 1. When you right-click the Start menu, choose Command Prompt to open the Command Prompt window as an administrator.
Step 2. Write down the name of the drive that came with the ExFAT drive that you want to convert. You can use the diskpart tool in the Prompt tool or look in File Explorer to find this information.
Step 3. Type the following code into the code Prompt window and press Enter:
format [drive letter]: /FS:NTFS
Change [drive letter] to the letter that your ExFAT storage device is given. For instance, if the name of your device is E:, the order would be:
format E: /FS:NTFS
Step 4. You'll get a message telling you that all the data on the drive will be erased after you run the command. To confirm, type Y and press Enter. It will start the change.
Step 5. The format process will start, and you'll see a progress bar that shows how the change is going. Depending on your storage device's size, this process could take a while. Wait your turn, and don't get in the way of the process.
Step 6. When the formatting is done, you'll see a message telling you it went well. To see the drive's file system, right-click on it in File Explorer, choose Properties, and then go to the General tab.
Solution 2: Format ExFAT to NTFS with Disk Management
You can also convert ExFAT drive to NTFS, FAT, or FAT32 using Windows Disk Management. Let me show you how to do this step by step:
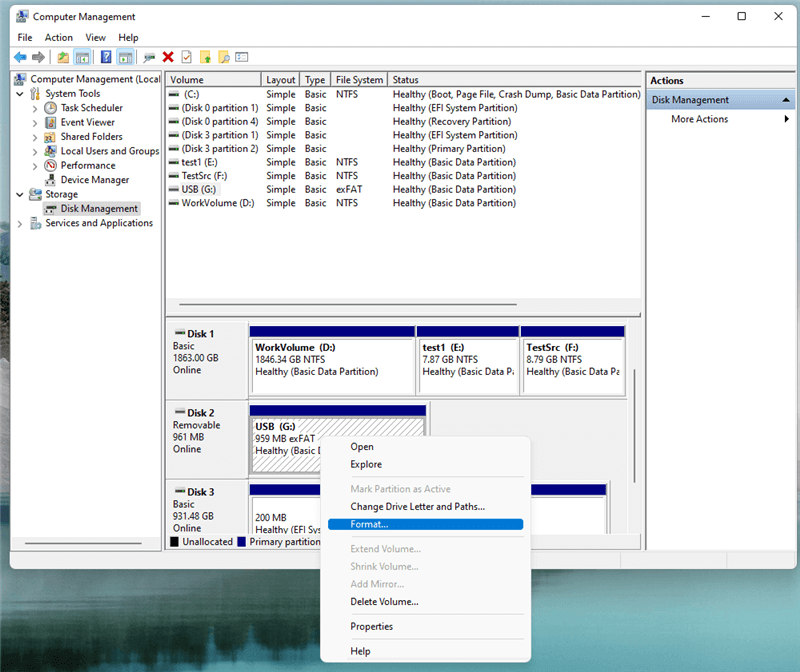
- Press the Win + X keys to get to the Power User menu. Then, pick Disk Management from the list. You can also use the search bar in the Start menu to look for "Disk Management" and then click on the result.
- The Disk Management box shows a list of all the storage devices that are linked. From the list, find your ExFAT drive. To avoid formatting the wrong file, know which one it is.
- You should always make a copy of all the data on the device before editing or converting it. Since formatting will remove all the data on the drive, it is important to make a copy before you format it.
- Disk Management will show you where your ExFAT drive is. Right-click on its partition and choose Format from the menu that appears.
![Using Windows Disk Management]()
- When you open the Format window, Choose "NTFS" from the drop-down menu.
- You can give the drive a volume label to make it easier to find. Label the volume with a meaningful name in the Volume label field.
- Once you've chosen the file system you want and given the volume a name, hit OK to start the formatting process. A message will tell you that all the data on the drive will be deleted. To be sure, click OK.
- You'll see a progress bar that shows you how far along the editing process is. The time it takes to do this may depend on your storage device's size. Wait your turn, and don't get in the way of the process.
- Right-click on it in File Explorer, choose Properties, and then go to the General tab to check the file system. Now, the file system should be the same as the one you chose when you formatted it.
Solution 3: Format ExFAT to NTFS in File Explorer
It is easy and clear to change the format of a storage device from ExFAT to NTFS using File Explorer. Here is how to do this:
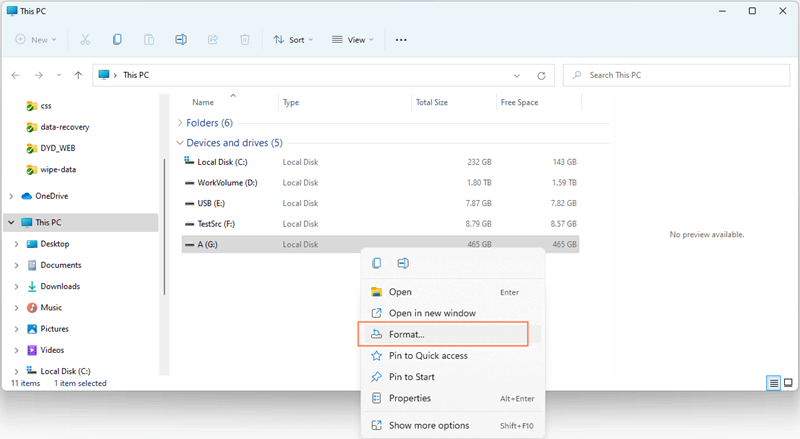
- Go to your desktop or press Win + E keys to access File Explorer.
- You can find a list of linked drives in File Explorer under This PC (or Computer). Find your ExFAT drive in the list of available drives. Ensure you pick the right drive, not format the wrong one.
- It is important to back up all the info on the device before you do any formatting. Formatting the drive will eliminate all the data, so you must back up to avoid losing data.
- Find your ExFAT drive in File Explorer. Then, right-click on its icon and choose Format from the menu that appears.
![Format exFAT to NTFS through File Explorer]()
- You can pick the file system for the drive in the Format text box. Choose "NTFS" from the drop-down box to change the drive to NTFS. You can also pick "FAT32" or "FAT" if needed, but NTFS is better because it has more features and works with more current systems.
- You can label the drive's volume to make it easier to find. In the Volume label field, label the volume with a name.
- Once you've chosen the file system you want and given the volume a name, hit Start to begin formatting. A message will tell you that all the data on the drive will be deleted.
- You'll see a progress bar that shows you how far along the editing process is. Wait your turn, and don't get in the way of the process.
- To check the file system, right-click on it in File Explorer, choose Properties, and then go to the General tab.
🎈 Note: If you want to format an ExFAT drive to NTFS, just try NTFS for Mac tool, it can help you force format an ExFAT drive to NTFS on Mac.
Recover Lost Data after Formatting ExFAT Drive to NTFS
If you have lost data due to formatting ExFAT drive to NTFS, just use a data recovery program to help you get the lost data back.
Donemax Data Recovery is one of the best data recovery programs. It is fully capable of recovering formatted data from any drive including ExFAT drive, NTFS drive, FAT32 drive, APFS drive, etc.
Donemax Data Recovery
- Recover lost data from accidentally formatted drive.
- Recover deleted or other lost files from HDD, SSD, USB drive, SD card, etc.
- Quickly scan and recover lost data within a few clicks.
Step 1. Download and install Donemax Data Recovery on your computer, then open it. Choose the formatted drive to start data recovery.

Step 2. Click on Scan button to deeply scan the formatted drive and find all recoverable files including deleted files and formatted data.

Step 3. Once the scan is completed, you can preview all recoverable files. Then select the wanted files and save them to another drive.

How to format drive and wipe data permanently?
After formatting a hard drive, the data is still recoverable. But in some cases, users might want to permanently wipe the data before selling or giving away the drive. Donemax Data Eraser is a reliable data wiping tool that can destroy data from a hard drive completely.

How to wipe hard drive to avoid data recovery?
Wipe the data from a hard drive with Donemax Data Eraser to prevent data recovery possibility.
Conclusion:
In conclusion, changing the format of a storage device from ExFAT to NTFS makes it more compatible and gives it more advanced features. Command Prompt, Windows Disk Management, or File Explorer make the change easy.
Before you format, remember to make a copy of your information in case you lose it. Switching your storage device to the NTFS file system is easy, and you can enjoy its benefits if you follow these step-by-step instructions. Pick the best way for you, and enjoy how much better your storage device works with NTFS.
Donemax Data Recovery
Powerful, safe & easy-to-use data recovery software to easily and completely recover deleted, formatted, inaccessible and lost data from PC, Mac, HDD, SSD, USB drive, camera, SD card, RAID and other storage devices.
Related Articles
- May 23, 2025Step-by-step Guide: Fix a Corrupted USB Flash Drive Using CMD
- Jan 02, 2025Disk is OFF or Offline on Mac, Fix It Now
- Sep 08, 2025iMac's Fusion Drive Not Mounting, How to Fix It?
- Jul 03, 2025How to Reformat Time Machine Drive?
- Jan 20, 2026How to Format A Hard Drive for Xbox One?
- Dec 19, 2024Why Is My SD Card Showing as RAW Drive? How to Fix RAW SD Card?

Contributing Writer
Steven
Steven has been a senior writer & editor of Donemax software since 2020. He's a super nerd and can't imagine the life without a computer. Over 6 years of experience of writing technical solutions and software tesing, he is passionate about providing solutions and tips for Windows and Mac users.

Editor in chief
Gerhard Chou
In order to effectively solve the problems for our customers, every article and troubleshooting solution published on our website has been strictly tested and practiced. Our editors love researching and using computers and testing software, and are willing to help computer users with their problems