
Written byLucienUpdated on Apr 17, 2024
How to Mount An External Hard Drive or Other Storage Device on Mac?
Approved byGerhard Chou
PAGE CONTENT:
Our digital lives keep adding more data, which needs more storage room than our Macs can provide. The reliable external hard drive (HDD or SSD) is a movable safe that lets us store more files on our Mac and keeps them safe. But before you use your new external storage device for anything digital, it needs to be installed, which means it becomes part of your Mac's file system.
This guide will be your compass, showing you the easy steps to put your external hard drive, which will let you use all its features and keep your data safe. We'll talk about the different kinds of external hard drives, show you how to mount them step by step, and give you debugging tips if you encounter any problems.
How to Understand External Hard Drives?
Understanding the basics of external hard drives is important before getting into the placement details. These devices add to the limited space on your Mac's internal drive by acting as extra storage units. External HDDs or SSDs come in a range of sizes and formats so that they can be used for large storage needs, from simple file backups to high-definition video libraries.
Types of External Hard Drives:
There are many types of external hard drives, and each has its way of connecting. Here is a list of the most popular kinds:
- HDD (Hard Disk Drive): Stores info on spin magnetic platters.
- Solid State Drive (SSD): Uses flash memory to access info faster and longer.
- Portable vs. Desktop: Size, portability, and power needs should differ.
How to Mount External HDDs/SSDs/USB Drives/SD Cards on Mac?
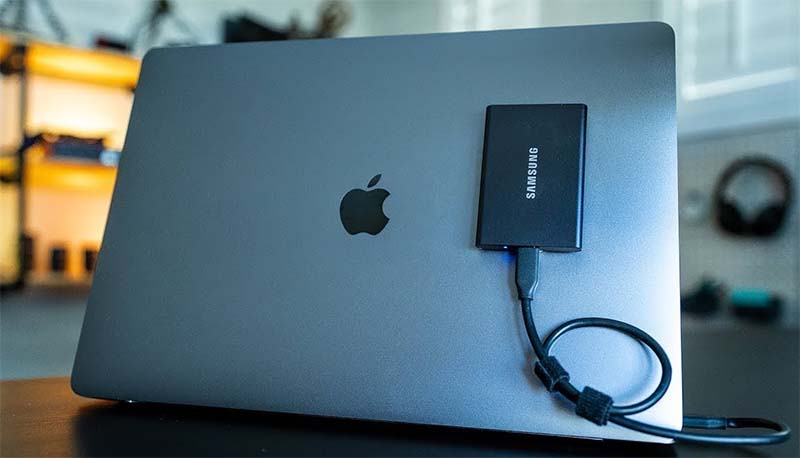
Step 1. Connect the external hard drive to the Mac.
The first thing you need to do is connect your external hard drive to your Mac. What kind of hard drive you have will determine which of these ports you use:
- USB (Universal Serial Bus): The most common type of link, it makes things easy to use by just plugging them in.
- Thunderbolt: A high-performance choice for sending and receiving data very quickly.
- FireWire (Legacy): This is an old technology that can still be found on some Macs and EHDs.
- Network Attached Storage (NAS): Connects to your network so multiple devices can view it.
The type of link will have a small effect on the mounting process, but don't worry - the main steps will stay the same. Once everything is hooked up, ensure the hard drive gets power (if needed) and that all the cables are firmly plugged in.
Step 2. Recognize the external storage device.
Once the physical link is made, your Mac should immediately recognize the external hard drive. To make sure of this, do these things:
- Open Finder.
- Press Command + N or click on the Finder button in the Dock.
- You should see your external hard drive in the "Locations" area of the Finder sidebar. It could show up with your name or the name the maker gave it.
- If you can't see the drive, try unplugging it and putting it back in. Also, ensure the drive is turned on, and the cables are connected properly.
Step 3. Mount the External Hard Drive.
Most of the time, Macs immediately mount external drives they recognize. If your drive doesn't mount instantly, though, you can do it by hand using these steps:
Method 1: Mounting via Finder
- Start up Finder.
- Click Finder on Apple menu.
- Choose Settings.
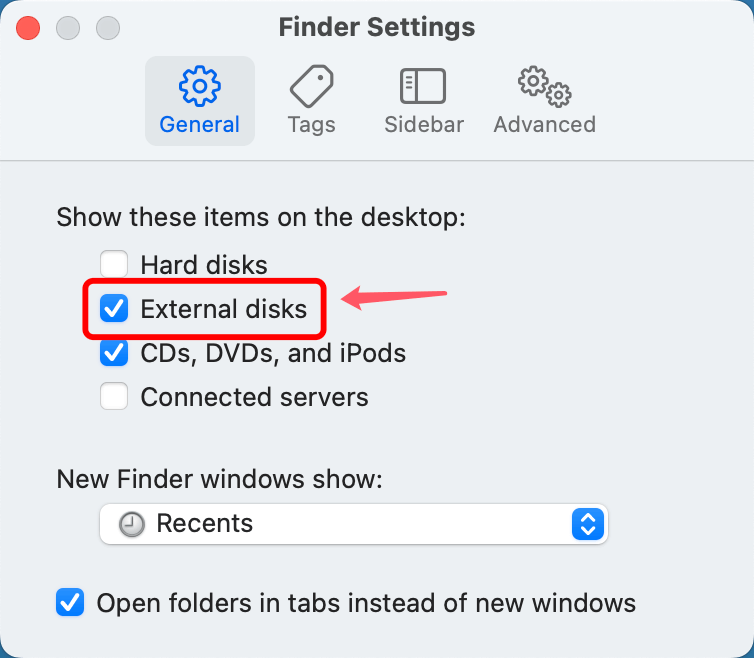
- Click on the "General" tab in the Preferences window.
- Click the box next to "External disks" under "Show these items on the desktop." This step ensures that external drives can be seen on the screen and are easy to access.
- Close the Finder Settings window and go back to Finder.
Now, you should see your external hard drive on the screen. Just double-click on its picture to open it and see what's inside.
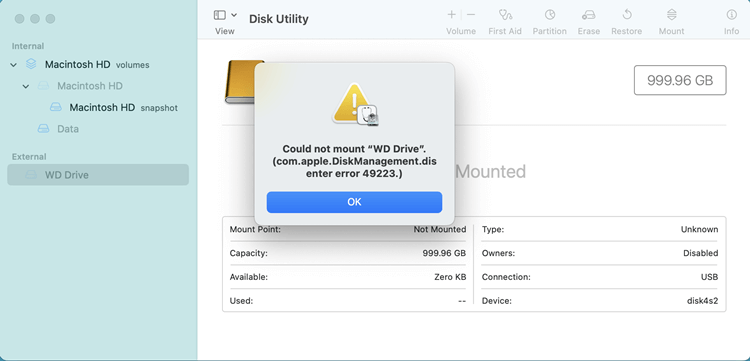
Method 2: Mounting via Disk Utility
Disk Utility is a built-in macOS tool for handling disks and volumes. It can mount your external hard drive if you can't see it in Finder.
- Open Disk Utility.
- You can use Spotlight to find Disk Utility (Command + Space, then type "Disk Utility" and press Enter) or go to Applications > Utilities to find it.
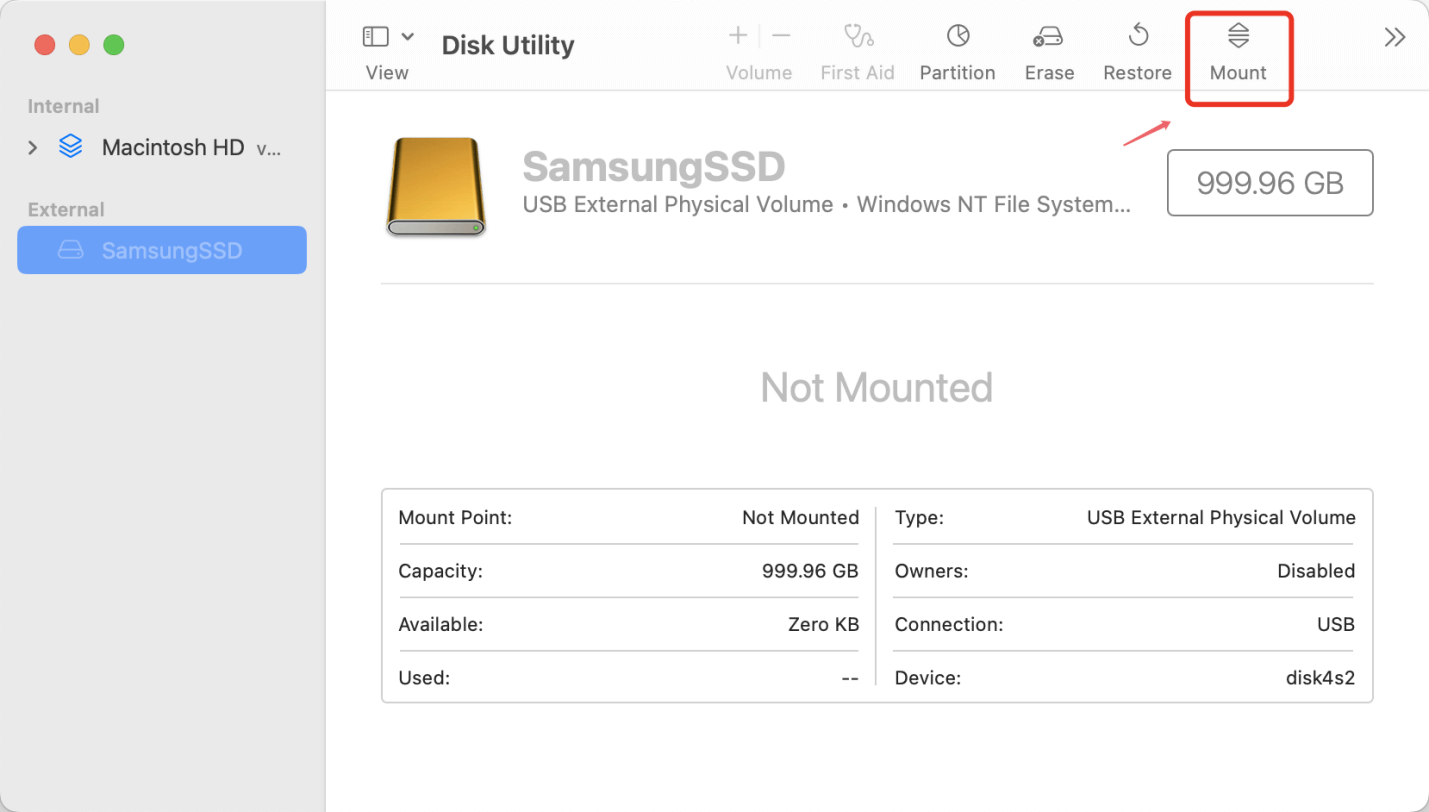
- Disk Utility will display a list of all the linked drives and volumes. In the list on the left, look for your external hard drive.
- Click on the name of the external hard drive to choose it.
- Choose the "Mount" button from the menu. It looks like a play button.
- The disk utility will try to mount the drive. If it works, it will show up in the sidebar with a list of its titles below it.
- To get to your mounted external hard drive, close Disk Utility and go to Finder.
Step 4. Safely Ejecting the External Hard Drive.
It's important to properly eject your portable hard drive when you're done using it to avoid losing or corrupting your data. How to do it:
- Find the icon for the portable hard drive on the desktop or Finder.
- Click the drive icon and then right-click or press and hold it.
- "Eject" can be chosen from the choices that appear.
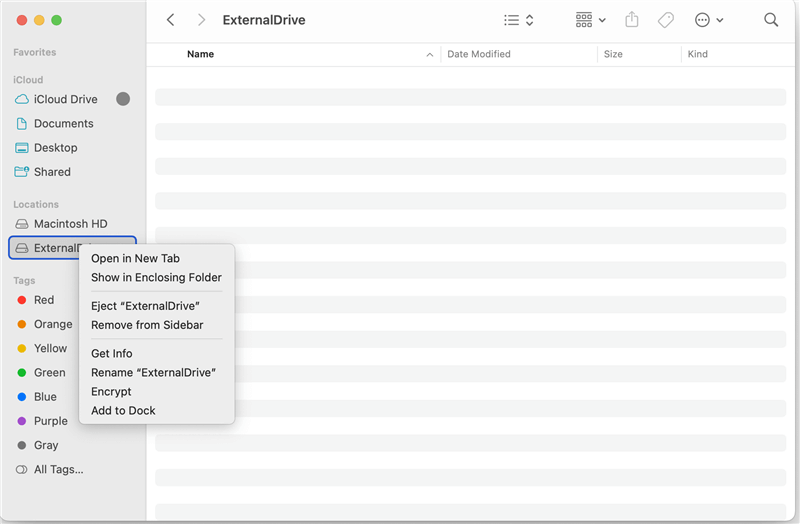
Before disconnecting the drive, wait until the icon disappears from the screen or the Finder sidebar.
Troubleshooting: When External Drive Not Mounting on Mac
Technology can be unpredictable at times. If your external hard drive doesn't mount, do these things:
- Double-check the Connection: Ensure the external hard drive and your Mac have a tight connection on the wire. If you can, try another USB port.
- Power Up: Make sure that any external power source your external hard drive needs is plugged in and working.
- Permissions Peek: In very rare cases, permission problems could stop building. Disk Utility lets you check and change rights (more on this later).
- Restart for Refresh: A simple restart of your Mac often fixes any short-term problems, stopping the mounting process.
Fix External Hard Drive Not Mounting on Mac
Find why the external hard drive not showing up on Mac and fix this issue by changing settings, running First Aid, reformatting the drive, etc.
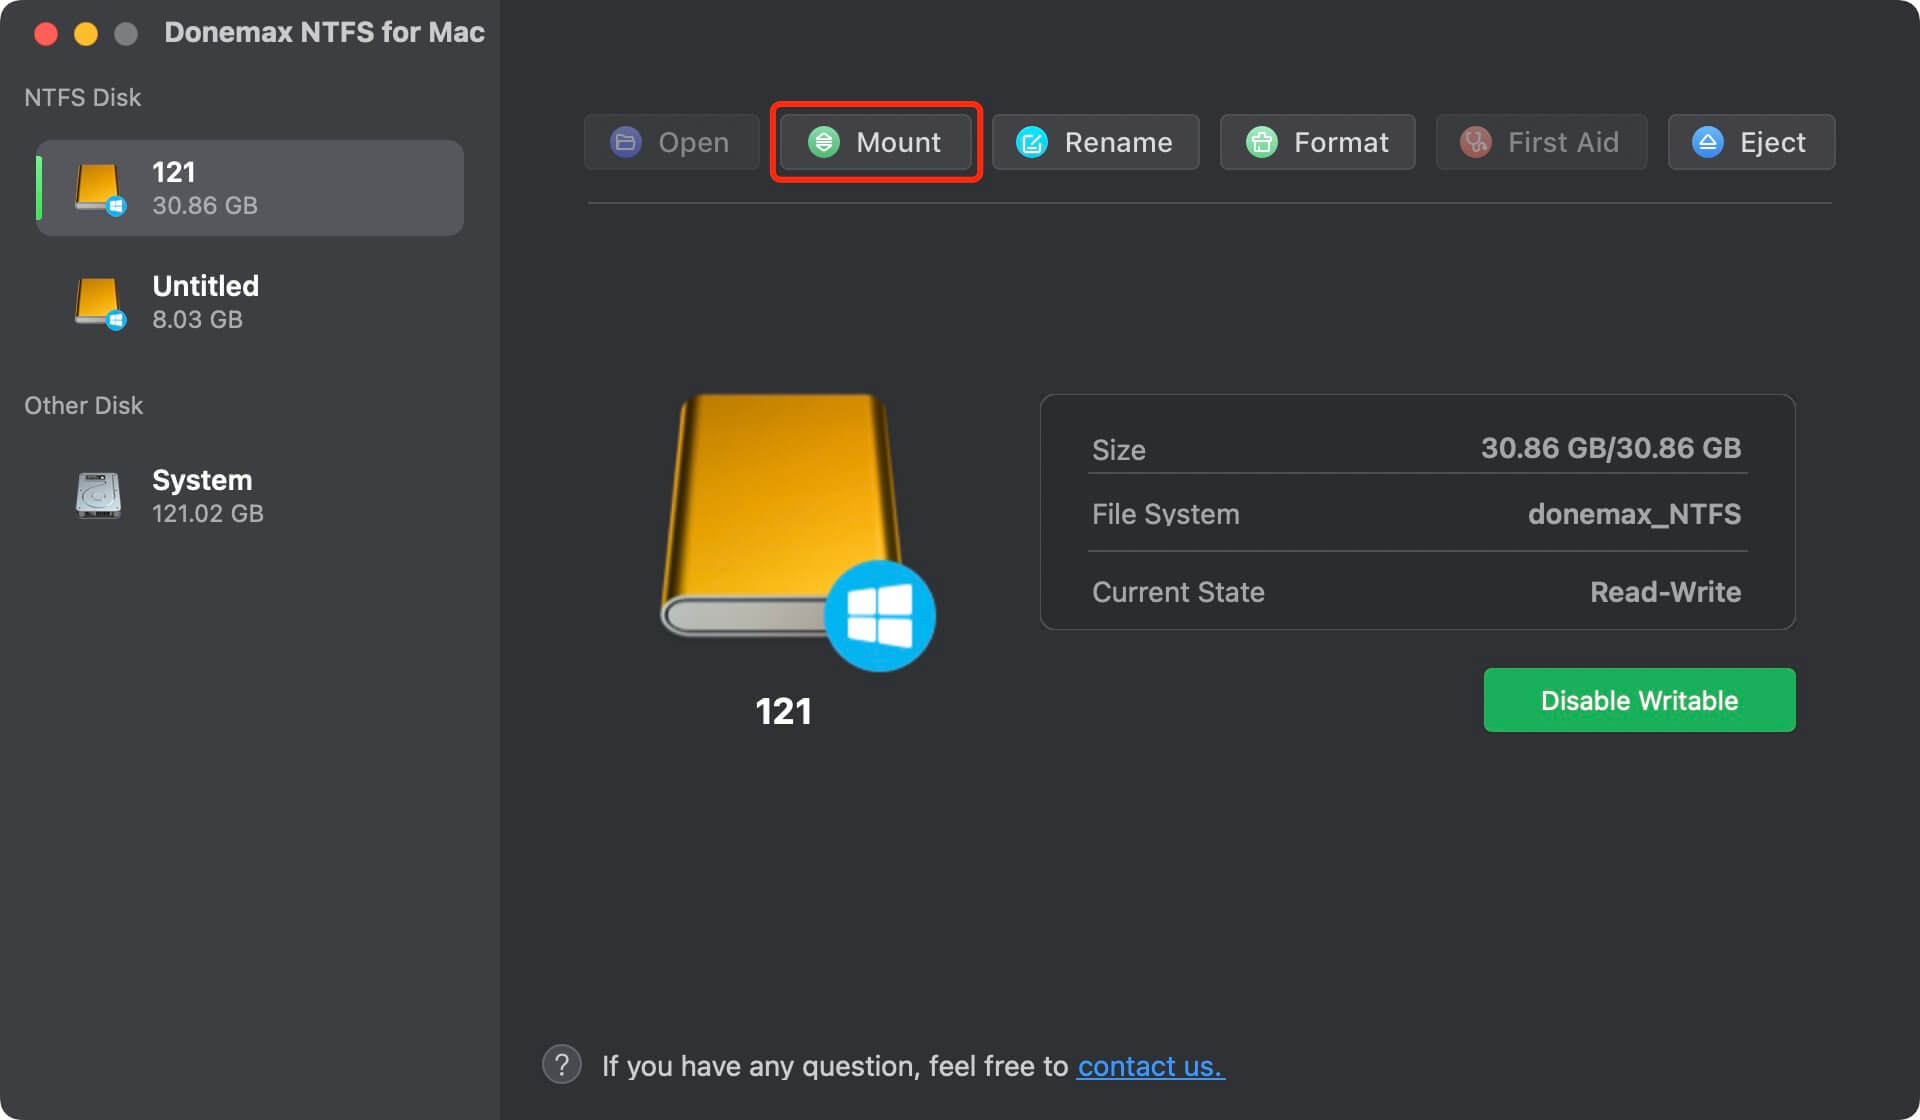
Force Mount External Storage Device on Mac with NTFS for Mac
Donemax NTFS for Mac tool is able to force mount NTFS drive, APFS drive, HFS Drive, ExFAT or FAT32 drive on Mac.
Step 1. Download and install Donemax NTFS for Mac, open it.
Step 2. Connect the external hard drive to the Mac.
Step 3. Select the external hard drive, click on Mount button.
Conclusion:
In conclusion, connecting an external hard drive to your Mac is an easy but necessary step that will give you more space and make handling your files easier. Following the steps in this guide, you can connect, mount, and use external storage devices without any problems. External hard drives are a flexible and easy way to meet your storage needs, whether you're a professional working on big projects or a person whose video library is growing. You can use extra storage to improve your Mac experience and keep your digital life organized and easy to get to now that you know these tips.
FAQs About Mounting External Hard Drive on Mac
Normally, when you connect the external hard drive to the Mac, it will mount automatically. If it is not mounting on the Mac, open Disk Utility, find and select the external hard drive, then click on Mount button to mount the external hard drive.
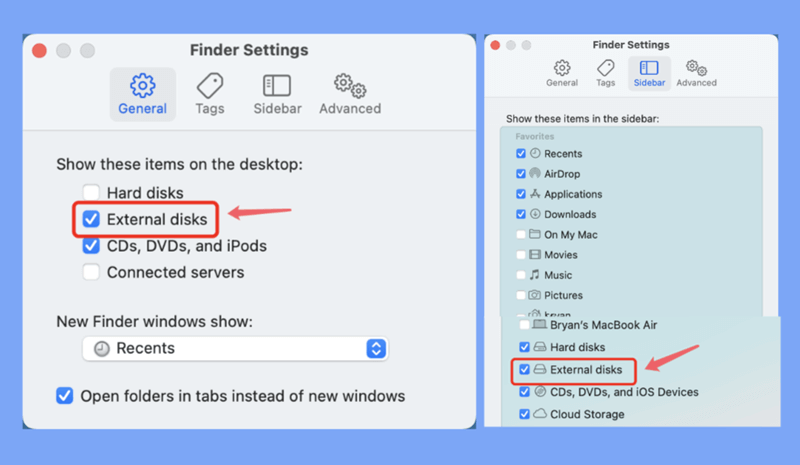
If you can’t see the external hard drive on Finder and desktop, just check if you’ve selected External disks in Finder Settings.
- Open a Finder.
- Click Finder on Apple menu.
- Choose Settings.
- Open Finder Settings, click General and Sidebar.
- Select External disks.
![mount external hard drive on Mac]()
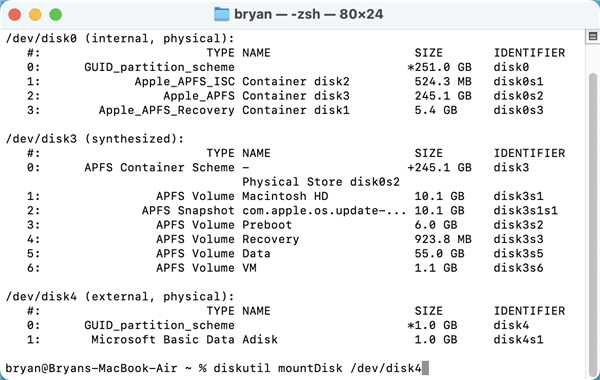
- Open Terminal.
- Type diskutil list, hit Enter.
- Type diskutil mountDisk /dev/diskX, hit enter (X is the disk number)
![mount external hard drive on Mac]()
Yes, first of all, you can try to mount the NTFS drive in Disk Utility. If it won’t mount, just try NTFS for Mac tool - such as Donemax NTFS for Mac. This tool can force mount any NTFS drive on your Mac.
Related Articles
- Aug 06, 2024Fix External Hard Drive Not Working on Mac Without Losing Data
- Feb 21, 2025How to Fix Overheated Hard Drive?
- Feb 05, 2025How to Fix Failed Seagate External Hard Drive?
- Jan 02, 2025Disk is OFF or Offline on Mac, Fix It Now
- Apr 25, 2025Fix ADATA External Hard Drive Not Working (such as not mounting, not detected, being read-only) on Mac
- Feb 19, 2025Fix The Parameter is Incorrect Without Losing Data

Contributing Writer
Lucien
Lucien is a writer and a chief programmer of Donemax software who has worked in the company for 5+ years. He has written much of the content on the site and devotes to providing troubleshooting and solution for Windows and Mac users including disk cloning, data recovery, migration, eraser, error fixes.

Editor in chief
Gerhard Chou
In order to effectively solve the problems for our customers, every article and troubleshooting solution published on our website has been strictly tested and practiced. Our editors love researching and using computers and testing software, and are willing to help computer users with their problems