
Written byCoco LinUpdated on May 18, 2024
Mac Documents Folder Emptied or Missed Suddenly – How to Recover Lost Files?
Approved byGerhard Chou
PAGE CONTENT:
It isn't very pleasant and typical for Mac users running macOS Sonoma, Ventura, Monterey, Big Sur, Catalina, Mojave, High Sierra, and earlier versions to lose their Documents folder. The problem usually starts after updating to the newest version of macOS. It's very frustrating when important files disappear without a trace.
You're not the only one who has had this problem; there is still hope. This article will explain why your Mac's Documents folder disappears, giving you some idea why this happens. More importantly, we'll give you many effective methods to deal with the issue directly.
Methods to Recover Lost Mac Documents Folder Files
If you delete files from Documents folder or the Documents folder is lost or emptied, follow these methods to get the lost files back!
Method 1: Restore from iCloud
iCloud is a reliable way to get back info you lost on your Mac if you had the upsetting experience of losing it. To easily get back your important files, do these steps:
- Start by going to your Mac's System Preferences or Settings and clicking "Apple ID." Afterward, go to "iCloud" and make sure the box next to "Documents & Desktop" is checked.
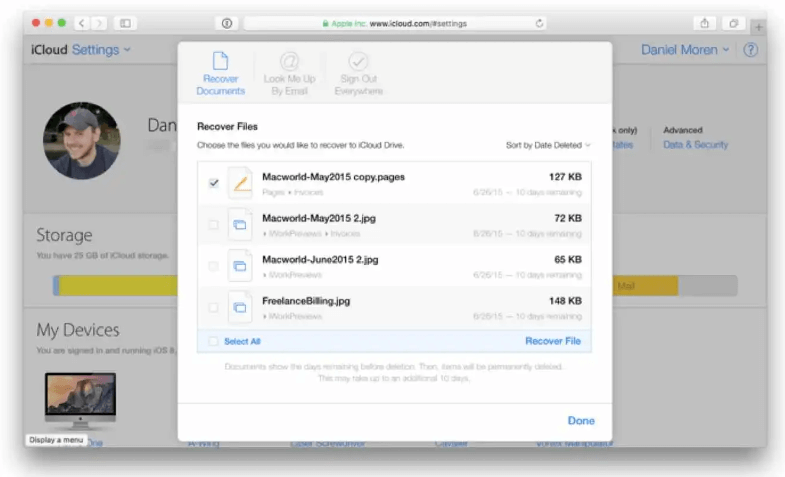
- If you've turned on iCloud Drive, use a web browser to go to iCloud.com. Sign in with your Apple ID and then go to "iCloud Drive" to find the things you're looking for.
- When you find the files you want to return, you can select each separately or use the "Select All" button. Then click the Download or Recover Files and download them to your Mac.
- You can also use Finder to access your iCloud Drive files if you have macOS Catalina or are older. To find your lost files, open Finder and choose "iCloud Drive" from the menu.
- Check your iCloud settings again to ensure all necessary files, such as Documents and Desktop, are synced.
Method 2: From Time Machine Backup
If you've lost important info on your Mac, don't worry - Time Machine is a reliable way to get it back. To easily get back your important files, follow these step-by-step instructions:
Step 1. First, hook up your Time Machine backup drive to your Mac. A few different NAS (network-attached storage) devices could be used for this.
Step 2. Go to the top left part of your screen and click on the Apple menu. Then, choose "System Preferences" or “System Settings.” After that, pick "Time Machine" and click "Enter Time Machine."
Step 3. You can look through backups using the schedule on the right side of the screen. You can also use the arrows or the schedule at the bottom to reach your desired backup date.
Step 4. You can use the Finder window to find the files you want to restore once you've hit the backup date you want.
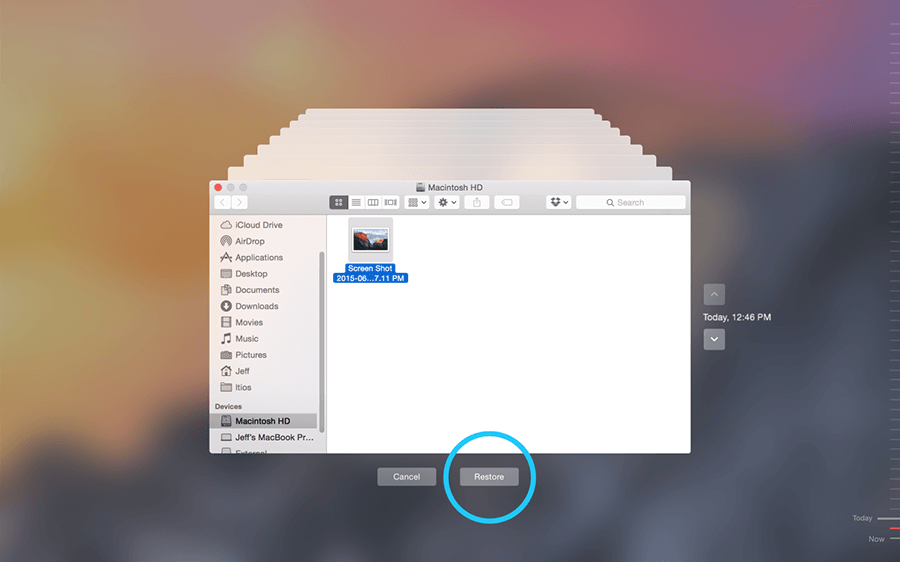
Step 5. Pick out the folders or files you want to retrieve. By clicking on the lines, you can move between different versions of the chosen file.
Step 6. Click the "Restore" button after choosing files. Time Machine will copy the selected backup files back to where they were on your Mac.
Step 7. While the process may take some time, it will depend on the size of the files and the speed of your backup drive. The progress bar in Time Machine or Finder allows you to see how things are going.
Step 8. Once the restoration is complete, check that the files have been properly restored to their original location on your Mac.
Method 3: Through the Terminal
Do not worry if you find that important files on your Mac have disappeared because they were hidden. There is another easy way to get them back using the Terminal. To see those secret files and get back in, follow these steps:
- For Spotlight Search, press Command + Spacebar, type "Terminal," and press Enter. It will start the Terminal app.
- Once in the Terminal, find the secret file directory. Type "cd" and then the path to the location.
- To see a list of all the files in the directory, even ones that are hidden, run the following command: ls -a.
- Use "chflags" followed by "nohidden" and the file name to show a hidden file again. For example, chflags nohidden filename
- After restoring the files, you can check the changes by listing the directory items again.
- You can repeat the process until all the files you want to show are no longer hidden.
Method 4: Use Mac Data Recovery Software
Mac data recovery software can help you securely and easily recover deleted files from Mac Documents folder.
Step 1. Download and install the reliable Mac data recovery software, such as Donemax Data Recovery for Mac.
Donemax Data Recovery for Mac
- Recover deleted files from Documents folder.
- Recover lost files from emptied Documents folder.
- Recover lost files from disappeared Documents folder.
Step 2. Open Donemax Data Recovery for Mac, select the Mac internal drive to start data recovery.

Step 3. Click on Scan button to deeply scan the SSD or HDD, then find all recoverable files.

Step 4. Once the scan is completed, you can preview all recoverable files, then select the wanted files and save them.

Fix Documents Folder Disappeared Issue on Mac
If you cannot find the Documents folder in Finder, follow the steps below to fix this issue and unhide the Documents folder on your Mac.
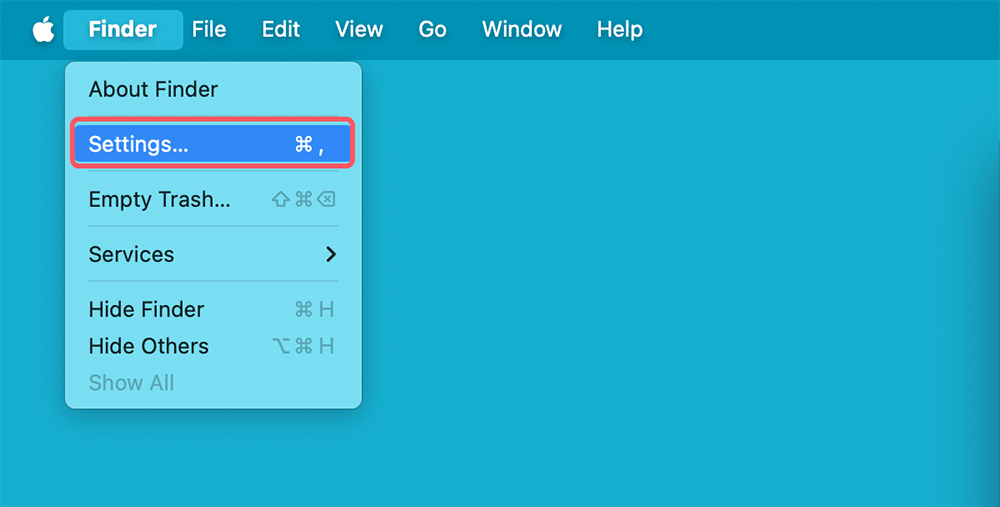
Step 1. Open a Finder, then click Finder on Apple menu, choose Settings.
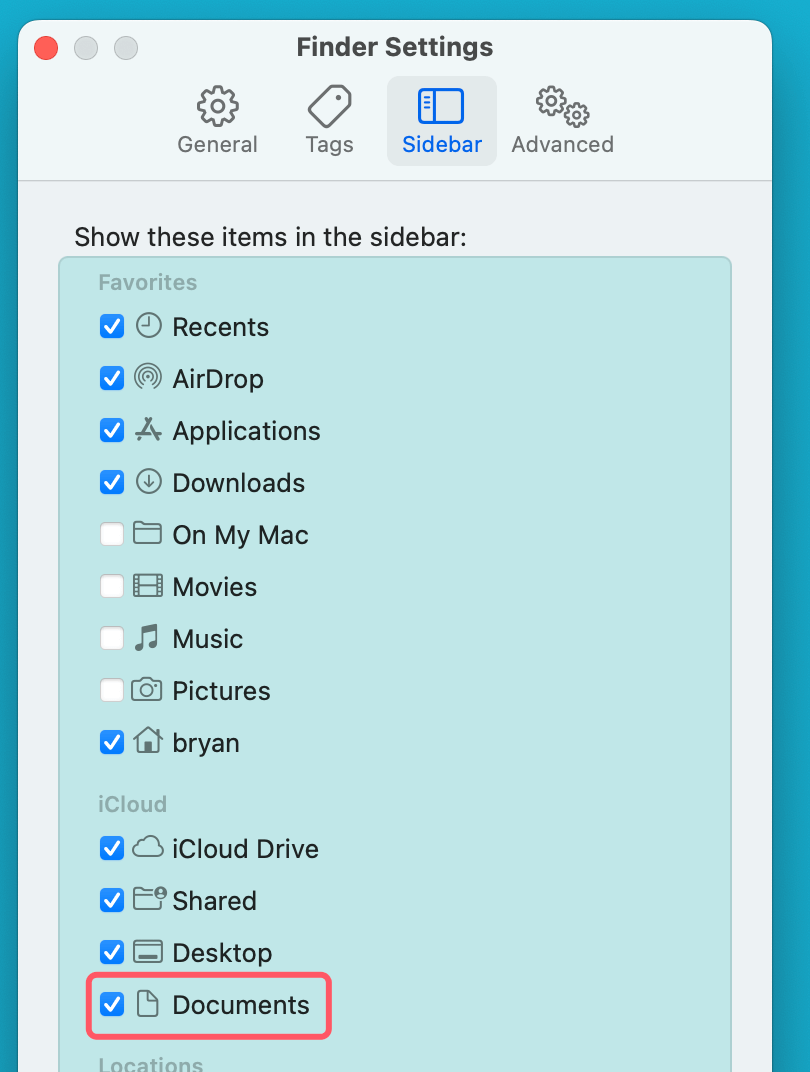
Step 2. Open Finder Settings, then click Sidebar,make sure Documents is selected.
Step 3. Then close Finder Settings and open Finder, check if you can see the Documents folder.
Conclusion:
Users of all macOS versions can find it frustrating when the Documents folder suddenly disappears. However, using the techniques described above, there are quick and easy ways to retrieve lost data.
Whether this is your first time dealing with a problem or it happens often, being proactive about learning what caused it and using the right repair methods can help keep your workflow as smooth as possible and prevent future data loss incidents. Keep yourself updated, get ready, and take back control of your important Mac files.
Donemax Data Recovery for Mac is a powerful data recovery application. It can help you recover deleted files, recover lost files from emptied Documents folder or recover lost files from missing Documents folder on Mac. If you lose important files on Mac, just use this app to get all lost files back.
Related Articles
- Sep 01, 2025How to Recover Deleted Safari Histories on Mac?
- Mar 06, 2025Recover Formatted WD External Hard Drive on Mac: A Complete Guide
- Aug 10, 2025Recover Lost Data from SanDisk G-DRIVE on Mac – Complete Guide
- Feb 05, 2025How to Unformat an SD Card on Mac?
- Apr 12, 2024How to Recover Erased Seagate External Hard Drive on Mac?
- May 28, 2025Recover Deleted/Lost or Unsaved Pages Documents on Mac

Contributing Writer
Coco Lin
Coco has been a writer and a chief programmer at Donemax software since 2018. Over 10 years of experience of writing troubleshooting articles in the software industry, she is passionate about programming and loves to providing solutions to Windows and Mac users. Also she enjoys music and palying tennis in her free time.

Editor in chief
Gerhard Chou
In order to effectively solve the problems for our customers, every article and troubleshooting solution published on our website has been strictly tested and practiced. Our editors love researching and using computers and testing software, and are willing to help computer users with their problems