
Written byCoco LinUpdated on Sep 25, 2025
Solutions to Recover Deleted Files on macOS Tahoe
Approved byGerhard Chou
Before we start: As the best data recovery tool for macOS Tahoe, Donemax Data Recovery for Mac can easily recover data after accidental deletion, formatting, or other data loss scenarios.
PAGE CONTENT:
Upgrading to macOS Tahoe brings users a refined interface, performance enhancements, and security updates. However, just like in older versions of macOS, file loss is still a common problem. Whether you accidentally deleted documents, emptied the Trash, lost files after a system crash, or formatted a drive, the panic that follows is universal.

The good news is that in most cases, your deleted files are not gone forever. macOS Tahoe, combined with backup tools like Time Machine, iCloud Drive, and third-party recovery software, gives you multiple options to restore data. The key is to act quickly—because once deleted files are overwritten by new data, recovery becomes much harder.
In this guide, we'll walk you through all the effective methods to recover deleted files on macOS Tahoe, starting with the simplest options and moving to advanced solutions.
Understanding File Deletion on macOS Tahoe
Before moving into recovery methods, it's important to understand how file deletion works on macOS Tahoe:
- Soft Delete (Trash): When you press Delete or drag a file to Trash, macOS doesn't erase the file immediately. Instead, it moves it to the Trash folder, where you can restore it easily.
- Hard Delete: If you empty the Trash or use Command + Option + Delete, macOS removes the file reference. The data itself still exists on the storage drive until new data overwrites it.
- SSD vs HDD Recovery:
- On HDDs, deleted data often remains recoverable until overwritten.
- On SSDs, macOS Tahoe's TRIM command may make recovery harder since it clears blocks automatically. Still, recovery is often possible if you act fast.
The takeaway: stop using the affected drive as soon as you notice file loss. The less you write new data, the higher your chances of recovery.
6 Methods to Recover Deleted Files on macOS Tahoe
Method 1. Recover Deleted Files from the Trash Bin
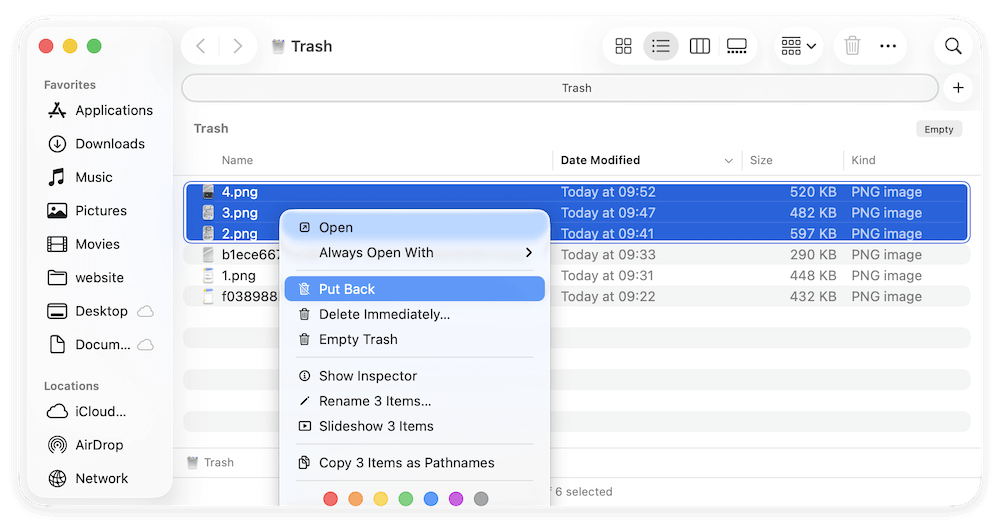
The simplest way to restore deleted files on macOS Tahoe is by checking the Trash.
- Open the Trash icon from the Dock.
- Locate the deleted files.
- Right-click the file and select Put Back.
- The file will return to its original folder.
Limitations:
- If you've already emptied the Trash, files won't appear here.
- Files deleted with Command + Option + Delete skip Trash entirely.
This method works best for recently deleted files.
Method 2. Restore Deleted Files Using Time Machine
Time Machine is macOS's built-in backup solution and remains one of the most reliable ways to recover files.
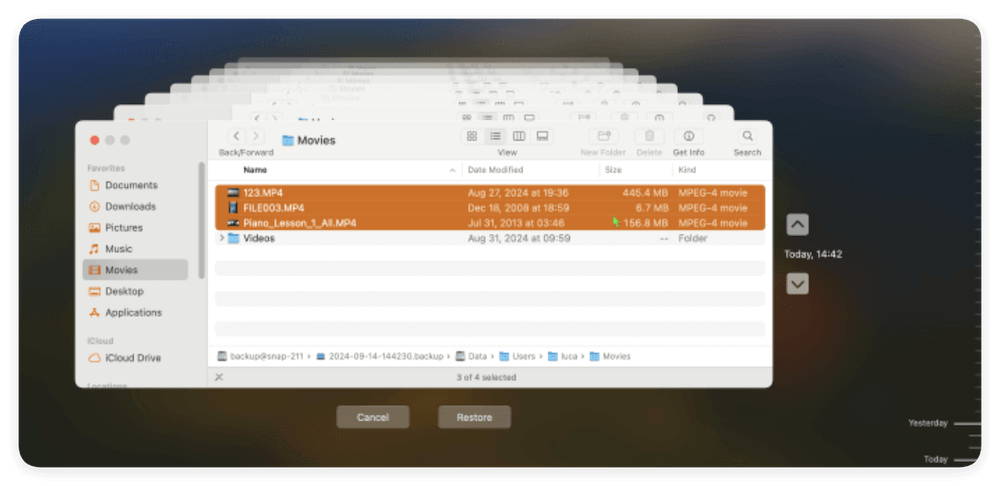
Steps to Restore with Time Machine:
- Connect the drive you use for Time Machine backups.
- Open the folder where the deleted file was located.
- Click the Time Machine icon in the menu bar and select Browse Time Machine Backups.
- Use the timeline to browse backups.
- Select the file you want and click Restore.
Pros
- Recovers even permanently deleted files.
- Restores files to their original locations.
- Supports full system restore if needed.
Cons
- Only works if you had Time Machine set up before the deletion.
- Requires enough storage on the backup drive.
Method 3. Recover Files from iCloud Drive
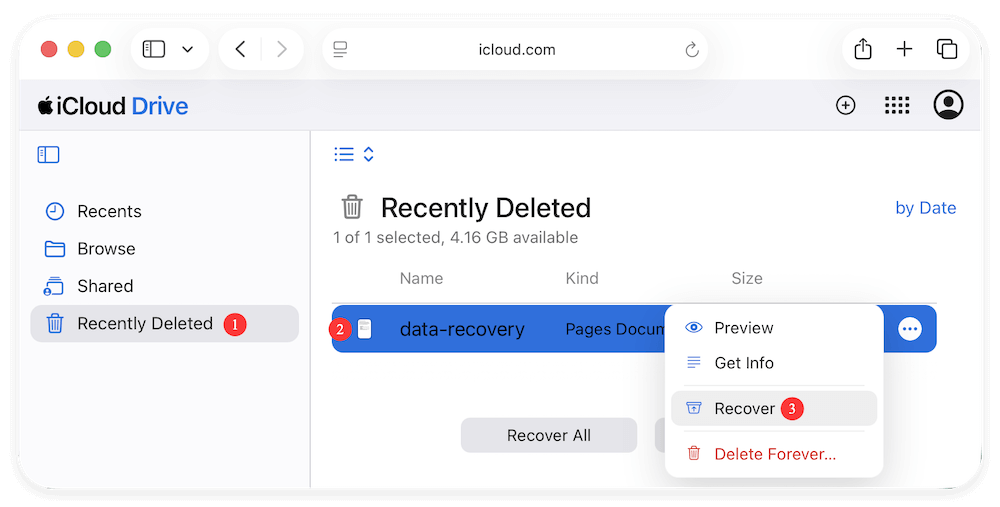
macOS Tahoe integrates seamlessly with iCloud Drive, which can also serve as a recovery tool. iCloud stores deleted files for up to 30 days in the "Recently Deleted" folder.
- Go to iCloud.com.
- Log in with your Apple ID.
- Navigate to iCloud Drive > Recently Deleted.
- Restore the desired files.
Limitations:
- Works only if files were synced to iCloud.
- Deleted files older than 30 days are permanently removed.
- Free iCloud storage (5 GB) may not cover large backups.
Method 4. Explore macOS Tahoe's New Recovery Options
Each new macOS release adds refinements, and Tahoe includes improvements in System Settings and Storage Management.
Possible new recovery features include:
- Files App Enhancements: A more organized Recently Deleted folder.
- System Settings Integration: Quicker access to recovery options.
- Improved iCloud Sync: Faster restoration of files across devices.
If you recently upgraded from macOS Sonoma or earlier, explore these new utilities before moving to third-party tools.
Method 5. Use Professional Data Recovery Software
When files are permanently deleted from the Trash and not available in Time Machine or iCloud, third-party recovery software becomes the most effective option. These tools scan your Mac's storage drive for recoverable fragments of deleted files and reconstruct them for restoration.
Why Use Data Recovery Software on macOS Tahoe?
- Handles multiple data loss scenarios: Accidental deletion, formatted partitions, corrupted drives, or even crashed macOS updates.
- Supports a wide range of file types: Documents (Word, Excel, PDFs), images (JPG, PNG, RAW), videos (MOV, MP4), audio, and system files.
- Works across different storage media: Internal Mac drives, external HDDs, SSDs, USB drives, and memory cards.
- User-friendly: Designed for non-technical users, recovery software typically offers step-by-step guidance with a graphical interface.
Best Data Recovery Software for macOS Tahoe
- Donemax Data Recovery for Mac
- Simple interface with advanced recovery technology.
- Can recover files from formatted APFS and HFS+ partitions.
- Allows preview before recovery.
- Supports latest macOS Tahoe and Apple Silicon Macs.
- Disk Drill for Mac
- Known for high recovery rates and fast scanning.
- Provides data protection features like Recovery Vault.
- Supports external devices including SD cards and USB drives.
- Stellar Data Recovery for Mac
- Strong support for photo and video recovery.
- Useful for professional users like photographers or video editors.
- Offers recovery from crashed macOS systems via bootable media.
Step-by-Step Example: Recover Files with Donemax Data Recovery
Step 1. Download the software Donemax Data Recovery for Mac which is compatible with macOS Tahoe. Install it on Mac.
Step 2. Open Donemax Data Recovery for Mac. From the list of available drives, select the one where the files were deleted.

Step 3. Click the Scan button to scan the selected drive. The software will scan for file fragments across the entire drive. It can find the deleted files even if Trash has been emptied.

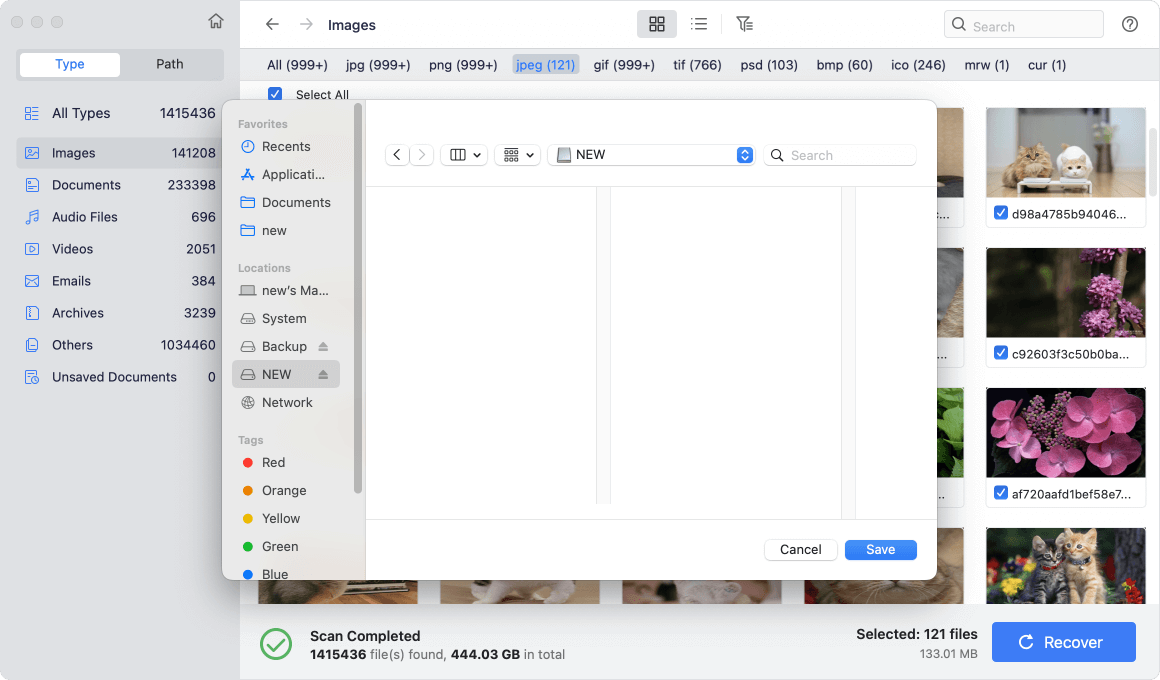
Step 4. Once the scan finishes, Donemax Data Recovery for Mac will display a list of recoverable files. Locate the wanted files and preview documents, images, or videos before recovering to ensure they're intact.
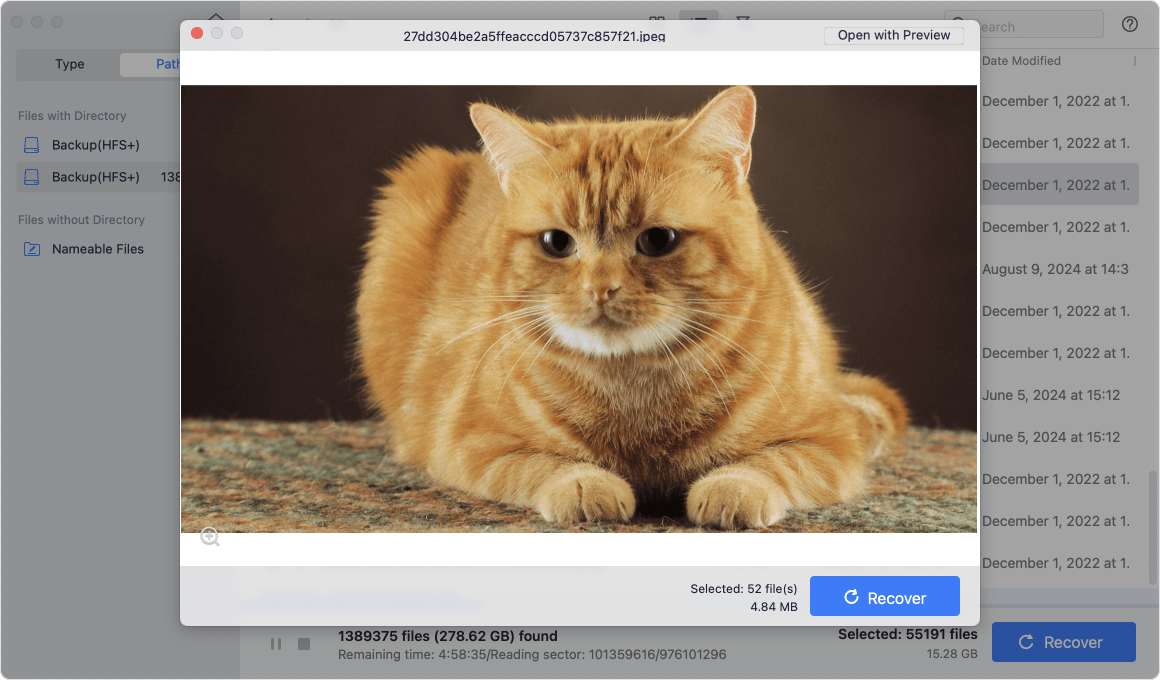
Step 5. Select the files you want to restore. Click Recover button and choose a safe storage location (not the same drive where data was lost).
Tips for Using Recovery Software Effectively
- Act Quickly: The sooner you scan, the better the recovery chances.
- Don't Save New Files: Avoid writing new data to the affected drive until recovery is complete.
- Use Deep Scan for Older Losses: Recently deleted files may appear in Quick Scan, but older ones usually require Deep Scan.
- External Drive Install: If possible, install recovery software on an external drive to reduce overwrite risk.
Pros
- Works even after Trash is emptied.
- Supports recovery from formatted drives.
- Can restore files from external drives, USB sticks, and SD cards.
Cons
- Free versions often have recovery limits.
- Success rates vary depending on file system (APFS, HFS+, exFAT).
Method 6. Seek Professional Data Recovery Services
If none of the above methods work, or if your Mac's drive is physically damaged, professional recovery is the safest option.
When to Consider Professional Help:
- Clicking noises from HDDs.
- Mac doesn't detect the storage drive.
- SSD failures or water/fire damage.
What to Expect:
- Services like DriveSavers or Ontrack specialize in Mac recovery.
- Costs range from $300 to $1500+ depending on severity.
- Professionals use cleanroom labs to recover data.
Tips to Prevent Future Data Loss on macOS Tahoe
While recovery is possible, prevention is always better. Here are some tips to protect your data:
- Enable Time Machine: Connect an external drive and schedule automatic backups.
- Use iCloud or Cloud Backups: Keep copies of important files in cloud storage.
- Maintain Multiple Backups: 3-2-1 backup rule (3 copies, 2 media types, 1 offsite).
- Avoid Overwriting After Deletion: Stop saving new files to the affected drive.
- Install Reliable Recovery Software: Keep tools like Donemax Data Recovery for Mac pre-installed.
- Update macOS Regularly: Security updates reduce file corruption risks.
Conclusion
Losing important files on macOS Tahoe doesn't have to be a nightmare. Whether the files are still in the Trash, stored in a Time Machine backup, available in iCloud, or retrievable via recovery software, there are multiple ways to get your data back.
For everyday accidental deletions, the Trash and iCloud Drive should be your first stops. If you regularly back up with Time Machine, recovery becomes straightforward. When all else fails, third-party recovery software or professional services provide a final lifeline.
The key is to act quickly and avoid overwriting deleted files. Combine recovery methods with strong backup habits, and you'll protect your valuable data against future loss.
By following the steps outlined here, you can confidently recover deleted files on macOS Tahoe and keep your Mac running smoothly.
Donemax Data Recovery for Mac
Donemax Data Recovery for Mac is one of the best Mac data recovery software. It is easy-to-use and can help in recovering deleted, formatted, inaccessible or lost data from Mac HDD/SSD, external disk, USB drive, SD card, camera or other storage devices.
Related Articles
- Dec 31, 2024No Files on USB Drive on Mac, How to Get the Lost Files Back?
- May 19, 2025How to Recover Lost Data on M2 Mac? [4 Methods]
- Jan 14, 2025How to Recover Lost Data from Fusion Drive on Mac?
- Dec 24, 2025How to Recover Lost Data on Apple M2 Chip Mac?
- Nov 05, 2025Best iMac Data Recovery Software [Free & Paid]
- Apr 10, 2025[4 Methods] Recover ARW Files on Mac: A Complete Guide

Contributing Writer
Coco Lin
Coco has been a writer and a chief programmer at Donemax software since 2018. Over 10 years of experience of writing troubleshooting articles in the software industry, she is passionate about programming and loves to providing solutions to Windows and Mac users. Also she enjoys music and palying tennis in her free time.

Editor in chief
Gerhard Chou
In order to effectively solve the problems for our customers, every article and troubleshooting solution published on our website has been strictly tested and practiced. Our editors love researching and using computers and testing software, and are willing to help computer users with their problems