
Written byMariaUpdated on May 28, 2025
Recover Deleted/Lost or Unsaved Pages Documents on Mac
Approved byGerhard Chou
Summary: When Pages documents are deleted, lost, or unsaved on Mac, immediately check Trash, Temporary folders, iCloud drive or other devices. Also, you can restore the files from Time Machine or other backups if there were. The last chance is to recover the missing Pages documents with Mac data recovery software.
PAGE CONTENT:
- Common Causes of Pages Document Loss on Mac
- Method 1: Recover Deleted Pages Documents from Trash
- Method 2: Recover Lost Pages Documents with the "Revert To"
- Method 3: Recover Unsaved Pages Documents from Temporary Folders
- Method 4: Use Time Machine Backup to Restore Pages Documents
- Method 5: Check Pages Documents in iCloud Drive (if enabled)
- Method 6: Use Mac File Recovery Software to Recover Lost Pages Documents
- Bonus Tip: Restore Pages Documents from Email or External Sources
- Conclusion
Apple's Pages is a widely used word processor designed specifically for macOS and iOS users. Whether you're drafting reports, writing essays, or creating resumes, it's essential to save your work regularly. However, even the most cautious users can encounter scenarios where a Pages document is accidentally deleted, lost, or left unsaved. This can happen due to system crashes, sudden shutdowns, or simple user mistakes.
Luckily, macOS offers several built-in tools and recovery methods to help retrieve lost documents. This article provides a step-by-step guide to recovering deleted, lost, or unsaved Pages documents on a Mac — whether you saved them to iCloud, your local drive, or never hit the "Save" button at all.
Common Causes of Pages Document Loss on Mac
Before we explore recovery methods, let's understand the typical causes behind Pages document loss:
- 1. Accidental Deletion: You may delete a Pages file unintentionally, and if you empty the Trash immediately afterward, the file appears gone for good.
- 2. Unsaved Work: If your Mac crashes, Pages quits unexpectedly, or the battery dies before saving, your changes or document might not be saved.
- 3. System Crash or Power Failure: Unexpected power loss or kernel panics can interrupt Pages before it auto-saves your changes.
- 4. Formatting or Reinstallation: If you've recently formatted your drive or reinstalled macOS, you might lose documents that weren't backed up.
- 5. Corrupted Files: Damaged or corrupted .pages files can become unreadable or disappear from the Pages interface.
Method 1: Recover Deleted Pages Documents from Trash
The first place to check is the Trash. When you delete a Pages document, it usually moves to the Trash instead of being permanently deleted immediately.
How to recover:
- Open Trash from your Dock.
- Look for your deleted Pages document.
- Right-click and choose Put Back to restore it to its original location.
![recovering deleted, lost, or unsaved Pages documents on a Mac]()

💡 Tip: If you've recently deleted the file and haven't emptied the Trash, it's often recoverable.
Method 2: Recover Lost Pages Documents with the "Revert To" Feature
Pages automatically saves previous versions of your document in the background using AutoSave. If you accidentally deleted content within a file or overwrote important data, this method helps restore an earlier version.
Steps to use "Revert To":
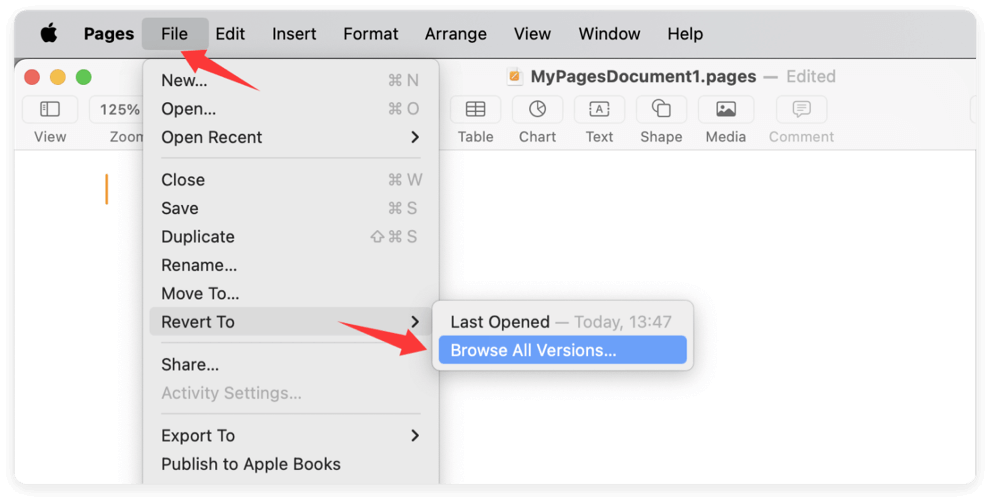
- Open the current Pages file.
- From the top menu, click File > Revert To > Browse All Versions.
![recovering deleted, lost, or unsaved Pages documents on a Mac]()
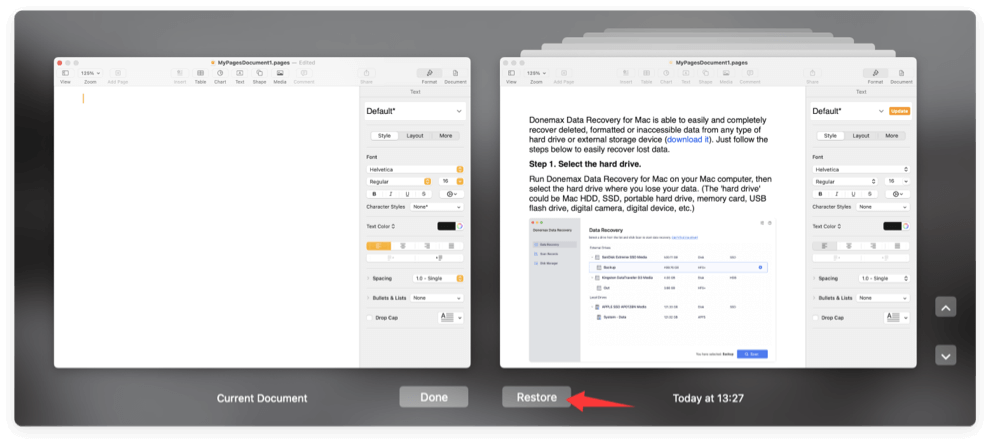
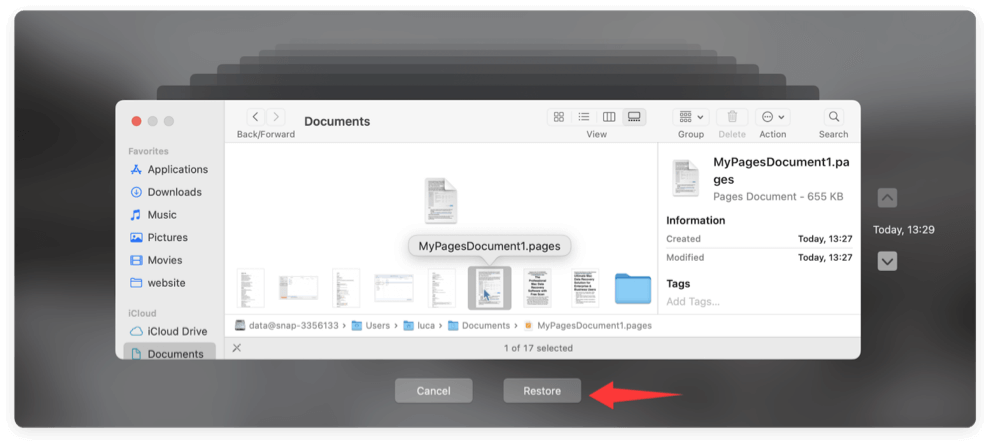
- Use the Time Machine-style interface to view past versions.
- Select the version you want and click Restore.
![recovering deleted, lost, or unsaved Pages documents on a Mac]()
⚠️ Limitation: This method works only if the document was saved at least once and has version history.
Method 3: Recover Unsaved Pages Documents from Temporary Folders
macOS often saves unsaved files temporarily in system folders. You can try retrieving your unsaved Pages file from these temporary directories using Terminal.
How to access temporary folders:
- Open Terminal from Utilities via Applications.
- Type the below command and press Return:
open $TMPDIR
![recovering deleted, lost, or unsaved Pages documents on a Mac]()
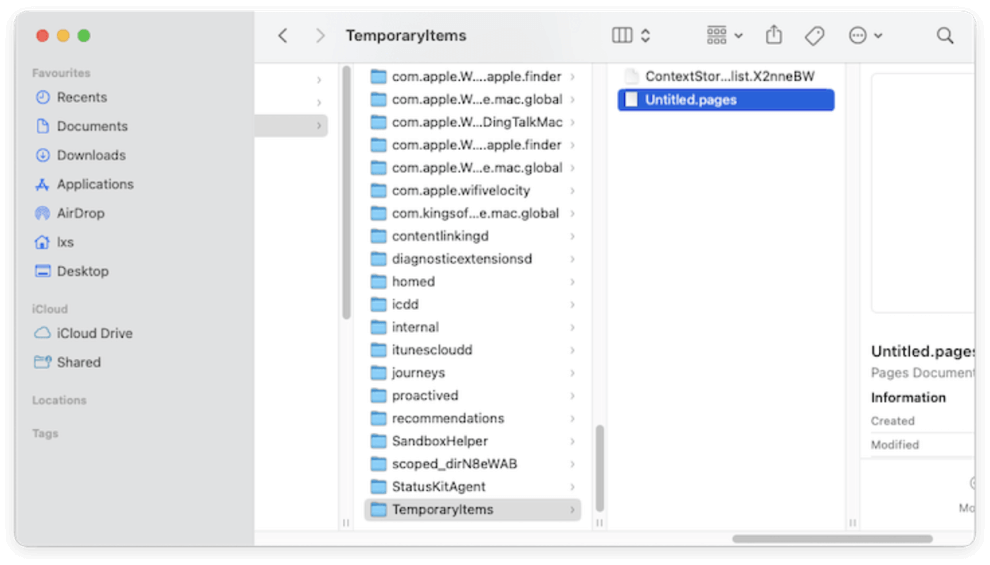
- This opens a hidden folder. Navigate through folders like com.apple.iWork.Pages or others under TemporaryItems.
- Look for files with .pages or no extension.
- If found, copy the file to your Desktop and try opening it in Pages.
![recovering deleted, lost, or unsaved Pages documents on a Mac]()

💡 Note: Temporary files are automatically cleared after a reboot, so this method works best if your Mac hasn't been restarted yet.
Method 4: Use Time Machine Backup to Restore Pages Documents
Time Machine is macOS's built-in backup utility, and it can restore deleted or lost Pages documents if it was enabled before the data loss occurred.
How to restore using Time Machine:
- Attach the backup drive for your time machine.
- Go to the Documents, Desktop, or other folder where the document was last stored.
- Choose "Browse Time Machine Backups" after clicking the Time Machine symbol in the navigation bar.
![recovering deleted, lost, or unsaved Pages documents on a Mac]()
- Navigate back in time using the timeline on the right.
- Select the Pages document and click Restore.
![recovering deleted, lost, or unsaved Pages documents on a Mac]()

💡 Tips: Time Machine can also restore previous versions of saved documents similar to the "Revert To" feature of Pages program.
Method 5: Check Pages Documents in iCloud Drive (if enabled)
Apple's iCloud Drive is a powerful feature that allows you to sync and store files across all your Apple devices. If you had iCloud Drive enabled on your Mac and were saving your Pages documents to the iCloud Drive folder (which is often the default location), there's a high chance your lost or deleted document can be recovered—even if it's no longer visible on your local system.
How to Check iCloud Drive on Your Mac
- Select iCloud Drive from the sidebar after opening Finder.
- Browse through folders, especially the Pages, Documents, or Desktop folders.
- Look for your lost or missing document.
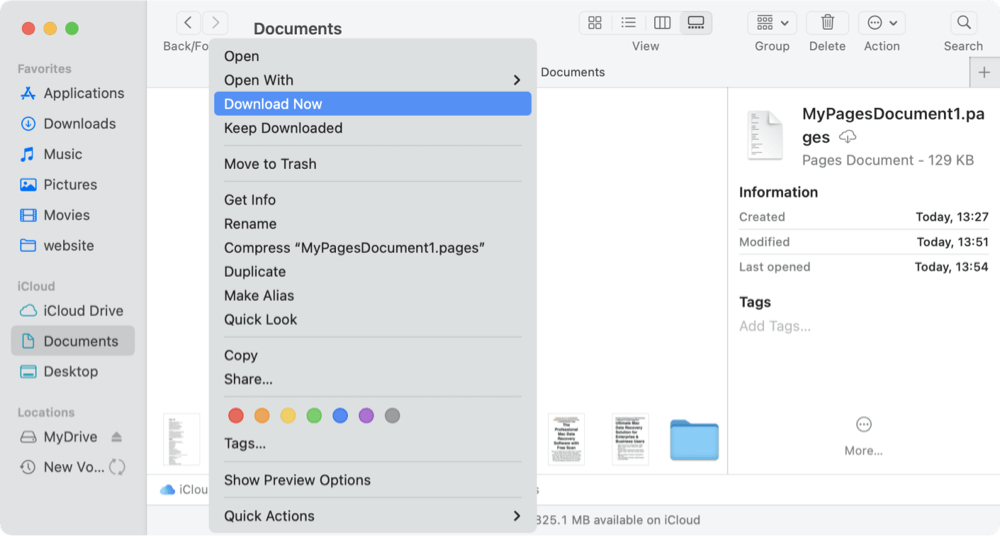
If the file is there, simply double-click to open it in Pages or right-click and choose Download Now if it's stored in the cloud but not yet downloaded locally.
How to Check iCloud Drive Online
Sometimes, the local iCloud sync may not reflect recently deleted files. In that case, try logging into the iCloud website to access the full cloud archive:
- Visit https://www.icloud.com and log in with your Apple ID.
- Click on Drive.
![recovering deleted, lost, or unsaved Pages documents on a Mac]()
- Use the search bar to type part of the filename or browse manually through folders.
- If found, click the file to download or open it.
![recovering deleted, lost, or unsaved Pages documents on a Mac]()


How to Restore Deleted Files from iCloud's "Recently Deleted" Folder
iCloud retains deleted documents for up to 30 days in a special "Recently Deleted" folder—similar to a second-stage Trash bin. To access Recently Deleted:
- On iCloud.com, navigate to Drive.
- Scroll down to the bottom right and click Recently Deleted.
- Browse the list of deleted files.
- Select the Pages document you want to recover and click Recover.
![recovering deleted, lost, or unsaved Pages documents on a Mac]()
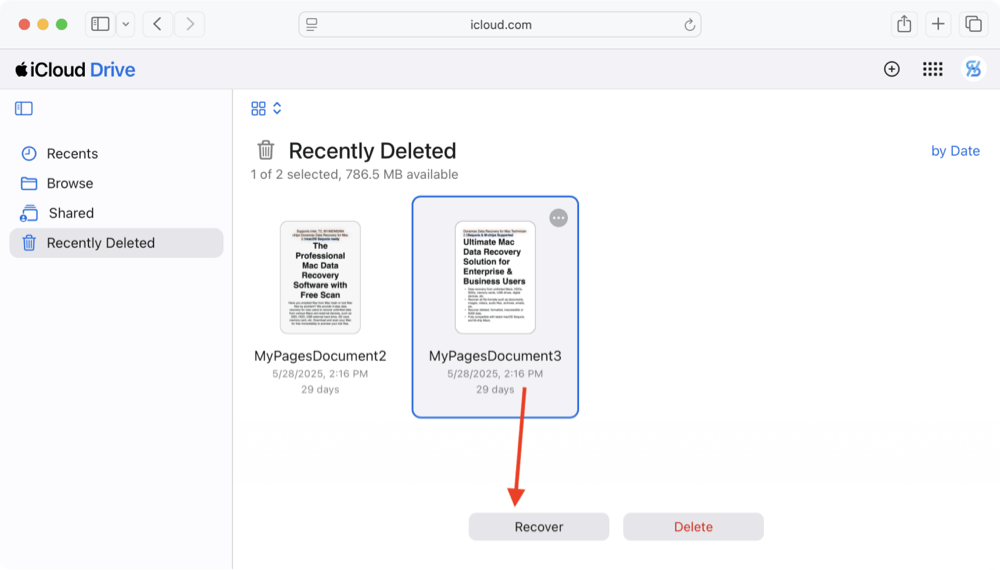
💡 Note: Files in "Recently Deleted" are permanently erased after 30 days or if you choose to manually delete them.
What If iCloud Drive Wasn't Enabled?
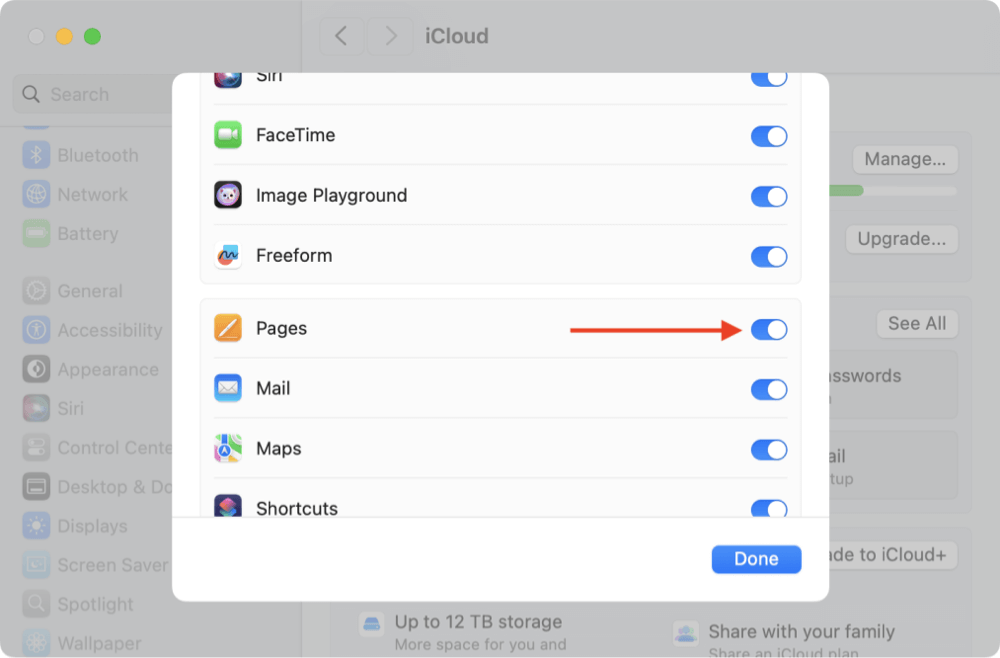
If iCloud Drive wasn't turned on before the file was deleted, the document won't be recoverable from iCloud. However, it's a good idea to enable it moving forward. To turn on iCloud Drive on macOS:
- Go to System Settings.
- Click on your Apple ID > iCloud.
- Enable iCloud Drive.
- Click See All and ensure Pages or Documents and Desktop is selected.
![recovering deleted, lost, or unsaved Pages documents on a Mac]()
This way, all Pages documents saved going forward will automatically sync to iCloud and remain accessible from any Apple device or iCloud.com.
By taking full advantage of iCloud Drive and its built-in recovery tools, you gain a reliable safety net for future Pages documents. It's an especially useful recovery option when you're away from your Mac or if your local storage has been wiped.
Method 6: Use Mac File Recovery Software to Recover Lost Pages Documents
If the above methods don't work—especially if the file was permanently deleted—you can use a third-party Mac data recovery software to scan your drive and retrieve lost Pages documents.
Recommended tools:
- Donemax Data Recovery for Mac
- Stellar Data Recovery for Mac
- PhotoRec/TestDisk (free and open-source, but less user-friendly)
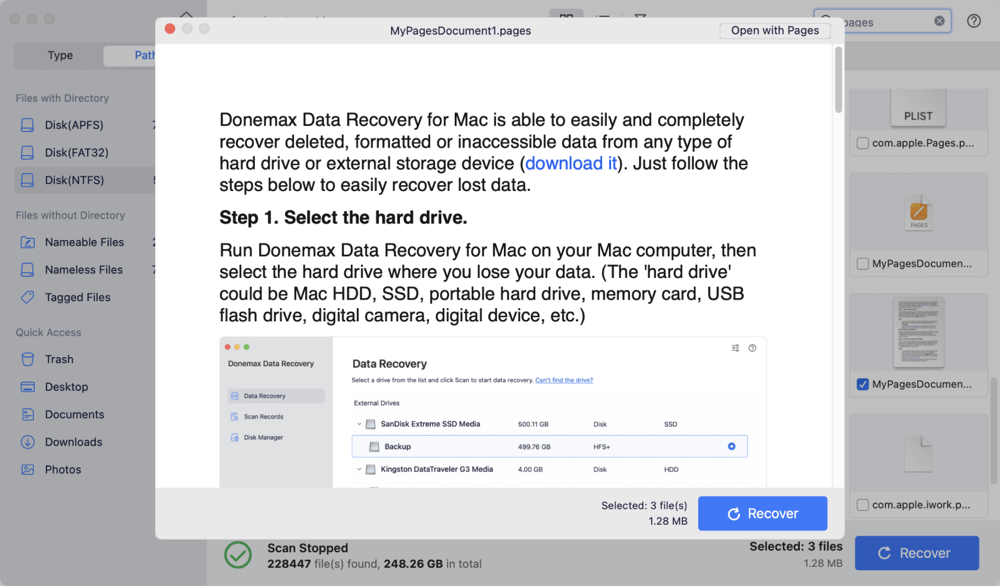
Recover Lost Pages Documents Using Donemax Data Recovery for Mac
Step 1. Download and install Donemax Data Recovery.
Step 2. Open the app and select the drive where the Pages documents was stored.

Step 3. Click Scan button. Then software will start to search for the lost files, including missing Pages documents.

Step 4. Once the scan completes, filter for .pages files. Preview and restore the files you need.
💡 Note: Don't install the software on the same drive you're trying to recover data from to avoid overwriting.
Bonus Tip: Restore Pages Documents from Email or External Sources
If you ever shared or backed up your Pages documents, you might be able to retrieve them from:
- Email attachments (search in your email client for "Pages" or ".pages")
- External hard drives or USB drives
- Cloud storage services.
Always double-check these places before assuming your data is permanently lost.
Prevention Tips for the Future
Once you've recovered your lost or deleted document, it's crucial to take steps to prevent such situations from happening again.
Enable AutoSave and Versions:
- By default, macOS enables AutoSave in native apps like Pages, but ensure it's functioning properly.
Use Time Machine:
- Set up Time Machine with an external hard drive. It provides automatic hourly, daily, and weekly backups.
Save Work to iCloud:
- Sync your Documents and Desktop folders with iCloud Drive via System Settings > Apple ID > iCloud > iCloud Drive.
Use Manual Backups:
- Regularly copy important documents to USB drives or external SSDs.
Install Uninterruptible Power Supply (UPS):
- For desktops, a UPS prevents power outages from corrupting or losing documents.
💡 Pro tip: Always hit Command + S (Save) periodically when editing important files, especially large documents or projects.
Conclusion
Losing or accidentally deleting a Pages document on your Mac can be frustrating, but in most cases, recovery is possible. Whether it's using the Trash, leveraging macOS's built-in AutoSave and versioning system, checking iCloud, or utilizing Mac data recovery software — there's a method for nearly every data loss scenario.
Acting quickly is key: the sooner you attempt recovery, the higher the chance of successful restoration. And once recovered, make sure to enable preventive measures like Time Machine and iCloud to safeguard your future work.
Donemax Data Recovery for Mac
Donemax Data Recovery for Mac is one of the best Mac data recovery software. It is easy-to-use and can help in recovering deleted, formatted, inaccessible or lost data from Mac HDD/SSD, external disk, USB drive, SD card, camera or other storage devices.
Related Articles
- Nov 05, 2025Best iMac Data Recovery Software [Free & Paid]
- Mar 26, 2025How to Recover Replaced Files or Folders on Mac?
- Dec 10, 2025How to Recover Lost Data from NTFS Hard Drive on Mac?
- Jan 14, 2025How to Recover Lost Data from Fusion Drive on Mac?
- Nov 11, 2024How to Recover Screen Recordings on Mac?
- Sep 25, 2025Top 5 Data Recovery Software for macOS Tahoe – Complete Guide

Contributing Writer
Maria
Maria is one of the senior writers & editors of Donemax who lives and works in Sydney, Australia. She loves PC, Mac and Internet Technology. She has 6 years of writing articles about data recovery on PC/Mac, disk cloning solution, data eraser and computer OS optimization, etc. She is also interested in testing various software and digital products.

Editor in chief
Gerhard Chou
In order to effectively solve the problems for our customers, every article and troubleshooting solution published on our website has been strictly tested and practiced. Our editors love researching and using computers and testing software, and are willing to help computer users with their problems