
Written byCharlesUpdated on Jul 08, 2025
Fix Your Startup Disk Is Almost Full on Mac – Complete Guide
Approved byGerhard Chou
Before we start: Encountering "Your startup disk is almost full" warning on your Mac is stressful. You'd better free up disk space to solve this problem by cleaning up junk data, uninstalling unwanted apps, deleted old files or duplicate files, etc. Donemax DMcleaner for Mac is a powerful junk cleaner. It can quickly and securely delete all junk files, useless apps, duplicate files from your Mac, try it now!
PAGE CONTENT:
If you own a Mac, chances are you've encountered the dreaded "Your Startup Disk is Almost Full" warning at some point. This message might pop up unexpectedly and can lead to frustration, especially if you're in the middle of important tasks.
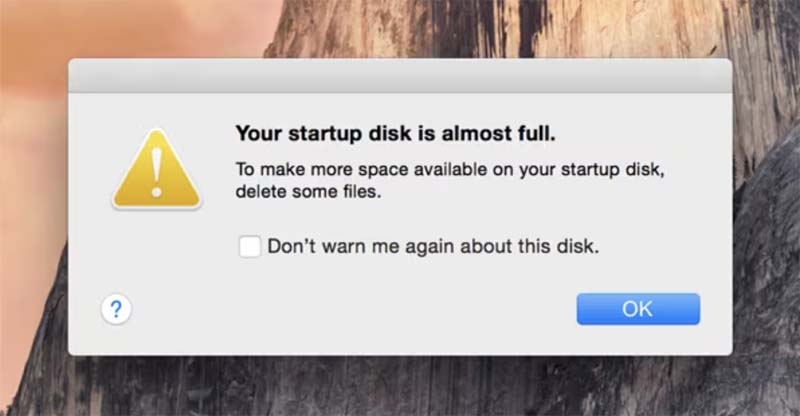
The good news? This issue is common and easily fixable with the right steps. In this guide, we'll explain why you're seeing this warning, how much free space your Mac really needs, and provide a range of proven solutions to clear up your startup disk and keep your Mac running smoothly.
What is the Startup Disk on Mac?
Your Mac's startup disk is the main hard drive or SSD where the operating system (macOS) and essential system files are stored. It's also where your applications, personal files, downloads, and other data reside by default.
For most Mac users, the startup disk is named Macintosh HD, although it might have a different name if you or someone else renamed it.
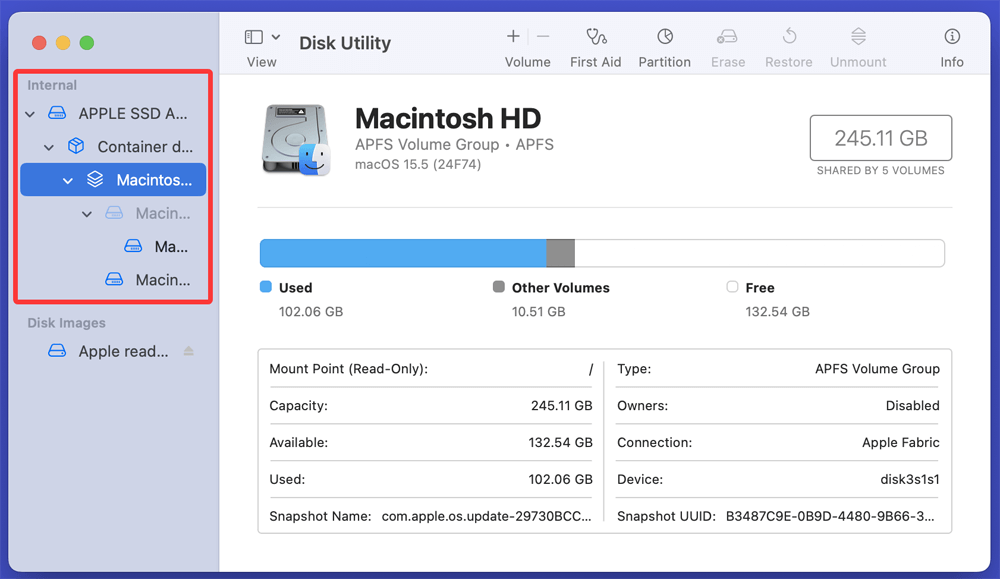
Maintaining enough free space on your startup disk is essential for macOS to operate efficiently. When the disk becomes full, system processes slow down, apps may crash, and you might face trouble installing updates or saving files.
Why You See the "Startup Disk Almost Full" Warning?
The warning means your Mac's startup disk is critically low on free space. Here are the most common reasons:
- Accumulation of Large Files: Videos, photos, applications, and other large files fill up your storage quickly.
- System Caches and Logs: macOS stores temporary data to speed up operations, but these files can grow large over time.
- Downloads and Trash Build-Up: Forgotten files in the Downloads folder or items in the Trash bin still occupy space.
- Time Machine Snapshots: Local backups made by Time Machine take up space if not managed.
- Old iOS Backups: If you've synced iPhones or iPads with your Mac, backups may remain on your startup disk.
How Much Free Space Should You Keep on a Mac?
Experts recommend keeping at least 10-20% of your startup disk free for optimal performance. For example:
| Disk Size | Minimum Recommended Free Space |
|---|---|
| 128 GB | 13 - 25 GB |
| 256 GB | 25 - 50 GB |
| 512 GB | 50 - 100 GB |
| 1 TB | 100 - 200 GB |
A nearly full disk can result in sluggish performance, app crashes, and even system instability.
Step-by-Step Solutions to Fix "Startup Disk Almost Full" on Mac?
Here's how to efficiently reclaim storage space:
1. Empty the Trash and Downloads Folder
Files in the Trash still consume space until permanently deleted:
- Right-click the Trash Bin and select Empty Trash.
- Go to Finder > Downloads, sort by size, and delete unnecessary files.
2. Delete Large or Unused Files
Identify and remove large files manually:
- Open Finder, press Command + F, select This Mac.
- Filter by File Size > Greater Than > Enter a size (e.g., 500MB).
- Review and delete unnecessary files, especially in:
- Documents
- Movies
- Music
- Pictures
Always double-check files before deletion to avoid losing important data.
3. Remove Unused Applications
Applications can take significant storage space, even if you rarely use them:
- Open Finder > Applications.
- Sort apps by size.
- Drag unwanted apps to the Trash and empty it.
For complete removal of leftover files, consider tools like AppRemover (free and safe).
4. Clear System Junk and Cache Files
Over time, macOS and installed applications generate temporary files known as caches. These files help apps run faster by storing frequently accessed data locally. While caches improve performance initially, they accumulate and consume valuable disk space over time, contributing to the "Startup Disk Almost Full" warning.
Other system junk includes:
✔App logs and crash reports
✔Temporary files created during installations
✔Old update files
✔Unused language files
Clearing these files can free up gigabytes of space, but it must be done carefully to avoid deleting essential system files.
★ Manual Method to Clear Cache Files
You can manually clear cache files by following these steps:
Step 1: Open Finder.
Step 2: Press Shift + Command + G to open the Go to Folder window.
Step 3: Type ~/Library/Caches and press Enter.

This will take you to your user-specific cache folder.
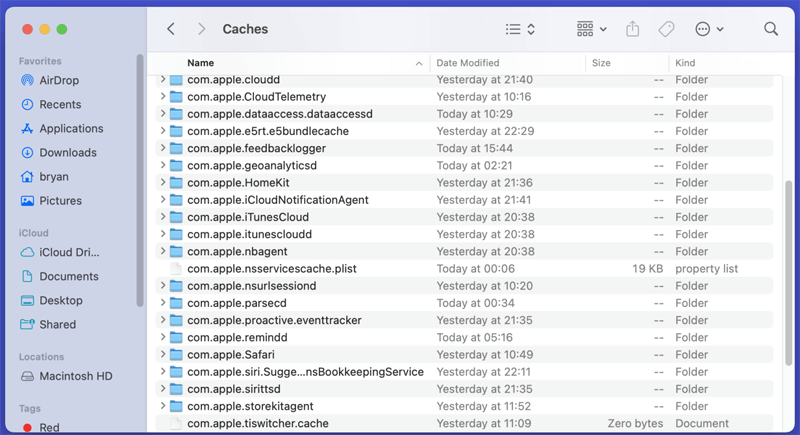
Step 4: Inside, you'll see folders belonging to different apps (e.g., Safari, Chrome, Photos, etc.). You can safely delete files inside these folders, but avoid deleting the folders themselves.
For example:
- Open the folder named com.apple.Safari.
- Delete files inside but keep the folder structure intact.
Note:
- Some apps may rebuild caches automatically after deletion.
- Avoid touching unfamiliar files in /Library/Caches (system-level caches) unless you're experienced.
★ Clear System Logs and Crash Reports
To delete log files:
Step 1: Open Finder, press Shift + Command + G.
Step 2: Enter ~/Library/Logs.
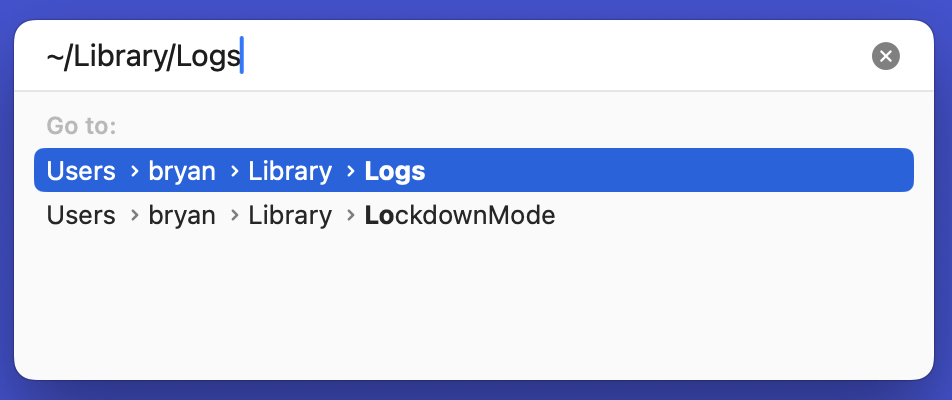
Step 3: Review and delete unnecessary log files.

These logs are often harmless to remove and can free up storage space.
★ Clear Application Support Junk
Sometimes, apps store large support files even after you uninstall them. To check:
Step 1: Go to Finder > Go > Go to Folder.
Step 2: Enter ~/Library/Application Support.
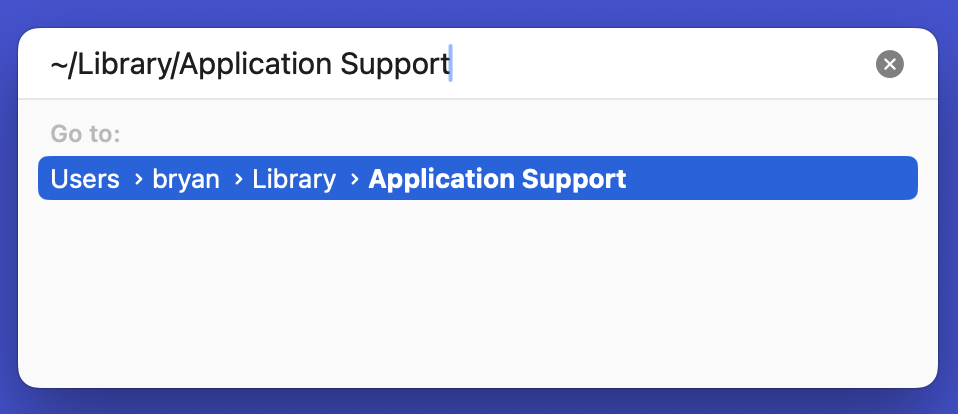
Step 3: Locate leftover folders from uninstalled apps and delete them.
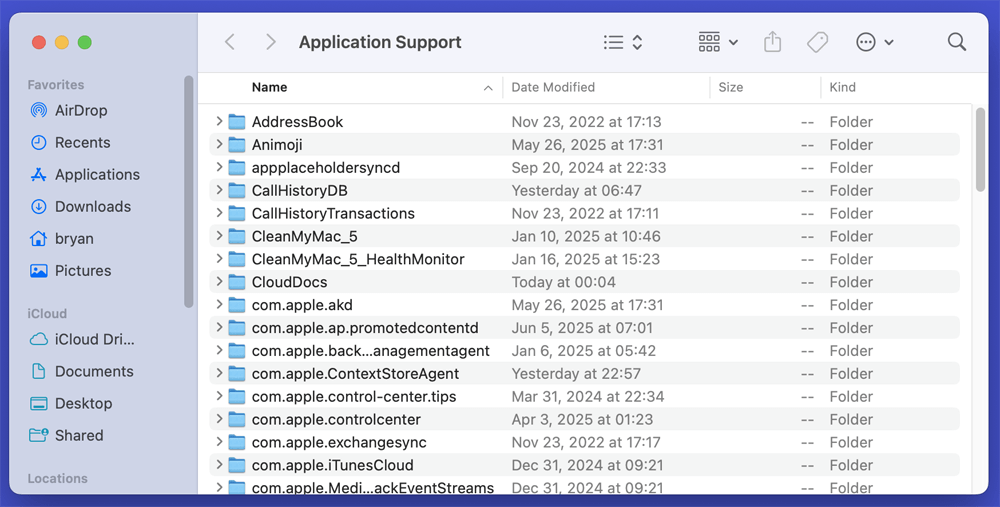
Caution: Don't delete folders for active apps, as this may cause them to malfunction.
★ Using Trusted Cleaning Tools for Safe Removal
Manual cleanup works, but for beginners or those short on time, tools like DMcleaner for Mac can automate junk file removal.
⚫Download and install DMcleaner for Mac.
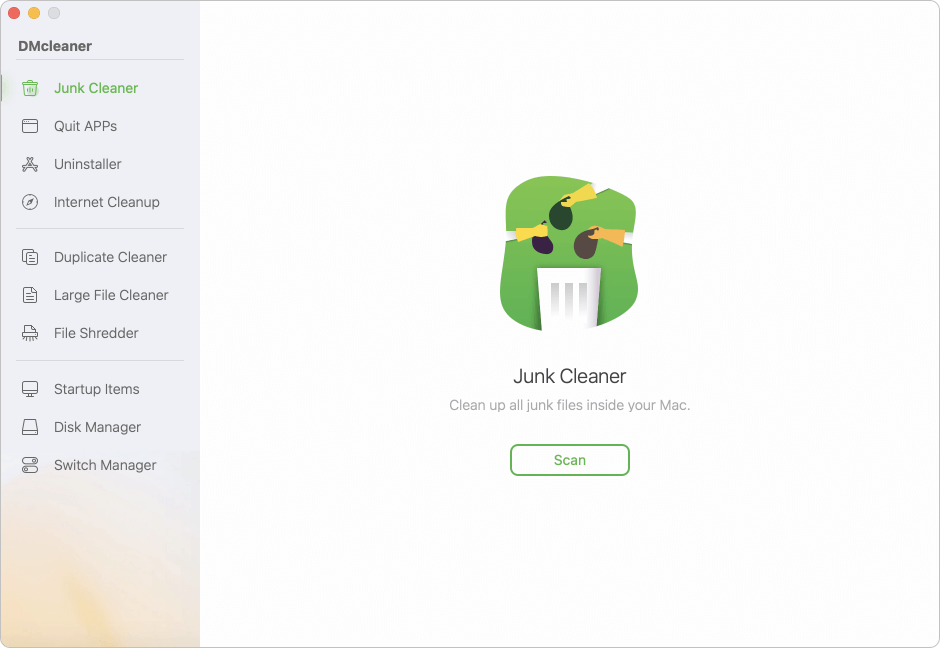
⚫Open DMcleaner for Mac.
⚫Click on Scan button to find all types of junk data.
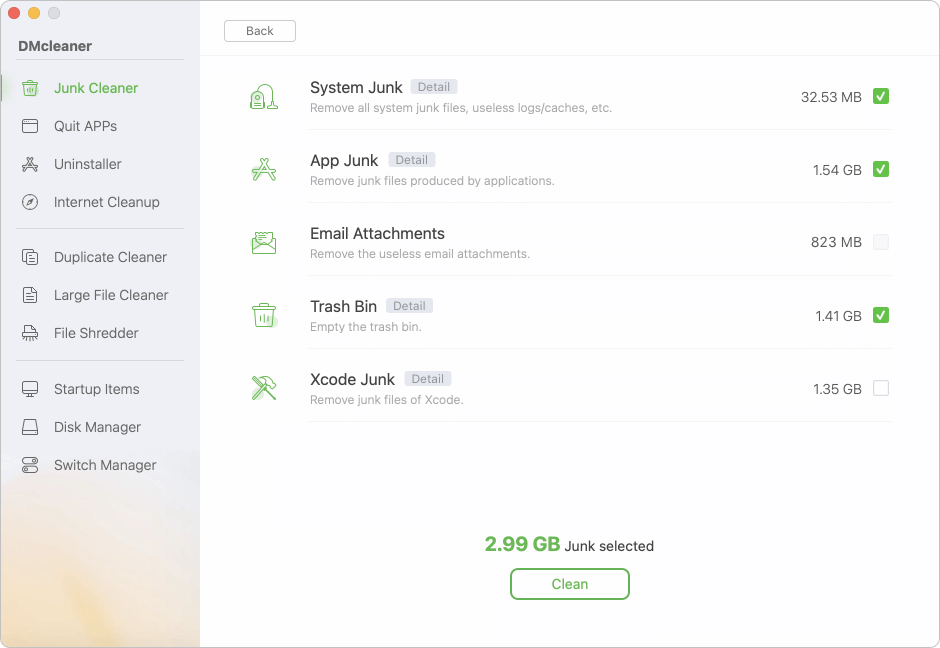
⚫Select the junk data you want to delete, click on Clean button.
Benefits of Trusted Tools:
✔ Automatically detect and safely remove system junk
✔ Visual breakdown of storage usage
✔ One-click cleanup without risking important files
Remember:
- Only use reputable software from verified developers.
- Avoid aggressive cleaners that claim to "boost" performance with unrealistic promises.
How Much Space Can You Recover?
Cleaning caches and system junk often reclaims 2 to 10 GB or more, depending on how long it's been since your last cleanup. Apps like browsers, video editors, and creative software (e.g., Photoshop) can accumulate massive caches.
When Not to Delete Cache Files
Some caches improve app performance. You may notice apps load slightly slower after clearing caches initially. That's normal; they rebuild fresh caches over time.
Avoid deleting cache files if:
- You're unsure about the folder contents
- You're actively working on time-sensitive tasks
- You rely on apps with complex configuration files stored in cache
5. Manage Storage with macOS Recommendations
macOS provides built-in tools to help manage space:
- Go to Apple Menu > About This Mac > Storage > Manage. (for macOS Monterey or earlier versions)
- Review options:
- Store in iCloud: Moves files, photos, and messages to iCloud.
- Optimize Storage: Removes watched iTunes movies and TV shows.
- Empty Trash Automatically: Deletes items in Trash after 30 days.
- Reduce Clutter: Allows manual review of large files.
These built-in recommendations can free up significant space safely.
6. Delete Old iOS Backups and Time Machine Snapshots
iOS Backups:
- Open Finder, connect your iPhone/iPad.
- In device summary, check Manage Backups, and delete outdated ones.
Time Machine Snapshots:
- Open Terminal, type:
tmutil listlocalsnapshots /
- To delete specific snapshots:
sudo tmutil deletelocalsnapshots [snapshot date]
Snapshots can occupy large portions of storage unnoticed, so managing them helps reclaim space.
7. Move Files to External Storage or Cloud Services
For permanent storage management:
- Transfer large files to external drives or SSDs.
- Use reliable cloud services:
- iCloud Drive (seamless Mac integration)
- Google Drive
- Dropbox
Cloud storage offers flexibility while keeping your Mac’s startup disk clutter-free.
Advanced Solutions for Severe Cases to Free Up Space on Mac
If storage issues persist despite cleanup:
1. Create a New Startup Disk or Partition
- Install macOS on an external SSD.
- Boot from the new disk when needed, reducing pressure on your internal drive.
This is especially useful for Macs with smaller internal storage.
2. Reinstall macOS
As a last resort, reinstalling macOS can help eliminate hidden junk files:
- Backup important data with Time Machine or manually.
- Restart your Mac while holding Command + R (for Intel-based Mac.) or Power button (for Apple silicon Mac.)
- Select Reinstall macOS and follow the prompts.
Reinstallation doesn’t erase personal files but ensures system files are refreshed.
3. Upgrade to a Larger Internal SSD
Older Macs allow internal storage upgrades. Consider replacing your disk with a higher-capacity SSD.
Note: Upgrades depend on your Mac model. Newer Macs with M1/M2 chips have non-removable storage.
Preventive Tips to Avoid "Startup Disk Almost Full" in the Future
- Regularly monitor storage in About This Mac > Storage (for macOS Monterey earlier).
- Empty Trash and Downloads folder weekly.
- Enable Optimize Storage and automatic Trash emptying.
- Periodically delete caches and system junk.
- Move large files to external drives or the cloud.
- Be cautious when installing apps - only keep essential ones.
- Schedule monthly cleanups using manual methods or trusted tools.
Consistent maintenance reduces the risk of sudden disk space warnings.
Conclusion
The "Your Startup Disk is Almost Full" warning on Mac is inconvenient but fixable. From clearing out junk files to managing storage with built-in tools, the solutions above will help you reclaim space and improve your Mac's performance.
Ignoring storage warnings can lead to severe slowdowns, app crashes, or even system instability. That's why taking action early is crucial.
If you've tried all recommended solutions and space remains limited, consider advanced steps like creating a new startup disk, reinstalling macOS, or upgrading your internal SSD.
By following preventive measures and managing storage regularly, you can ensure your Mac runs efficiently - free from storage headaches.
💡Tip: The quickest way to free up disk space on your Mac is to use DMcleaner for Mac to delete all junk data and useless files from your Mac. 100% safe.
Donemax DMcleaner for Mac
The powerful, safe and easy-to-use Mac cleaning & maintenance application. It offers 10 tools such as junk cleaner, duplicate finder, file shredder, switch manager to help clean up junk data, speed up slow Mac and manage files & disks, etc.
Related Articles
- Jul 15, 2025How to Enable and Disable Built-in Camera on Mac (Complete Guide)
- Mar 11, 2025How to Use Seagate One Touch SSD on Mac?
- Mar 21, 2025How to Use a Western Digital External Hard Drive on a Mac?
- Jun 03, 2026OpenCore Legacy Patcher Guide: Update Your Unsupported Mac Safely
- Jul 27, 2025How to Customize Dock on Mac, How to Hide Dock on Mac?
- Nov 13, 2024Clean Install macOS Mojave: The Guide for a Fresh Mac Experience

Contributing Writer
Charles
Charles, who lives in Sydney, Australia, is an editor & writer of Donemax Team. He is good at writing articles related with Apple Mac computers, Windows operating systems, data recovery, data erasure, disk clone and data backup, etc. He loves reading and playing tennis in his spare time and is interested in testing new digital devices such as mobile phones, Macs, HDDs, SSDs, digital cameras, etc.

Editor in chief
Gerhard Chou
In order to effectively solve the problems for our customers, every article and troubleshooting solution published on our website has been strictly tested and practiced. Our editors love researching and using computers and testing software, and are willing to help computer users with their problems