
Written byStevenUpdated on Jun 10, 2026
Can You Install macOS Tahoe on an Unsupported Mac?
Approved byGerhard Chou
Before we start: Before installing macOS Tahoe on unsupported Macs, it's necessary to make a full and bootable clone for the old system. Also, you can create a clone for the Mac after installing the macOS Tahoe as a full backup.
PAGE CONTENT:
macOS Tahoe, Apple's latest operating system, brings a suite of exciting new features, enhanced security, and performance improvements. While officially designed for modern Macs, many older systems are left out of the upgrade list. For users with unsupported Macs, this limitation can be frustrating, especially if you want to enjoy the latest features or breathe new life into older hardware.
Fortunately, with patching tools like OpenCore Legacy Patcher or DosDude's patchers, it is possible to install macOS Tahoe on unsupported Macs. This guide provides a complete, step-by-step walkthrough for safely installing macOS Tahoe on older machines.
Understanding Compatibility with macOS Tahoe
Apple maintains a strict list of supported devices for each macOS release. Unsupported Macs typically fail to meet hardware requirements such as CPU architecture, graphics capability, or firmware updates. Installing macOS Tahoe on these machines requires workarounds, which can involve patching the installer, adding kernel extensions, or modifying bootloaders.
Supported Macs usually include:
- MacBook Pro (2015 and later)
- MacBook Air (2015 and later)
- iMac (2015 and later)
- Mac Mini (2014 and later)
- Mac Pro (2013 and later)
Why some Macs are unsupported:
- Older GPUs may lack Metal support required by macOS Tahoe.
- Legacy CPUs may not support required instruction sets.
- Firmware limitations prevent the standard installer from running.
- New system features may rely on hardware unavailable in older Macs.
Risks of installing on unsupported hardware:
- System instability or kernel panics.
- Limited support for Wi-Fi, Bluetooth, or graphics acceleration.
- Difficulty receiving future software updates.
- Possible data loss if backup precautions aren't followed.
Preparing Your Old Mac for macOS Tahoe Installation
Before attempting to install macOS Tahoe on unsupported Macs, thorough preparation is crucial to avoid data loss and ensure success.
1. Backup Your Data
Use Time Machine, Donemax Disk Clone for Mac, or an external drive to back up all important files. Installing a patched macOS can potentially erase your data if mistakes occur during the process.
2. Check System Requirements
Ensure your Mac has:
- Minimum 8GB RAM recommended for smooth operation.
- At least 50GB free storage for macOS Tahoe installation.
- A CPU capable of running patched macOS Tahoe (Intel Macs 2008+ or Apple Silicon alternatives via VM).
3. Create a Bootable USB Installer
A USB drive with at least 16GB storage is required. To create a bootable installer:
- Download macOS Tahoe from the App Store on a supported Mac or obtain the official macOS installer file.
- Use Terminal commands or third-party tools like OpenCore Legacy Patcher or UniBeast to make the USB drive bootable.
Example Terminal command for a standard USB creation:
sudo /Applications/Install\ macOS\ Tahoe.app/Contents/Resources/createinstallmedia --volume /Volumes/MyUSB
4. Install Patchers
Two primary patching tools allow installation on unsupported Macs:
- OpenCore Legacy Patcher (OCLP): Modern, actively maintained, supports kernel patches, GPU fixes, and more.
- DosDude Patchers: Older but effective method for legacy hardware, includes prebuilt installers with patches applied.
Methods for Installing macOS Tahoe on Unsupported Macs
Method 1. Using OpenCore Legacy Patcher (Recommended)
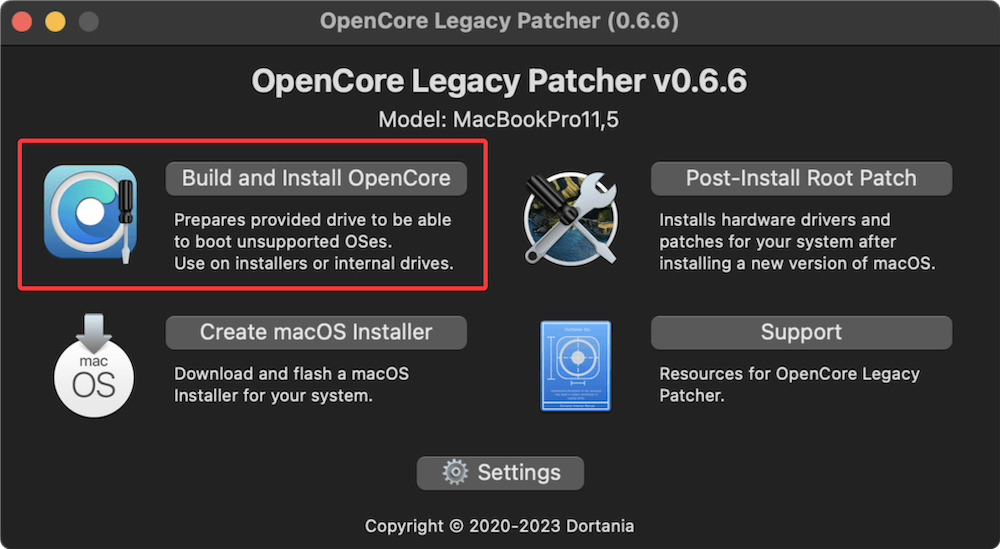
OpenCore Legacy Patcher (OCLP) modifies macOS to bypass hardware restrictions, adding necessary drivers and kernel patches.
- Download OCLP from the official GitHub repository.
- Open OCLP and select "Build and Install OpenCore".
![install macOS Tahoe on unsupported Macs]()
- Choose the USB installer you created.
- Apply patches for CPU, GPU, and Wi-Fi compatibility.
- Reboot your Mac and hold Option (⌥) key to select the patched USB drive.
![install macOS Tahoe on unsupported Macs]()
- Follow the macOS installer prompts.

OCLP allows additional customization:
- GPU patches for older graphics cards.
- Wi-Fi/Bluetooth fixes.
- Boot arguments for improved stability.
Method 2. Using DosDude Patchers
DosDude patchers have been a reliable tool for installing macOS on older machines. While they are less maintained than OCLP, they still support many older Mac models.
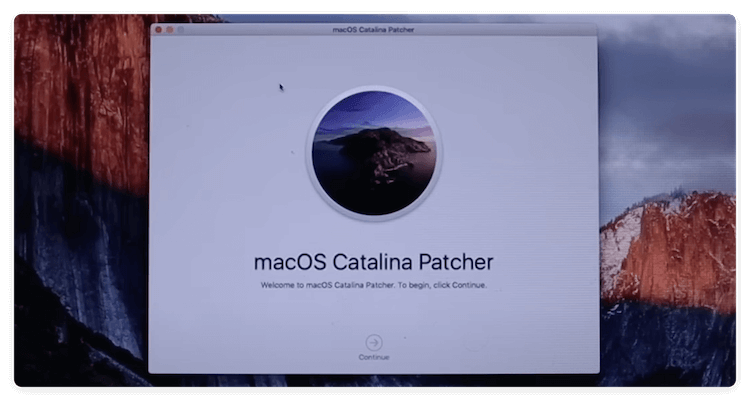
- Download the macOS Tahoe patcher from DosDude's website.
- Run the patcher, which prepares the USB installer with all necessary patches.
![install macOS Tahoe on unsupported Macs]()
- Boot from the USB installer by holding Option (⌥).
- Follow the installation prompts.
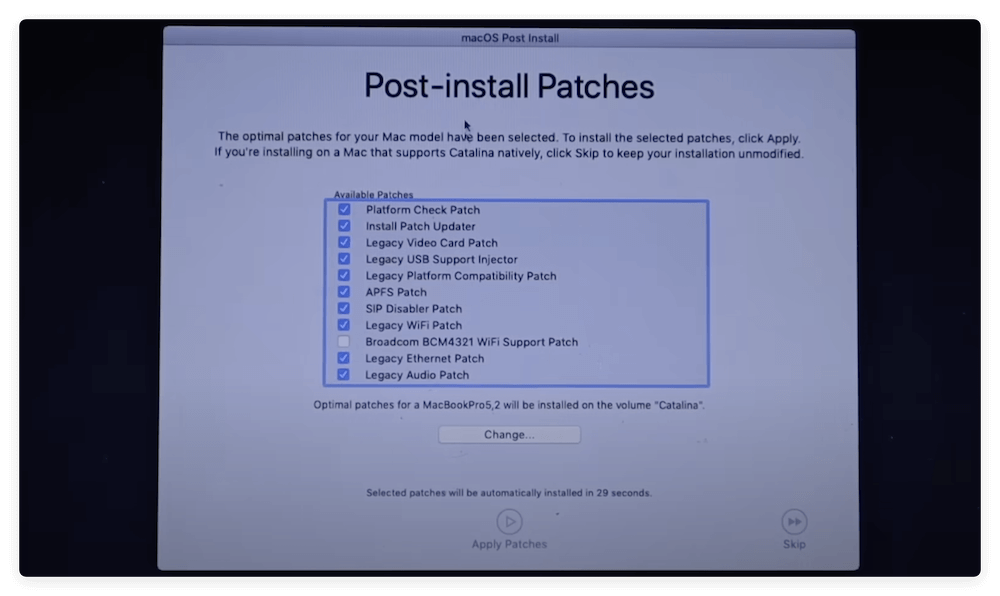
- Apply post-installation patches provided by DosDude for full hardware support.
![install macOS Tahoe on unsupported Macs]()
Pros and cons:
- Pros: Simple to use, good for Macs from 2008–2015.
- Cons: May lack support for the newest macOS features, limited updates.
Method 3. Installing macOS Tahoe in a Virtual Machine (Optional)
If modifying your main system is risky, consider running macOS Tahoe in a VM.
- Tools: UTM, VMware Fusion, VirtualBox, or Parallels Desktop.
- Allows testing new features without affecting existing macOS installation.
- Limitations: Performance depends on host Mac's hardware; GPU acceleration may be limited.
Post-Steps after Installing macOS Tahoe on Unsupported Macs
Step 1. Install Necessary Drivers (Kexts)
After installation, some hardware components may not function out-of-the-box. macOS uses kernel extensions, or kexts, to communicate with hardware. Unsupported Macs often require additional or modified kexts to work properly.
Common kexts to install:
- Wi-Fi/Bluetooth kexts: Older Macs may have Wi-Fi or Bluetooth modules not recognized by macOS Tahoe. OpenCore Legacy Patcher includes prebuilt kexts for popular wireless chipsets.
- GPU kexts: If the display appears distorted, laggy, or certain graphical effects are missing, patched GPU drivers may be necessary.
- Audio kexts: Built-in speakers or headphone jacks may not function without proper audio kexts.
- USB kexts: Older Macs sometimes face issues with USB 3.0 or USB-C ports. Installing the correct kext ensures all ports work reliably.
How to install kexts:
- Open OpenCore Legacy Patcher and navigate to Post-Install Tools → Install Additional Kexts.
- Select the kexts your Mac requires.
- Reboot after installation to ensure the changes take effect.
Step 2. Optimize System Performance
Installing a modern OS on older hardware can strain system resources. Optimizing settings improves performance and prolongs hardware lifespan.
Key optimizations:
- Reduce Startup Items: Navigate to System Settings → Users & Groups → Login Items and disable unnecessary apps.
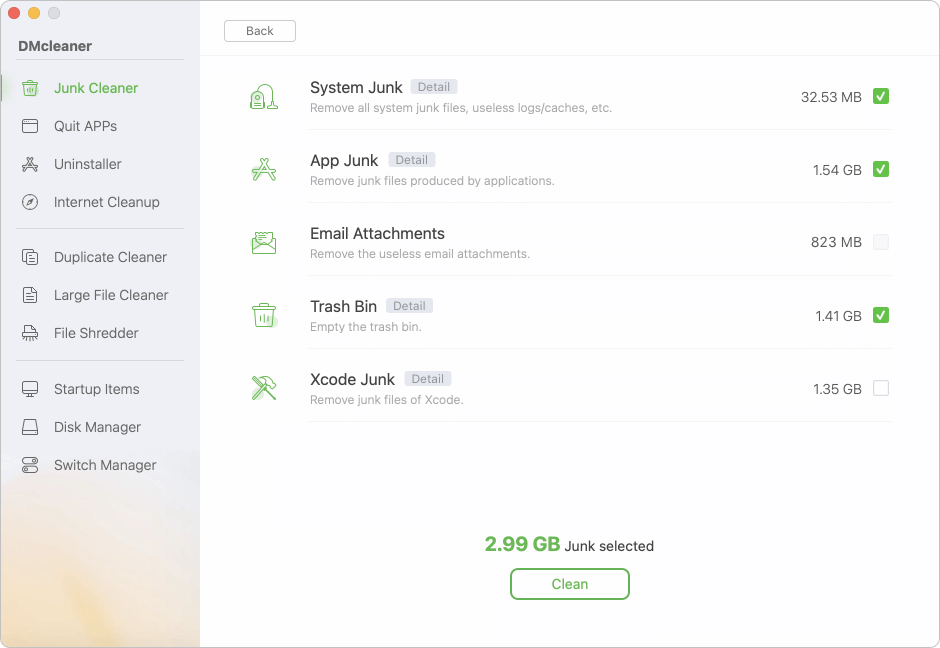
- Clear System Caches: Use utilities like Donemax DMcleaner for Mac to clear caches and remove leftover files from previous macOS versions.
![install macOS Tahoe on unsupported Macs]()
- Adjust Visual Effects: Go to System Settings → Accessibility → Display and reduce motion or transparency if the system feels sluggish.
- Enable TRIM (for SSDs): Improves write speeds and prolongs SSD lifespan. Check TRIM status with Terminal:
system_profiler SPSerialATADataType | grep 'TRIM'
Step 3. Backup the Patched System
After successfully installing and optimizing macOS Tahoe, creating a full backup is essential. Unsupported installations carry inherent risks—future updates or accidental misconfigurations can break the system.
Backup strategies:
- Time Machine: Use a large external drive to make a complete backup. Time Machine can restore your system to its current state if needed.
- Donemax Disk Clone for Mac: Create a bootable clone of your patched macOS installation for easy recovery.
![install macOS Tahoe on unsupported Macs]()
- Disk Images: Using Disk Utility, create a compressed disk image of your system. This can be stored separately for disaster recovery.

Step 4. Verify Hardware Functionality
After installation and optimization, ensure all hardware components work correctly. This includes:
- Wi-Fi & Bluetooth: Test connection stability and range.
- Audio: Play sound through built-in speakers and headphones.
- Graphics Acceleration: Open a graphics-intensive app or game to verify smooth performance.
- USB Ports & Thunderbolt: Connect external drives and peripherals to confirm functionality.
- Camera & Microphone: Test FaceTime or Photo Booth to ensure input devices work properly.
Step 5. Maintain System Updates Safely
Apple regularly releases macOS updates to fix bugs and improve security. On unsupported Macs, blindly installing updates may cause system instability.
Best practices:
- Check Patcher Compatibility: OpenCore Legacy Patcher and DosDude forums usually indicate which updates are safe for unsupported Macs.
- Delay Updates: Allow the community to test new updates before applying them to your system.
- Backup Before Updating: Always create a fresh backup before installing any system update.
Troubleshooting Common Issues
1. Kernel Panics and Boot Loops
- Check for missing or incompatible kexts.
- Ensure bootloader is correctly configured.
- Boot into safe mode for diagnostics.
2. Missing Hardware Drivers
- Audio, Wi-Fi, and GPU may need separate patches.
- Use OpenCore Legacy Patcher's post-install tools to resolve missing drivers.
3. Reverting to Previous macOS
- Boot from the original macOS backup USB or Time Machine.
- Restore your system if installation fails.
Tips and Best Practices
- Keep Backups Updated: Always maintain multiple copies of your system.
- Regularly Update Patches: Both OpenCore and DosDude patches are periodically updated to fix bugs.
- Avoid System Updates Without Checks: Future macOS updates can break unsupported hardware; check patcher forums first.
- Monitor System Performance: Some older Macs may not handle new features smoothly; adjust settings for stability.
Conclusion
Installing macOS Tahoe on unsupported Macs is no longer a far-fetched idea thanks to tools like OpenCore Legacy Patcher and DosDude patchers. While it requires preparation and careful execution, older Macs can enjoy many of Tahoe's features, from improved security to interface enhancements.
By following the steps outlined above — backing up your Mac data, creating a patched installer, applying necessary kexts, and troubleshooting carefully—you can safely extend the life of your Mac and experience the latest macOS on hardware previously deemed obsolete. Always proceed with caution and maintain backups, as unsupported installations can carry risks. Ultimately, this approach offers a practical way to modernize your old Mac and keep it productive in 2025 and beyond.
Donemax Disk Clone for Mac
An award-winning disk cloning program to help Mac users clone HDD/SSD/external device. It also can create full bootable clone backup for Macs.
Related Articles
- Mar 30, 2026Turn Off iPhone Mirroring on Mac: 4 Easy Methods
- May 11, 2026How to Create Bootable USB Installer for macOS Sequoia?
- May 21, 2026How to Safely Eject or Force Eject an External Drive, USB, or SD Card on Mac?
- Nov 11, 2024Fix macOS Sequoia Crashes Frequently or Keeps Restarting
- Jun 10, 2026Where Is the Power Button on a Mac? (All Models)
- Jul 27, 2025How to Lock and Unlock a USB Flash Drive on Mac?

Contributing Writer
Steven
Steven has been a senior writer & editor of Donemax software since 2020. He's a super nerd and can't imagine the life without a computer. Over 6 years of experience of writing technical solutions and software tesing, he is passionate about providing solutions and tips for Windows and Mac users.

Editor in chief
Gerhard Chou
In order to effectively solve the problems for our customers, every article and troubleshooting solution published on our website has been strictly tested and practiced. Our editors love researching and using computers and testing software, and are willing to help computer users with their problems