
Written byCharlesUpdated on Jul 27, 2025
How to Lock and Unlock a USB Flash Drive on Mac?
Approved byGerhard Chou
Before we start: It is easy to lock or unlock an USB drive on Mac. With data recovery software, you even can recover lost or inaccessible files from an encrypted or locked USB flash drive. If you have reformatted an locked USB drive, you can use data recovery software - such as Donemax Data Recovery for Mac to unformat the USB drive and get all erased/lost files back!
PAGE CONTENT:
USB flash drives are incredibly convenient for storing and transferring files across devices, but they can easily be lost or stolen, putting your personal or professional data at risk. If you're a Mac user looking for ways to lock or unlock a USB flash drive, macOS offers several methods - some built-in, some requiring third-party apps - to help secure your data. Whether you want to encrypt a USB drive, set it to read-only, or password-protect a folder on it, this guide walks you through all the options in detail.
Why Locking a USB Flash Drive Matters?
Flash drives are small and portable, which makes them easy to misplace. If you're storing sensitive documents, personal photos, or work files on a USB drive, locking it with encryption or a password ensures that unauthorized users cannot access your data. On macOS, the native tools like Finder and Disk Utility provide robust options to secure your USB drives, while third-party tools can add cross-platform compatibility and advanced features.
What Does "Locking" a USB Drive on Mac Mean?
Locking a USB drive on macOS can involve one of the following actions:
- Encryption: Securing the drive contents with a password using built-in macOS tools.
- Password Protection: Creating a secure, encrypted disk image (.dmg) that requires a password to open.
- Read-Only Mode: Changing file permissions to prevent unauthorized edits or deletions (not true locking but useful in some cases).
It's important to note that macOS doesn't allow direct password-protection of USB drives unless you encrypt them or use disk images.
Methods to Lock an USB Drive or Other Device on Mac
Method 1: Encrypt USB Flash Drive via Finder (macOS Built-In)
This is the most straightforward way to secure an entire USB drive.
Steps:
- Insert the USB Drive: Plug your USB flash drive into the Mac.
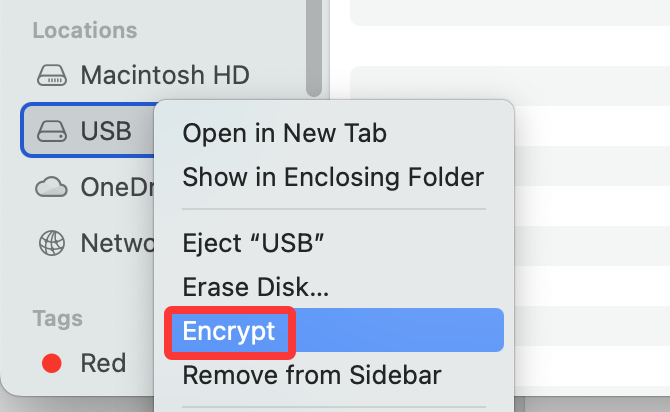
- Open Finder: Find the USB drive in the sidebar.
- Right-click the Drive: Choose the "Encrypt [Drive Name]" option.
![lock USB drive on Mac]()
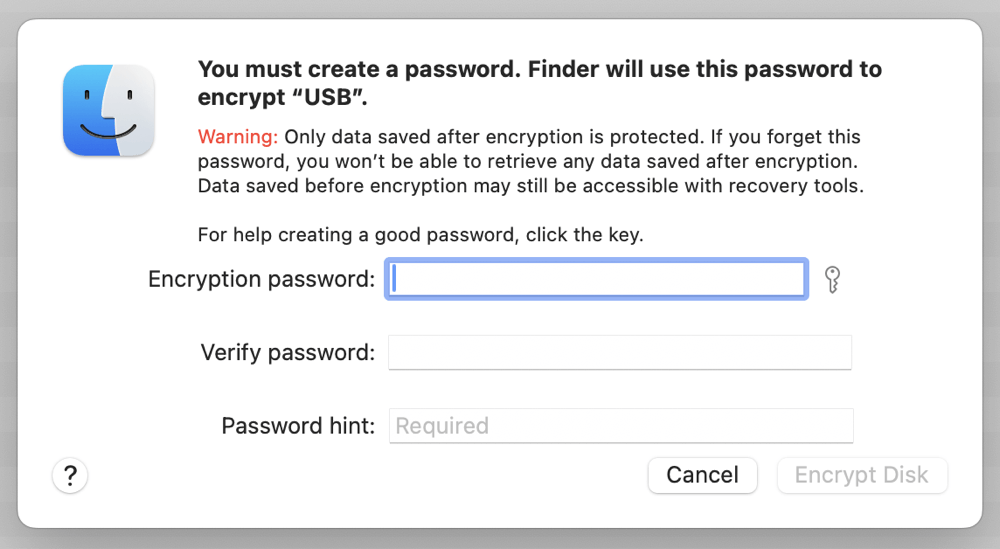
- Set Password: Enter and verify a strong password. Add a password hint if needed.
![lock USB drive on Mac]()
- Wait for Encryption: macOS will begin encrypting the drive. Time varies depending on size and drive speed.
💡 Notes:
- This option only appears if the drive is formatted in Mac OS Extended (Journaled) or APFS.
- If not, you'll need to reformat the drive first using Disk Utility (we'll cover that shortly).
- The encrypted drive will prompt for a password every time it's mounted on macOS.
Pros
- Simple and secure
- Fully integrated with macOS
- No need for additional apps
Cons
- Not compatible with Windows systems unless decrypted first
- Format limitations
Method 2: Create a Password-Protected Disk Image Using Disk Utility
If you don't want to encrypt the entire USB flash drive but still need to protect specific files or folders, creating a password-protected disk image (.dmg) is an ideal solution. This method uses macOS's built-in Disk Utility tool and is particularly helpful when you need flexible, file-level security on your USB.
A disk image behaves like a virtual disk. Once created, it can be opened (mounted) only by entering the correct password. After unlocking, it acts like a regular volume, allowing you to add, modify, or remove files. When you eject the disk image, it becomes inaccessible again until re-mounted with the password.
When to Use a Disk Image
- You want to lock only part of your USB content (e.g., confidential documents).
- You need a simple, password-protected method without changing the file system of the USB.
- You want to easily move the secure container between Macs without encrypting the entire drive.
Steps:
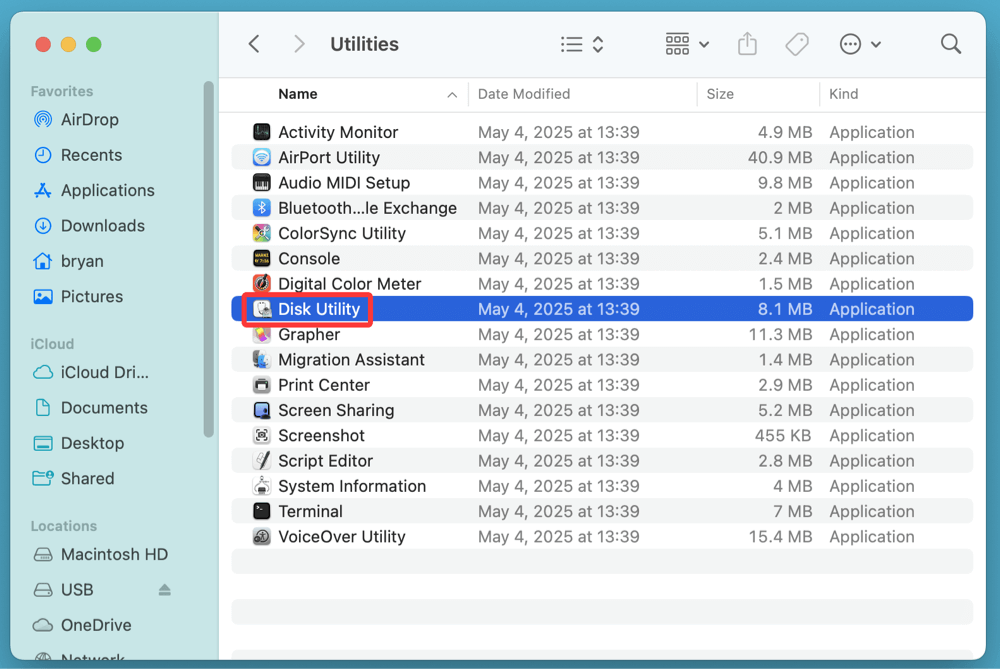
- Open Disk Utility: Go to Applications under Utilities.
![lock USB drive on Mac]()
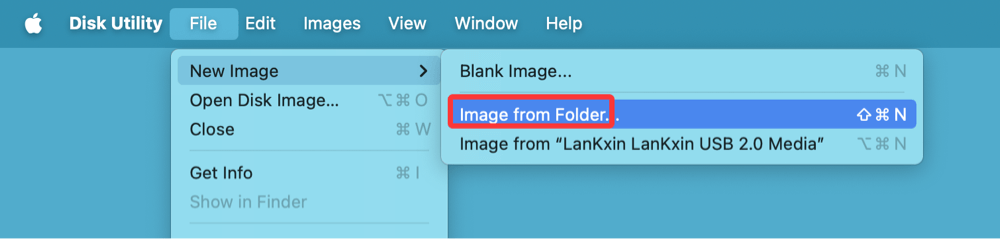
- Click File > New Image > Image from Folder.
![lock USB drive on Mac]()
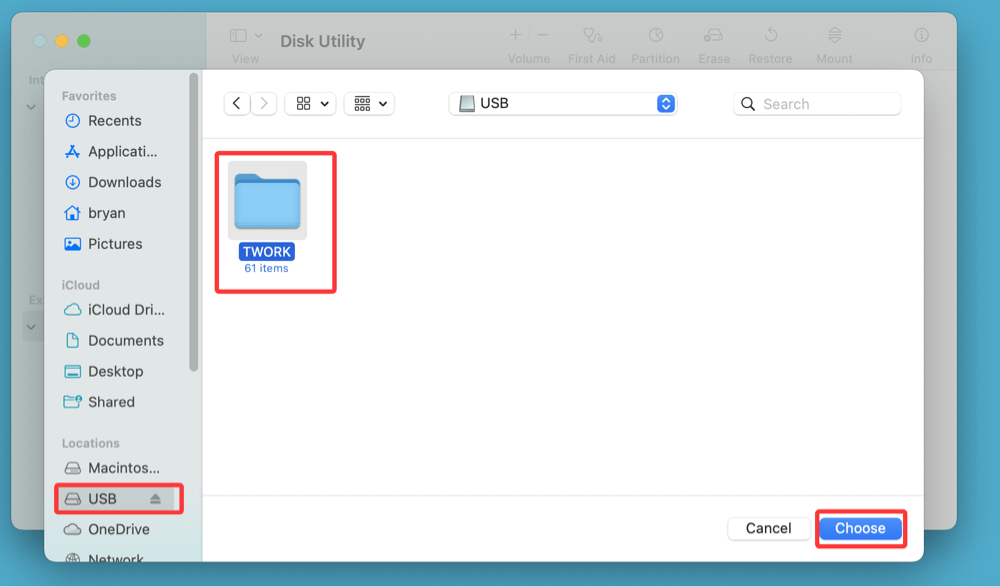
- Select the Folder: Choose a folder from your USB flash drive that you want to lock.
![lock USB drive on Mac]()
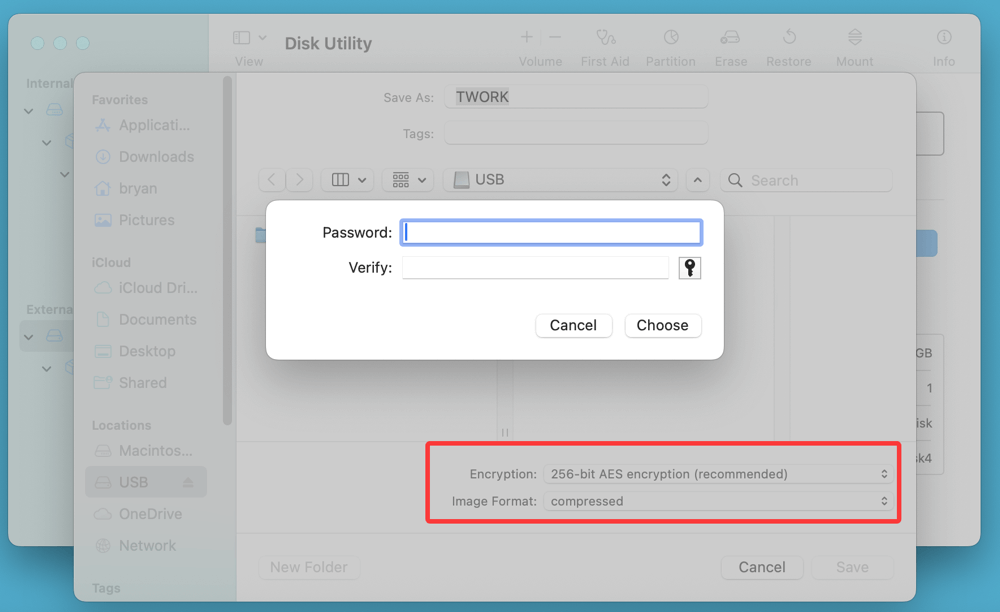
- Choose Encryption: Select either 128-bit or 256-bit AES encryption (256-bit is more secure).
![lock USB drive on Mac]()
- Enter Password: Create and confirm a secure password.
- Save the Disk Image: Select the destination (your USB drive), name the file, and click "Save".
The result is a .dmg file on your USB drive. To access its contents, double-click and enter the password.
How to Use the Encrypted Disk Image?
Whenever you want to access your protected files:
- Insert the USB drive into your Mac.
- Double-click the .dmg file.
- A prompt will ask for your password.
- Upon correct entry, the disk image will mount as a virtual drive in Finder.
- Open it and use it like any other folder - copy, edit, or delete files inside.
⭐ Important: After you're done, eject the virtual disk (right-click > Eject or Cmd + E) to lock it again.
Bonus Tip: Make It Cross-Compatible
If you want to create a password-protected archive that works on both Mac and Windows, consider using Keka (for macOS) to create a .zip or .7z archive with AES encryption.
Best Use Case Scenarios
- Freelancers who carry client files on-the-go
- Students storing confidential projects or research
- Professionals needing to transport sensitive documents (e.g., legal, financial, medical)
Pros
- Partial encryption (no need to encrypt the whole drive)
- Can be transferred easily
- Better control over specific content
Cons
- Extra steps required to access files
- Still macOS-specific unless converted
Method 3: Make USB Flash Drive Read-Only
This isn't encryption, but it's a quick way to prevent edits or accidental deletions.
Change Permissions in Finder:
- Insert the USB Drive.
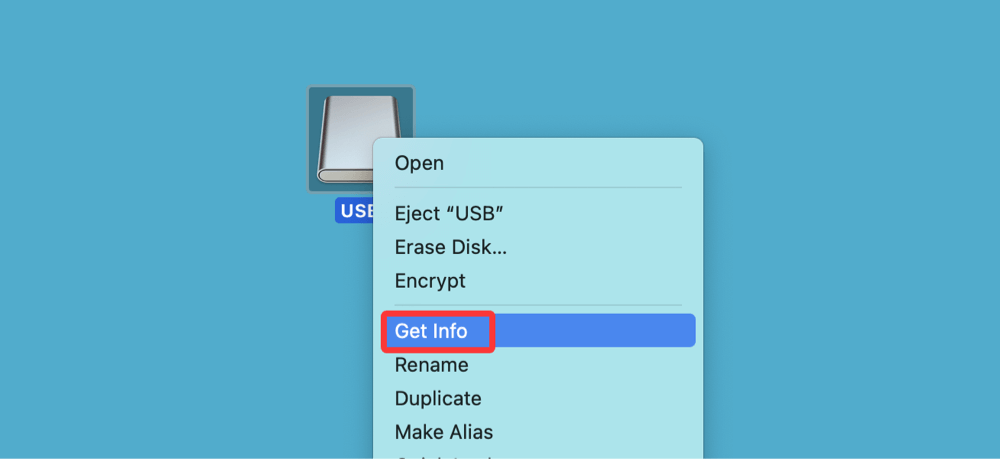
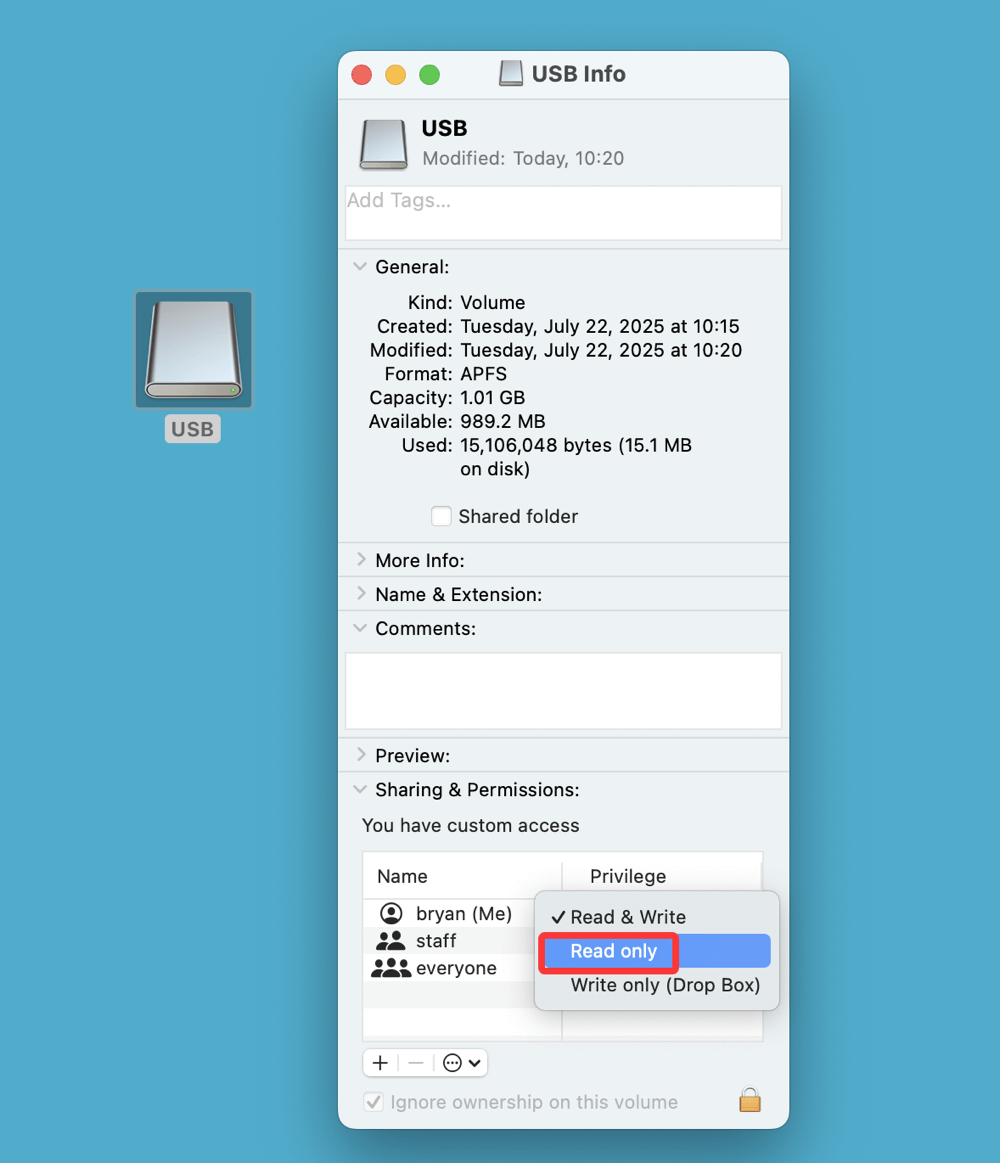
- Right-click > Get Info.
![lock USB drive on Mac]()
- Scroll to Sharing & Permissions.
- Set access for all users to Read only.
![lock USB drive on Mac]()
Using Terminal (Advanced Users):
sudo chmod -R 444 /Volumes/YourDriveName
This makes all files read-only.
To reverse it:
sudo chmod -R 755 /Volumes/YourDriveName
Pros
- Easy to implement
- Prevents accidental changes
Cons
- Doesn't stop someone from reformatting the drive
- Not secure against knowledgeable users
Using Third-Party Tools for Advanced Locking
macOS tools are great, but sometimes you need additional features like cross-platform encryption or more flexible password protection.
Recommended Tools:
1. VeraCrypt
- Free and open-source
- Cross-platform (Windows, Mac, Linux)
- Supports container-based encryption and full-drive encryption
How to Use VeraCrypt:
- Download and install VeraCrypt on your Mac.
- Plug in the USB flash drive.
- Create an encrypted volume on the USB drive.
- Mount the volume by entering your password.
2. Kanguru Defender
- Commercial-grade encrypted USB drives
- Hardware encryption
- Tamper-proof security
3. USB Lock for Mac
- Easy-to-use app for locking access to USB ports
- Focused more on blocking USB access on your system
Pros of Third-Party Tools:
- Stronger encryption options
- Better cross-platform support
- Some tools offer recovery methods
Cons
- Slight learning curve
- Not built into macOS
- Potential cost (for commercial tools)
How to Unlock a Locked USB Flash Drive?
🔹 Unlocking Encrypted Drive via Finder
- Plug in the drive.
- A password prompt will appear.
- Enter the correct password to access contents.
- Check "Remember this password in my keychain" (optional).
🔹 Unlocking Disk Images (.dmg)
- Double-click the .dmg file.
- Enter the password.
- Mounts as a virtual disk on your Mac.
Important:
- If you forget the password, there is no recovery method for encrypted USB drives or disk images. Always back up your data and store passwords securely.
🔹 Removing USB Encryption on Mac
To remove encryption from a USB drive:
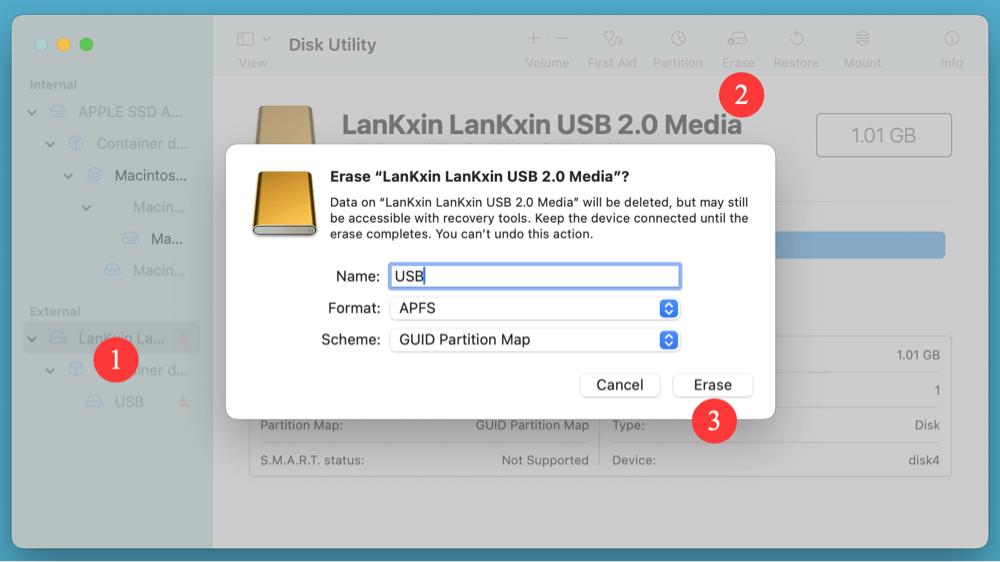
- Open Disk Utility.
- Select your encrypted drive.
- Click Erase.
- Choose a format such as exFAT or Mac OS Extended (Journaled).
- Name the drive and click Erase.
![lock USB drive on Mac]()
⚠️ Warning: This will delete all content on the drive. Backup data before doing this.
Tips for Secure USB Drive Use
- Always eject drives properly to avoid data corruption.
- Avoid using encrypted drives on public or shared computers.
- Use strong passwords: at least 12 characters, with symbols and numbers.
- Back up your encrypted data in case the drive gets damaged or lost.
- Label encrypted drives discreetly to avoid drawing attention.
Common Issues and How to Fix Them
USB Drive Not Showing in Finder After Encryption
- Try accessing through Disk Utility.
- Check if macOS is set to show external drives.
Password Prompt Not Appearing
- Reconnect the drive.
- Restart Finder or your Mac.
Drive Becomes Read-Only After Unlocking
- Use Disk Utility to repair the drive.
- Check permissions under Get Info.
Drive Is Unreadable on Windows
- Encrypted drives formatted in macOS formats like APFS or HFS+ won't mount on Windows.
- Use FAT32 or exFAT and third-party encryption tools for cross-compatibility.
Recover Files from Locked or Reformatted USB Drive on Mac
If you are looking for a solution to recover files from an locked or reformatted USB drive on Mac, data recovery software - such as Donemax Data Recovery for Mac is a good option.
Step 1. Download and install Donemax Data Recovery for Mac on Mac.
Step 2. Open Donemax Data Recovery for Mac, then select the USB drive to start data recovery.

Step 3. Click on Scan button so that Donemax Data Recovery for Mac can deeply scan the USB drive and find all recoverable files including existing files, inaccessible files, deleted/formatted/lost files.

Step 4. After scanning, you can preview all recoverable files. Then select the wanted files and save them to a safe location.

Conclusion
Locking and unlocking a USB flash drive on macOS doesn't require advanced skills -thanks to tools like Finder and Disk Utility, most users can encrypt drives or create password-protected disk images with ease. For more flexibility or compatibility across different operating systems, third-party tools like VeraCrypt offer robust encryption options.
If you just need a quick way to prevent edits, changing the drive to read-only might suffice, but for true data security, encryption is the way to go. Always remember: your USB flash drive is only as secure as the precautions you take.
Donemax Data Recovery for Mac
Donemax Data Recovery for Mac is one of the best Mac data recovery software. It is easy-to-use and can help in recovering deleted, formatted, inaccessible or lost data from Mac HDD/SSD, external disk, USB drive, SD card, camera or other storage devices.
Related Articles
- Apr 17, 20268 Ways to Fix Mac Error Code -8062 (2026 Troubleshooting Guide)
- Aug 07, 2024How to Format SD Card on Mac?
- Apr 18, 2025Couldn't Mount a Disk on Mac After Erasing It? Fix It Now
- Jan 04, 2025How to fix fsck_msdos on Mac without Data Loss?
- Jan 16, 202510 Solutions to Fix Fusion Drive Not Mounting or Not Showing Up on Mac
- Apr 17, 2026Install Google Drive on Mac Without Wasting Disk Space

Contributing Writer
Charles
Charles, who lives in Sydney, Australia, is an editor & writer of Donemax Team. He is good at writing articles related with Apple Mac computers, Windows operating systems, data recovery, data erasure, disk clone and data backup, etc. He loves reading and playing tennis in his spare time and is interested in testing new digital devices such as mobile phones, Macs, HDDs, SSDs, digital cameras, etc.

Editor in chief
Gerhard Chou
In order to effectively solve the problems for our customers, every article and troubleshooting solution published on our website has been strictly tested and practiced. Our editors love researching and using computers and testing software, and are willing to help computer users with their problems