
Written byCharlesUpdated on Apr 28, 2026
Turn Off Notifications on Mac: Guide to a Distraction-Free Workspace
Approved byGerhard Chou
PAGE CONTENT:
- 1. The Quickest Way: Using Focus (formerly Do Not Disturb)
- 2. How to Turn Off Notifications for Specific Apps
- 3. Disabling "The Red Dots": Turning Off Badge App Icons
- 4. Privacy First: Hiding Notifications on the Lock Screen
- 5. Advanced Strategy: Using Siri and Automation
- 6. Managing Notifications on Older macOS Versions
- 7. Troubleshooting: Why Am I Still Getting Notifications?
- 8. Essential Tools for a Cleaner Mac
We've all been there. You're in the middle of a deep-focus project or a high-stakes Zoom meeting when suddenly, a flurry of "pings" and banners start popping up in the corner of your screen. Whether it's social media updates, news alerts, or just "helpful" system reminders, digital clutter can seriously kill your productivity.

Knowing how to turn off notification on Mac is a essential skill for any modern user. In this guide, we'll walk you through everything from a quick "mute" to a complete notification overhaul, ensuring your Mac works for you, not the other way around.
1. The Quickest Way: Using Focus (formerly Do Not Disturb)
If you need immediate silence without digging into deep menus, Focus mode is your best friend. This is the modern version of "Do Not Disturb," and it's incredibly powerful for home users who want peace and quiet instantly.
How to toggle Focus mode:
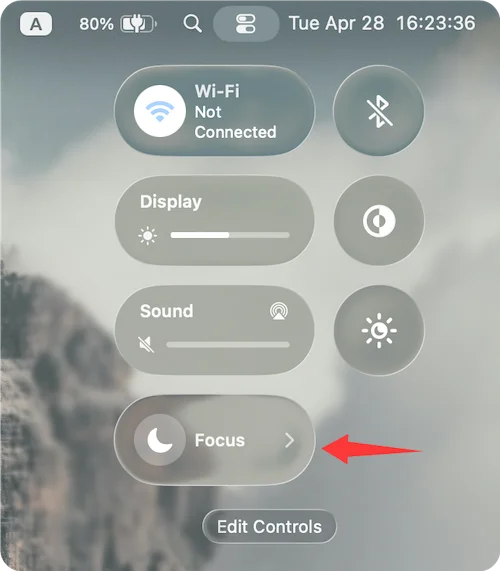
- Look at the top-right corner of your menu bar and click the Control Center icon (it looks like two small toggle switches).
- Click the Focus button.
![turn off notifications on Mac]()
- Select Do Not Disturb. You can choose to turn it on for one hour, until this evening, or indefinitely.
![turn off notifications on Mac]()
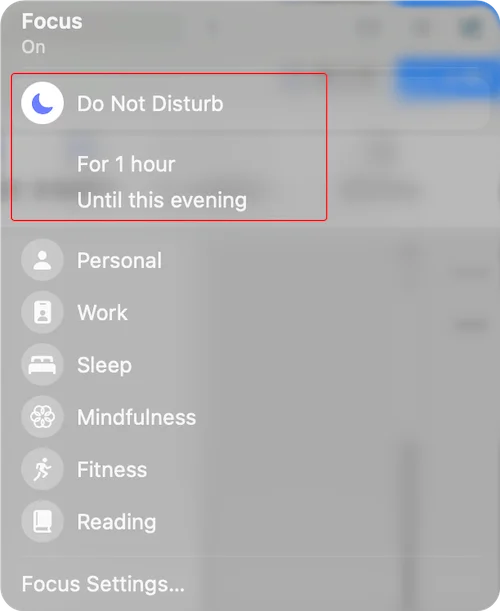
👀 Why this works: It's a "global" switch. It doesn't delete your notifications; it simply hides them so you can see them later when you're ready.
2. How to Turn Off Notifications for Specific Apps
Sometimes, you don't want to silence everything. You might want to keep your Work emails coming through while silencing your personal Messages or Steam updates.
Steps to manage app-specific alerts:
- Click the Apple Menu () and select System Settings.
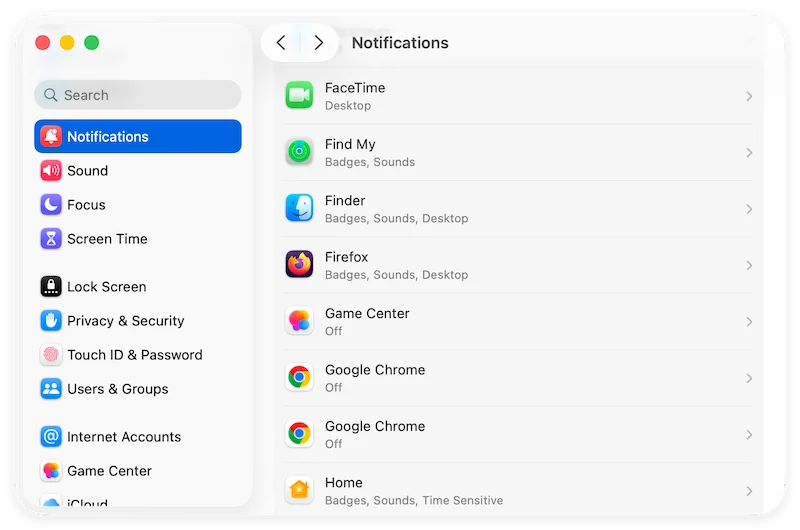
- In the sidebar, click on Notifications.
- Scroll down to the App Notifications section. Here you will see a list of every app installed on your Mac.
![turn off notifications on Mac]()
- Find the offending app and click on it.
- Toggle off Allow Notifications.
![turn off notifications on Mac]()
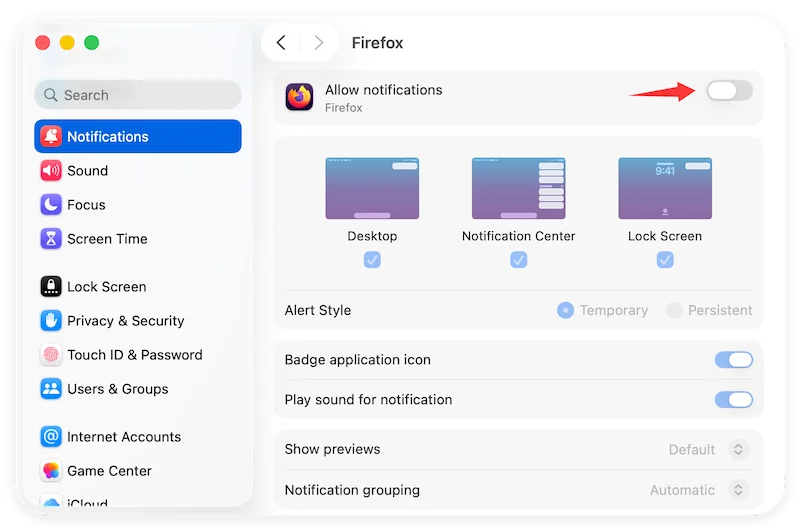
💡 Pro Tip: If you don't want to turn them off completely, you can change the "Alert style" from Banners (which disappear) to None. You can also uncheck Play sound for notification to keep things quiet but visible.
3. Disabling "The Red Dots": Turning Off Badge App Icons
Those little red circles with numbers on your Dock icons are called "Badges." For many, they are a source of "Notification Anxiety." Even if you silence the sound, the visual cue can still be distracting.
To remove badges:
- Go to System Settings > Notifications.
- Select the specific app (like Mail or Messages).
- Toggle off Badge application icon.

Now, your Dock will stay clean and minimalist, allowing you to check those apps on your own schedule.
4. Privacy First: Hiding Notifications on the Lock Screen
Do you ever leave your Mac in a coffee shop or a shared office? By default, macOS might show a preview of your messages on the lock screen. To keep your private business private:
- Navigate to System Settings > Notifications.
- Scroll to find Show Previews.
- Change this setting to When Unlocked or Never.
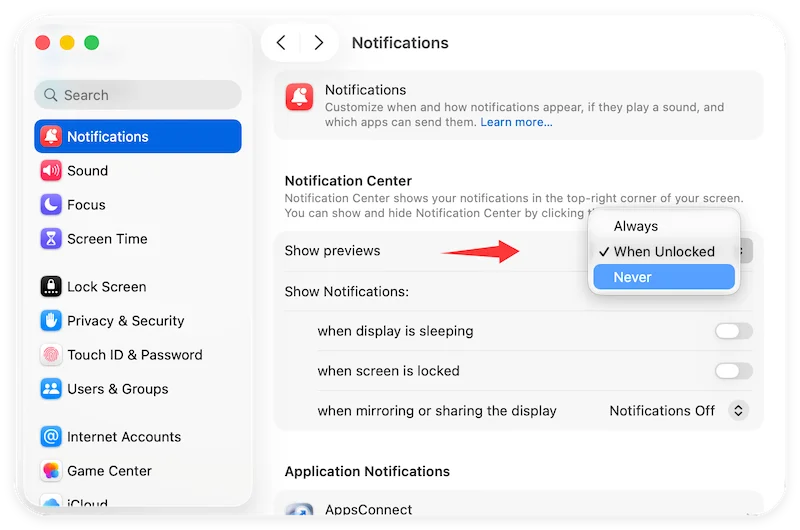
This ensures that even if a notification comes through, the content is hidden until you authenticate with Touch ID or your password.
5. Advanced Strategy: Using Siri and Automation
Now, it's more advanced to operate Mac, you can actually manage your notifications using voice commands or the Shortcuts app.
- Siri: Simply say, "Hey Siri, turn on Do Not Disturb until 5 PM." This is the fastest way for home users to manage distractions hands-free.
- Shortcuts: You can set a "Work Mode" shortcut that automatically turns off notifications and opens your browser when you arrive at a certain location or connect to a specific Wi-Fi network.
6. Managing Notifications on Older macOS Versions
If you are using an older Mac (like one running macOS Monterey or Big Sur), the steps are slightly different:
- Instead of System Settings, you'll look for System Preferences.
- The icon is usually a bell labeled Notifications & Focus.
- The logic remains the same: find the app in the sidebar and toggle the permission.
7. Troubleshooting: Why Am I Still Getting Notifications?
If you've followed the steps for how to turn off notification on Mac but alerts are still slipping through, check these three things:
- Critical Alerts: Some apps (like Find My or security software) have "Critical Alerts" that bypass Do Not Disturb. These must be disabled within the app's own settings.
- Shared Across Devices: If you have "Share Across Devices" turned on in your iCloud settings, turning off a Focus mode on your iPhone might accidentally turn it off on your Mac. Check this in System Settings > Focus.
- Browser Notifications: Sometimes the "ping" isn't coming from an app, but from a website (like Facebook or a news site) inside Safari or Chrome. You'll need to go to the Browser Settings > Websites > Notifications to block these.
8. Essential Tools for a Cleaner Mac
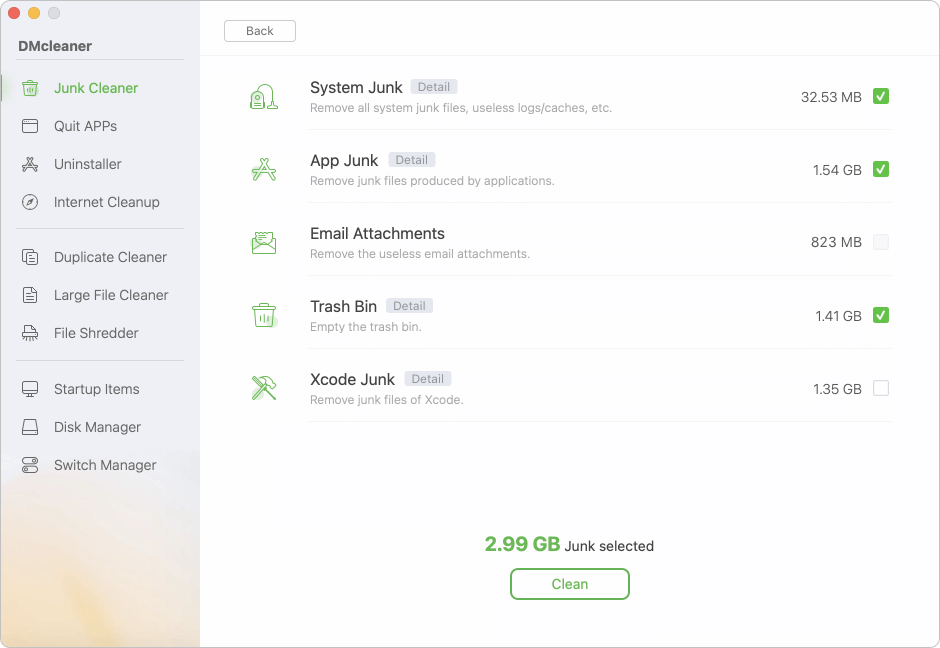
While macOS provides great built-in tools, sometimes a deeper clean is needed. If your Mac feels sluggish or "cluttered" even after fixing your notifications, consider using a maintenance utility.
Tools like Donemax DMcleaner for Mac can help you manage startup items (which often trigger those annoying "Background Items Added" notifications) and clear out system junk that might be slowing down your Notification Center.
Final Thoughts
Digital wellness starts with controlling your environment. By taking five minutes to optimize your macOS notification settings, you can transform your Mac from a source of stress into a streamlined tool for productivity. Whether you're a student, a creative, or a home user, a quieter Mac is a better Mac.
Summary Checklist for Home Users
- Need immediate quiet? Use the Control Center to toggle Focus.
- Annoyed by one app? Go to System Settings > Notifications and toggle it off.
- Want a clean Dock? Disable Badge app icons.
- Concerned about privacy? Set Show Previews to "When Unlocked."
Donemax DMcleaner for Mac
Donemax DMcleaner for Mac is an award-winning Mac cleanup & maintenance tool. It offers over 10 tools to help Mac users clean junk data. It helps speed up a slow Mac. Additionally, it includes a smart switch manager and disk manager for Mac.
Related Articles
- Jun 10, 2026Fix: Disk Utility Erase Button Greyed Out When Erasing Disk
- Jan 04, 2025How to fix fsck_msdos on Mac without Data Loss?
- May 20, 2025Convert RAW to ZIP on Mac: A Complete Guide
- Jun 10, 2026Can You Install macOS Tahoe on an Unsupported Mac?
- Apr 07, 2025[2025 Updated] 10 Reliable Tips for Speeding Up a Slow Mac
- Apr 18, 2025How to Boot into macOS Recovery Mode on Mac Studio?

Contributing Writer
Charles
Charles, who lives in Sydney, Australia, is an editor & writer of Donemax Team. He is good at writing articles related with Apple Mac computers, Windows operating systems, data recovery, data erasure, disk clone and data backup, etc. He loves reading and playing tennis in his spare time and is interested in testing new digital devices such as mobile phones, Macs, HDDs, SSDs, digital cameras, etc.

Editor in chief
Gerhard Chou
In order to effectively solve the problems for our customers, every article and troubleshooting solution published on our website has been strictly tested and practiced. Our editors love researching and using computers and testing software, and are willing to help computer users with their problems