
Written byLucienUpdated on Feb 27, 2024
External Hard Drive Is Read-Only on M3-Chip Mac, Fix It
Approved byGerhard Chou
PAGE CONTENT:
External hard drives are necessary to back up important info and add more storage space. But having problems like being read-only on M3-chip Macs can be annoying and stop you from getting work done. These chips, called M1, M2, and M3, were made by Apple, making Mac computers run much faster.
There may be problems with some external devices, like portable hard drives. If a Mac with an M3 chip finds an external hard drive as "read-only," the system can't write data to the drive, which limits what it can do. This guide will look at the most common reasons for this issue and give you step-by-step instructions on how to fix it.
Why Is the External Hard Drive Read-only on the M3-Chip Mac?
There can be many possible reasons, some of which are given below:
Compatibility with File Systems: It's possible that the external hard drive was set up with a file system that doesn't work well with macOS on Macs with the M3 chip.
Setting Up Permissions: If the portable hard drive or its files or folders don't have the right permissions, you might be unable to write to them.
Faulty Disks: If there are problems with the file system or the disk, the external hard drive might also be seen as read-only.
Problems With The Firmware Or Drivers: M3-chip Macs may be unable to connect to external hard drives with outdated hardware or driver software.
The External Hard Drive Has the NTFS Format
The file system format of your drive is very important because macOS doesn't handle all of them. Better yet, the NTFS format doesn't work with macOS. It can cause more than one problem, but the most common one is that it puts your hard drive into read-only mode forever.
The NTFS format can only be used on Windows devices. Macs can read these files and their contents, but you won't be able to write to an NTFS external drive on macOS. Right-click on your device and then left-click on Get Info to see if it has the NTFS format.
If you want to use an external hard drive which has been formatted to NTFS on Mac, you can use a NTFS for Mac tool to help you to fix the read-only issue.
Step 1. Download and install the third-party NTFS for Mac software - Donemax NTFS for Mac. This tool can help you easily and securely add NTFS read-write support on Mac.
Step 2. Connect the external HDD/SSD or USB drive to your Mac, then open Donemax NTFS for Mac. Select the NTFS drive, click on Enable Writable. Then you can read-write NTFS drives on your M3 Mac.

Fix External Drive Read-only on M3/M3 Pro/M3 Max/M3 Ultra Mac
1. Check to See If the File System Works
Connect the portable hard drive to a Mac with a different chip (Intel or M1) to see if the problem still happens. If the drive works fine on a Mac that isn't an M3, it means there are problems with the M3 chip. Save a copy of the info on the external hard drive somewhere else. Use a suitable file system, like APFS or ExFAT, to reformat the external hard drive. Making sure you pick the right style for your needs is important.
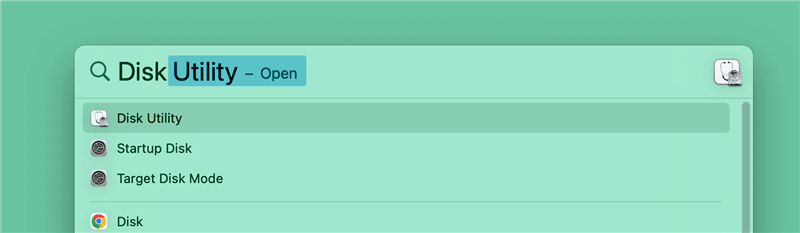
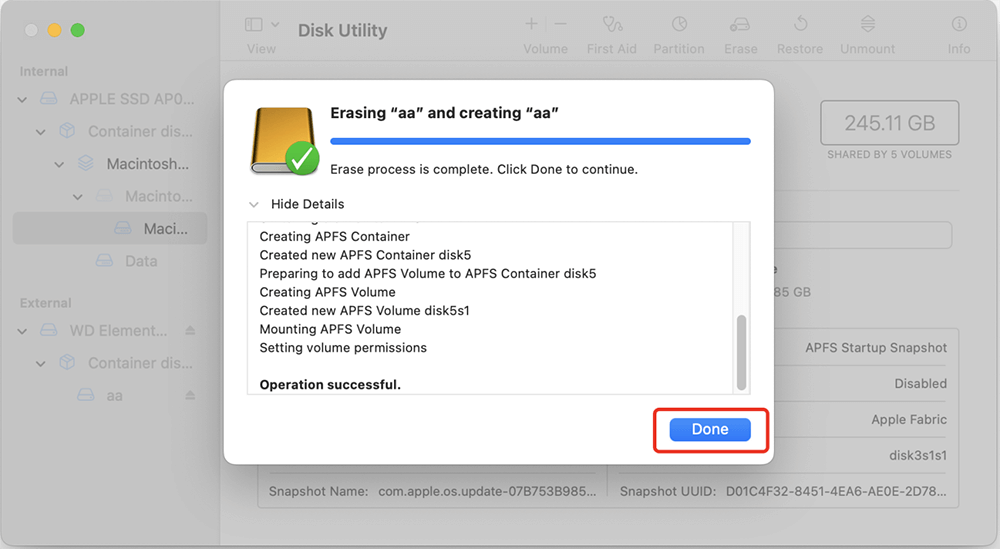
Step 1. Command+Space, then type Disk Utility, open this app on your M3 Mac.
Step 2. Connect the external hard drive to your M3 Mac, then it will be detected by Disk Utility.
Step 3. Select the external hard drive, click Erase.
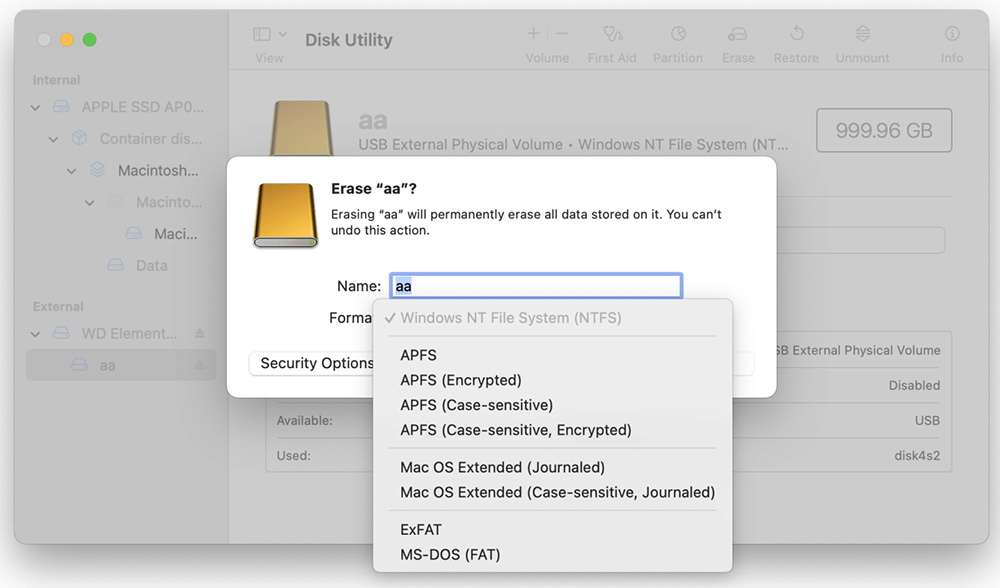
Step 4. Select a file system, click Erase again. (Choose APFS/Mac OS Extended for macOS, and choose ExFAT for both macOS and Windows)
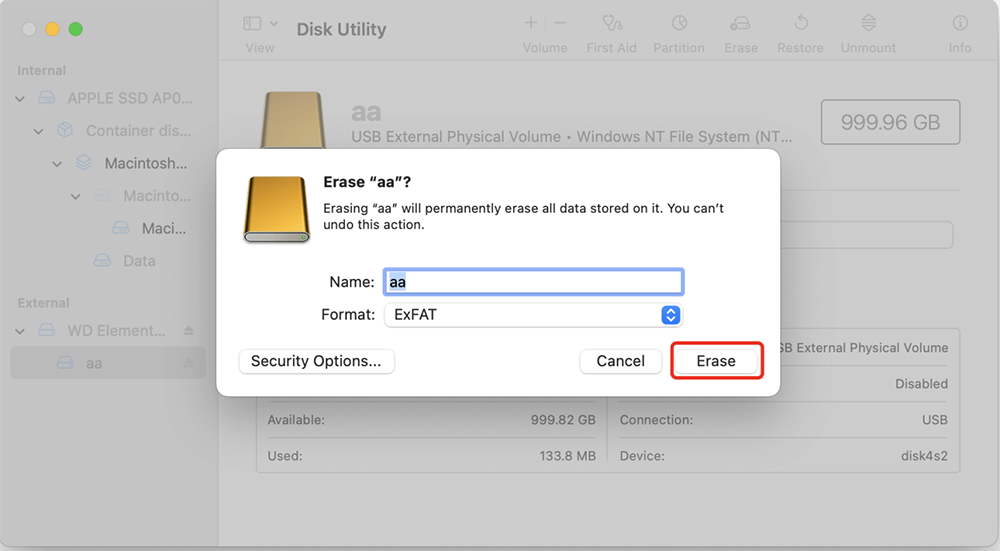
Step 5. Once the process gets finished, click on Done button.
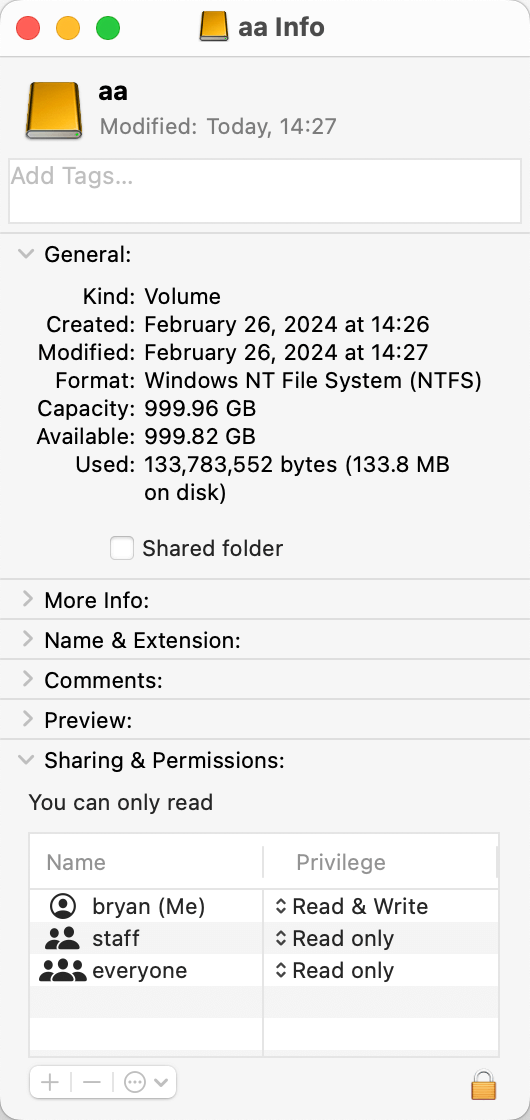
2. Change the settings for permissions:
Find the icon for the external hard drive and right-click on it. Then, choose "Get Info." Go to the "Sharing & Permissions" part in the "Info" window. It is important to ensure your user account can read and write to the external hard drive. If you need to, click the lock icon, type in your administrator password, and then change the settings for access.
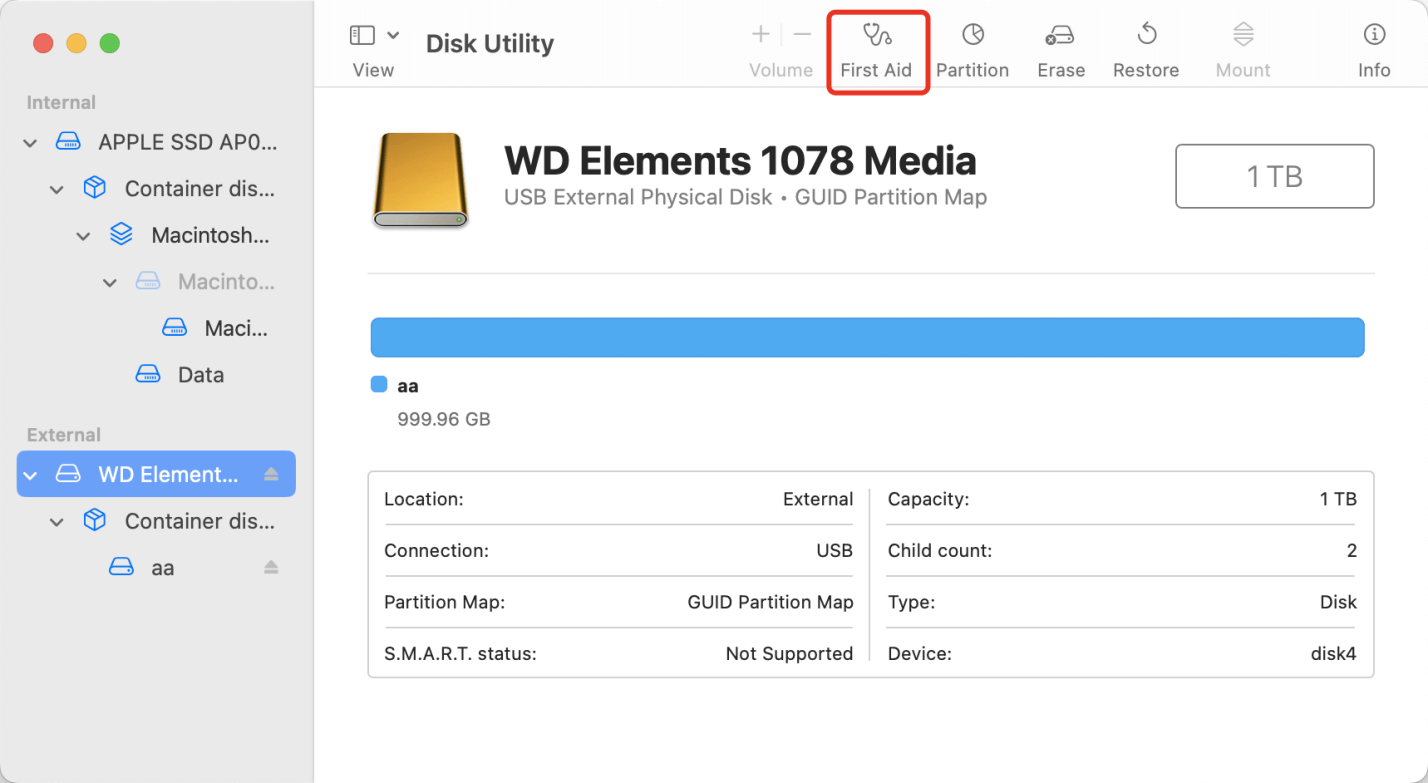
3. Fix errors on the disk:
You can look for Disk Utility in Spotlight or open it from the Utilities folder in Applications. From the list of disks and directories, choose the external hard drive. Once on the "First Aid" tab, click "Run" to begin the disk check and fix process. To finish the repair process, follow the steps shown on the screen. Once the repair is done, remove the external hard drive and put it back in to see if the problem still exists.
4. Install new drivers or firmware:
Check for any firmware or driver changes for the external hard drive on the manufacturer's website. Install the most recent software, or driver updates with macOS and Macs with an M3 chip. Before you connect the external hard drive and restart your Mac, ensure the software or drivers have been updated.
5. Clear NVRAM or PRAM:
Turn off your Mac and then wait a moment. Press the Option, Command, P, and R keys when your Mac starts. As soon as you hear the startup sound a second time or see the Apple logo and loading bar show and disappear twice, hold down the keys. Let go of the keys, and your Mac should start up properly. Connect the external hard drive again and see if it can only be read.
Recover Lost Data after Erasing Hard Drive on M3 Mac
Fixing external hard drive read-only on M3 Mac may erase all data stored on the external hard drive. Data recovery software can help you unformat any hard drive on M3 Mac and get all erased data back.
Step 1. Download and install Donemax Data Recovery for Mac, one of the best Mac data recovery software.
Step 2. Open Donemax Data Recovery for Mac, then select the hard drive which is erased by Disk Utility.

Step 3. Click on Scan button. Then deeply scan the erased hard drive and find all recoverable files.

Step 4. Once the scan is completed, you can preview all recoverable files. Then select the wanted files and save them.

Conclusion:
Finally, having read-only problems with portable hard drives on M3-chip Macs can be annoying, but following these steps can usually fix the issue. Users can get back to being able to write to their external drives by checking to see if the file systems are compatible, changing the permissions settings, fixing disk failures, updating the firmware or drivers, and resetting the NVRAM or PRAM.
It's important to back up data before fixing anything to avoid losing data. By following these steps, users can ensure that their external hard drives work perfectly with their M3-chip Macs, giving them safe ways to store and back data up.
If you don’t want to format your NTFS drive and want to read-write it on your M3 Mac, you can install a NTFS for Mac tool on the M3 Mac. Then run it to enable writable for the NTFS drive.
Related Articles
- Jan 17, 2025How to Delete Files from NTFS Drive on Mac?
- Dec 25, 2024How to Fix External Hard Drive Read-Only on macOS Catalina [7 Solutions]
- Dec 25, 2024NTFS Extension for Mac, NTFS Driver for Mac, NTFS Plugin for Mac
- Dec 06, 2024Seagate NTFS Driver for Mac: Unlock Seamless Compatibility
- Apr 21, 2026Can NTFS Work on Mac? Full Read & Write Guide
- May 29, 2026How to Read-Write NTFS Drives on macOS Sequoia?

Contributing Writer
Lucien
Lucien is a writer and a chief programmer of Donemax software who has worked in the company for 5+ years. He has written much of the content on the site and devotes to providing troubleshooting and solution for Windows and Mac users including disk cloning, data recovery, migration, eraser, error fixes.

Editor in chief
Gerhard Chou
In order to effectively solve the problems for our customers, every article and troubleshooting solution published on our website has been strictly tested and practiced. Our editors love researching and using computers and testing software, and are willing to help computer users with their problems