
Written byCharlesUpdated on May 25, 2026
Fix & Format: How to Reformat or Repair SSD Using Command Prompt
Approved byGerhard Chou
Tip: Before using Command Prompt to format or repair a damaged SSD, you can use data recovery program to completely recover data from the SSD. It also can help you reformat a damaged SSD, repair a corrupted SSD, etc.
PAGE CONTENT:
Solid State Drives (SSDs) have become the preferred storage medium for most modern computers due to their speed, durability, and energy efficiency. However, just like any other form of storage, SSDs can become damaged or corrupted over time due to software bugs, power failures, malware attacks, or improper handling. When this happens, accessing your data becomes difficult, and the SSD might not work as expected.
If you're facing problems with your SSD, one of the most effective and free tools available for troubleshooting and repair is the Command Prompt in Windows. This article will walk you through everything you need to know about reformatting or repairing a damaged SSD using Command Prompt, including clear steps and important safety precautions.
Signs That Your SSD May Be Damaged
Before diving into repair methods, it's important to confirm whether your SSD is damaged. Some common symptoms include:
1. SSD Not Showing Up: Your SSD may disappear from File Explorer but appear in Disk Management as "unallocated" or without a drive letter.
2. Frequent System Freezes or Crashes: A damaged SSD may cause your system to freeze, crash, or show the infamous "blue screen of death."
3. Slow Performance: SSDs are designed for high speed. If boot times and application launches become abnormally slow, something may be wrong.
4. Access Errors: You may receive messages such as "The file or directory is corrupted and unreadable" or "Access is denied."
5. Boot Errors: Your computer may display "No bootable device found" if the SSD contains the system partition and is corrupted.
Preparations Before Using Command Prompt
Repairing or reformatting a drive is not without risks, especially when using command-line tools. Here's what to do before proceeding:
1. Backup Accessible Data - If you can still access the SSD, immediately back up important files to another storage device.
2. Check Physical Connections - Ensure that the SSD is properly connected via SATA, PCIe, or USB (if using an external enclosure).
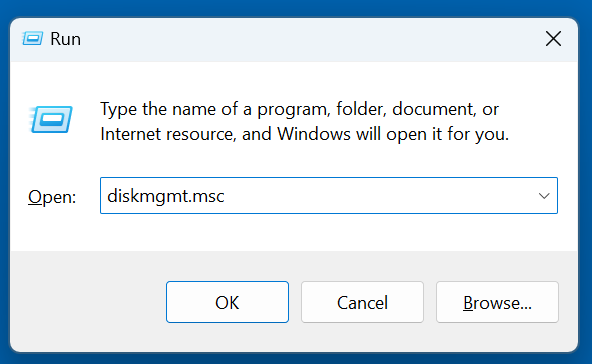
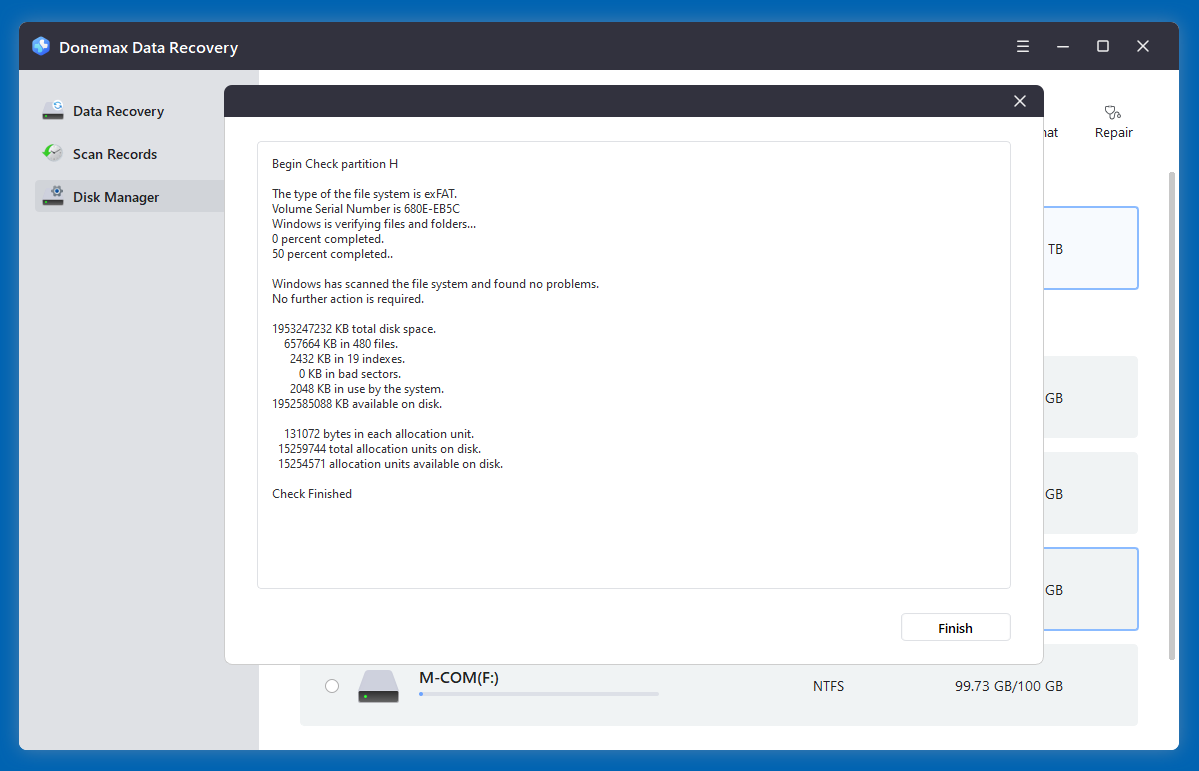
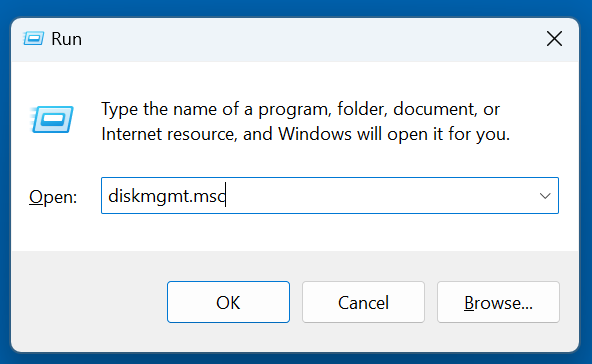
3. Run Disk Management - Go to Start > Run > type diskmgmt.msc to check whether the SSD is detected and how it's being recognized.
4. Use Administrator Access - Command Prompt must be launched with administrator privileges to run repair and formatting tools effectively.
To open Command Prompt with admin rights:
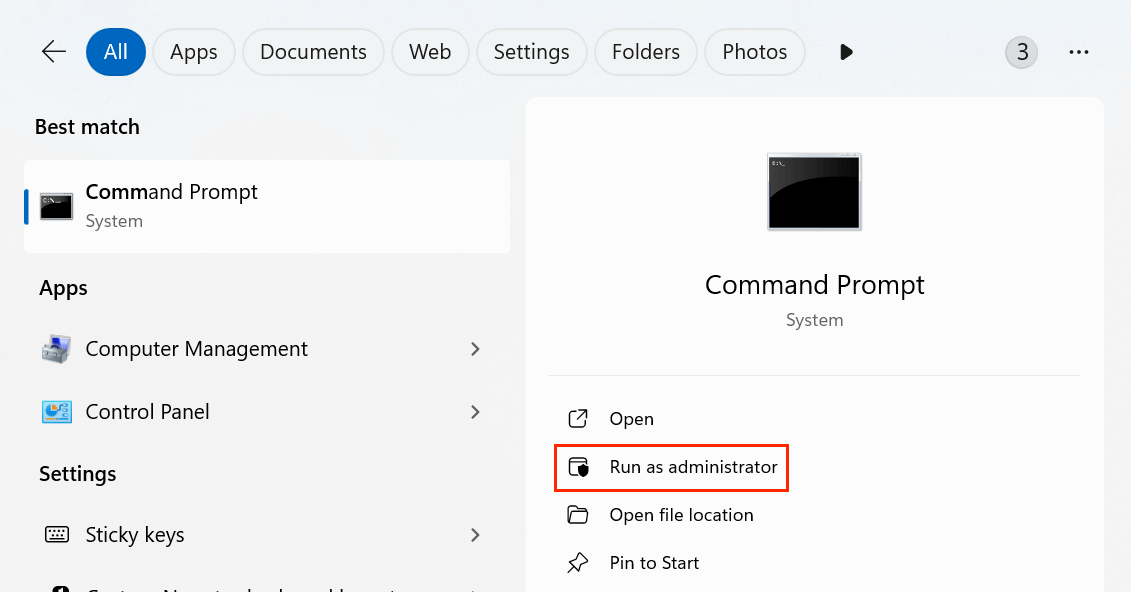
- Press Windows + S and search for "Command Prompt."
- Right-click on it and choose “Run as administrator.”
![reformatting or repairing a damaged SSD using Command Prompt]()
- You'll see a black terminal window with elevated permissions, ready for commands.
Recover Files Before Repairing Damaged SSD Using CMD
Before reformatting or repairing the damaged SSD, you can use data recovery program - such as Donemax Data Recovery to recover and export all files from the SSD to another drive.
Step 1. Download and install Donemax Data Recovery on your computer and connect the SSD to the computer.
Step 2. Open Donemax Data Recovery, choose the SSD to start data recovery.
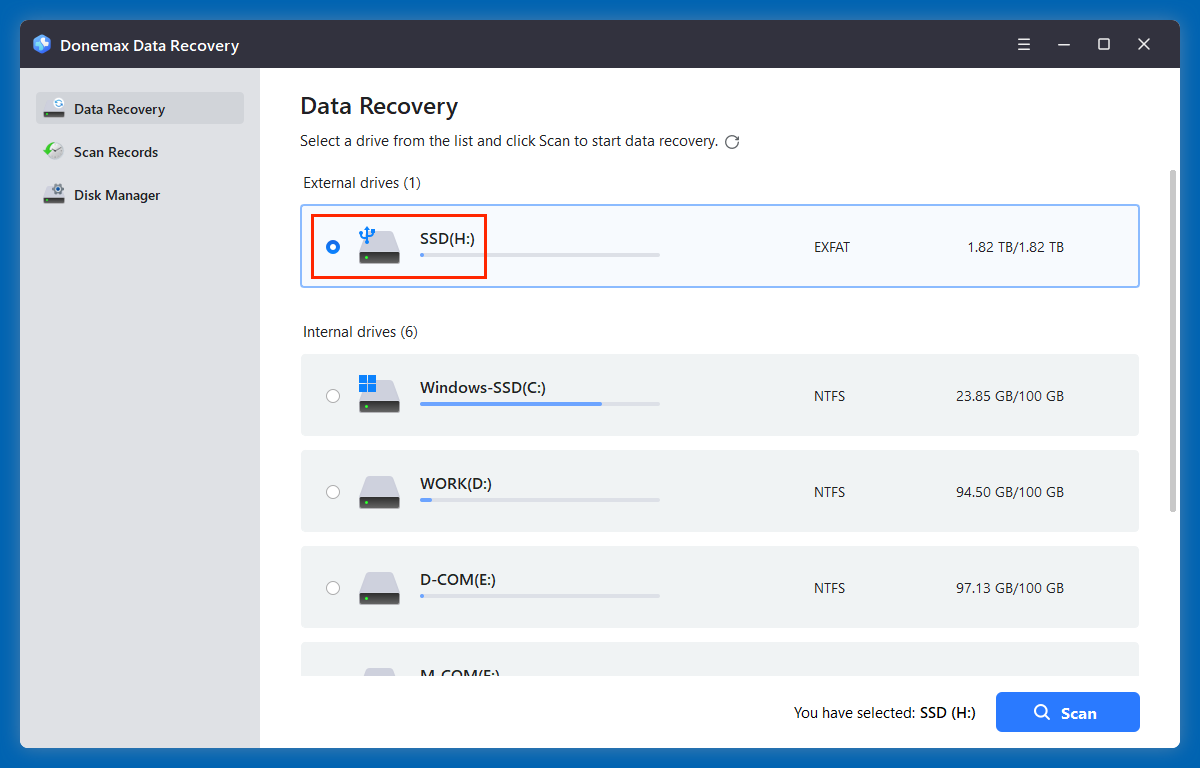
Step 3. Click on Scan button to deeply scan the SSD and find all existing files, inaccessible/hidden files, deleted/formatted and lost files.
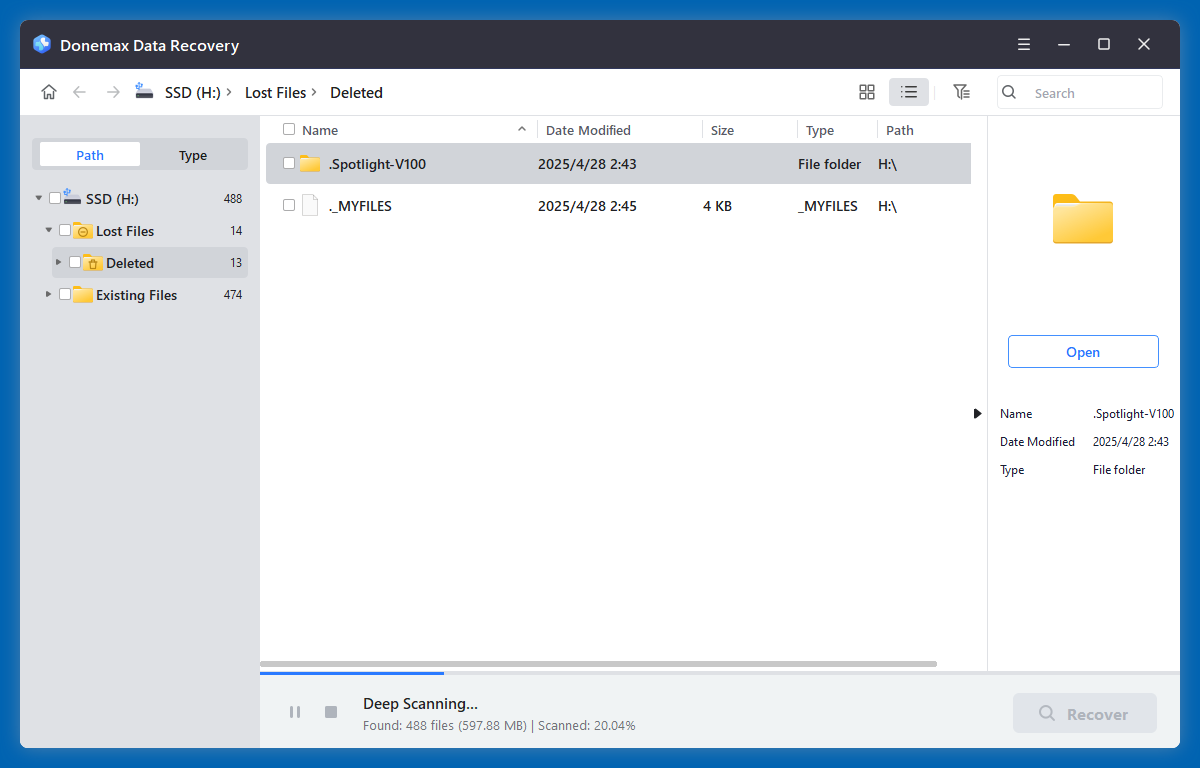
Step 4. Once the scan gets finished, you can preview the files. Then select the wanted files, click on Recover button to save them.

After data recovery, you also can use Donemax Data Recovery to reformat or repair the damaged SSD.

Click on Format button to reformat the damaged SSD to NTFS, exFAT, etc.

Click on Repair button to fix damaged SSD.
Methods to Reformat or Repair Damaged SSD Using CMD
Method 1: Repair SSD Using CHKDSK Command
CHKDSK (short for "Check Disk") is a built-in Windows utility that scans and fixes file system issues on a drive. It's particularly useful for SSDs experiencing logical errors, bad sectors, or filesystem corruption. While CHKDSK won't fix physical damage, it can often restore usability to a disk suffering from software-level problems.
What CHKDSK Can and Cannot Do
Can Fix:
- File system corruption
- Lost clusters and cross-linked files
- Directory structure errors
- Bad sector mapping (logical)
Cannot Fix:
- Physically worn-out NAND flash
- Damaged SSD controller
- Disk not detected in BIOS
Knowing this distinction helps you set realistic expectations before using CHKDSK.
Step-by-Step Guide to Use CHKDSK
Step 1: Identify the Drive Letter
Before launching the repair process, open File Explorer and note the drive letter assigned to your SSD. If your SSD is labeled as the "H:" drive, you’ll use that in the command.
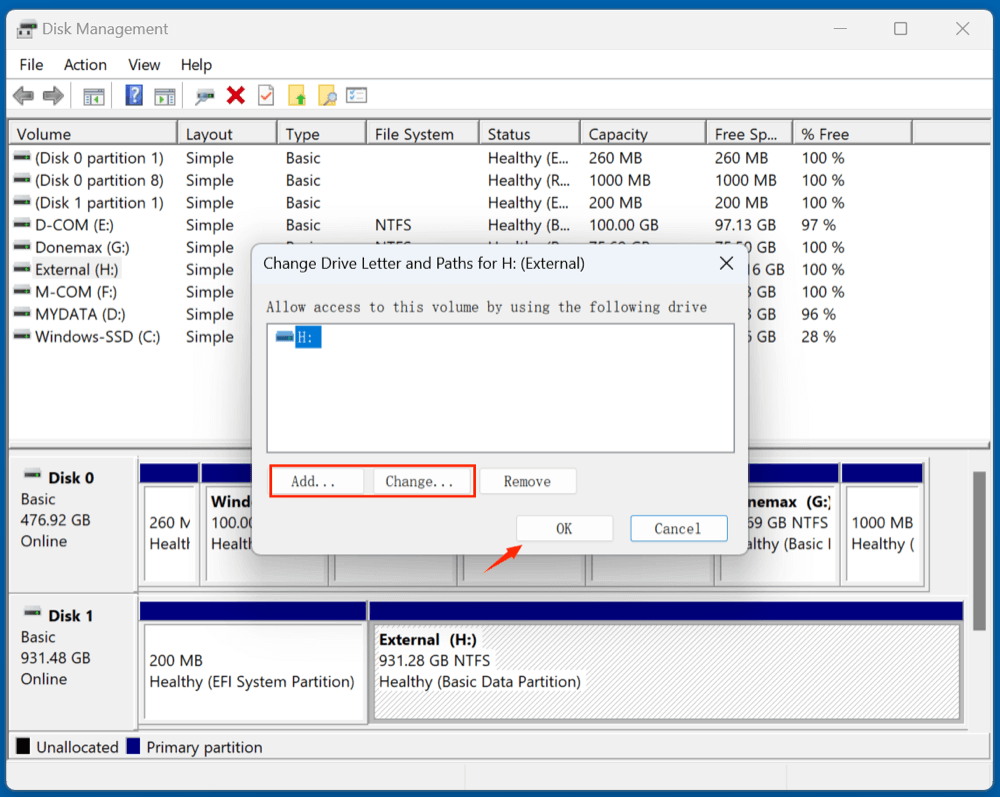
If the SSD does not show in File Explorer, check Disk Management:
- Press Windows + R, type diskmgmt.msc, and hit Enter.
![reformatting or repairing a damaged SSD using Command Prompt]()
- Look for the SSD's partition and see if it has a drive letter.
- If not, right-click and assign one before proceeding.
![reformatting or repairing a damaged SSD using Command Prompt]()
Step 2: Open Command Prompt as Administrator
- Press Windows + S, type cmd.
- Right-click Command Prompt, choose "Run as administrator."
![reformatting or repairing a damaged SSD using Command Prompt]()
- You'll see a terminal window that reads: C:\Windows\system32>
![reformatting or repairing a damaged SSD using Command Prompt]()

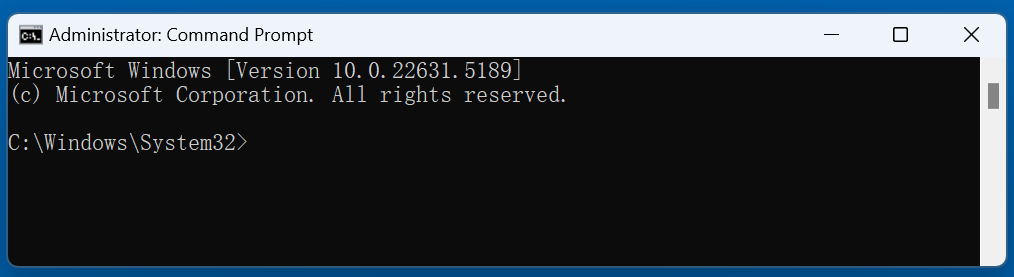
Step 3: Run the CHKDSK Command
Type the following command:
chkdsk X: /f /r /x
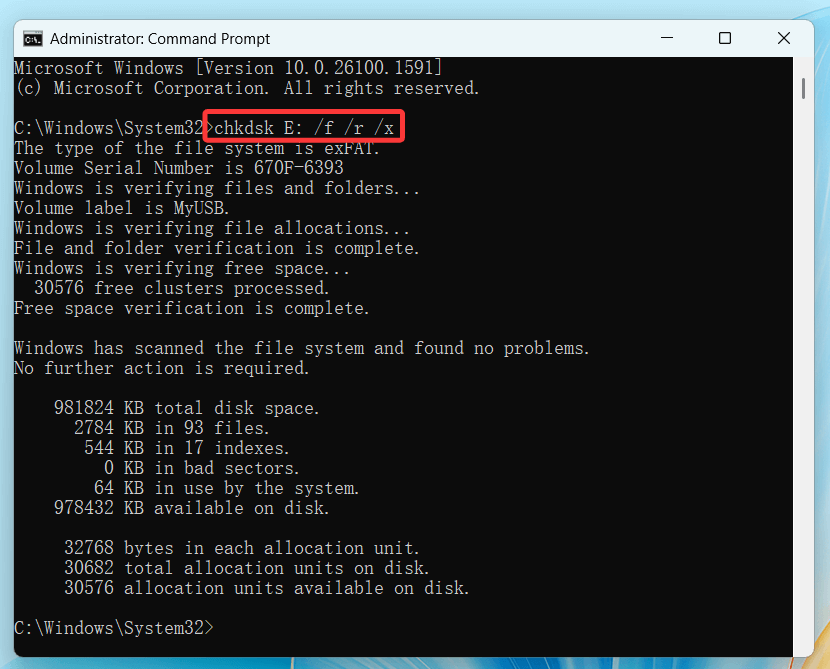
Replace X: with your actual drive letter.
What to Expect During the Scan
Depending on the size of your SSD and the extent of the damage, the scan might take several minutes to several hours. During the process, Windows may display lines like:
CHKDSK is verifying files (stage 1 of 3)...
Correcting errors in the Master File Table (MFT)...
Windows has made corrections to the file system.
You might also see lines indicating the presence of bad sectors:
Windows replaced bad clusters in file \DOCS\PROJECT.DOC.
These outputs indicate CHKDSK is attempting to fix and recover affected data.
After the Scan: Reading the Results
At the end of the scan, you'll receive a summary:
- No problems found: Your SSD's file system is healthy.
- Errors fixed: Issues were found and corrected successfully.
- Bad sectors found: Indicates potential wear; consider replacing the SSD if errors persist or multiply.
You can find a detailed CHKDSK report in Event Viewer:
- Open Event Viewer (eventvwr.msc)
- Go to Windows Logs > Application
- Filter by source: Wininit
- Open the latest entry to review full CHKDSK logs.
What to Do If CHKDSK Finds Errors
If CHKDSK completes with errors and your SSD is still acting up:
- Run it again to ensure errors aren't recurring.
- Use SSD manufacturer diagnostic tools to check firmware or health status.
- Consider cloning your SSD to a new drive if errors persist.
- If CHKDSK freezes or doesn’t complete, move to DiskPart or third-party software.
Important Warnings
- Do not run CHKDSK on RAW drives directly. You may need to format or use recovery tools first.
- CHKDSK with /r can be intensive. Avoid unnecessary use on healthy SSDs, as it performs deep sector scans that could reduce SSD lifespan marginally due to excessive writes.
Method 2: Reformat SSD Using DiskPart Utility
If CHKDSK doesn't fix the issues or you want to completely wipe the SSD, you can use DiskPart to reformat the drive. Reformatting is useful for removing partitions, erasing corrupted data, and preparing the SSD for a fresh start.
📍 Warning: Reformatting will erase all data on the SSD.
Steps to Reformat Using DiskPart:
- In Command Prompt, type:
diskpart
- Then type:
list disk
This displays all connected drives. Identify your SSD based on size.
- Select the SSD:
select disk X
(Replace X with the disk number of your SSD.)
- Wipe the disk:
clean
This command deletes all partitions and data.
- Create a new partition:
create partition primary
- Format the partition:
format fs=ntfs quick
(You can use exfat or fat32 instead of ntfs depending on your use case.)
- Assign a drive letter:
assign
- Exit DiskPart:
Exit
![reformatting or repairing a damaged SSD using Command Prompt]()
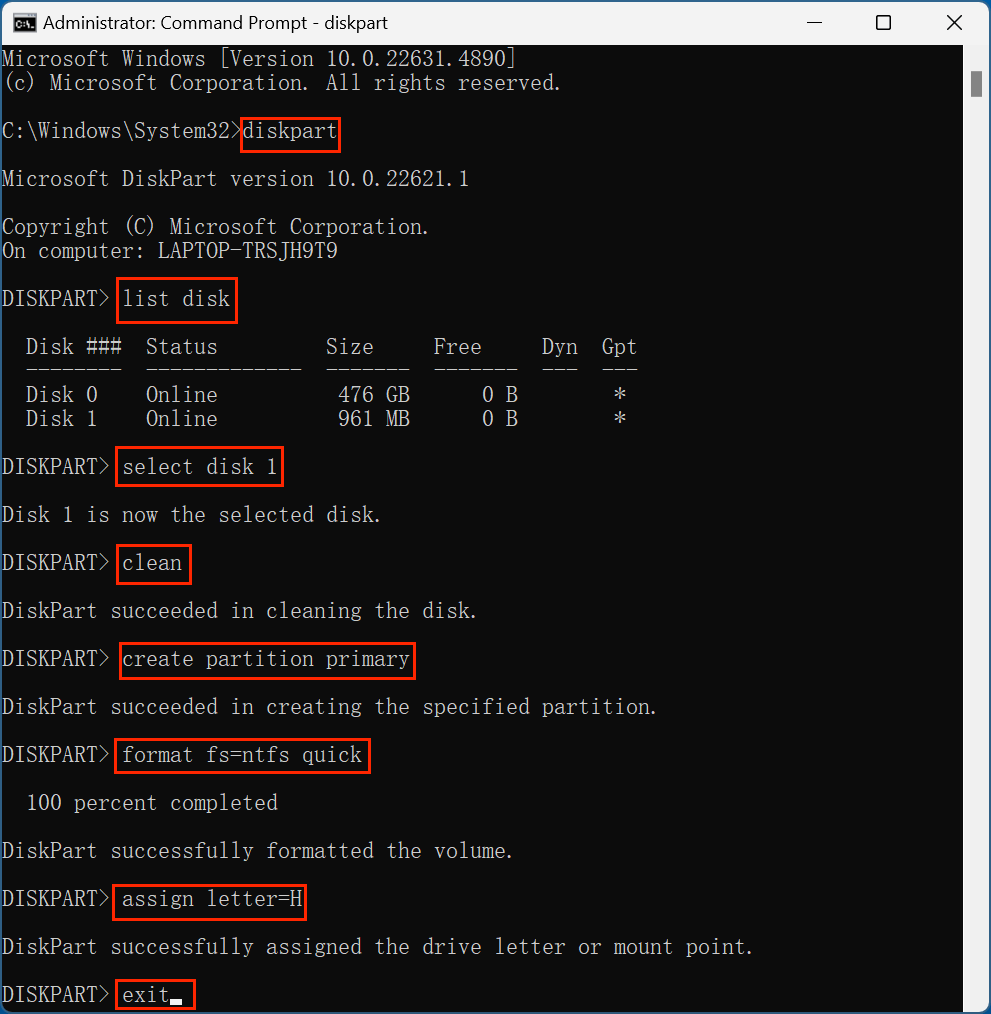
Your SSD should now be fully reformatted and usable again.
Method 3: Rebuild SSD Partition Table
If the partition table is corrupted, reformatting alone may not solve the issue. You can use DiskPart to delete and rebuild the partition structure.
Steps to Rebuild:
- Repeat the DiskPart steps above up to the clean command.
- Recreate all partitions manually using:
create partition primary
- Format and assign drive letters as needed.
This is particularly useful if your SSD shows as "RAW" format or "Unallocated" in Disk Management.
When Command Prompt Isn't Enough?
There are scenarios where Command Prompt may fail to repair the SSD:
1. Physical Damage
No software can repair physical damage like broken NAND chips or controller failure.
2. SSD Not Detected in BIOS
If your BIOS/UEFI doesn't detect the SSD, the problem is likely hardware-related.
3. Repeated Errors After Fix
If CHKDSK or DiskPart repairs only work temporarily, your SSD may be at the end of its life.
4. SMART Status Warnings
Check SSD health using tools like CrystalDiskInfo or the SSD manufacturer's software. Warnings like "Reallocated Sector Count" or "Pending Sector" indicate failing hardware.
Alternative Tools to Consider
If Command Prompt isn't effective, you may explore:
- Donemax Data Recovery
- MiniTool Partition Wizard
- GParted (for advanced users)
- Windows Installation Media (to reformat during OS reinstall)
These tools offer graphical interfaces and more flexibility, especially for beginners.
Preventive Measures After Repairing SSD Using CMD
Once your SSD is back in working condition, follow these practices to avoid future issues:
1. Regular Backups
Use Windows Backup, OneDrive, or third-party solutions to automatically back up important files.
2. Avoid Sudden Shutdowns
Unexpected power loss can corrupt SSD sectors. Use a UPS if needed.
3. Update Firmware
Visit the manufacturer’s website to get the latest firmware updates. Tools like Samsung Magician or Crucial Storage Executive can help.
4. Enable TRIM Command
TRIM helps maintain SSD performance. To check if TRIM is enabled, type:
fsutil behavior query DisableDeleteNotify
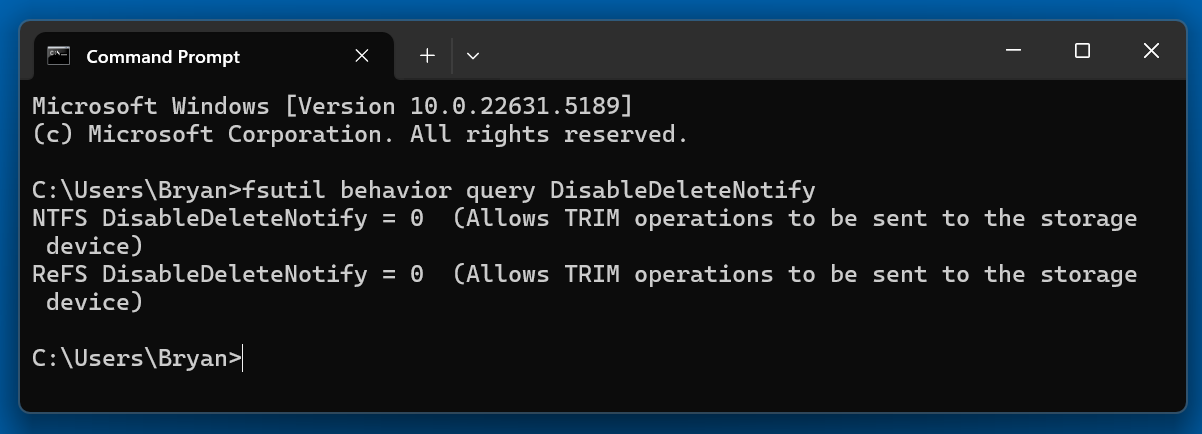
If the result is 0, TRIM is enabled.
5. Monitor Drive Health
Use SMART-monitoring tools regularly. Early detection of failure signs can help save your data.
FAQs about Repairing SSD Issues via CMD
No. Command Prompt utility commands like CHKDSK and Diskpart are designed strictly to resolve logical errors, file system corruption, partition glitches, and bad sectors.
A standard quick format (format fs=ntfs quick) does not harm your SSD or noticeably impact its lifespan. However, you should avoid performing a full format or running intensive data-writing loops via CMD on an SSD.
This error typically triggers when you try to run the clean command on the primary drive containing your currently active Windows operating system. Windows blocks this operation to prevent accidental system deletion. If you need to wipe or repair your primary boot drive, you must create a bootable Windows installation USB, boot your computer from that media, and access the Command Prompt via the "Repair your computer" option before running Diskpart.
Think of CHKDSK as a maintenance diagnostic tool and Diskpart as a structural management tool. chkdsk scans the existing file system to repair data corruption, find soft bad sectors, and fix file structure discrepancies without deleting your data. diskpart, on the other hand, is a command-line partitioning utility used to alter the disk's physical layout, clear attributes, delete partitions, or completely reformat the drive from scratch.
If your SSD is showing a "Disk is write-protected" error, you can clear this state using Diskpart. Open Command Prompt as an administrator, type diskpart, and hit Enter. Next, type list disk followed by select disk X (replace X with your specific SSD number). Finally, execute the command attributes disk clear readonly. This will strip the read-only attribute and allow you to reformat or write files to the drive again.
Conclusion
Repairing or reformatting a damaged SSD using Command Prompt is a powerful method for resolving many logical and file system errors. Tools like CHKDSK and DiskPart can scan, fix, and reinitialize an SSD without third-party software. However, these tools have limitations, especially when it comes to physical damage or firmware corruption.
To sum up:
- Use CHKDSK to repair file system issues and scan for bad sectors.
- Use DiskPart to reformat, clean, and rebuild your SSD structure.
- Rebuild partitions when facing raw or unallocated disk errors.
Remember to always back up your data before performing any repair or reformat operation. Prevention is key - keep your SSD firmware up to date, avoid abrupt shutdowns, and monitor health indicators to extend its lifespan.
If all else fails, consider professional data recovery services to salvage important files from a failing SSD. While Command Prompt is a great start, knowing when to escalate can make all the difference between data recovery and permanent loss.
Donemax Data Recovery
One of the best data recovery programs to recover deleted, formatted or lost data from PC, Mac, HDD, SSD, USB drive, SD card, camera, RAID, Sever or other storage devices.
Related Articles
- Jan 14, 2025How to Fix Corrupted or Dead SSD Without Losing Data?
- Jul 20, 2024How to Format M.2 SSD Without Losing Data?
- Sep 15, 2025Upgrade Alienware Gaming Laptop SSD: A Complete Guide
- Mar 31, 202510 Solutions to Fix SanDisk Extreme Portable SSD Not Recognized on Mac
- Jan 17, 2025How to Format an SSD to ExFAT or FAT32 on Mac: A Detailed Guide
- Jul 24, 2024How to Fix SanDisk Portable SSD Not Working on Mac?

Contributing Writer
Charles
Charles, who lives in Sydney, Australia, is an editor & writer of Donemax Team. He is good at writing articles related with Apple Mac computers, Windows operating systems, data recovery, data erasure, disk clone and data backup, etc. He loves reading and playing tennis in his spare time and is interested in testing new digital devices such as mobile phones, Macs, HDDs, SSDs, digital cameras, etc.

Editor in chief
Gerhard Chou
In order to effectively solve the problems for our customers, every article and troubleshooting solution published on our website has been strictly tested and practiced. Our editors love researching and using computers and testing software, and are willing to help computer users with their problems