
Written byLucienUpdated on Apr 11, 2024
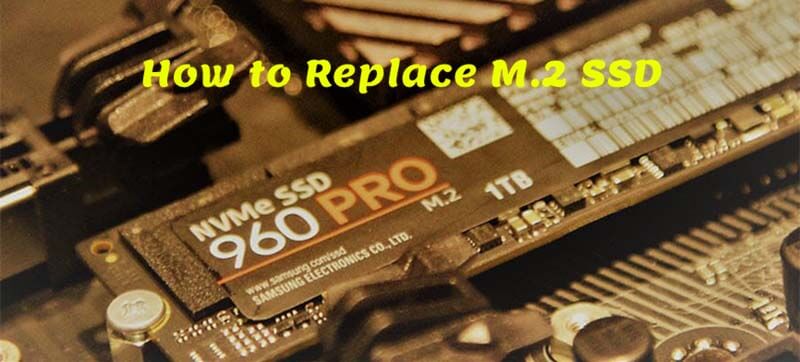
How to Replace M.2 SSD in PC?
Approved byGerhard Chou
PAGE CONTENT:
Upgrading your computer doesn't get much better than changing your storage drive with one that is faster and has more space. When you want to boost your PC's speed and storage, replacing your old M.2 SSD is the best thing you can do. This guide will help you upgrade without any problems, whether you're a gamer, a content creator, or just someone who uses computers for everyday chores.
There are clear perks, such as faster load times and more space for your growing digital library. Don't worry if you've never messed with hardware before; this guide is meant to take the mystery out of it by giving you a clear, step-by-step guide that will give you the tools you need to upgrade. As we dive into M.2 SSD upgrades, get ready to see what your PC can do.
Preparation Before Upgrade Your M.2 SSD
Before replacing the M.2 SSD, ensuring you're ready for a smooth and successful update is important. First, get all the tools and supplies you'll need, such as a Phillips-head screwdriver and an antistatic wrist strap to protect delicate parts from static electricity.
Also, please turn off your PC and unplug all its cords before you start the installation. It will help avoid any accidents or damage. Next, learn how your PC is set up and find the M.2 spot on your motherboard. Please write down the names of any M.2 SSDs already installed and plan how to remove them.
Lastly, ensure the area where the change will be done is clean and well-lit. Remove any extra stuff, and ensure you have enough room to move around your PC easily. Following the guide, you can have a smooth and successful M.2 SSD repair. They will also lower the chance of mistakes or problems occurring during the process.
How to Replace M.2 SSD in PC?
1. Get the M.2 Slot
Find the space for M.2 on your motherboard. It's usually labeled to point you toward the CPU socket. There may be more than one M.2 slot on some processors, so make sure you use the right one for your needs.
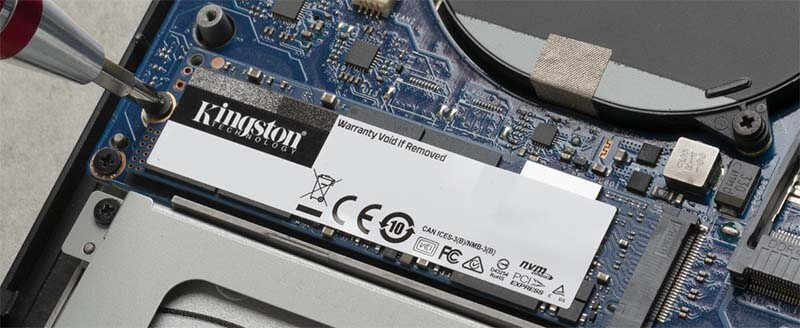
2. Remove the old SSD
If an M.2 SSD is already in the slot, carefully unscrew it and remove it. You'll need the screw to hold the new SSD in place later, so keep it somewhere safe. Take the SSD out of the slot slowly and set it down.
3. Put the new SSD
Place your new M.2 SSD in the slot and ensure the notch lines up with the key. Put the SSD in the slot at an angle, then press down hard until it's completely in place. To keep the SSD in place, use the screw you took out earlier.
4. Reconnect Wires
After putting in the new SSD, make sure it's still firmly attached and in the right place. Reconnect any cables you took out earlier, and make sure everything is firmly linked. Last, put your PC case back together and turn it on.
5. Setting up the SSD
Once your PC is up and running, you may need to set up the new SSD in your working system. You can format and set up the drive in Disk Management on Windows or Disk Utility on macOS if it doesn't show up immediately.
6. Data Transfer
Moving your files from the old SSD to the new one is important if you replace the earlier one. Software like Donemax Disk Clone, Clonezilla or Macrium Reflect can be used to copy your old SSD to the new one.
7. Check and Verify
It's important to try the new SSD to ensure everything works right after it has been installed and set up. Check the drive's performance with benchmarking tools and ensure your system can see it.
After successfully installing and turning on your new M.2 SSD, you can enjoy faster boot times, faster app starts, and more storage space. Your upgraded system will make everything run more smoothly and quickly, whether playing games, editing movies, or just surfing the web.
How to Clone Old M.2 SSD to the New SSD?
Disk cloning program can help you clone old M.2 SSD to a new SSD such as NVME M.2 SSD. Windows doesn’t offer built-in disk cloning program, you can try third-party disk cloning program - such as Donemax Disk Clone to help you securely clone old M.2 SSD to a new SSD.
Step 1. Download and install Donemax Disk Clone on your computer, then open it. Make sure both of the SSDs are connected or installed on the same computer.
Step 2. Open Donemax Disk Clone and choose OS Clone mode. Select the old M.2 SSD as the source disk, select the new SSD as the destination disk. Click Next.

Note: Sector by sector clone requires the size of the new SSD is equal to or bigger than the old M.2 SSD.
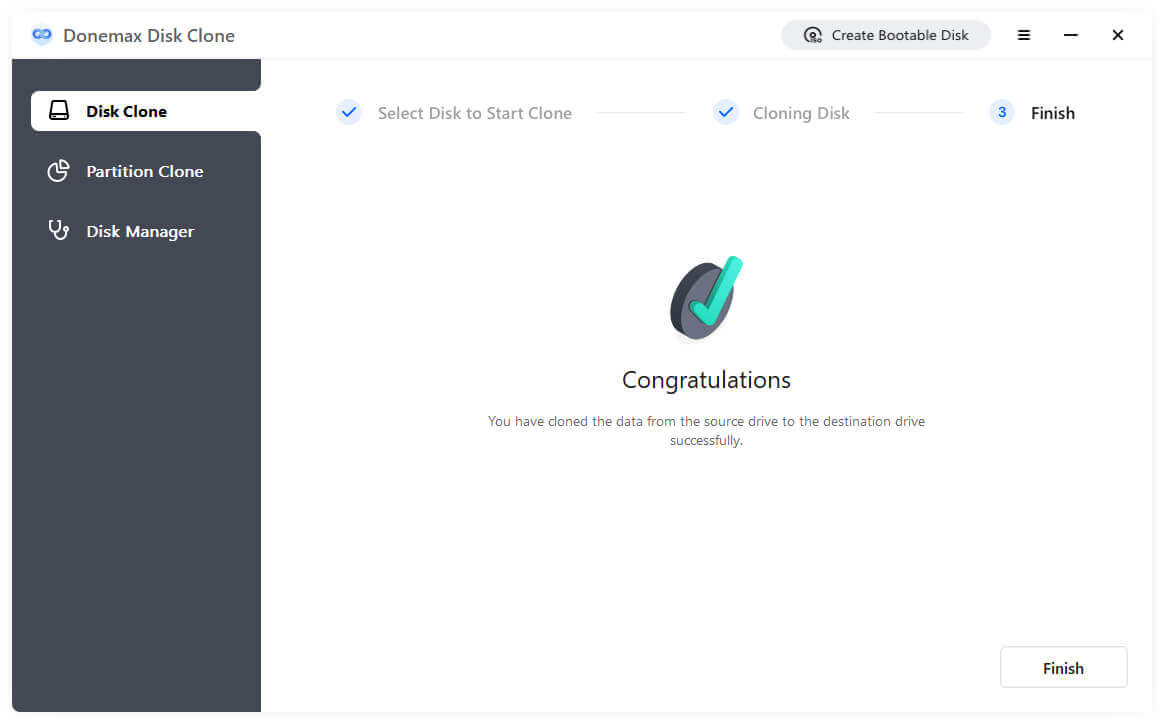
Step 3. You can edit the clone layout, tick Check the option if the destination is SSD. Then click on Clone button to securely clone all data from the old M.2 SSD to the new SSD.

Step 4. Once the process gets finished, you can check the cloned data on the new SSD.
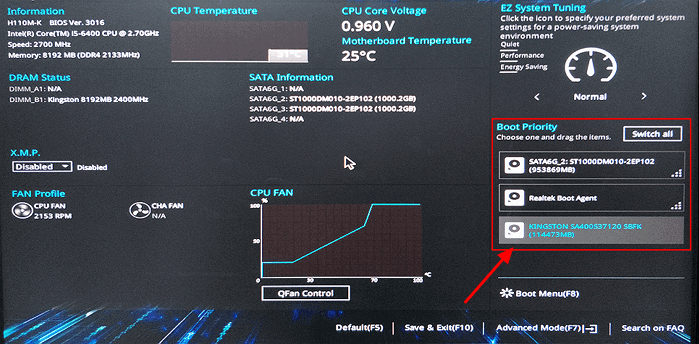
If you want to use the new SSD as the boot drive, close your computer, then turn on it. Press F2/F8/Del key to enter the BIOS mode. Find the boot tab, then select the new SSD as the boot drive. When it is done, save the changes and exit the BIOS mode, and your computer will boot from the new SSD.
★ Tips:
- New NVMe M.2 SSD is highly recommended, it will improve the performance of your computer.
- It is strongly recommended to clone everything including operating system, programs, user files, settings from the old M.2 SSD to the new SSD. It means you can transfer data without reinstalling OS. Donemax Disk Clone is a powerful yet easy-to-use disk cloning program. It can help you securely and easily clone all data from an old M.2 SSD to a new SSD on Windows PC or Mac.
- If you lose important files due to replacing M.2 SSD, you can use a data recovery software - such as Donemax Data Recovery to scan the SSD and get all lost files back!
- Before you dispose of the old M.2 SSD, you can use data erasure tool, such as Donemax Data Eraser to securely and permanently erase all private data from it. Secure erasure ensures all files are lost for good, won’t be recovered by the next owner.
Conclusion:
In conclusion, changing an M.2 SSD in your PC is an easy process with big benefits. The upgrade improves your computer for many jobs by speeding up load times, adding more storage space, and improving overall performance. People who have never upgraded gear can easily get through the process by following the step-by-step guide.
Remember to take measures like using antistatic clothing and keeping your work area clean to reduce the chance of making mistakes. Once done, you can enjoy your faster and more efficient system, whether playing games, making content, or doing regular computer chores. With a new M.2 SSD, you can improve your PC and get the most out of it.
Related Articles
- Oct 30, 2025How to Upgrade a HDD to a KIOXIA SSD?
- Dec 31, 2024Clone One External Hard Drive to Another External Hard Drive
- May 21, 20242025 Best 6 Free Acronis Disk Cloning Software Alternatives
- Oct 17, 2023What Is Sector by Sector Clone? How to Perform Sector by Sector Clone?
- Apr 18, 2024Best 5 ADATA Clone Software
- Jun 05, 2023How to Clone System Drive to SSD and Make it Bootable in Windows?

Contributing Writer
Lucien
Lucien is a writer and a chief programmer of Donemax software who has worked in the company for 5+ years. He has written much of the content on the site and devotes to providing troubleshooting and solution for Windows and Mac users including disk cloning, data recovery, migration, eraser, error fixes.

Editor in chief
Gerhard Chou
In order to effectively solve the problems for our customers, every article and troubleshooting solution published on our website has been strictly tested and practiced. Our editors love researching and using computers and testing software, and are willing to help computer users with their problems