
Written byCoco LinUpdated on Sep 10, 2025
How to Upgrade Acer Nitro 5 Laptop's SSD?
Approved byGerhard Chou
Before we start: Donemax Disk Clone can help you make a bootable clone for system SSD or HDD. It's useful to upgrade Acer Nitro 5 laptop's SSD quickly without reinstalling the windows operating system.
PAGE CONTENT:
The Acer Nitro 5 is a popular budget gaming laptop known for delivering impressive performance at an affordable price point. However, many configurations come with a slower or smaller-capacity SSD that can become a bottleneck over time—especially for gamers, video editors, and multitaskers. Upgrading Acer Nitro 5 laptop's SSD is one of the most impactful improvements you can make, offering faster load times, better responsiveness, and more storage space.

This guide walks you through the entire SSD upgrade process—from choosing the right SSD to installing it and setting up your system afterward.
Why Upgrade the SSD on Acer Nitro 5?
The stock SSD in many Acer Nitro 5 models is either a SATA-based drive or a lower-end NVMe drive with limited capacity, often around 256GB or 512GB. These can quickly become insufficient, especially if you're installing multiple AAA games, managing large media files, or simply want better performance.
Here are the main reasons to consider upgrading:
- 🚀 Faster performance: A high-speed NVMe SSD can significantly reduce boot times, loading screens, and overall system lag.
- 💾 More storage: Expanding your storage capacity helps you manage more games, videos, and files without external drives.
- 📊 Enhanced multitasking: With faster read/write speeds, programs open instantly, and the system becomes snappier during multitasking.
- 📈 Longer lifespan: Newer SSDs often offer better durability and longevity, with improved thermal management and endurance ratings.
What to Do before Upgrading the SSD on Acer Nitro 5
Check Compatibility and Specifications
Before buying a new SSD, it's essential to determine what your Nitro 5 supports. Acer has released many Nitro 5 variants with different hardware configurations.
1. Identify Your Model
Check the exact model of your Nitro 5 using:
- The label on the bottom of your laptop, or
- Typing msinfo32 into the Windows Run command to find the model number.
2. Supported SSD Types
Most Nitro 5 models support:
- 1x M.2 NVMe PCIe Gen 3 SSD (main slot)
- 1x 2.5-inch SATA drive (for additional storage)
Some models even support dual NVMe drives, but always check your laptop's manual or Acer's official support page to confirm.
3. Form Factor and Interface
Ensure the SSD you purchase is:
- M.2 2280 size (22mm wide, 80mm long)
- PCIe NVMe Gen 3 or Gen 4 interface (Gen 4 is backward compatible but won't reach full speed unless supported)
4. Recommended SSD Options
Depending on your needs and budget, consider:
- Samsung 970 EVO Plus (performance)
- Crucial P5 Plus (balanced)
- WD Black SN770 (Gen 4 future-proofing)
- Kingston NV2 (budget option)
What You'll Need
Gather these tools and resources before you begin:
Hardware
- Compatible M.2 SSD
- Small Phillips-head screwdriver
- Plastic pry tool (optional, for opening the case)
- Antistatic wrist strap (recommended)
Software
- USB flash drive (at least 8GB) for Windows installation
- Windows Media Creation Tool
- SSD cloning software (if you're not doing a clean install)
Clone the SSD (Recommended)
If you want to move everything exactly as it is (OS, files, settings) to the new SSD. Install the new SSD via USB using an M.2 enclosure. Clone your current drive using software. After cloning, install the new SSD internally.
To clone the SSD effectively and ensure to make a bootable clone, you can use the reliable disk cloning software Donemax Disk Clone. You can use it to clone the entire old SSD to the new one.
Donemax Disk Clone
- Simple to clone disk or partition with the software.
- Make a bootable clone for the system disk.
- Create an exact copy for your HDD or SSD.
Here we will show you how to clone the SSD with the software Donemax Disk Clone:
Step 1. Run the software and use the Disk Clone mode to clone the entire disk. Select the old SSD as the source drive and choose the new SSD as the destination drive. Click Next.

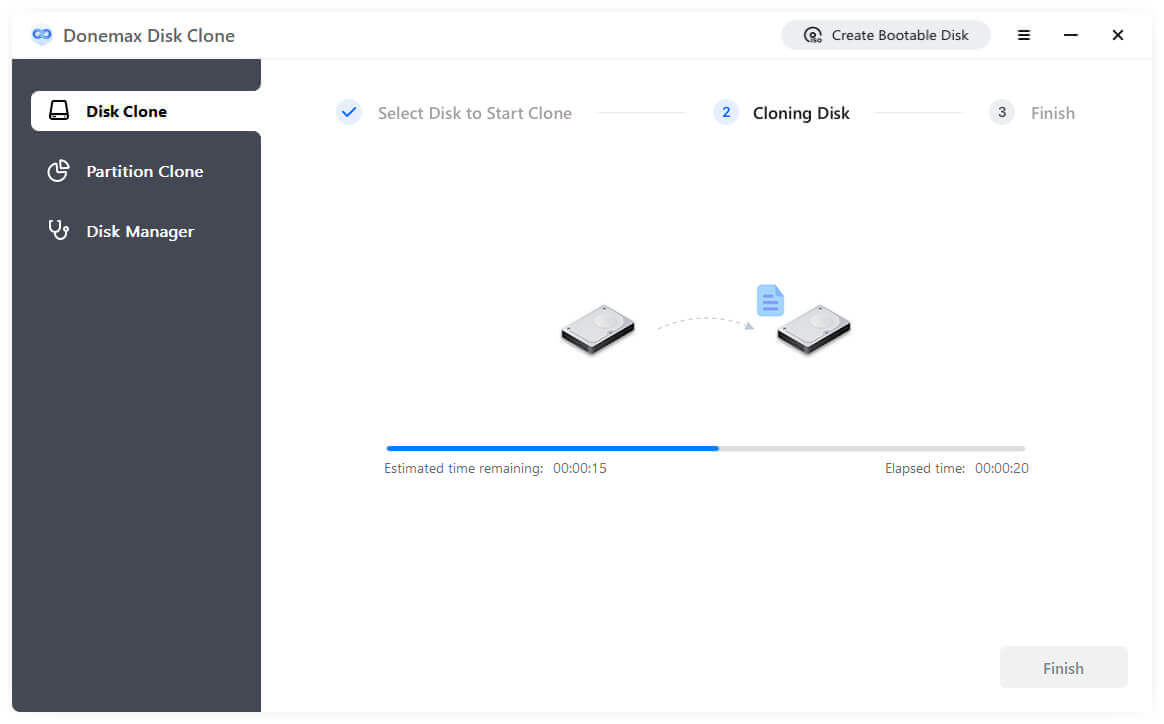
Step 2. Edit the disk layout on the new SSD to use the full space. Also, enable the checkbox "Check the option if the destination is SSD." Click Clone button to start cloning.

Step 3. After the cloning process is complete, the new SSD is also bootable. After replacing the SSD, you can then boot the laptop directly from the new SSD.
Physically Replacing the SSD on Acer Nitro 5
Upgrading the SSD in your Acer Nitro 5 may sound intimidating, but it's a relatively straightforward process that even beginners can handle with the right guidance. This section walks you through each physical step in great detail, helping ensure a safe and successful hardware installation.
Before you begin, make sure to:
- Power down the laptop completely.
- Disconnect the power adapter and all peripherals (USB devices, mouse, Ethernet cable, etc.).
- Press and hold the power button for 10–15 seconds to drain any residual electricity.
- Work on a clean, static-free surface. If possible, wear an antistatic wrist strap and ground yourself by touching a metal surface.
Step-by-Step Installation Guide
Step 1: Flip and Unscrew the Bottom Panel
- Place the laptop face down on a soft cloth or mat.
- Locate all screws around the perimeter of the back panel—there are usually between 11 and 13 screws.
- Use the screwdriver to carefully remove each screw and place them in a safe place. Some screws may be longer than others, so keep track of their positions.
Step 2: Remove the Back Cover
- Starting from a back corner, insert a plastic pry tool between the bottom panel and the laptop chassis.
- Gently work your way around the edges, releasing the clips that hold the panel in place.
- Once all clips are loose, lift the panel off and set it aside.
💡 Tip: If you meet resistance, double-check that you've removed all screws.
Step 3: Locate the Existing SSD Slot
- You'll typically find the M.2 slot toward the center or left side of the motherboard.
- If your laptop has a factory-installed SSD, it may be covered by a thin metal heat spreader.
- Carefully unscrew the heat shield if present.
Step 4: Remove the Existing SSD (if applicable)
- Find the retaining screw at the end of the SSD.
- Remove this screw with your precision screwdriver.
- The SSD will pop up at an angle (about 30 degrees).
- Gently slide it out of the M.2 slot by pulling straight outward.
Step 5: Install the New SSD
- Align the connector on the new SSD with the M.2 slot.
- Insert the SSD into the slot at a 30-degree angle.
- Gently press it down flat so that the screw hole lines up with the standoff on the motherboard.
- Secure the SSD in place using the small retaining screw.
💡 Note: Do not overtighten the screw—just snug enough to hold the drive.
Step 6: Reattach the Heatsink (Optional)
- If your laptop came with a heat shield or pad, place it back over the SSD.
- This helps dissipate heat and maintain drive performance, especially during intense gaming or large file transfers.
Step 7: Close Up the Laptop
- Realign the bottom panel with the laptop chassis.
- Press down gently around the edges to reengage the clips.
- Reinsert and tighten all screws in their original positions.
- Flip the laptop right-side up.
Final Pre-Boot Checklist
Before powering the laptop back on:
- Double-check that all screws are tight.
- Ensure no cables or components were disturbed during installation.
- Confirm that the SSD is securely seated in the slot.
Once everything looks good, connect your power adapter and press the power button. If installed correctly, your laptop should either boot directly into the operating system (if cloned) or display the BIOS/boot options screen.
What to Do after Upgrading Acer Nitro 5 Laptop's SSD
If the Windows system was cloned from the old SSD to the new SSD, there should be no problem to boot the laptop directly after replacing the SSD.
Clean Installation of Windows (Optional)
After physically installing the SSD, you'll need to install your operating system if you didn't clone the SSD before. If you're starting fresh, do as the following steps:
- Use the Windows Media Creation Tool on another PC. Select "Create installation media."
- Insert the USB into your Nitro 5. Power on and press F2 (or Del) to enter BIOS. Set the USB as the first boot device.
- Follow the on-screen instructions to install Windows on the new SSD. Choose the unallocated space during the installation process. Format if needed, then proceed.
- After Windows is installed, visit Acer's website to download chipset, audio, Wi-Fi, and graphics drivers. Run Windows Update for security patches.
Verifying the Upgrade
Once Windows is running:
1. Check Storage
- Go to Settings > System > Storage to confirm your SSD is recognized with the right size.
- Open Disk Management to verify partitions.
2. Check SSD Health with Tools Like:
- CrystalDiskInfo (SSD health)
- CrystalDiskMark (read/write performance)
- HWInfo (detailed drive specs)
3. Update SSD Firmware
- Visit your SSD manufacturer's site to check for firmware updates.
- Some offer dedicated software (e.g., Samsung Magician, Crucial Storage Executive).
Troubleshooting Common Issues while Upgrading Acer Nitro 5's SSD
Here are some potential issues and how to resolve them:
SSD Not Detected
- Reseat the SSD and check the screw connection.
- Try resetting BIOS to default settings.
- Ensure the SSD is compatible with your Nitro 5 model.
Boot Loop or No Boot Device Found
- Check boot order in BIOS.
- Make sure Windows was installed on the correct drive.
- Reinstall Windows if the system partition was not created properly.
Activation Issues
- Windows 10/11 should automatically activate if you previously had a digital license.
- If not, log in with your Microsoft account or enter your product key.
Thermal Throttling
- Use SSDs with DRAM cache and heat spreaders.
- Consider aftermarket thermal pads if temperatures exceed 70°C under load.
Conclusion
Upgrading the SSD in your Acer Nitro 5 can breathe new life into your laptop—enhancing speed, responsiveness, and overall storage capacity. Whether you're a gamer looking to store more titles, a student juggling large files, or a creative professional, this upgrade is one of the most cost-effective ways to improve your system's performance.
By following the steps in this guide—checking compatibility, carefully installing the drive, and setting up your OS—you can ensure a smooth and successful SSD upgrade. Don't forget to regularly back up your data and maintain your hardware to keep your Nitro 5 running at peak performance.
Donemax Disk Clone
An award-winning disk cloning program to help Windows users and Mac users clone HDD/SSD/external device. It also can create full bootable clone backup for Windows PCs and Macs.
Related Articles
- Mar 26, 2024How to Move OS to Samsung NVMe SSD?
- Dec 31, 2024How to Clone Hard Drive to SanDisk Extreme M.2 NVMe Internal SSD?
- Mar 01, 2024How to Clone HDD Or OS to Samsung 870EVO SSD?
- Jan 25, 2024How to Clone SATA SSD to NVMe SSD?
- Sep 15, 2023How to Clone A Hard Drive to New Kingston SSD?
- Jun 04, 2025How to Clone FAT32 Drive to exFAT Drive?

Contributing Writer
Coco Lin
Coco has been a writer and a chief programmer at Donemax software since 2018. Over 10 years of experience of writing troubleshooting articles in the software industry, she is passionate about programming and loves to providing solutions to Windows and Mac users. Also she enjoys music and palying tennis in her free time.

Editor in chief
Gerhard Chou
In order to effectively solve the problems for our customers, every article and troubleshooting solution published on our website has been strictly tested and practiced. Our editors love researching and using computers and testing software, and are willing to help computer users with their problems