Written byCoco LinUpdated on Oct 29, 2025
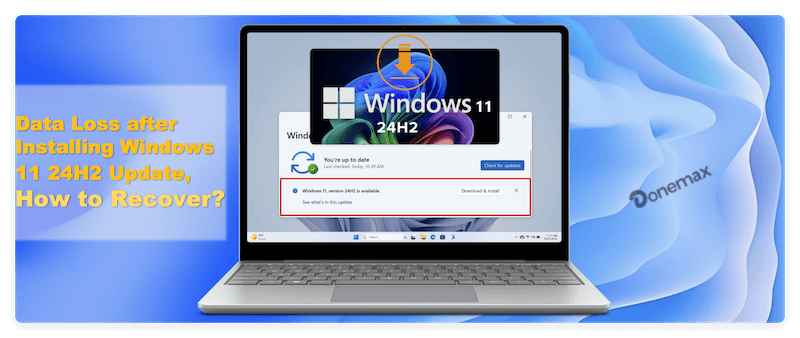
Data Loss after Installing Windows 11 24H2 Update, How to Recover?
Approved byGerhard Chou
Before we start: Donemax Data Recovery is a reliable recovery software which can recover deleted or lost data in any data loss scenarios. If you lost data and there is no backup available, you can download and use the software to help you retrieve the missing files effectively.
PAGE CONTENT:
- Why Data Loss Happens after Installing the Windows 11 24H2 Update
- Preliminary Checks for Lost Data after Installing Windows 11 24H2 Update
- Advanced Methods to Recover Lost Data after Installing Windows 11 24H2 Update
- What to Do when Data Recovery Software Fails
- Prevent Future Data Loss During Windows Updates
Windows 11 24H2 is one of Microsoft's most feature-rich updates, introducing new AI enhancements, performance optimizations, and improved security capabilities. However, as many users have reported, this update has also led to unexpected data loss, missing files, and inaccessible partitions.
If you've recently suffered data loss after installing Windows 11 24H2 update and can't find your files, don't panic. In most cases, the data isn't permanently deleted—it may simply be misplaced, hidden, or overwritten during the update process. This guide explains why this happens, how to recover lost files effectively, and how to prevent it from happening again.
Why Data Loss Happens after Installing the Windows 11 24H2 Update
While Microsoft strives for seamless updates, the complex nature of operating system installations means things can go wrong. Below are the most common reasons for file disappearance after installing 24H2.
1. Temporary or Reset User Profiles
During the update, Windows might fail to load your original user profile and instead log you into a temporary profile. In this case, your Desktop, Documents, and Downloads folders may appear empty, though your actual files still exist in another user directory.
📍 Tip: Navigate to C:\Users\ and check if your original user folder (e.g., YourName) still exists. Files are often preserved there.
2. File System or Partition Errors
System updates can occasionally corrupt the file system or partition table—especially on drives formatted as NTFS or exFAT. This can make the disk unreadable or convert it to a RAW state. If your drive appears as "unallocated" or "not accessible," file system corruption may be the culprit.
3. System Restore or Rollback Changes
If you attempted to roll back the update or if Windows restored automatically due to an installation error, data written after the restore point could be deleted.
4. Drive Letter Reassignment
After updates, Windows may reassign drive letters. For example, your D: drive might now appear as E:, making it seem as if files are gone.
5. OneDrive Sync Issues
The update might log you out of OneDrive, pause syncing, or change the sync folder location. Your data could still exist in the cloud but not on your local drive.
6. Cleanup of Old System Files
Windows updates often perform automatic cleanup to remove previous installations (the Windows.old folder). If you didn't back up before the update, important user files may have been deleted along with old OS data.
Preliminary Checks for Lost Data after Installing Windows 11 24H2 Update
Before you use any advanced recovery software, try these quick checks—they often solve the problem immediately.
1. Check for Temporary Profile
- Go to C:\Users\ and see if there's another folder with your original username.
- If found, navigate to your Desktop, Documents, and Pictures folders to retrieve the data.
- Restart the system and log in using your main account credentials.
2. Use File Explorer Search
Use Windows search with wildcards like *.docx or *.jpg to locate misplaced files.
- In File Explorer, open This PC and type the extension or file name in the search bar.
- You can also filter by Date Modified to locate recently updated files.
3. Check the Windows.old Folder
The Windows.old directory stores files from the previous Windows version for up to 10 days after upgrading.
- Go to: C:\Windows.old\Users\YourName\
- Copy and paste your needed files to another folder.
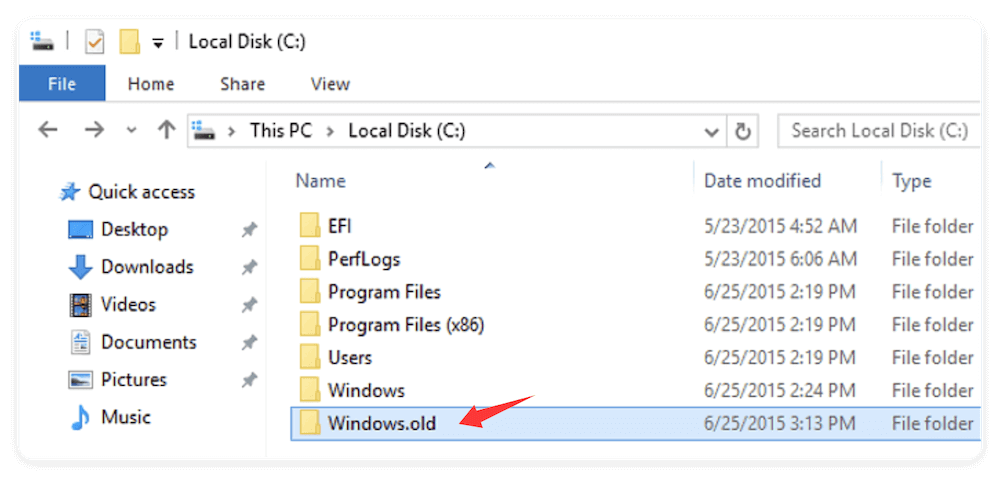
If this folder is missing, it may have been automatically deleted by the system.
4. Check Recycle Bin
It's possible that some files were moved to the Recycle Bin during the update.
- Open Recycle Bin, right-click the file, and select Restore.
5. Verify OneDrive and Other Cloud Services
If you use cloud storage:
- Sign in to your OneDrive account.
- Check your Documents, Desktop, and Pictures folders for synced files.
Sometimes the update changes the local folder path, but your files remain in the cloud.
Advanced Methods to Recover Lost Data after Installing Windows 11 24H2 Update
If you can't locate your files through the basic checks, use the following advanced recovery techniques.
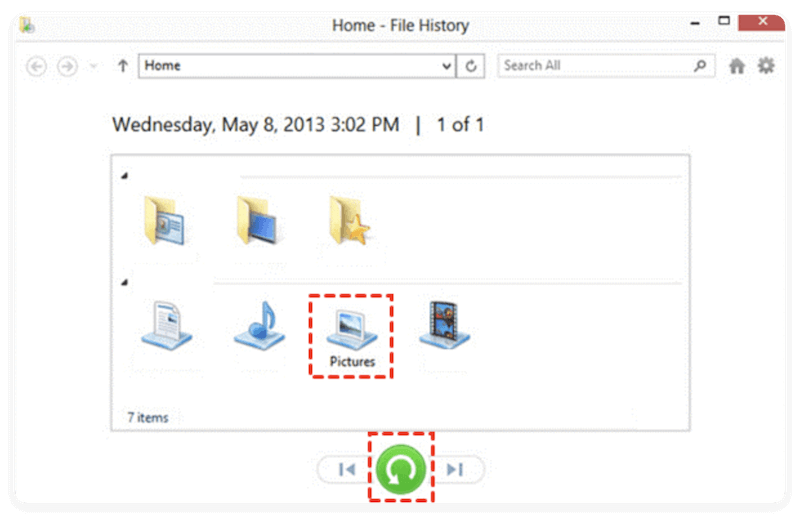
Method 1. Use File History or Previous Versions
Windows' built-in File History feature allows you to restore previous copies of your files.
- Go to Control Panel > File History.
- Select Restore personal files.
- Browse through the backups and select files or folders to restore.
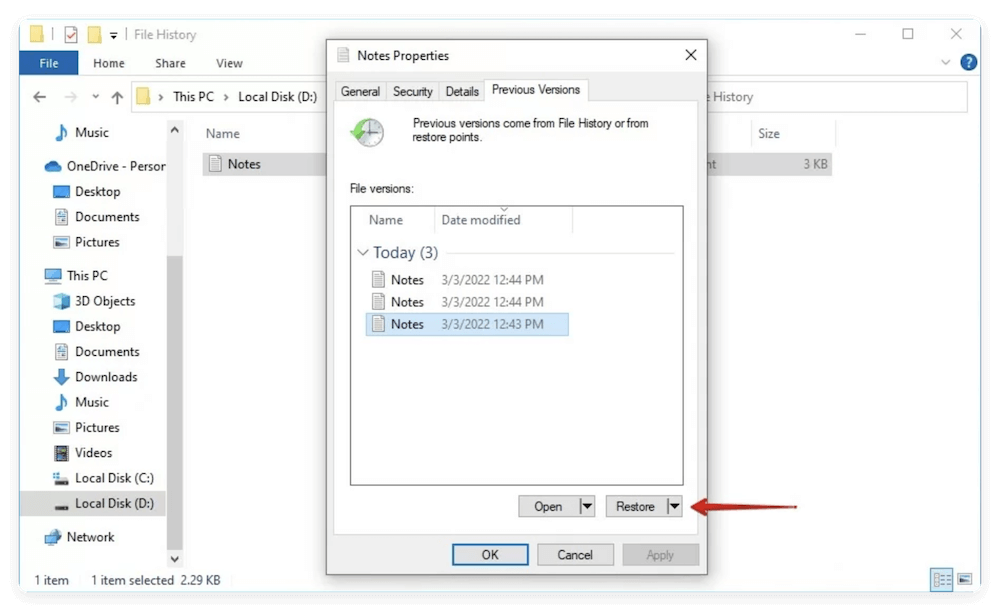
If File History wasn't enabled, you can also try restoring from Previous Versions:
- Right-click on the affected folder (e.g., Documents).
- Select Properties > Previous Versions.
- Choose a version before the 24H2 update and click Restore.
Method 2. Recover Hidden Files via Command Prompt
If your files are hidden after the update, you can use the attrib command to reveal them.
- Press Win + R, type cmd, and press Enter.
- In the Command Prompt, type the following command: (Replace F: with your drive letter)
attrib -h -r -s /s /d F:\*.*
- Press Enter to execute the command.
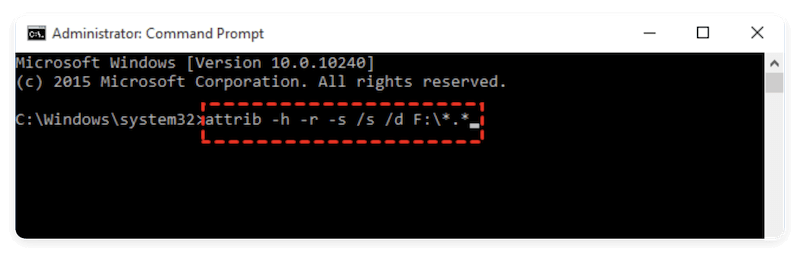
This command unhides hidden files and removes system attributes that may prevent them from appearing.
Method 3. Check Disk Management for Hidden Partitions
After the update, some partitions might become hidden.
- Right-click Start > Disk Management.
- Look for missing partitions.
- If found, right-click and choose Change Drive Letter and Paths to reassign the letter.
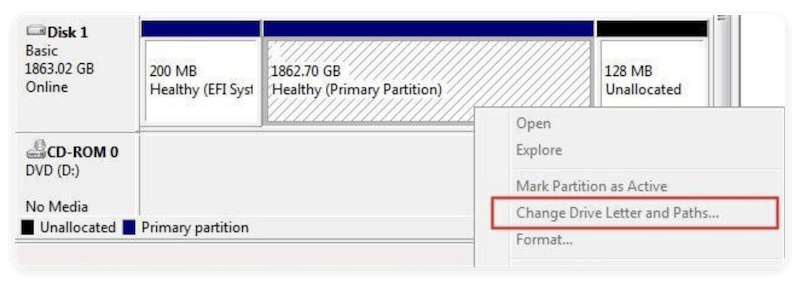
Avoid formatting the partition—doing so may overwrite recoverable data.
Method 4. Recover Files Using Professional Data Recovery Software
If files are missing due to corruption or deletion and above methods don't work, data recovery software can help. Trusted tools like Donemax Data Recovery, Stellar Data Recovery, or Wondershare Recoverit are effective.
How to recover lost files using Donemax Data Recovery:
Step 1. Download and install the recovery software on a drive different from the one where you lost data (to avoid overwriting).
Donemax Data Recovery
- Most effective data recovery software for Windows 11.
- Support data recovery for HDD/SSD, USB flash drive, SD card, etc.
- Recover pictures, videos, documents and other files in any data loss case.
Step 2. Select the drive or partition where files were lost after installing Windows 11 24H2 or due to other issues.

Step 3. Start a scanning to search for the missing files from the drive. It may take some time depending on the size of the drive.

Step 4. Preview recoverable files to ensure they're intact after the scan process is done. Recover and save the files to a safe location.

Most tools offer a deep scan mode that detects files lost due to formatting, RAW partitions, or corruption.
What to Do when Data Recovery Software Fails
In some cases, the issue might go beyond what consumer tools can handle.
1. Contact Professional Data Recovery Services
If your system drive or SSD is physically damaged, professional data recovery labs are the safest option. They use specialized hardware and cleanroom environments to retrieve data from corrupted or encrypted drives.
Examples of reputable recovery labs:
- DriveSavers
- Ontrack Data Recovery
- Secure Data Recovery
Always avoid DIY physical repairs, as they can worsen data damage.
2. Stop Using the Affected Drive
Once you suspect data loss, immediately stop writing new data to the affected partition.
- Don't install apps, updates, or save files.
- Every write operation risks overwriting recoverable data sectors.
Prevent Future Data Loss During Windows Updates
While data recovery is possible, prevention is always better. Follow these best practices to protect your data during future Windows updates.
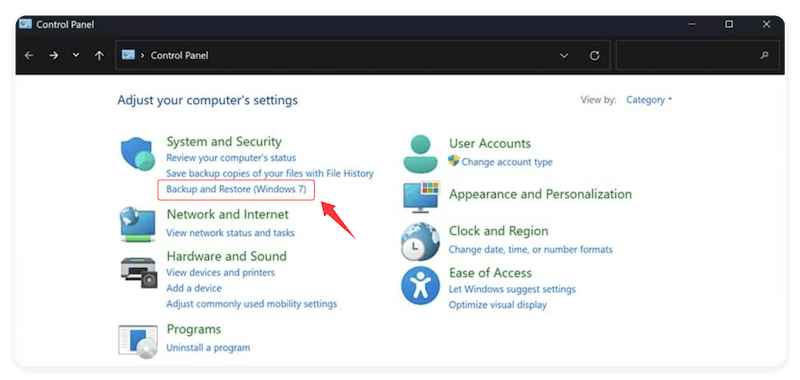
1. Create a Full System Backup Before Updating
Use Windows Backup & Restore or third-party imaging tools to create a full system image.
- Go to Control Panel > Backup and Restore (Windows 7) > Create a system image.
- Store the backup on an external drive or network location.
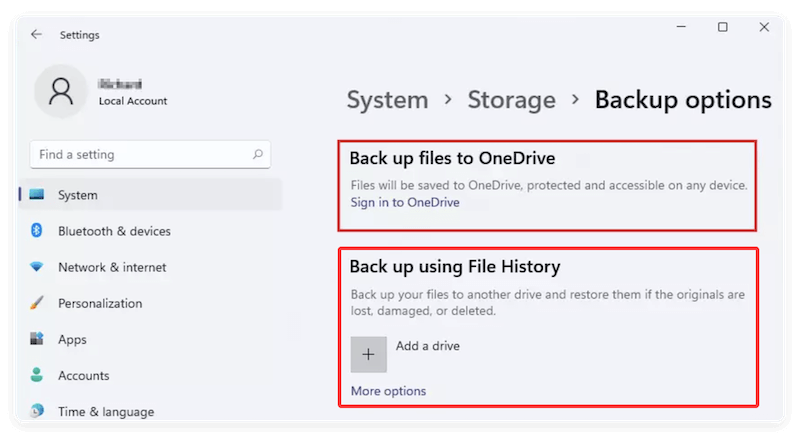
2. Enable File History or Cloud Sync
Set up File History or use OneDrive's automatic backup feature.
- This ensures continuous backup of important folders like Desktop, Documents, and Pictures.
3. Ensure Sufficient Disk Space Before Updating
Windows updates require adequate disk space to copy and extract new files.
- Keep at least 20–30 GB of free space before installing major updates.
4. Avoid Interrupting the Update Process
Sudden power loss or forced restarts during updates can corrupt system files.
- Keep your device plugged in.
- Avoid shutting it down while the update is in progress.
5. Regularly Verify System Restore Points
Enable System Protection so Windows automatically creates restore points before major updates.
- Go to Control Panel > System > System Protection.
- Choose your system drive and click Configure > Turn on system protection.

Conclusion
The Windows 11 24H2 update brings exciting advancements, but it has also introduced unexpected data loss issues for many users. Fortunately, in most cases, your files are not permanently gone—they're just hidden, misplaced, or temporarily inaccessible.
By following the recovery steps outlined above—checking the Windows.old folder, using recovery software, restoring from File History, or applying the Command Prompt method—you can often retrieve your data without resorting to expensive professional help.
However, the best way to safeguard your data is proactive protection. Regular backups, cloud sync, and creating restore points before updates will ensure that even if something goes wrong, your important files remain safe.
If all else fails, stop using the affected drive immediately and consult a professional data recovery service. Acting quickly increases your chances of full recovery.
With careful preparation and the right tools, you can enjoy the benefits of Windows 11 24H2—without losing your valuable data.
Donemax Data Recovery
Powerful, safe & easy-to-use data recovery software. Easily and completely recover deleted, formatted, or other lost data. The tool supports PC, Mac, HDD, SSD, USB drive, camera, SD card, RAID and other storage devices.
Related Articles
- Apr 10, 2025Pictures Disappeared from SD Card, How to Recover Them?
- Nov 29, 2024Are the Files Lost Permanently After Emptying Them from the Recycle Bin?
- Jun 30, 2025How to Recover Deleted or Lost MOV Videos?
- Apr 18, 2025How to Recover Lost Data from Crashed SSD? [5 Methods]
- Sep 07, 2023SAS Hard Drive Data Recovery: Recover Deleted Files and Unformat SAS Hard Drive
- Mar 12, 2025How to Recover Lost Data from Seagate Ultra Compact SSD?

Contributing Writer
Coco Lin
Coco has been a writer and a chief programmer at Donemax software since 2018. Over 10 years of experience of writing troubleshooting articles in the software industry, she is passionate about programming and loves to providing solutions to Windows and Mac users. Also she enjoys music and palying tennis in her free time.

Editor in chief
Gerhard Chou
In order to effectively solve the problems for our customers, every article and troubleshooting solution published on our website has been strictly tested and practiced. Our editors love researching and using computers and testing software, and are willing to help computer users with their problems