
Written byStevenUpdated on Jun 28, 2025
Windows.old: What Is It & How to Delete It - Is It Safe?
Approved byGerhard Chou
PAGE CONTENT:
Upgrading your Windows system often brings new features, enhanced security, and improved performance. However, it also introduces something many users notice only after their upgrade: a folder named Windows.old. This mysterious folder can take up significant disk space and leave users wondering whether it's safe to delete. In this comprehensive guide, we'll explore what Windows.old is, what it contains, whether it's safe to delete, and how to get rid of it using various methods.
What Is Windows.old?
Windows.old is a system-generated folder created when you upgrade your Windows OS, perform a custom installation without formatting the drive, or reinstall Windows over an existing installation. Essentially, it acts as a backup of your old operating system, containing system files, installed applications, program settings, and personal user data from the previous Windows installation.
This folder is stored in the root of the C:\ drive and is automatically created by Windows Setup to make it possible to roll back to your previous version of Windows within a specific time frame. For Windows 10 and Windows 11, the rollback window is usually 10 days after the upgrade.
What Does Windows.old Contain?
Understanding the contents of the Windows.old folder can help you determine its importance and whether or not it can be safely deleted.
Here's what it typically includes:
- System Files: The core components of your previous Windows version, including system32 files and boot data.
- Program Files: Applications that were installed on your previous system, though not all will be usable if you try to copy them back manually.
- User Data: Folders like Documents, Pictures, Downloads, Desktop, Videos, and Music for each user account that existed before the upgrade.
- App Settings and System Configurations: Personalized system settings and app preferences from the previous installation.
In essence, Windows.old is a snapshot of your old system, and while it's not a direct recovery point like a system image, it gives you manual access to most of your old data.
Is It Safe to Delete Windows.old Folder?
In most cases, yes - it is completely safe to delete the Windows.old folder once you're certain that your new Windows installation is working correctly and you don't need to roll back to the previous version.
When to Keep Windows.old:
- You desire the option to revert to the earlier iteration of Windows.
- You haven't yet recovered personal files or settings you might need from the old installation.
- You're not sure everything works perfectly in the new OS.
When to Delete Windows.old:
- You're satisfied with the new Windows installation.
- You have no intention of reverting to the previous version.
- You've already backed up or retrieved all necessary data.
- You need to free up disk space (the folder can consume 15GB to 30GB or more depending on the previous system).
⚠️ Warning:
Do not attempt to manually delete Windows.old using the Delete key or Shift+Delete via File Explorer. Doing so may trigger permission errors or leave orphaned files that could interfere with the system.
How to Delete the Windows.old Folder?
There are multiple safe and effective methods for deleting the Windows.old folder. Here are the best ones:
Method 1: Use Storage Settings to Delete Windows.old (Windows 10/11)
For modern Windows versions, the Storage settings make it simple to remove system files, including the Windows.old folder.
Steps:
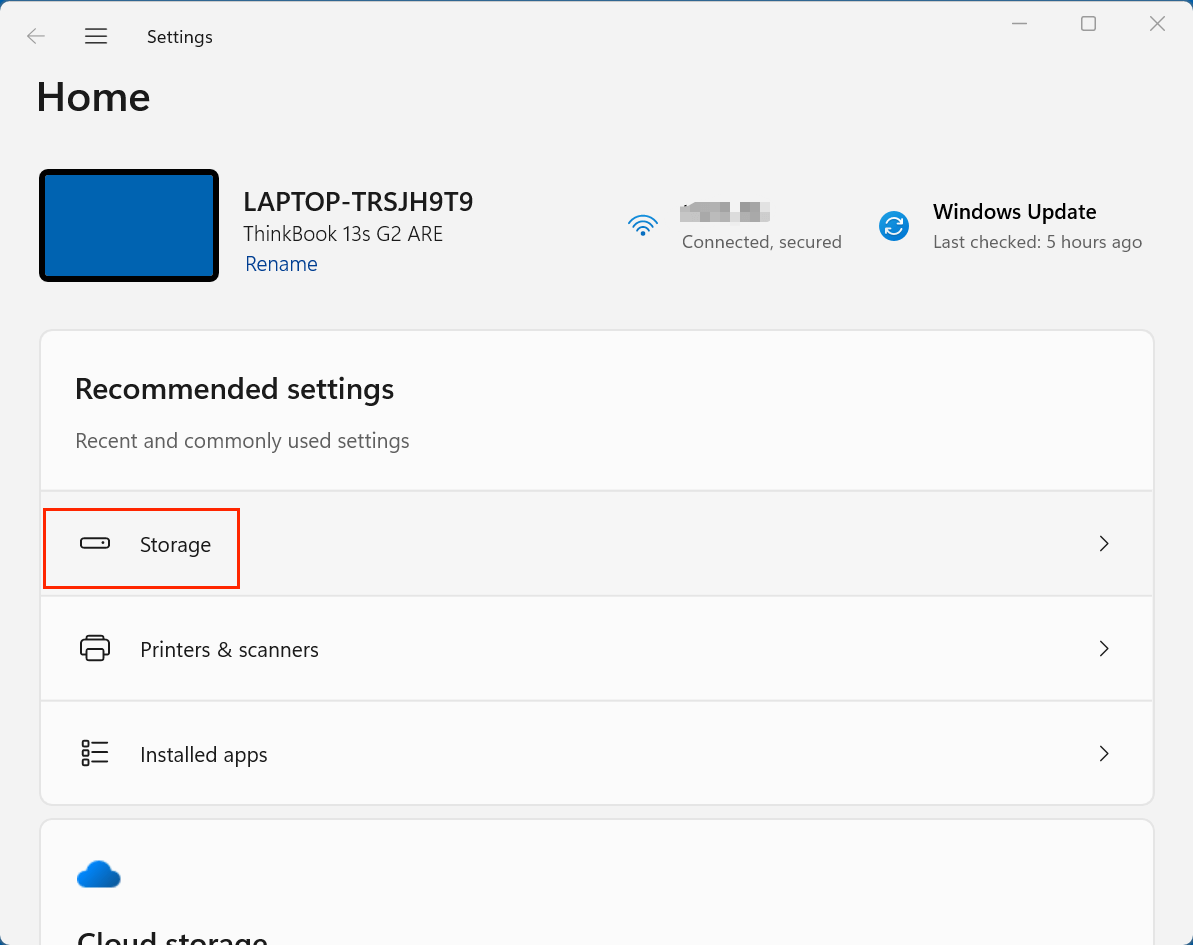
- Open Settings by pressing Windows + I.
- Go to System > Storage.
![Windows.old]()
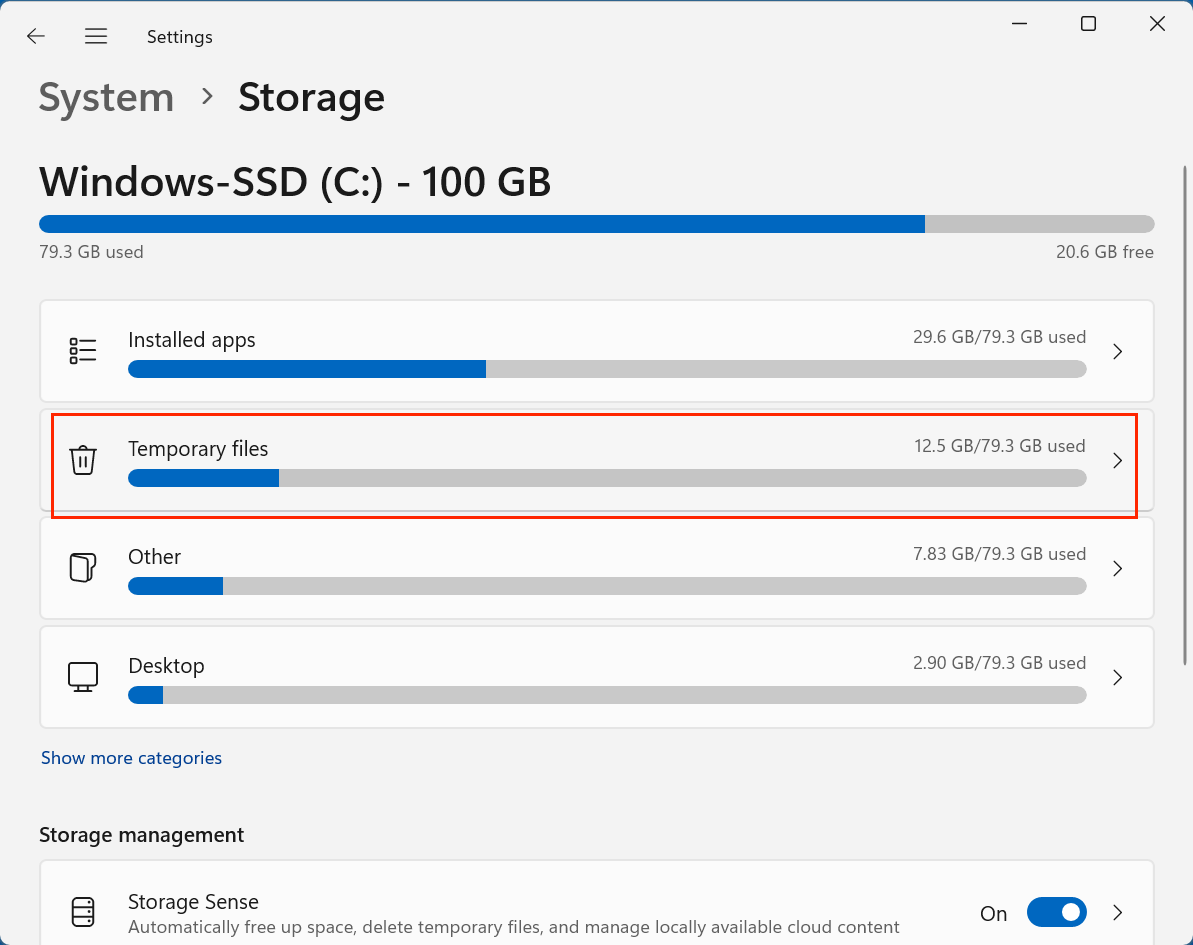
- Click on Temporary files.
![Windows.old]()
- Wait while Windows scans for temporary files.
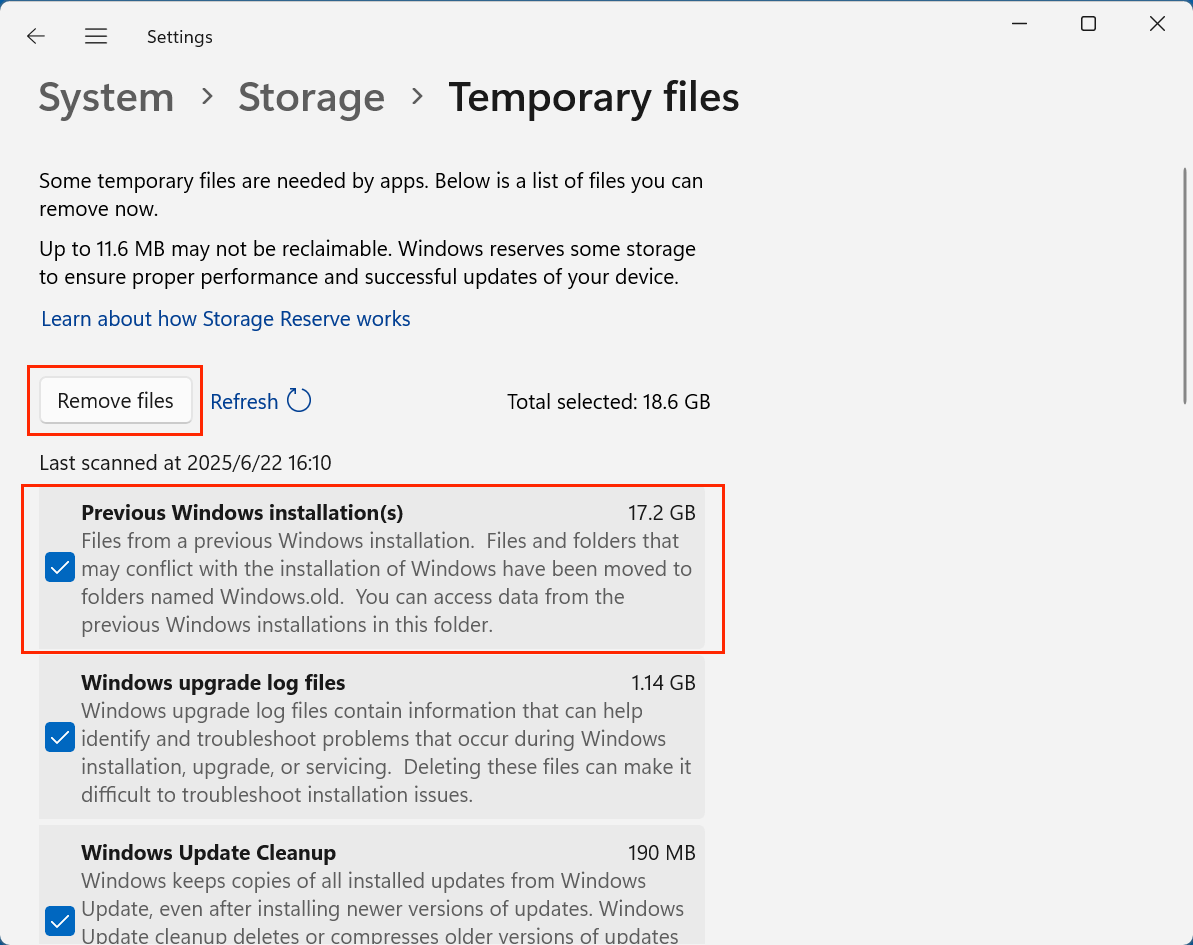
- 5Scroll down and check the box labeled Previous Windows installation(s).
![Windows.old]()
- Click Remove files to delete.
This is the most user-friendly way and avoids permission issues.
Method 2: Use Disk Cleanup Tool to Delete Windows.old
The classic Disk Cleanup utility has been a reliable tool for cleaning system files for decades.
Steps:
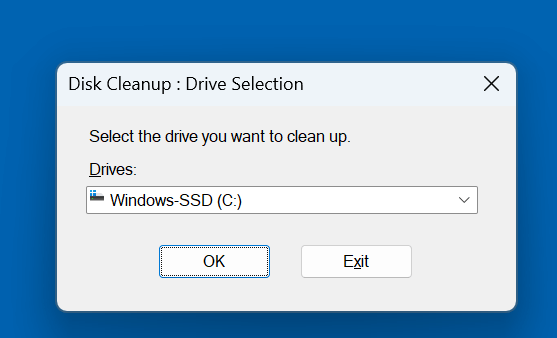
- Press Windows + S and type Disk Cleanup, then click to open.
- Choose C: as the drive (if prompted).
![Windows.old]()
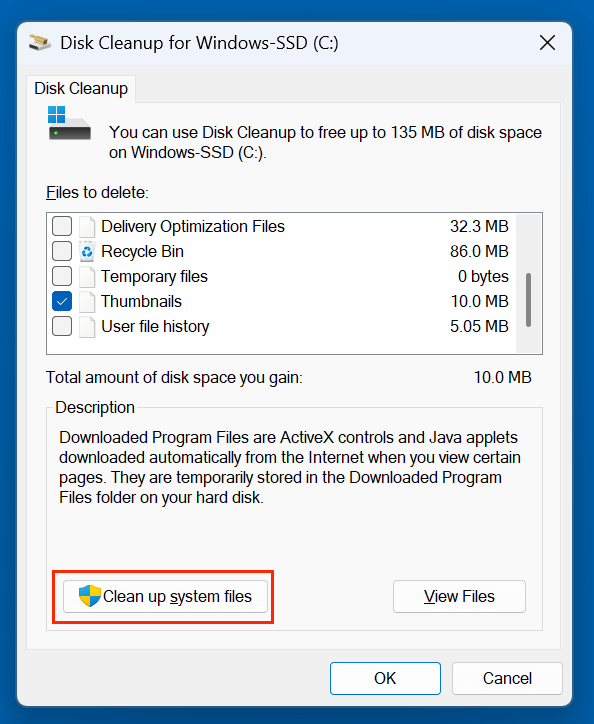
- Click on Clean up system files.
![Windows.old]()
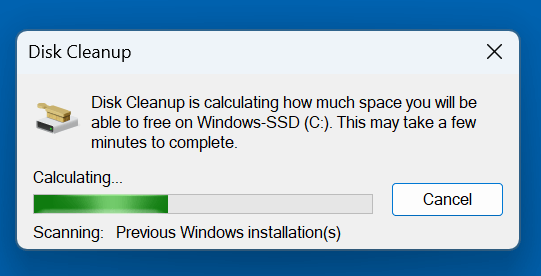
- Again, select C:.
- Wait for it to scan system files.
![Windows.old]()
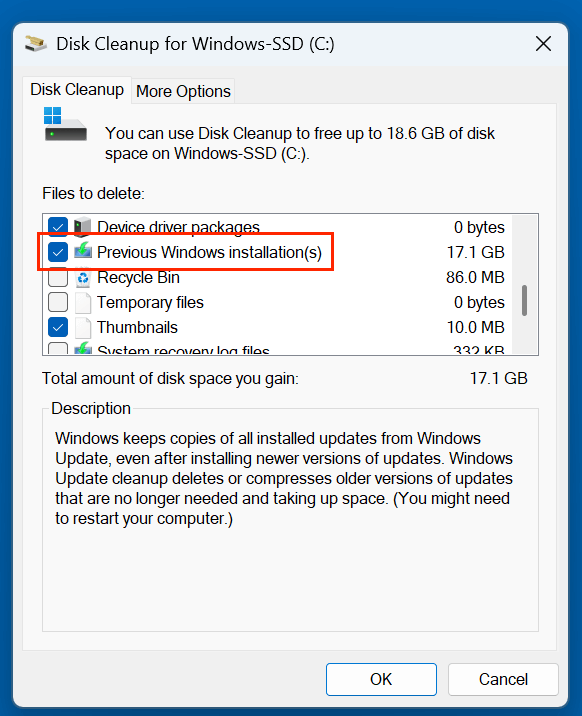
- In the list, check Previous Windows installation(s).
![Windows.old]()
- Click OK, then confirm by clicking Delete Files.
![Windows.old]()
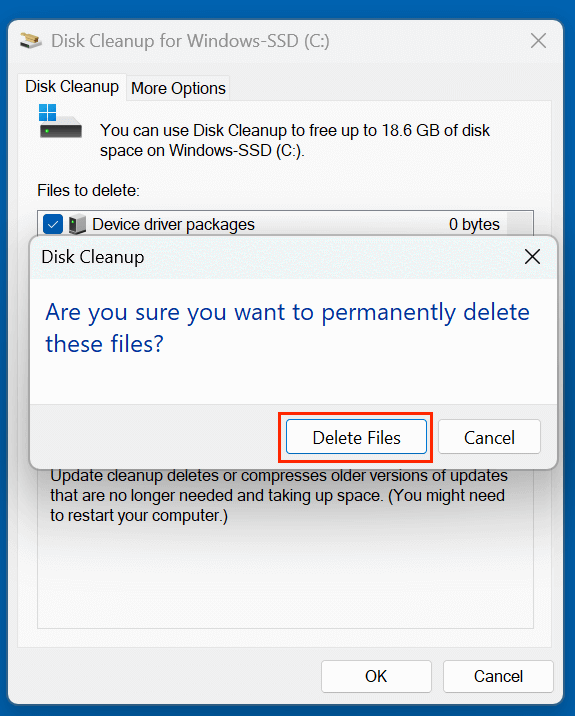
This will remove Windows.old and other temporary upgrade files safely.
Method 3: Use Command Prompt to Delete Windows.old (Advanced Users)
If you prefer the command-line method or are encountering issues with other tools, you can use Command Prompt to take ownership and force delete the folder.
Steps:
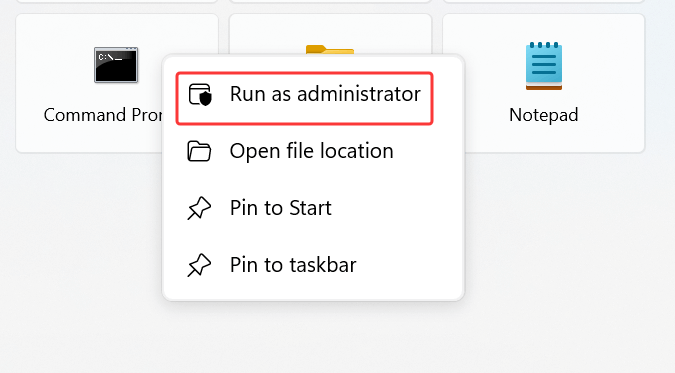
- Choose Command Prompt (Admin) or Windows Terminal (Admin) by pressing Windows + X.
![Windows.old]()
- Run the below commands one at a time:
takeown /F C:\Windows.old\* /R /A /D Y
icacls C:\Windows.old\*.* /T /grant administrators:F
rmdir /S /Q C:\Windows.old- takeown takes ownership of all files.
- icacls gives admins complete control.
- rmdir deletes the folder recursively and quietly.
Be careful using this method. Ensure you're typing the commands correctly to avoid deleting essential directories.
Can You Recover Data from Windows.old Before Deletion?
Yes, you can absolutely recover data from the Windows.old folder, and it's highly recommended that you do so before deleting it. The Windows.old folder is essentially a full copy of your previous installation, including user files, settings, and installed programs (though the latter won't run unless reinstalled).
If you find that some files were not carried over during the upgrade - such as documents, pictures, or configuration files - you can manually navigate through Windows.old and retrieve what you need. This step is crucial if you skipped creating a manual backup before performing a Windows upgrade or reinstallation.
1. What Files Can Be Recovered?
Here's a list of typical files and folders you can recover:
- Documents: Files stored under your old Documents folder.
- Pictures, Music, and Videos: Any personal media files in your user profile.
- Desktop Files: Items saved directly on the desktop of your old installation.
- Downloads: Files you downloaded and saved before the upgrade.
- App Data: Application-specific settings stored in AppData (useful for advanced users).
- Browser Profiles: For browsers like Chrome or Firefox, settings and saved sessions may still be present under the old AppData folders.
💡 Note: While you can recover data files, you cannot simply copy and paste installed programs from Windows.old and expect them to run. Programs typically require registry entries and system dependencies to function properly. You will need to reinstall them.
2. How to Access and Recover Files
Follow these steps to manually recover files:
- Open File Explorer (Windows + E).
- Move to:
C:\Windows.old\Users\
- Open the folder corresponding to your old user account.
- Browse folders like:
- Documents
- Desktop
- Downloads
- Pictures
- AppData (you may need to enable hidden items to see this)
- Select the files or folders you want to keep, then copy and paste them into the appropriate folder in your current Windows user profile (e.g., C:\Users\YourNewUsername\Documents).
💡 Tip: If you encounter access issues when trying to open or copy certain folders, it's usually a permission-related problem. You may need to take ownership of the folder by:
- Right-clicking the folder in Properties
- Go to the Security tab in Advanced
- Change the Owner to your current user account and apply changes.
3. Special Note on AppData and Configuration Files
For power users or developers, AppData folders within Windows.old can be valuable. They may contain:
- Email client settings and local cache (e.g., Outlook PST/OST files).
- Application preferences, templates, or caches (Adobe, Microsoft, and more).
- Web browser profiles, bookmarks, and session data (especially for Chrome and Firefox).
You can try importing these into the same folder path of your new profile or use app-specific import/export functions.
4. Back Up Before Deleting
Even if you believe you’ve copied everything you need, it's smart to back up Windows.old to an external drive or compressed archive (ZIP) if you have sufficient storage. This gives you a recovery option if you later realize you missed something important.
For example:
- Right-click on C:\Windows.old
- Choose Send to > Compressed (zipped) folder
- Move the zipped folder to an external drive
This way, you free up your system drive but retain a copy of old data just in case.
5. When Recovery Is No Longer Possible
If Windows.old has already been deleted - either manually or automatically after 10 days - recovery becomes much more difficult. In such cases, you may attempt data recovery using specialized software like Donemax Data Recovery.
Step 1. Download and install the reliable data recovery software - such as Donemax Data Recovery on the computer.
Step 2. Open Donemax Data Recovery, select the drive such as C drive where you deleted the Windows.old folder.

Step 3. Click on Scan button to deeply scan the selected drive and find all deleted files & folders.

Step 4. After scanning, select the files you want to recover, click on Recover button to save them.

However, these tools have limited success when it comes to recovering large, fragmented system folders like Windows.old, especially after new data has overwritten the disk sectors.
To avoid such risks, always take time to review and recover needed files before deletion.
How to Prevent Windows.old from Being Created Again?
If you're planning a fresh installation or an upgrade and want to avoid having Windows.old created again, there are a few precautions you can take:
1. Do a Clean Installation
During a Windows installation:
- Choose "Custom: Install Windows only (advanced)".
- Format the partition before installing Windows.
- This prevents the system from keeping old files and avoids generating Windows.old.
2. Backup Important Data First
Before any major OS upgrade or reinstall:
- Manually backup your personal files to an external drive or cloud storage.
- This reduces the need for automatic retention by Windows Setup.
3. Keep System Clean Post-Upgrade
After ensuring everything is working post-upgrade:
- Recover any essential files from Windows.old immediately.
- Then proceed to remove the folder to save space and reduce clutter.
Conclusion
The Windows.old folder is a thoughtful addition by Microsoft, providing users with a safety net during system upgrades. It can be a lifesaver for those needing to recover lost files or roll back to a previous OS version. However, once you've confirmed your new system is running smoothly and you no longer need anything from the old installation, it's safe - and often wise - to delete the Windows.old folder to free up valuable storage space.
Whether you choose to use Storage Settings, Disk Cleanup, or Command Prompt, removing Windows.old is a straightforward process when done properly. Just remember to check its contents first and make any necessary backups. Managing your system’s storage efficiently helps keep your PC fast, clean, and clutter-free.
💡 Tips:
- Before or after deleting Windows.old folder on your computer, you can use disk cloning software - such as Donemax Disk Clone to create a bootable clone for your computer.
- If you want to recover some of the lost files after deleting Windows.old folder on your computer, just use data recovery software - such as Donemax Data Recovery to scan the drive.
- If you want to permanently delete the Windows.old folder from your computer, just use data erasure software - such as Donemax Data Eraser to securely delete the folder or wipe free disk space of the C drive.
Donemax Disk Clone
An award-winning disk cloning program to help Windows users and Mac users clone HDD/SSD/external device. It also can create full bootable clone backup for Windows PCs and Macs.
Related Articles
- Nov 23, 2024Full Disk Access on Mac: Should I Enable It?
- Dec 19, 2024How to Add/Delete/Use Zsh Alias on Mac?
- Nov 11, 2024What is Mac Safe Mode? How to Use Safe Mode on Mac?
- May 28, 2025What is Micro SDXC & Is it the Same as microSD?
- Sep 17, 2025Windows Secure Boot – A Complete Guide
- Jan 01, 1970About Text File (.txt), How to Open It on Windows or macOS

Contributing Writer
Steven
Steven has been a senior writer & editor of Donemax software since 2020. He's a super nerd and can't imagine the life without a computer. Over 6 years of experience of writing technical solutions and software tesing, he is passionate about providing solutions and tips for Windows and Mac users.

Editor in chief
Gerhard Chou
In order to effectively solve the problems for our customers, every article and troubleshooting solution published on our website has been strictly tested and practiced. Our editors love researching and using computers and testing software, and are willing to help computer users with their problems
Hot Donemax Products

Clone hard drive with advanced clone technology or create bootable clone for Windows/Mac OS.

Completely and easily recover deleted, formatted, hidden or lost files from hard drive and external storage device.

Certified data erasure software - permanently erase data before selling or donating your disk or any digital device.