
Written byCharlesUpdated on Oct 09, 2025
External Hard Drive/USB Drive Not Readable on macOS Tahoe, Fix It
Approved byGerhard Chou
Before we start: There are some methods to fix not readable external hard drive or USB drive on macOS Tahoe. If there are important files on the drive, you can first use Donemax Data Recovery for Mac to restore the files.
PAGE CONTENT:
If you recently upgraded to macOS and discovered that your external hard drive or USB drive is not readable on macOS Tahoe, you are not alone. Many Mac users encounter this issue after installing a new macOS version. In some cases, the drive doesn't show up in Finder, while in others, it appears but cannot be opened or mounted. This can be frustrating, especially when the drive contains essential files, backups, or work projects.
The good news is that in most cases, this problem can be fixed without losing your data. In this article, we'll walk through the common causes of this error, troubleshooting steps, and effective solutions to restore access to your external hard drive or USB drive on macOS Tahoe.
Why an External Drive Is Not Readable on macOS Tahoe
Understanding the root cause is the first step toward fixing the issue. Here are the most frequent reasons why your Mac may fail to read an external drive:
- Incompatible File System: Drives formatted in NTFS (Windows default) are read-only on macOS. Sometimes, even exFAT or FAT32 can malfunction after updates.
- Disk Corruption or Bad Sectors: Improper ejection, malware, or physical wear can corrupt drive partitions.
- Outdated Drivers or System Bugs: New macOS versions sometimes introduce bugs that affect USB and storage devices.
- Hardware Problems: A faulty USB cable, adapter, or port may prevent your Mac from detecting the drive.
- Power Supply Issues: External hard drives that require external power adapters may fail if not powered properly.
- Permissions and Security Settings: System preferences or disk permissions might restrict drive access.
- Incorrect Ejection from Other Devices: Removing the drive unsafely from a Windows PC, game console, or TV can leave the file system in an inconsistent state.
Initial Checks for Not Readable External/USB Drive on macOS Tahoe
Before jumping into advanced fixes, it's best to rule out basic issues. Try these quick checks:
- Test on Another Device: Connect the drive to another Mac or even a Windows PC. If it works, the issue lies with your macOS system.
- Change USB Ports and Cables: Sometimes, a simple switch fixes detection problems. If possible, use an Apple-certified cable.
- Enable External Disks in Finder: Go to Finder → Preferences → Sidebar and ensure "External Disks" is checked.
- Check Disk in Disk Utility: Open Applications → Utilities → Disk Utility. If your drive appears but is greyed out, it may just need to be mounted.
- Check Power Source: For larger external HDDs, ensure the adapter or dual-USB power cable is working properly.
If the drive still does not appear or mount, continue with the fixes below.
Fixes for External Hard Drive/USB Not Readable on macOS Tahoe
Fix 1. Use Disk Utility to Check Drive Status
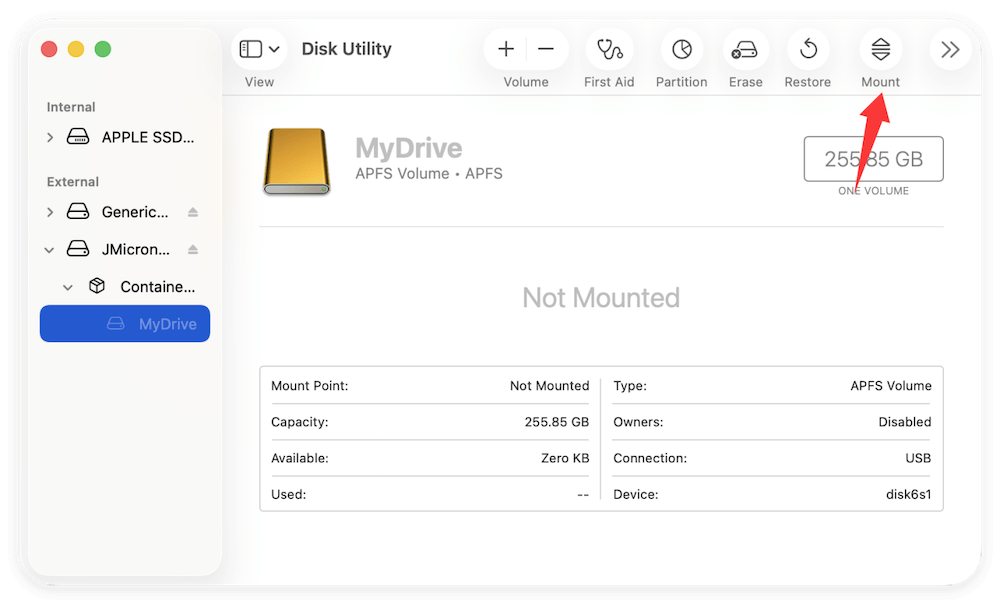
- Open Disk Utility from Applications → Utilities.
- In the sidebar, locate your external drive.
- If it appears but is unmounted, select it and click Mount.
![fix external or USB drive unreadable on macOS Tahoe]()
- If mounting fails, click First Aid and let macOS attempt to repair the disk.
![fix external or USB drive unreadable on macOS Tahoe]()
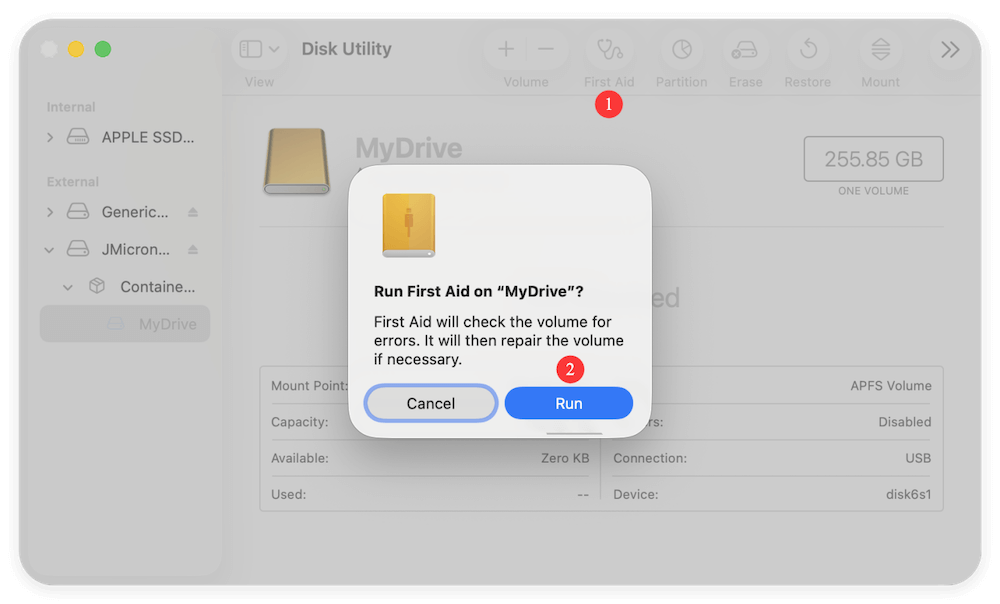
📍 Tip: If First Aid reports that the disk cannot be repaired, backup and reformatting may be necessary.
Fix 2. Check Disk Permissions and Manually Mount the Drive
- In Disk Utility, select the drive → File → Get Info.
- Verify if you have read/write permissions.
- If permissions are restricted, click the lock icon and authenticate with your admin password to adjust them.
- Try manually mounting by selecting the drive and clicking Mount.
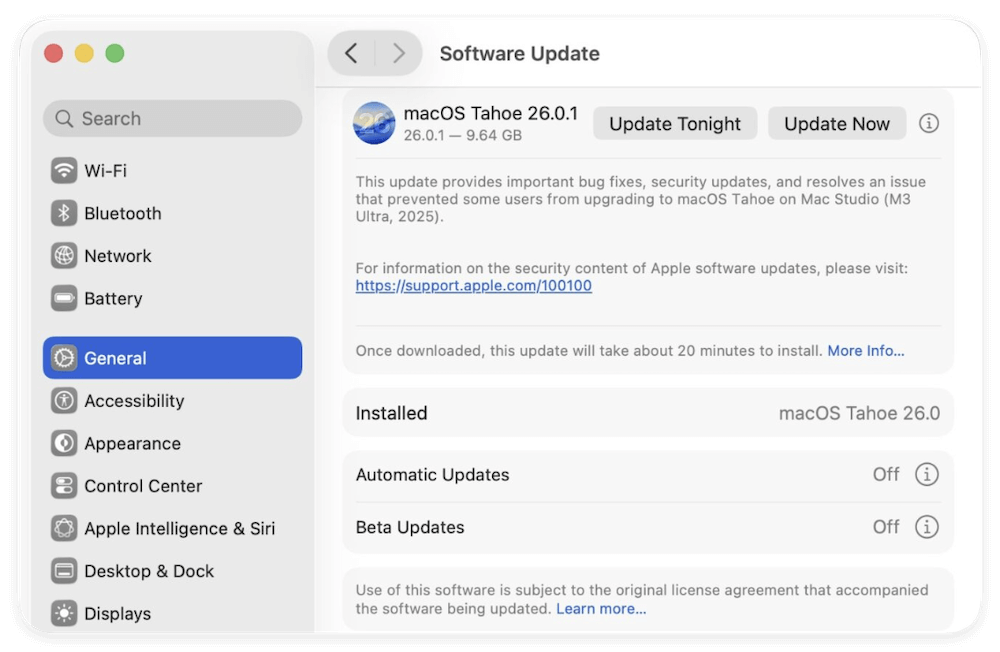
Fix 3. Update macOS Tahoe
Sometimes, the issue is caused by a bug in the initial release of macOS Tahoe. Apple often releases minor updates to fix storage and peripheral issues.
- Go to Apple Menu → System Settings → General → Software Update.
- Install any available updates.
- Restart your Mac and reconnect the drive.
Fix 4. Format the Drive (If Necessary)
If your external hard drive or USB drive is still not readable on macOS Tahoe after trying repairs, mounting, and system updates, the last resort is to format the drive. Formatting erases everything on the disk, but it refreshes the file system and eliminates corruption that prevents macOS from recognizing it.
Before you proceed, keep these points in mind:
- Backup First (if possible): If the drive is partially accessible, copy files to another storage device.
- Try Data Recovery: If you can't access the drive, consider using recovery software like Disk Drill or Stellar before formatting.
- Choose the Right File System: The file system you pick will determine compatibility with macOS and other devices.
Step-by-Step: How to Format a Drive on macOS Tahoe
- Go to Disk Utility from Utilities via Applications. In the sidebar, locate your external hard drive or USB drive.
- Choose the top-level drive (not the volume beneath it). Example: If your drive shows as Seagate Expansion Media → Untitled, select the parent drive Seagate Expansion Media.
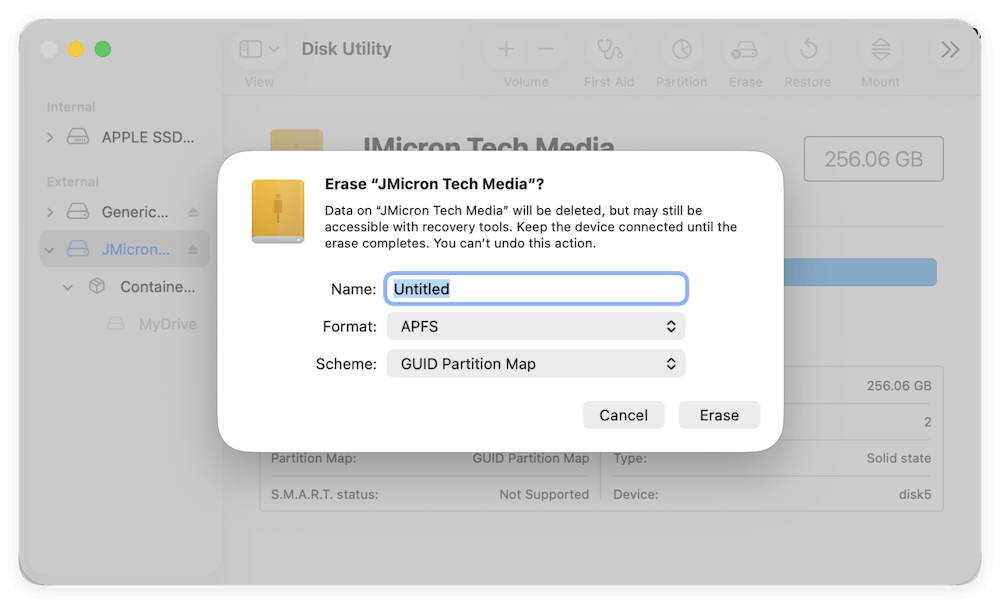
- At the top of the Disk Utility window, click Erase. A dialog box will appear asking you to name the drive, choose a format, and select a partition scheme.
- Choose File System Format. Here's what each option means:
- APFS (Apple File System): Best for modern Macs running macOS High Sierra or later. Fast, reliable, and optimized for SSDs. However, it won't work with Windows PCs.
- Mac OS Extended (Journaled): Older format, good for mechanical hard drives, but not as fast as APFS. Compatible with macOS versions before High Sierra.
- exFAT: Recommended if you plan to use the drive with both Mac and Windows. Supports large files and works across platforms.
- FAT32 (MS-DOS): Works with almost any device, but has a 4GB file size limit and is less reliable for modern use.
Recommendation:
- Mac-only users → APFS.
- Cross-platform (Mac + Windows) → exFAT.
- Choose GUID Partition Map if the drive is 1TB or larger and you'll mainly use it with macOS. Choose Master Boot Record (MBR) if you want maximum compatibility with Windows or older devices.
- Double-check your selections. Click Erase. Disk Utility will wipe the drive and create a new, clean file system.
- Once formatting is complete, your drive will remount automatically. Open Finder to confirm the drive appears in the sidebar and is fully readable.
Troubleshooting After Formatting
- If the drive still doesn't appear:
- Try formatting again using exFAT.
- Test the drive on another Mac or Windows PC to rule out hardware failure.
- If Disk Utility throws errors:
- Use Terminal with the diskutil eraseDisk command to force a clean format. Example:
diskutil eraseDisk exFAT MyDriveName GPT /dev/disk2
Replace /dev/disk2 with your actual disk identifier (check in Disk Utility or run diskutil list).
- Use Terminal with the diskutil eraseDisk command to force a clean format. Example:
Fix 5. Reset NVRAM and SMC
Sometimes, system-level configurations cause storage issues. Resetting NVRAM and SMC can help.
Reset NVRAM (PRAM):
- Turn Off your Mac.
- Turn it on and immediately press Option + Command + P + R.
- Hold for 20 seconds, then release.
Reset SMC (for Intel Macs):
- Turn Off your Mac.
- Hold Shift + Control + Option + Power button for 10 seconds.
- Release all keys and restart.
On Apple Silicon Macs, simply restart the computer to reset SMC-like functions.
Fix 6. Use Third-Party NTFS Drivers (For Windows Drives)
If your drive is formatted in NTFS, macOS can read it but cannot write to it by default. Sometimes, after updates, even read access fails.
To fix this, consider installing third-party NTFS drivers such as:
- Donemax NTFS for Mac
- DoYourData NTFS for Mac
These tools allow full read/write access to NTFS drives on macOS Tahoe.
Data Recovery for External/USB Drive Not Readable on macOS Tahoe
If your external hard drive or USB drive remains unreadable, recovering data should be your priority.
Use Professional Data Recovery Software
Several macOS-compatible recovery tools can scan damaged or unreadable drives and restore files. For example, Donemax Data Recovery for Mac is an effective data recovery software for macOS Tahoe.
Steps to recover data with Donemax Data Recovery for Mac:
- Install one of the recovery tools on your Mac. Connect the unreadable drive. Run the software and ensure to choose the drive.
![recover data from unreadable external or USB drive on macOS Tahoe]()
- Click the Scan button to run a deep scan. The software will search for the entire drive to locate the missing files.
![recover data from unreadable external or USB drive on macOS Tahoe]()
- Preview and recover the files after the scan is done. Save recovered data to another drive (never the same drive).
![recover data from unreadable external or USB drive on macOS Tahoe]()


Seek Professional Data Recovery Services
If the drive is physically damaged or software recovery fails, professional data recovery labs may be required. While expensive, they are the safest option for retrieving critical data.
Preventive Measures to Avoid Future Problems
To reduce the risk of running into unreadable drive issues again, follow these best practices:
- Always Eject Safely: Use Finder → Eject before unplugging a drive.
- Keep macOS Updated: New updates often include bug fixes for USB and storage devices.
- Use Compatible File Systems: If you use the drive across Mac and Windows, exFAT is the most reliable option.
- Backup Regularly: Use Time Machine or cloud storage to keep a copy of your important files.
- Check Drive Health Periodically: Use Disk Utility or third-party tools to scan for bad sectors.
Conclusion
When an external hard drive or USB drive is not readable on macOS Tahoe, it doesn't always mean your data is gone. Most of the time, the issue is caused by file system incompatibility, minor corruption, or macOS bugs. By following the troubleshooting steps outlined in this guide—from checking cables and ports to running Disk Utility, updating macOS, and formatting drives—you can usually restore access.
If your drive remains unreadable, don't panic. Data recovery software or professional services can often help retrieve your important files. Finally, adopting preventive habits like safely ejecting drives and using the right file system will keep your storage devices healthy and reduce the risk of future issues.
Donemax Data Recovery for Mac
Donemax Data Recovery for Mac is one of the best Mac data recovery software. It is easy-to-use and can help in recovering deleted, formatted, inaccessible or lost data from Mac HDD/SSD, external disk, USB drive, SD card, camera or other storage devices.
Related Articles
- Nov 29, 2024How to Format ExFAT or FAT32 Drive to NTFS on Mac?
- Jul 17, 2023What to Do If An USB Flash Drive Not Working on Mac?
- Apr 17, 2024How to Mount An External Hard Drive or Other Storage Device on Mac?
- May 14, 2026Why Internal Drives Fail Without Warning and How to Protect Data
- Mar 31, 2025[11 Fixes] Fix Seagate External Hard Drive Not Recognized by Mac – Guide 2025
- Jul 17, 2023Format A SD Card for Both Windows and Mac OS

Contributing Writer
Charles
Charles, who lives in Sydney, Australia, is an editor & writer of Donemax Team. He is good at writing articles related with Apple Mac computers, Windows operating systems, data recovery, data erasure, disk clone and data backup, etc. He loves reading and playing tennis in his spare time and is interested in testing new digital devices such as mobile phones, Macs, HDDs, SSDs, digital cameras, etc.

Editor in chief
Gerhard Chou
In order to effectively solve the problems for our customers, every article and troubleshooting solution published on our website has been strictly tested and practiced. Our editors love researching and using computers and testing software, and are willing to help computer users with their problems