Written byCoco LinUpdated on Mar 19, 2024
How to Format SanDisk G-DRIVE for Mac?
Approved byGerhard Chou
Summary: A lots of tools including Disk Utility, Donemax Data Eraser for Mac, Donemax NTFS for Mac can help you easily format a SanDisk G-DRIVE for Mac. With Donemax NTFS for Mac, you don’t need to format the NTFS SanDisk G-DRIVE and you can add NTFS read-write support on Mac so that you can use the NTFS SanDisk G-DRIVE on your Mac without any limitation.
PAGE CONTENT:
You want to connect your SanDisk G-DRIVE to your Mac. Good pick! However, you need to format the drive first to ensure it works well with your macOS system before you start saving files. Do not worry if you are not a tech expert; formatting is not as complex as it sounds.
Formatting a drive prepares your Mac to use by teaching it how to read and write data. It's like setting up a new office: you want everything to be ready to go. This guide will show you how to easily format your SanDisk G-DRIVE to get the most out of your external storage. Let's jump right in!
Why Format SanDisk G-DRIVE for Mac?
Knowing what coding means and why you need to do it is essential. Formatting a drive prepares it for use by setting up a file system that the operating system can understand. It's necessary to make a copy of any important files before starting this process because it deletes everything on the drive.
The NTFS file system that comes pre-installed on most SanDisk G-DRIVEs works perfectly with Windows platforms, but it is not compatible with macOS. Formatting the drive to work with Mac guarantees faster speeds, better compatibility with macOS features like Time Machine backups, and the ability to handle bigger file sizes.
Step-by-Step Guide to Format SanDisk G-DRIVE for Mac
Step 1. Connect the SanDisk G-DRIVE to your Mac.
Connect the SanDisk G-DRIVE to your Mac using the right cord and a free USB or Thunderbolt port. Make sure the drive is plugged correctly and turned on.
Step 2. Backup Important Data.
It's essential to back up any critical data on the SanDisk G-DRIVE before you start the cleaning process. Ensure you have a copy of everything you need because formatting the drive will eliminate all the data.
Step 3. Launch Disk Utility.
macOS or OS X comes with Disk Utility, which lets users control disks, partitions, and formatting. If you want to get to Disk Utility, do these things:
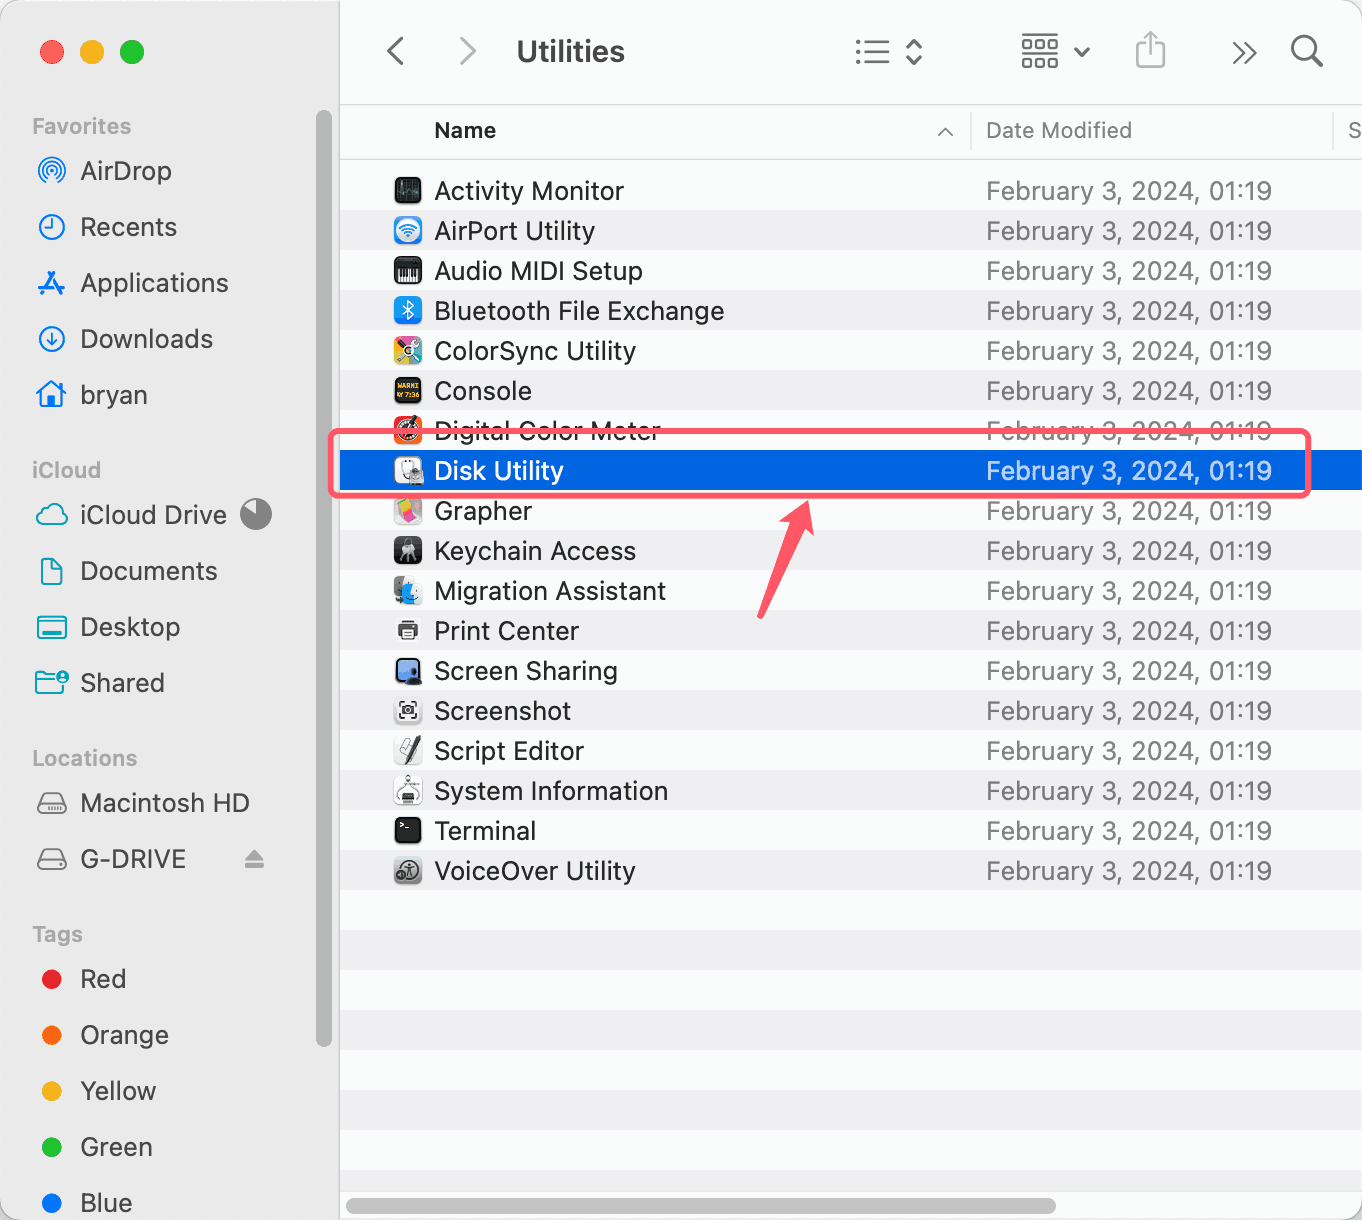
- Find the Utilities folder under Applications.
- To open Disk Utility, double-click on it.
![format SanDisk G-DRIVE for Mac]()
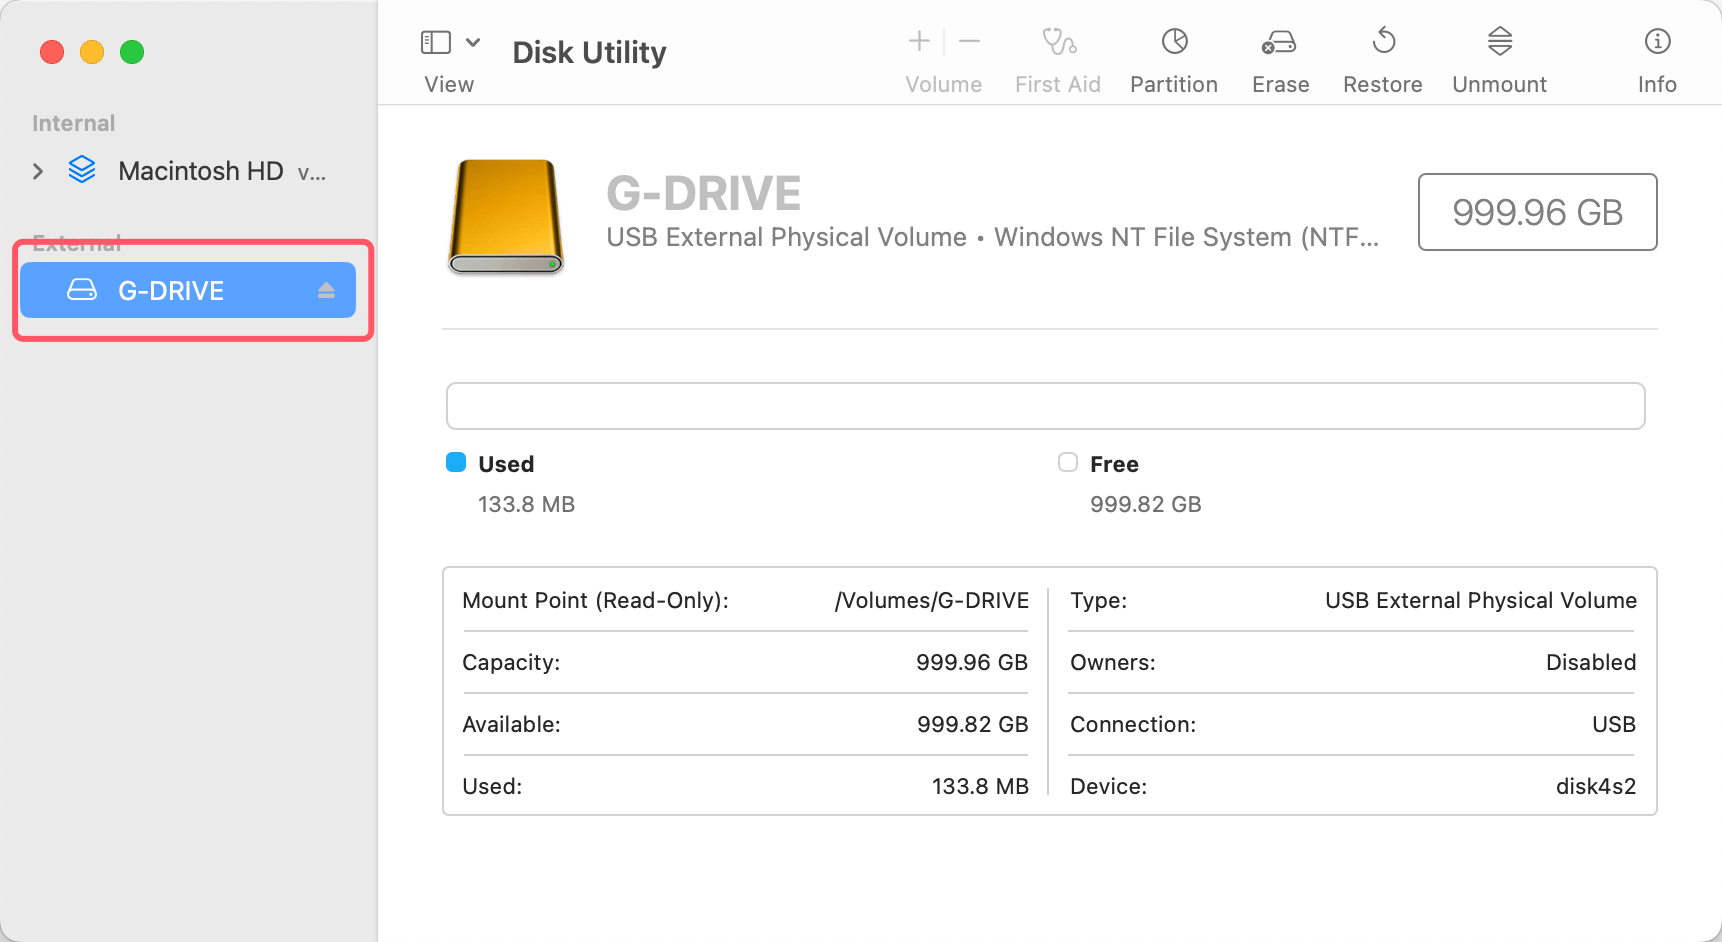
Step 4. Select the SanDisk G-DRIVE.
The left side of Disk Utility shows a list of all the linked drives and volumes. From the list, find and choose the SanDisk G-DRIVE. Ensure you pick the right drive so you don't accidentally format the wrong one.
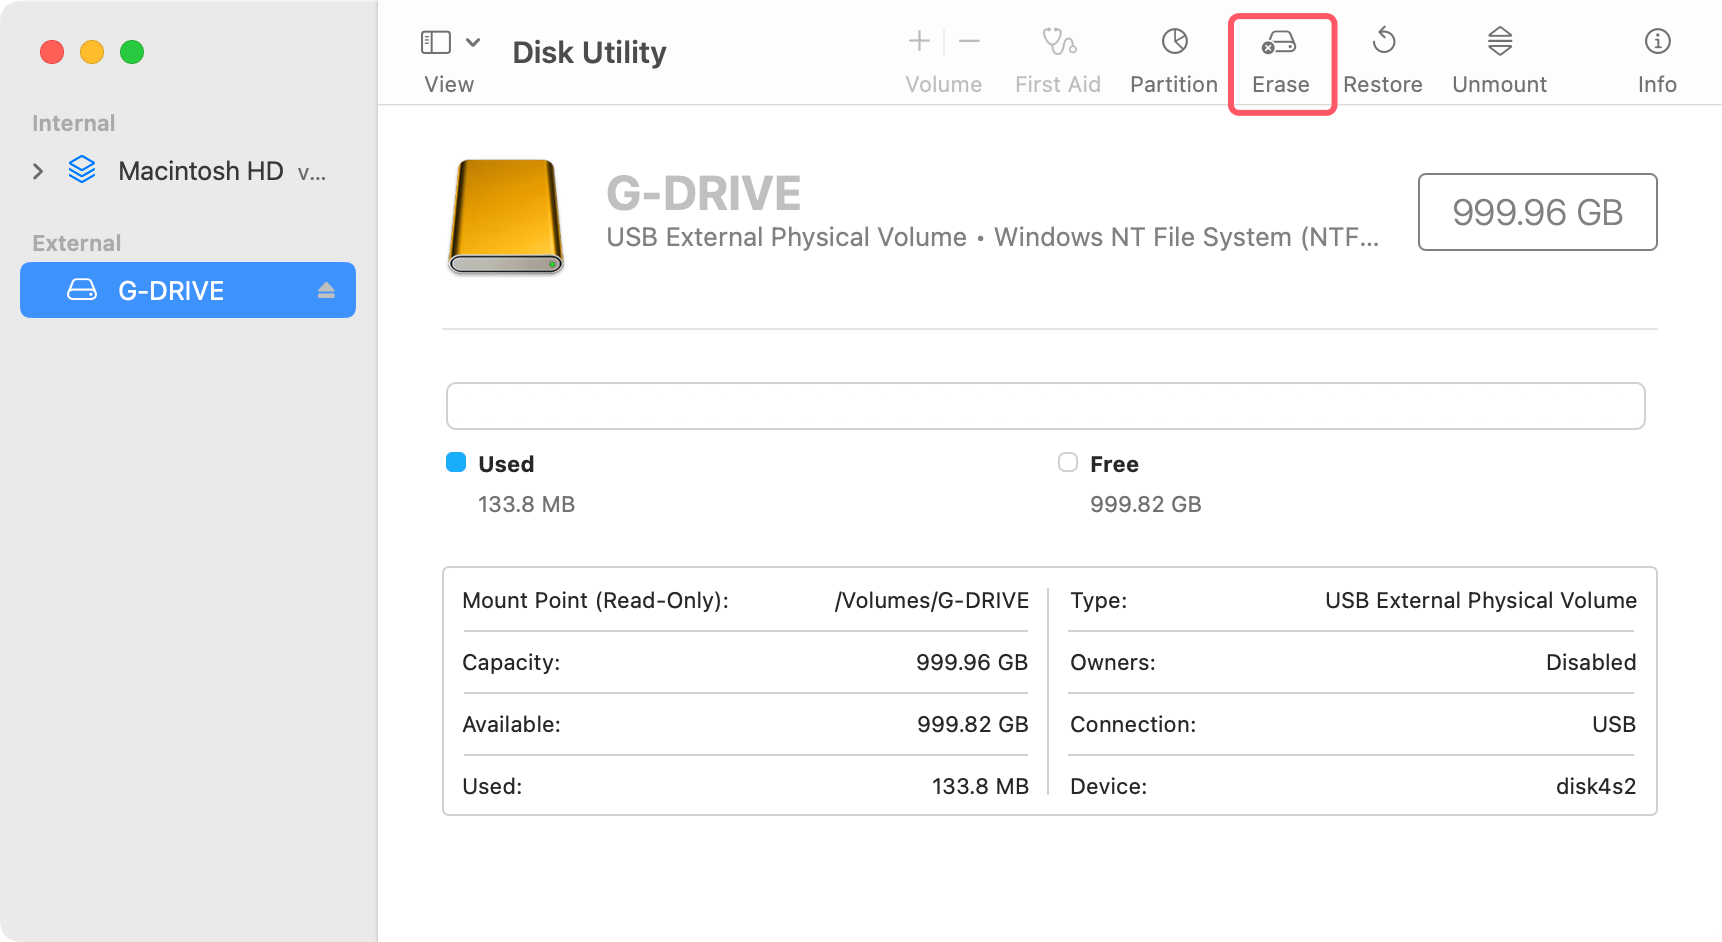
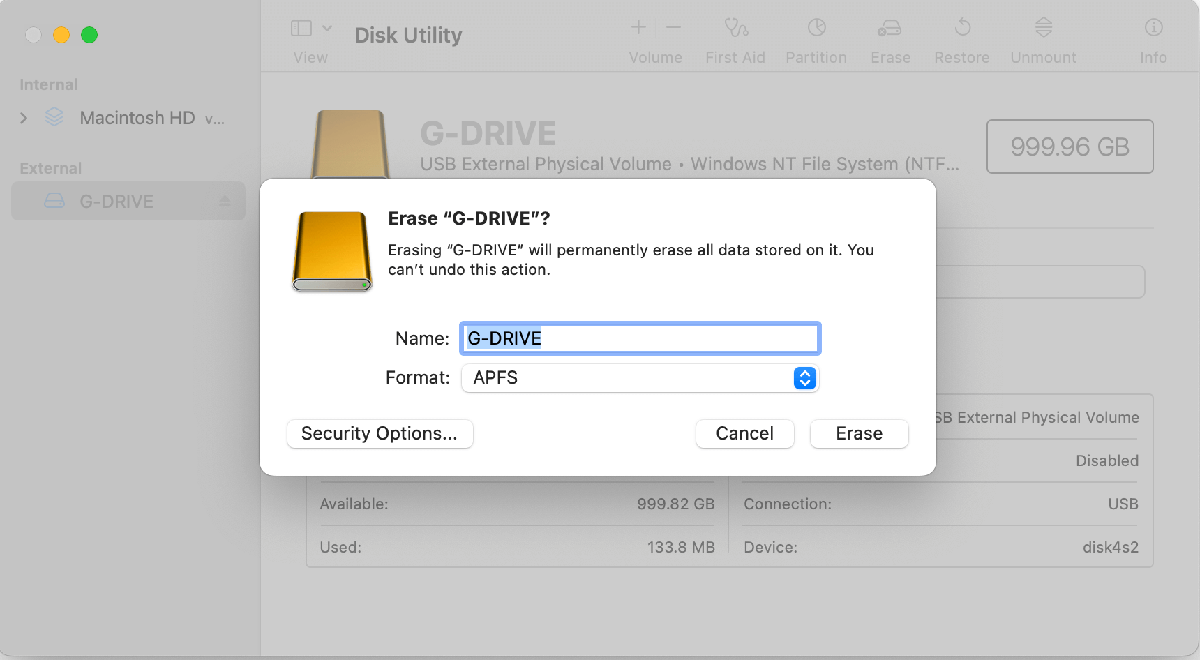
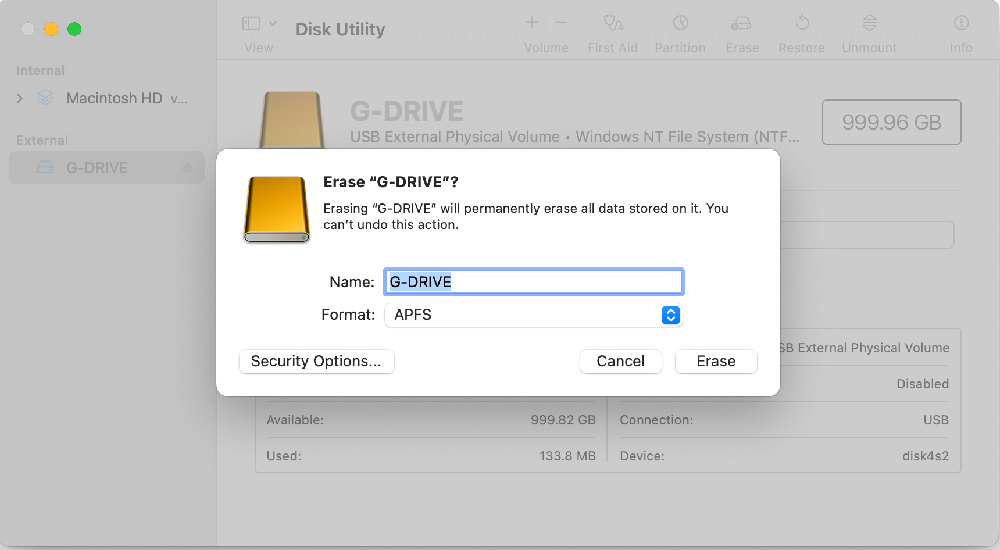
Step 5. Erase the SanDisk G-DRIVE.
Click the "Erase" button which is present at the top of the Disk Utility window once you've chosen the SanDisk G-DRIVE. It will create a new window where you can change how the removal works.
You must choose the format and scheme for the SanDisk G-DRIVE in the erase box. It would help if you used "Mac OS Extended (Journaled)" or "APFS" (Apple File System) as your file system for macOS. From the version dropdown menu, pick the version you want.
- If you want to use past macOS and other operating systems versions, you can choose "Mac OS Extended (Journaled)."
- If you have macOS High Sierra or later, you might want to choose "APFS" for better speed and compatibility.
- If you will use this SanDisk G-DRIVE on both Windows and macOS, select ExFAT as the file system.
- Next, select the partition plan. The usual choice, "GUID Partition Map," works well for most people. Press "Erase" to start the erasing process.
Disk Utility will show a message that erasing the drive will eliminate all its data. First, make sure you have a copy of any critical files. Then, click "Erase" to confirm and start the erasing.
Step 6. Wait for Formatting to Complete.
The formatting process could take a while, depending on how big and fast your SanDisk G-DRIVE is. A progress bar will show you how the process is going. A proof message will appear on the screen when Disk Utility completes the process. Just click on Done button when the process gets finished.
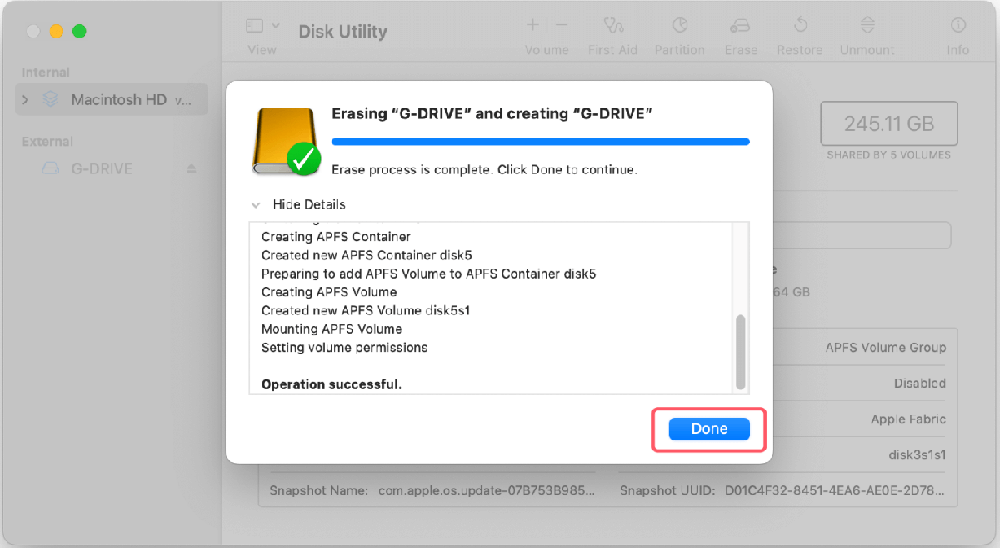
Once the cleaning is done, you can safely remove the SanDisk G-DRIVE from your Mac. To do this, right-click the drive icon in Finder or the desktop and choose "Eject."
You should ensure the SanDisk G-DRIVE has been formatted before you unplug it. Put the drive back on your Mac and start up Disk Utility again. Now, the drive should show up with the new format you chose.
If you lose data due to formatting the SanDisk G-DRIVE, you can use a data recovery tool to help you unformat the SanDisk G-DRIVE and get all lost files back.
Recover Lost Data from Erase Hard Drive on Mac
Your SanDisk G-DRIVE is erased by Disk Utility and all data is erased? Don’t worry, here is the guide to easily get the lost data back.
Manage SanDisk G-DRIVE on Mac With NTFS for Mac Tool
Donemax NTFS for Mac tool is a powerful and easy-to-use disk management tool for macOS 10.13 or later. It offers many useful tools including disk formatter and NTFS manager.
#1 Format SanDisk G-DRIVE on Mac
- Connect the SanDisk G-DRIVE to your Mac.
- Open Donemax NTFS for Mac.
- Select the SanDisk G-DRIVE and choose Format.
- Select a file system, then cluck on Format button.
![format SanDisk G-DRIVE for Mac]()
- Securely format the SanDisk G-DRIVE for Mac.
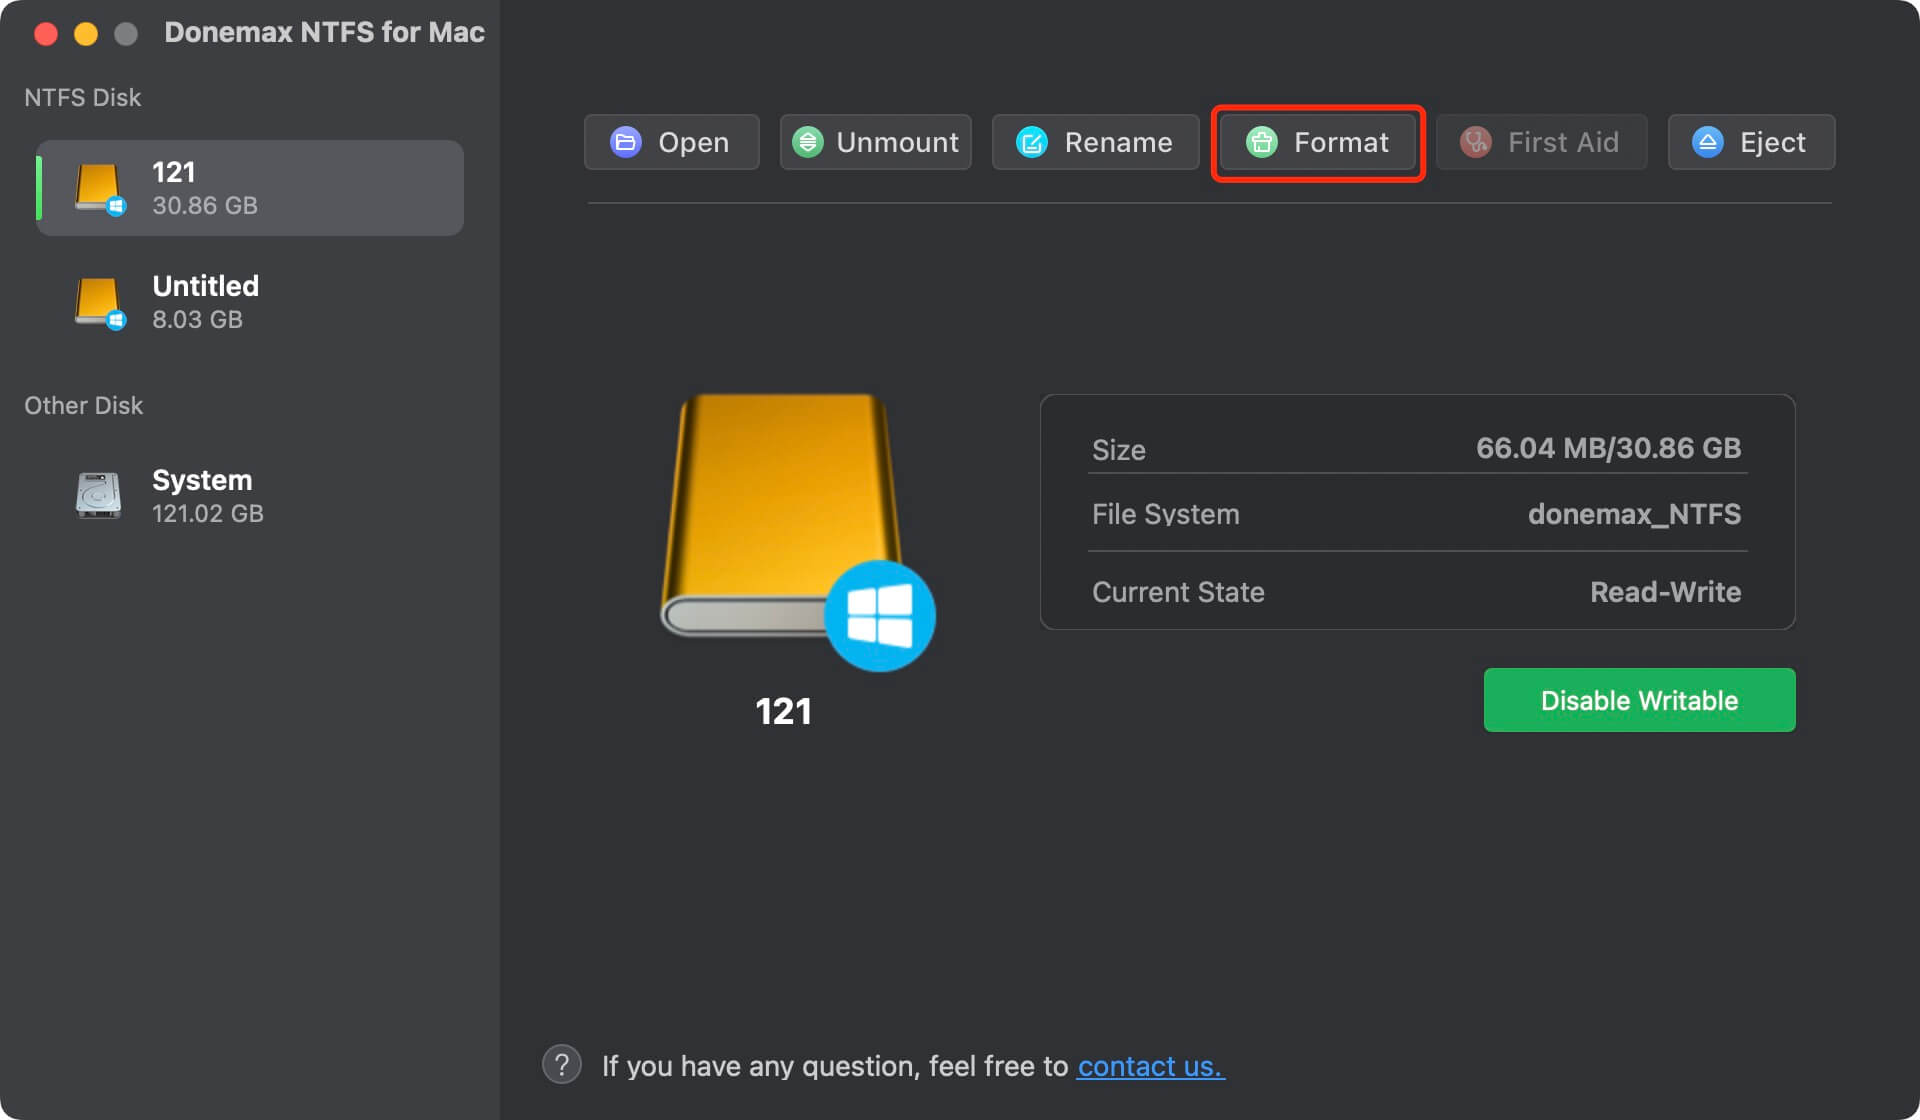
#2 Use NTFS SanDisk G-DRIVE on Mac without formatting
This software allows you to read-write NTFS drive on Mac without any limitation.
- Open Donemax NTFS for Mac.
- Select the SanDisk G-DRIVE.
- Click on Enable Writable button.
![format SanDisk G-DRIVE for Mac]()
- Then you can read-write NTFS drive on Mac without any limitation.

Conclusion:
Formatting your SanDisk G-DRIVE for Mac is a simple process that ensures it works with your computer and keeps your info safe. Following the above step-by-step guide will make it easy to change your drive to fit your needs. Before you format, back up any critical data, and always check your choices twice to ensure you don't lose data by accident. If you format your SanDisk G-DRIVE for Mac, it will work with all your macOS devices and give you safe storage options.
FAQs About Formatting SanDisk G-DRIVE on Mac
1. How to format SanDisk G-DRIVE for Mac.
First of all, back up important files stored on your SanDisk G-DRIVE since formatting will delete everything stored on the SanDisk G-DRIVE. Then choose a right tool to help you format SanDisk G-DRIVE for Mac:
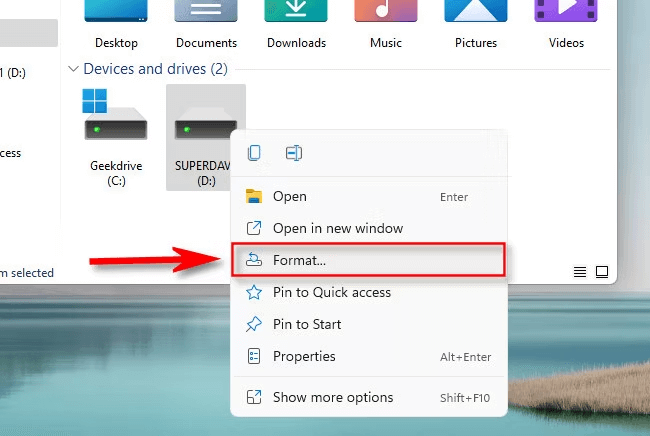
On Windows computer:
- Connect the SanDisk G-DRIVE to your computer, then open This PC.
- Find and right-click the SanDisk G-DRIVE, choose Format.
- Select the exFAT as the file system, then click on Start button to format the SanDisk G-DRIVE.
![erase SanDisk G-DRIVE on Mac]()
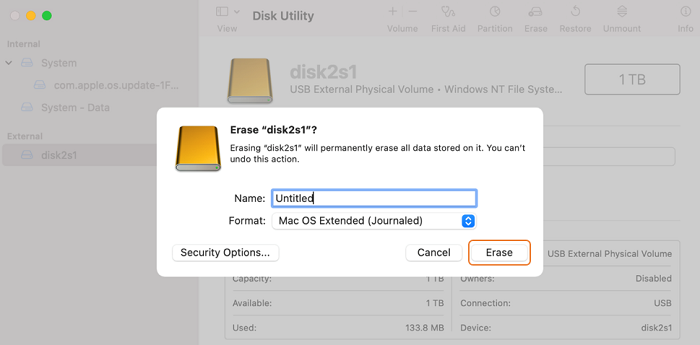
On Mac:
- Connect the SanDisk G-DRIVE to your Mac.
- Open Disk Utility and select the SanDisk G-DRIVE.
- Click on Erase button, then select a file system, click on Erase button again.
- When it completes, click on Done button.
![erase SanDisk G-DRIVE on Mac]()
2. Is it possible to recover lost data from a formatted SanDisk G-DRIVE on Mac?
Yes, with a Mac data recovery application, you can easily recover all erased files from a formatted SanDisk G-DRIVE on Mac. For example:
- Download and install Donemax Data Recovery for Mac
- Open Donemax Data Recovery for Mac, select the formatted SanDisk G-DRIVE.
- Click on Scan button to deeply scan the SanDisk G-DRIVE and find all lost files.
- Select the wanted files and save them after scanning.
3. Can I use a NTFS SanDisk G-DRIVE on Mac without formatting it?
Yes, you can easily enable read-write of NTFS drive with a third-party NTFS for Mac tool:
- Download and install Donemax NTFS for Mac.
- Connect the NTFS SanDisk G-DRIVE to your Mac.
- Open Donemax NTFS for Mac, select the NTFS SanDisk G-DRIVE.
- Click on Enable Writable. Then you can use any NTFS drive on your Mac without any limitation.
4. What is the best SanDisk G-DRIVE disk formatting tool for Mac?
Here are some tools you can use to format SanDisk G-DRIVE for Mac:
- Disk Utility
- Donemax Data Eraser for Mac
- DMmenu for Mac
- Terminal
- Donemax NTFS for Mac
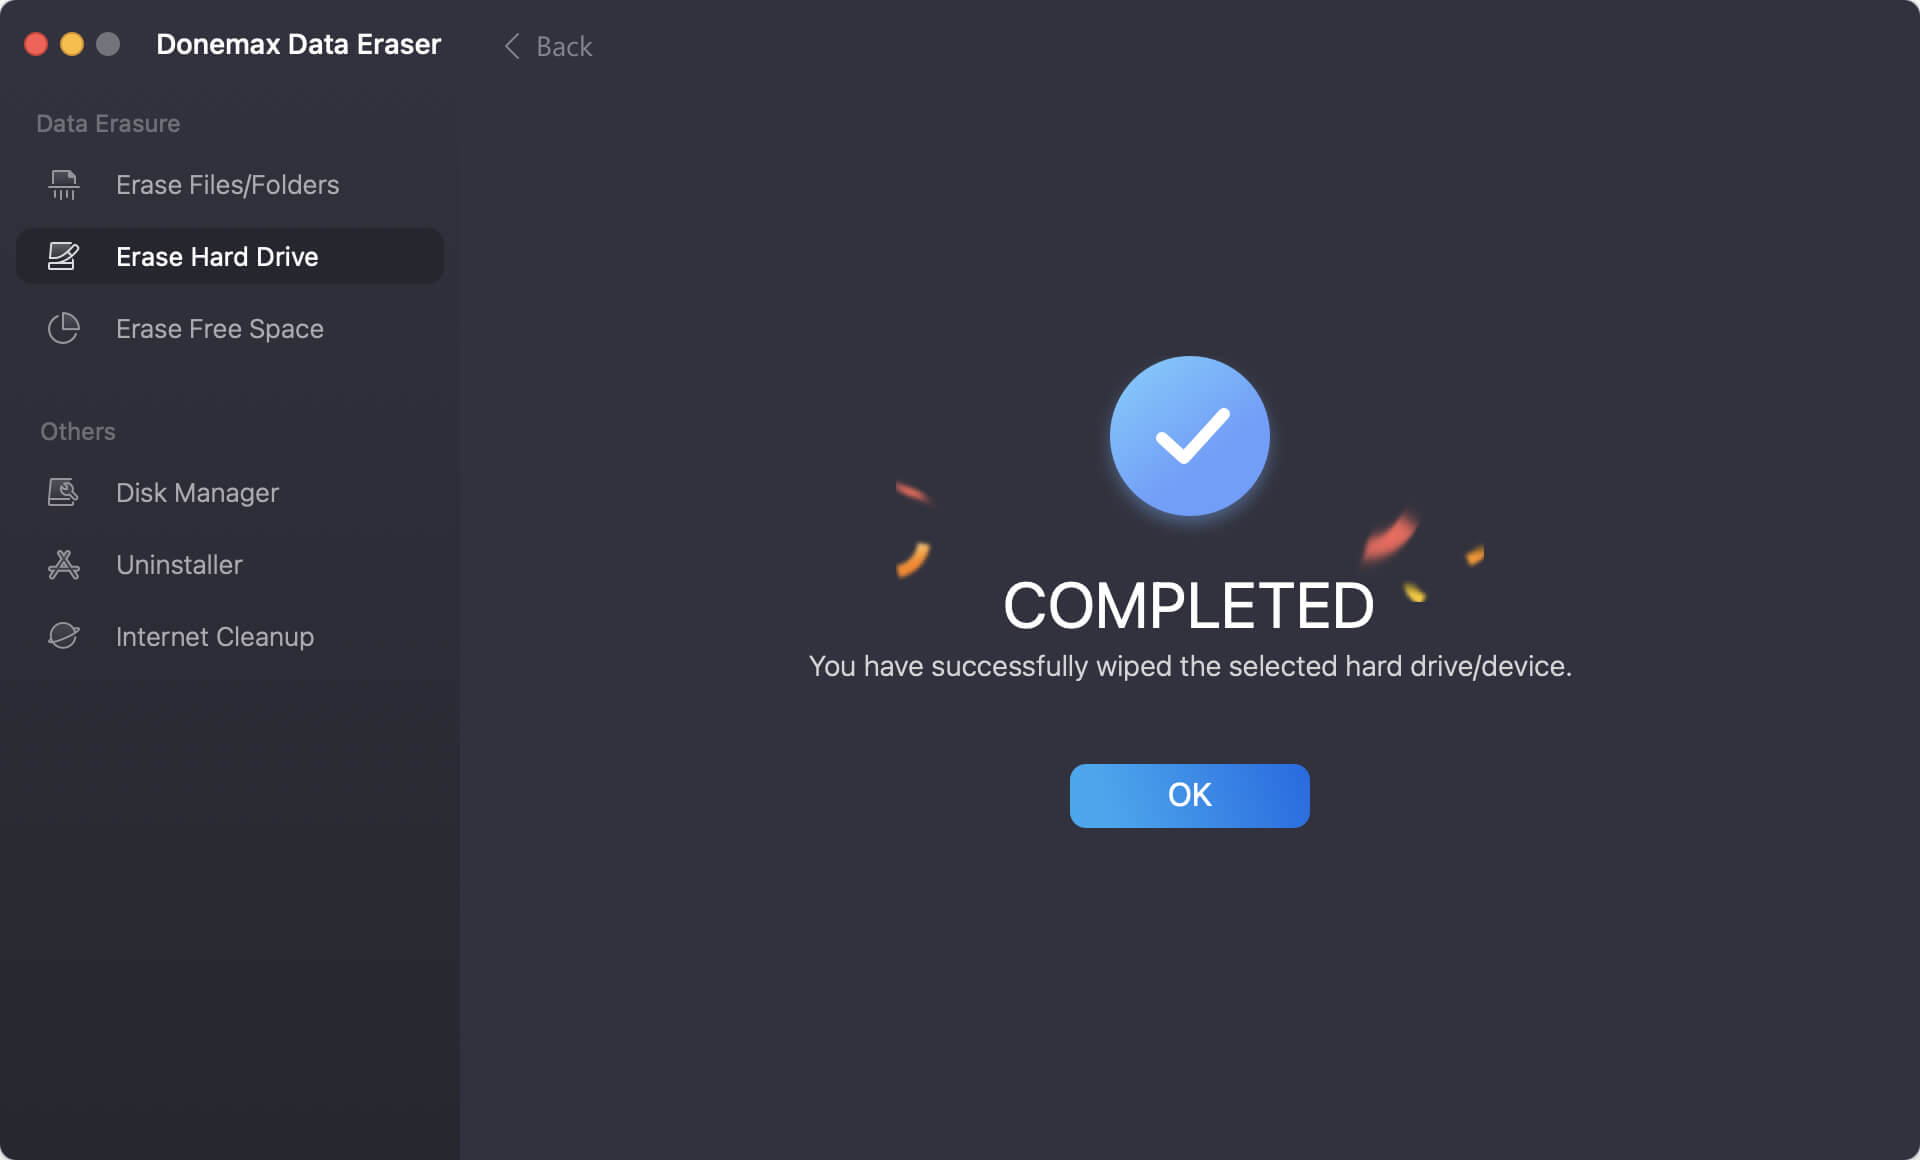
5. How to wipe SanDisk G-DRIVE on Mac before you sell or donate it?
To prevent data recovery from your SanDisk G-DRIVE, you can use a data erasure application to help permanently erase all data from the drive.
Step 1. Download and install the reliable data erasure application on your Mac. Here, you can download and install Donemax Data Eraser for Mac.
Step 2. Connect the SanDisk G-DRIVE to your Mac, and open Donemax Data Eraser for Mac.
Step 3. Choose Erase Hard Drive mode, this mode will format and wipe the SanDisk G-DRIVE, permanently erasing all data from the drive.
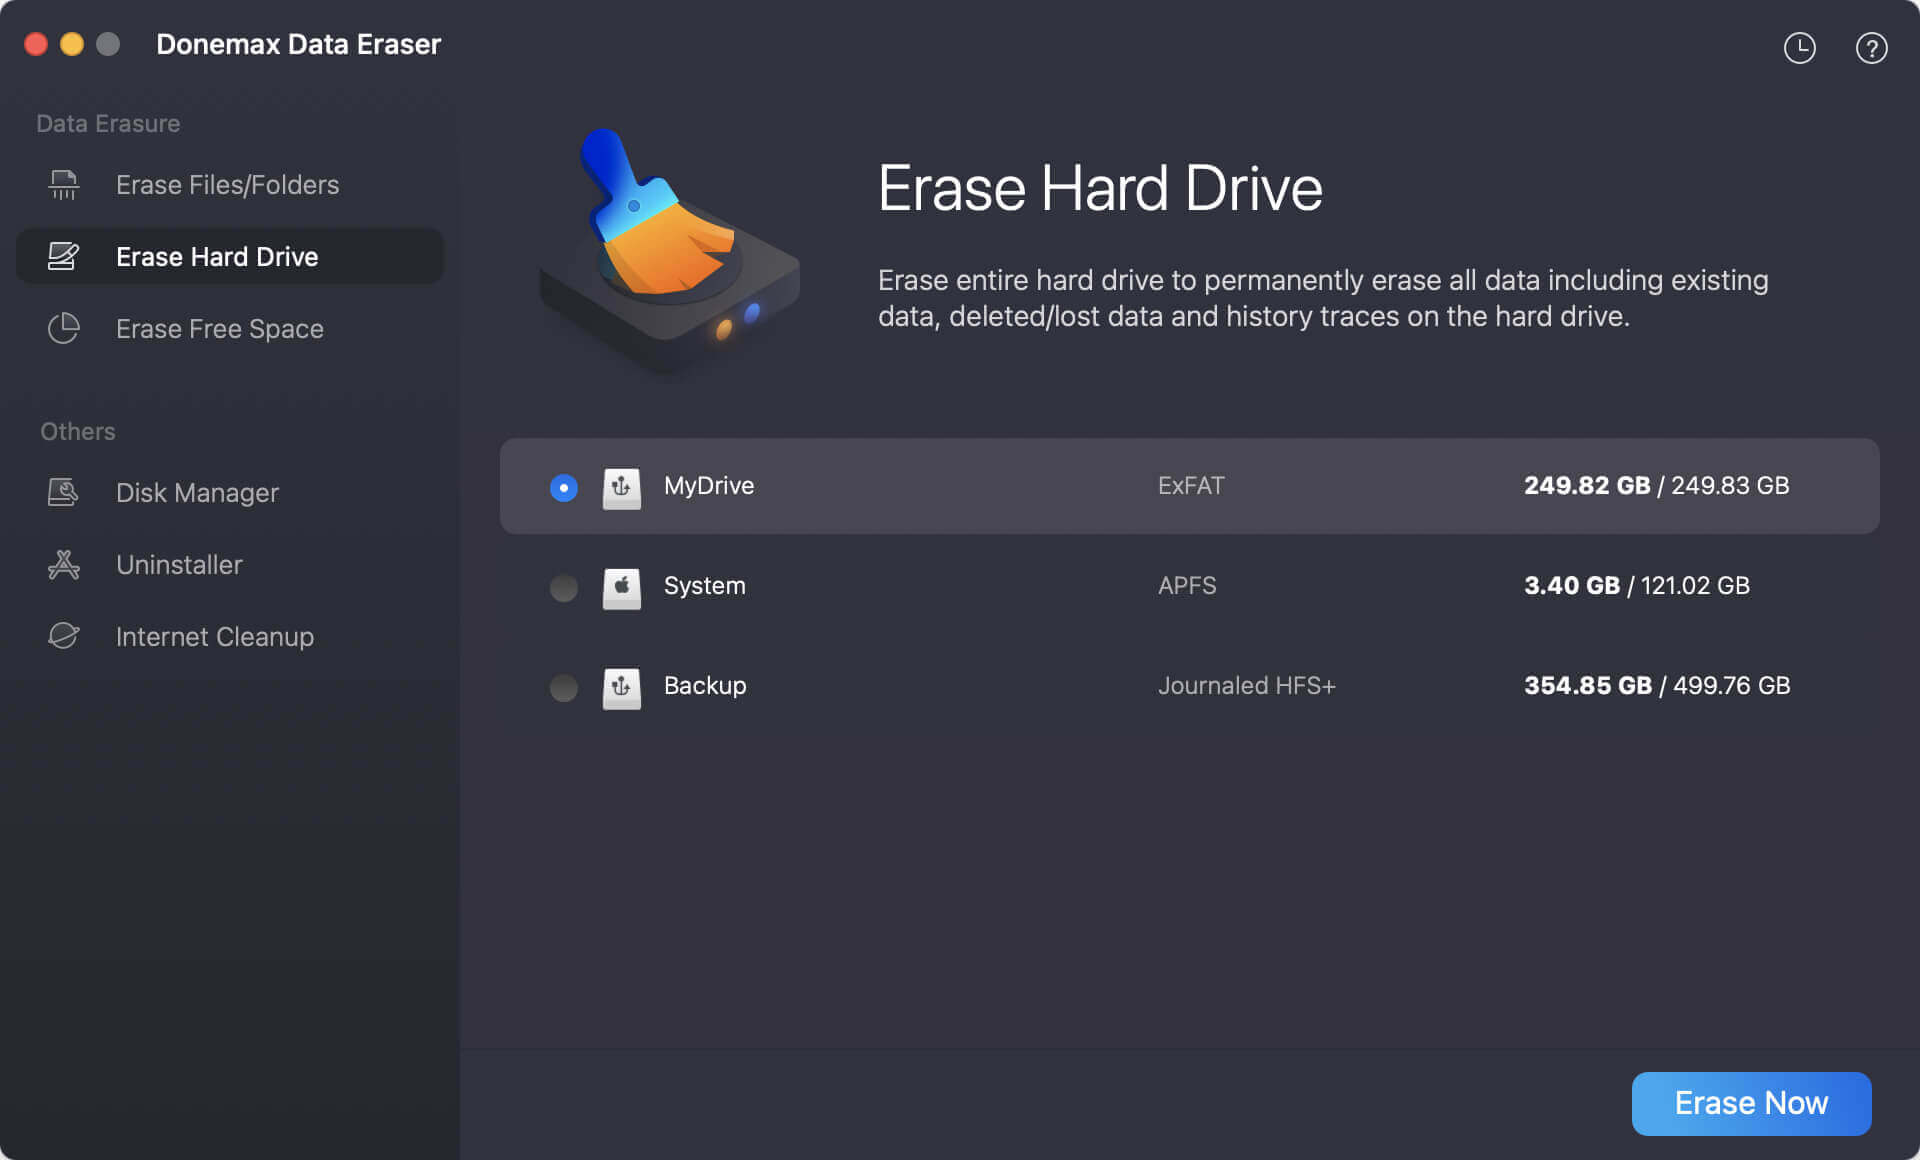
Step 4. Select the SanDisk G-DRIVE and click on Erase Now button. Then select a data erasure standard, click on Erase Now button again to start erasing the drive.
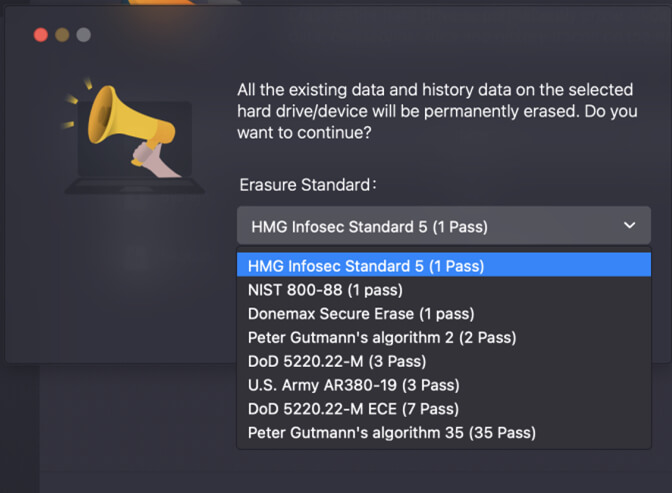
Step 5. Once the process gets finished, all data (exiting data, deleted/formatted/lost data, hidden data) on the SanDisk G-DRIVE is gone forever, can’t be recovered by any method.
6. How to format SanDisk G-DRIVE as the Mac Time Machine Backup drive?
Just connect the SanDisk G-DRIVE to your Mac, then open Disk Utility. Click Erase and select the right file system for Time Machine backup:
- APFS: for macOS 10.13 or later.
- Mac OS Extended: for older macOS to latest macOS version.
Then click Erase again to format the SanDisk G-DRIVE for Time Machine. If your Mac is running macOS 10.13 or later, APFS is highly recommended.
Related Articles
- Mar 19, 20252025 Guide: Fix WD External Hard Drive Not Mounting on Mac [11 Solutions]
- Aug 06, 2024Fix External Hard Drive Not Working on Mac Without Losing Data
- Jul 01, 2024How to Format and Unformat XQD Card on Windows PC or Mac?
- Dec 16, 2024My Brand New External Hard Drive is Read-Only on Mac, How to Fix This Issue?
- Jul 13, 2026Fix Unknown USB Device Error & Recover Your Data Safely
- Sep 14, 2023How to Check SSD Health and Fix Damaged SSD?

Contributing Writer
Coco Lin
Coco has been a writer and a chief programmer at Donemax software since 2018. Over 10 years of experience of writing troubleshooting articles in the software industry, she is passionate about programming and loves to providing solutions to Windows and Mac users. Also she enjoys music and palying tennis in her free time.

Editor in chief
Gerhard Chou
In order to effectively solve the problems for our customers, every article and troubleshooting solution published on our website has been strictly tested and practiced. Our editors love researching and using computers and testing software, and are willing to help computer users with their problems