
Written byStevenUpdated on Mar 05, 2024
How to Format Samsung Portable SSD X5 on Windows or Mac?
Approved byGerhard Chou
PAGE CONTENT:
The Samsung Portable SSD X5 is a small device that can help you store things. It can be helpful to know how to format this sleek portable SSD on Windows and Mac, whether you're a computer pro or just starting with tech.
For those who aren't tech-expert, formatting your Samsung Portable SSD X5 is like starting over, ensuring it works well with your computer. This guide explains each step in simple terms so anyone can easily follow along.
Let's talk about formatting if you want to get the most out of your Samsung Portable SSD X5. It will get your portable SSD up and running quickly.
Why Formatting Matters?
It's not just a technical step to format your Samsung Portable SSD X5. It's important to keep your portable SSD healthy and working well. By making a suitable file system, the formatting process gets the storage device ready to work with your operating system. You can also delete any data on the drive when you format it. It gives your Drive a fresh start and helps fix problems like file system corruption or mismatch.
Note: Formatting will erase all contents stored on your Samsung Portable SSD X5. You’d better make a backup of your Samsung Portable SSD X5 before you format it.
Format Samsung Portable SSD X5 on Windows PC
X5 on a Windows computer now. For a smooth experience, follow these steps one at a time:
Step 1. Connect the Samsung Portable SSD X5: Connect your Samsung Portable SSD X5 to a USB port on your Windows computer using the USB-C wire that came with it.
Step 2. Start up File Explorer: To find your connected Samsung Portable SSD X5, go to "This PC" or "My Computer" in the Start menu.
Step 3. Select the Drive: To format the Samsung Portable SSD X5 drive, right-click on it and select "Format" from the menu.

Step 4. Choose File System and Allocation Unit Size: In the Format box, pick the file system (NTFS is common for Windows) and the size of the allocation unit you want. You can change the name of the number label or leave it as it is.
Step 5. Perform a Quick Format: If you want the editing to go faster, check the "Quick Format" box. Leave it unchecked if you want a more detailed style.
Step 6. Start the Formatting Process: Press "Start" to begin the editing process. A message will tell you that all the data on the Drive will be erased. Confirm and move forward.

Step 7. Complete the Formatting: Wait until the process is done. You'll get a message that the format worked when it's done. Now, you can use your Samsung Portable SSD X5 on your Windows computer.
Note: If the Samsung Portable SSD X5 is not showing up under This PC, just open Disk Management, find the Samsung Portable SSD X5, then add a new drive letter or create new simple volume on it.
Format Samsung Portable SSD X5 on Mac
Disk Utility can help you easily format a Samsung Portable SSD X5 on Mac:
Step 1. Connect the Samsung Portable SSD X5: Get the USB-C cord into a USB port on your Mac to connect your Samsung Portable SSD X5.
Step 2. Open Disk Utility: To find Disk Utility, go to "Applications" > "Utilities" or press "Cmd + Space" and type "Disk Utility" into Spotlight.
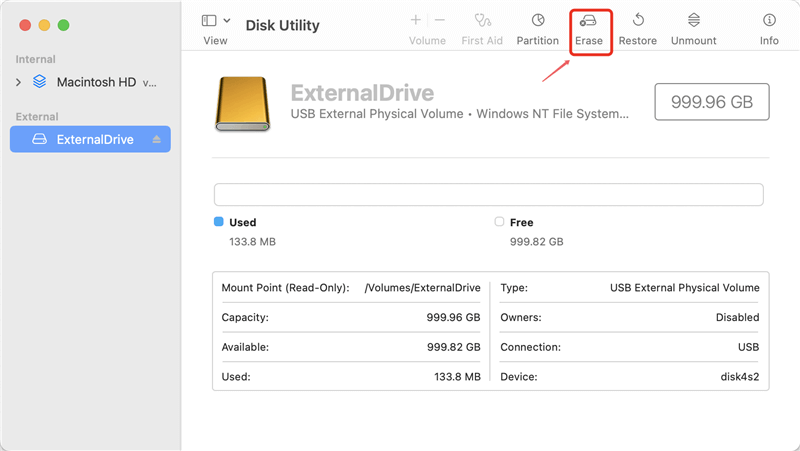
Step 3. Select the Samsung Portable SSD X5: You can find your Samsung Portable SSD X5 on the left side of Disk Utility under "External" or "External Devices."
Step 4. Erase the Drive: open the Disk Utility window and click the "Erase" tab.
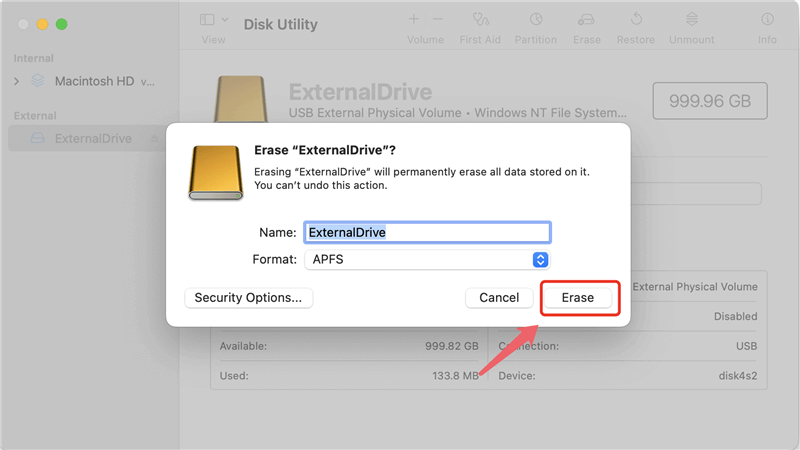
Name your Drive and pick the file system you want to use,such as APFS, Mac OS Extended. ExFAT is usually best because it works with both Windows and Mac.
Adjust Scheme and Format Options: If asked, pick the right scheme (for Intel-based Macs, usually GUID Partition Map) and make any necessary format changes.
Step 5. Start the Erase Process: Click the "Erase" button to start the editing process. There will be a message that says all the info will be deleted. Confirm and move forward.
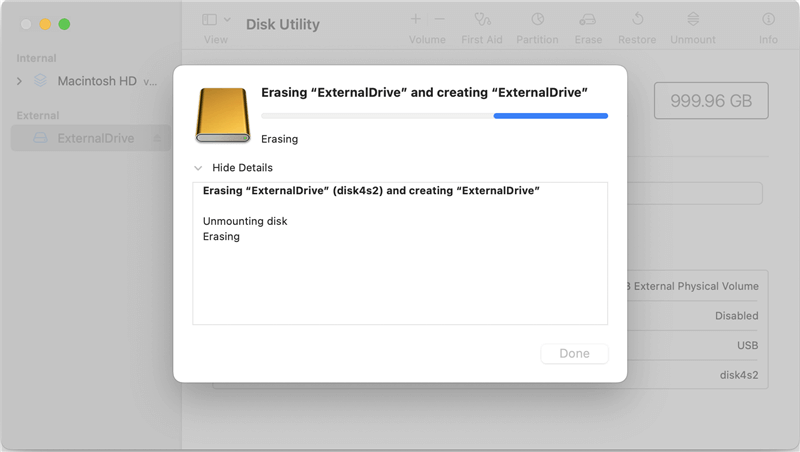
Step 6. Complete the Formatting: Wait until Disk Utility is done wiping the Drive. When it's done, you'll see a message letting you know the style worked. Now, you can use your Samsung Portable SSD X5 on your Mac.

Tips for a Smooth Formatting Experience:
To make sure that the layout goes smoothly, think about the following:
- Backup Important Data: Before you start the editing process, please make a copy of any important files so you don't lose them by accident.
- Choose the Right File System: Pick the best file system for how you plan to use it. NTFS only works with Windows, but ExFAT can be used on multiple platforms.
- Quick Format vs. Full Format: Choose a quick format if you want faster results. Choose a full format if you want a more thorough check of the Drive.
- Check for Firmware Updates: Ensure your Samsung Portable SSD X5 has the most recent firmware changes before you format it. It can make things work better and be more compatible.
How to Recover Lost Data from Formatted Samsung Portable SSD X5?
Formatting will erase all data stored on the Samsung Portable SSD X5. If you lose important data due to formatting your Samsung Portable SSD X5, just use a data recovery tool to get the lost data back.
Step 1. Download and install Donemax Data Recovery on your PC or Mac. Then connect the Samsung Portable SSD X5 to your PC/Mac.
Step 2. Select the formatted Samsung Portable SSD X5 to start data recovery.

Step 3. Click on Scan button to deeply scan the formatted Samsung Portable SSD X5, it will find all erased files.

Step 4. Once the scan is completed, just select all of the recoverable files, click on Recover button to save them.

Format and Wipe the Samsung Portable SSD X5 Before Selling or Donating
Before you sell, donate or dispose of an old Samsung Portable SSD X5, you should permanently erase all your private files from it to prevent potential data recovery. As you’ve seen, the formatted data is not lost forever and can be recovered by data recovery software, so it is not safe if you just format the SSD.
To permanently wipe data from your Samsung Portable SSD X5, just try data erasure tool - such as Donemax Data Eraser. This software offers certified data erasure standards including Peter Gutmann, U.S. Army AR380-19, DoD 5220.22-M ECE to help you wipe the Samsung Portable SSD X5, erase all data from it permanently.
Step 1. Download and install Donemax Data Eraser on your computer.
Step 2. Open Donemax Data Eraser, choose mode - Erase Hard Drive.
Step 3. Select the Samsung Portable SSD X5, click on Erase Now button to format and wipe the Samsung Portable SSD X5.

Once the process gets finished, all data on the Samsung Portable SSD X5 is lost forever, can’t be recovered by any method.
Conclusion:
Formatting your Samsung Portable SSD X5 is an easy process that ensures it works well with your operating system and runs at its best. It doesn't matter if you're on a Mac or Windows computer; this guide's steps will help you format your portable SSD quickly and easily. Before editing, back up any important data so you don't accidentally lose it. Once you've formatted and ready your Samsung Portable SSD X5, you can use it for all your computer needs to store and send data easily.
Related Articles
- Mar 31, 2025[11 Fixes] Fix Seagate External Hard Drive Not Recognized by Mac – Guide 2025
- Apr 25, 2025Fix ADATA External Hard Drive Not Working (such as not mounting, not detected, being read-only) on Mac
- Jul 01, 2024How to Format and Unformat XQD Card on Windows PC or Mac?
- Jan 14, 2025Convert GPM (GUID Partition Map, GPT) Disk to MBR (Master Boot Record) on Mac
- Apr 02, 2024How to Fix Samsung SSD Not Showing Up Without Losing Data?
- Jul 09, 2024External Hard Drive Is Not Initialized, How to Fix It?

Contributing Writer
Steven
Steven has been a senior writer & editor of Donemax software since 2020. He's a super nerd and can't imagine the life without a computer. Over 6 years of experience of writing technical solutions and software tesing, he is passionate about providing solutions and tips for Windows and Mac users.

Editor in chief
Gerhard Chou
In order to effectively solve the problems for our customers, every article and troubleshooting solution published on our website has been strictly tested and practiced. Our editors love researching and using computers and testing software, and are willing to help computer users with their problems