
Written byCoco LinUpdated on Apr 23, 2026
How to Use Samsung Portable SSD T7 on Mac: Setup & Troubleshooting Guide
Approved byGerhard Chou
Before we start: The Samsung Portable SSD T7 significantly boosts Mac performance with superior speed, reliability, and security. To maximize your drive's potential without reformatting, use an NTFS for Mac tool to enable full read-write access for Windows-formatted drives.
PAGE CONTENT:
Whether you are a creative professional handling 4K video or a home user looking to back up precious family photos, the Samsung Portable SSD T7 is one of the fastest and most reliable storage solutions available today. However, getting a new drive to play nice with macOS can sometimes feel a bit technical.
If you're wondering how to use Samsung portable SSD T7 on Mac effectively—from the initial unboxing to fixing the "Read-Only" NTFS blues—you've come to the right place. In this guide, we'll walk you through everything in plain English.
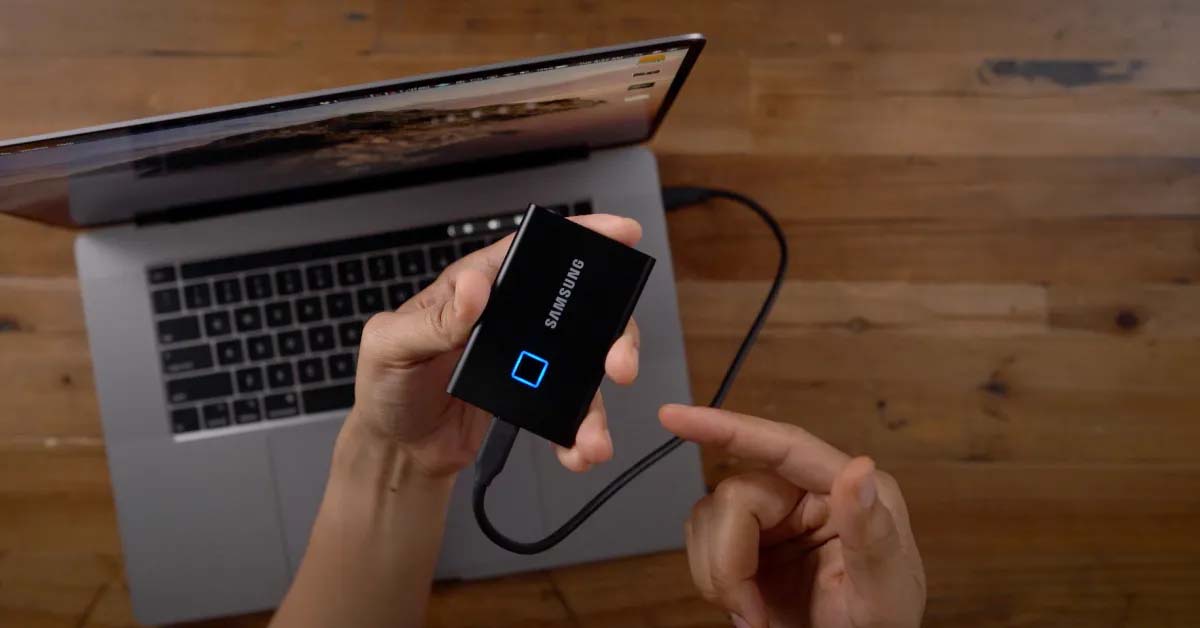
Unboxing Samsung T7 and Physical Connection
Before we dive into the software, let's ensure the physical connection is solid. The Samsung T7 typically comes with two cables:
- USB-C to USB-C: Use this for modern Macs (MacBook Pro/Air with M1, M2, or M3 chips).
- USB-C to USB-A: Use this for older Macs with the classic rectangular USB ports.
📌 Pro Tip: For the fastest data transfer speeds, always connect your T7 directly to your Mac's Thunderbolt or USB-C port rather than through a cheap USB hub.
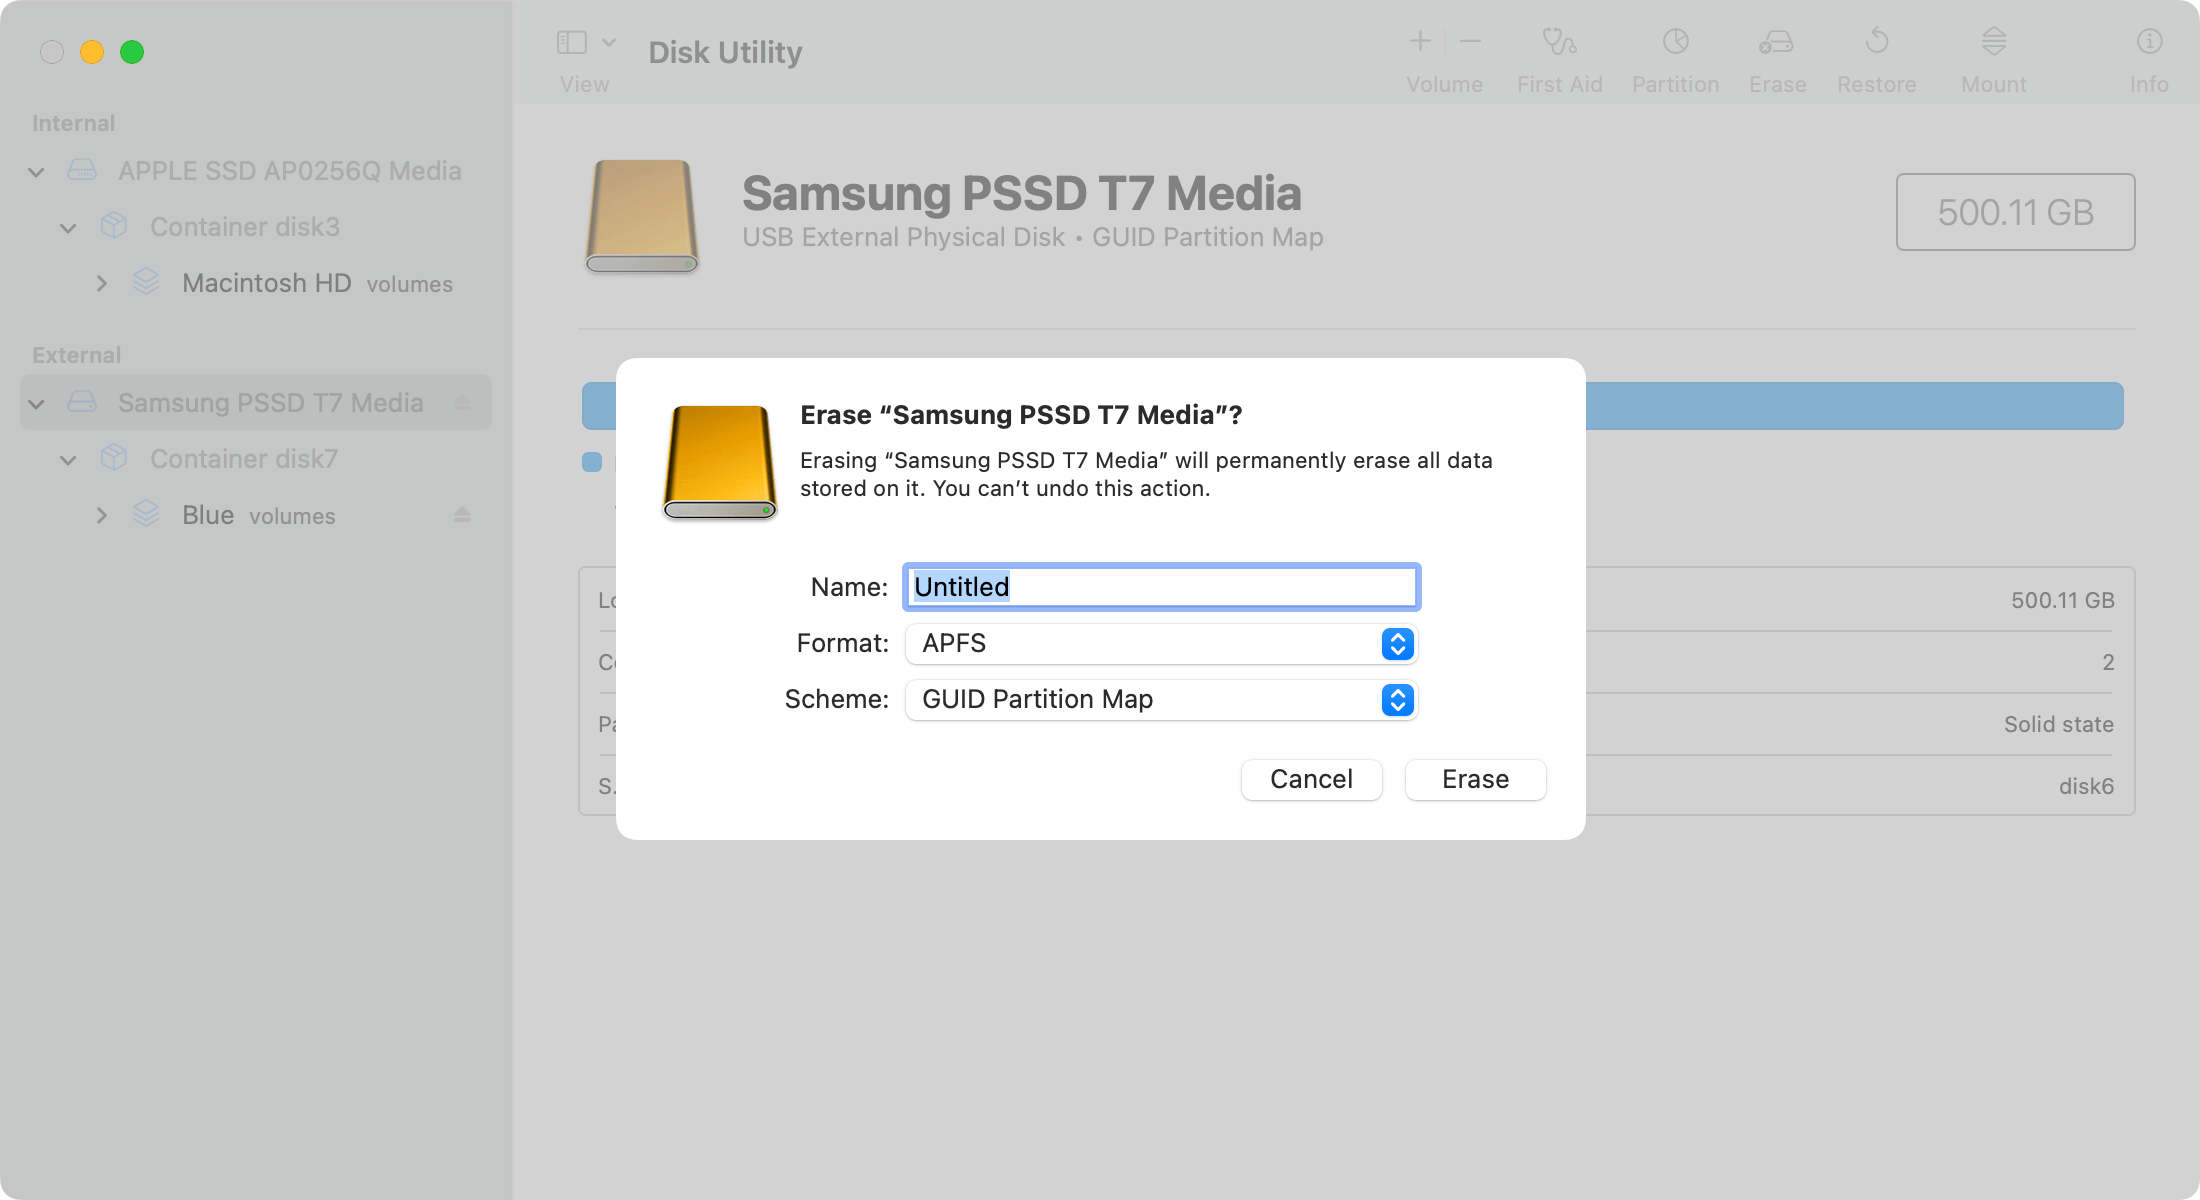
Formatting the Samsung T7 for macOS
The Samsung T7 comes pre-formatted in exFAT. While exFAT works on both Windows and Mac, it isn't always the most stable for Mac-only users. If you plan to use the drive exclusively with Apple devices, formatting it to APFS (Apple File System) is highly recommended for better speed and reliability.
Steps to Format your T7:
- Connect your SSD to your Mac.
- Open Disk Utility (Press Command + Space and type "Disk Utility").
- Select the Samsung SSD T7 from the left sidebar.
- Click the Erase button at the top.
- Name: Give your drive a name (e.g., "My T7 SSD").
- Format: Choose APFS (for macOS High Sierra or later) or Mac OS Extended (Journaled) for older systems.
- Scheme: Choose GUID Partition Map.
- Click Erase.
🚨 Warning: This will wipe all data currently on the SSD. Back up your files first!
Use Samsung T7 with NTFS on Mac (No Formatting Required)
Many users find that their Samsung T7 is in NTFS format because they previously used it on a Windows PC. On a Mac, NTFS drives are "Read-Only"—meaning you can see your files, but you can't add new ones or delete anything.
If you don't want to format the drive (which would delete your Windows files), you can use a tool like Donemax NTFS for Mac.
Why use a dedicated NTFS driver?
- Write Access: Instantly gain the ability to copy, move, and delete files on NTFS.
- Speed: High-speed data transfer that matches native Mac speeds.
- Convenience: No need to move files back and forth to reformat the drive.
How to do it: Just install Donemax NTFS for Mac, connect your T7, and click Enable Writable button. Your drive will now behave just like a native Mac drive.

Troubleshooting: Samsung T7 Not Showing Up?
It can be frustrating when you plug in your SSD and nothing happens. If your Samsung portable SSD T7 is not recognized on Mac, try these quick fixes:
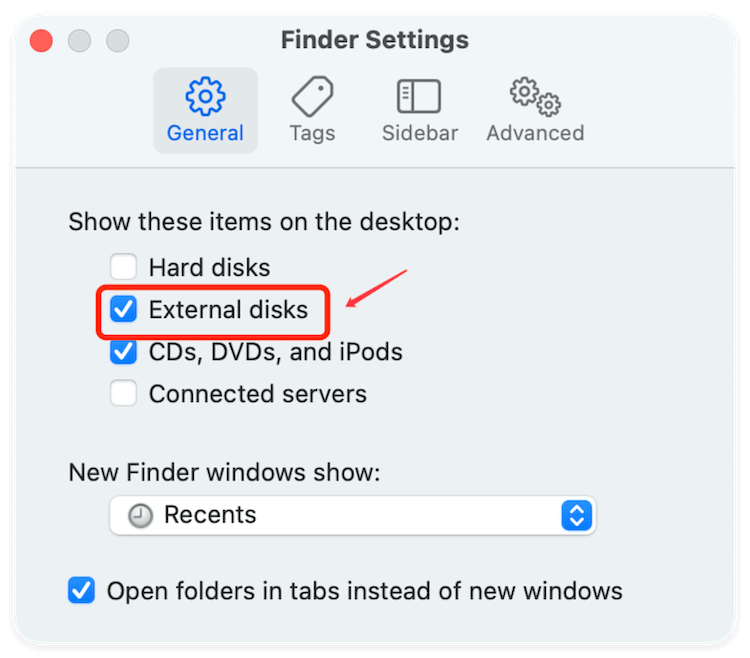
Check Finder Settings
Sometimes the drive is connected, but your Mac is hidden from showing it on the desktop.
- Open Finder.
- In the top menu, go to Settings (or Preferences).
- Under the General and Sidebar tabs, ensure "External disks" is checked.
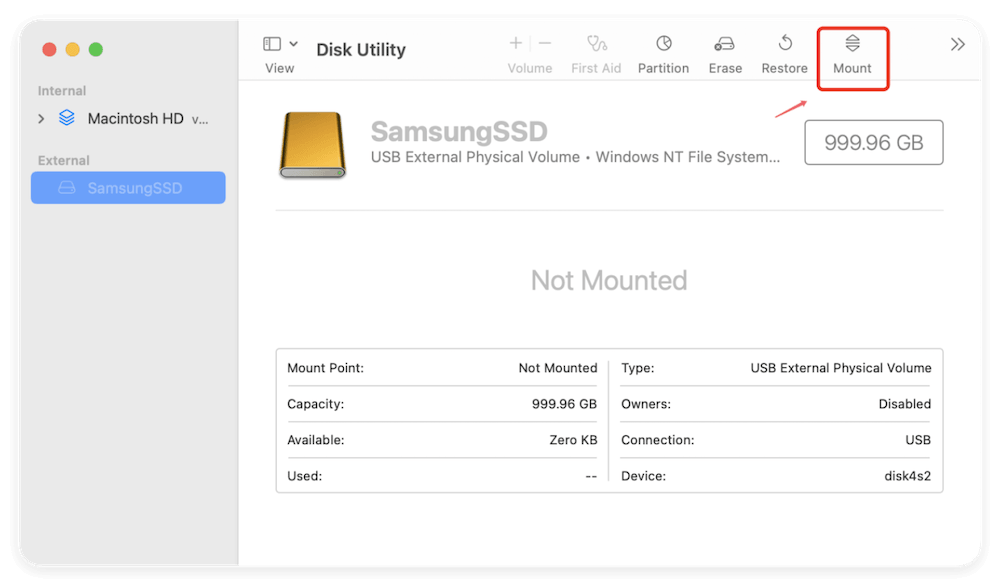
Use Disk Utility to Mount
If it still doesn't show, open Disk Utility. If you see the Samsung T7 listed but it looks "greyed out," select it and click the Mount button at the top.
Advanced Uses of Samsung T7 on Mac
The Samsung T7 is so fast that you can actually run your entire Mac operating system from it!
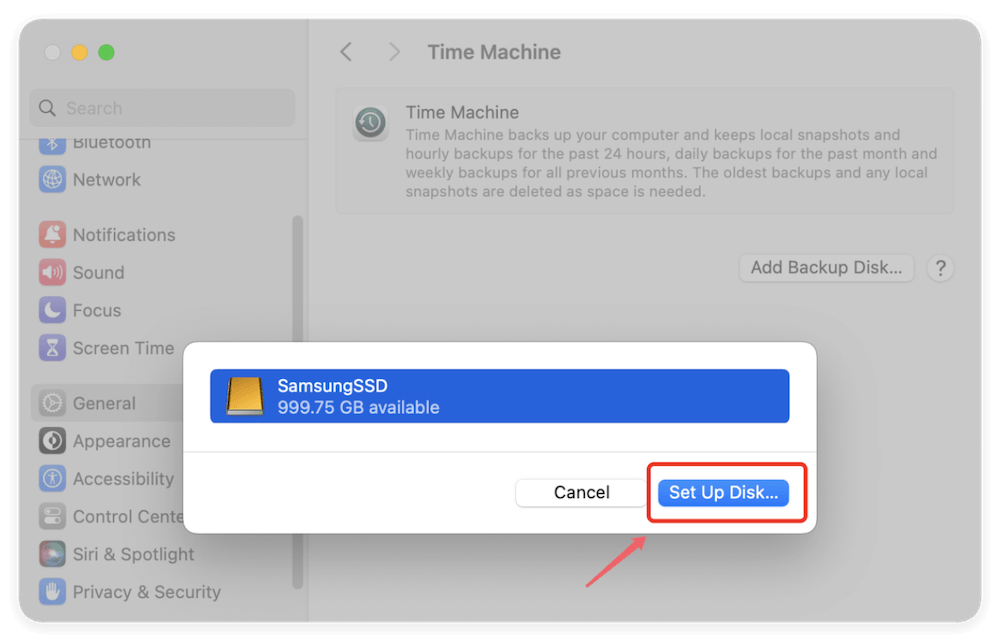
- Time Machine Backups: In System Settings > General > Time Machine, you can select your T7 as a backup disk to ensure your data is always safe.
![use Samsung portable SSD T7 for Time Machine on Mac]()
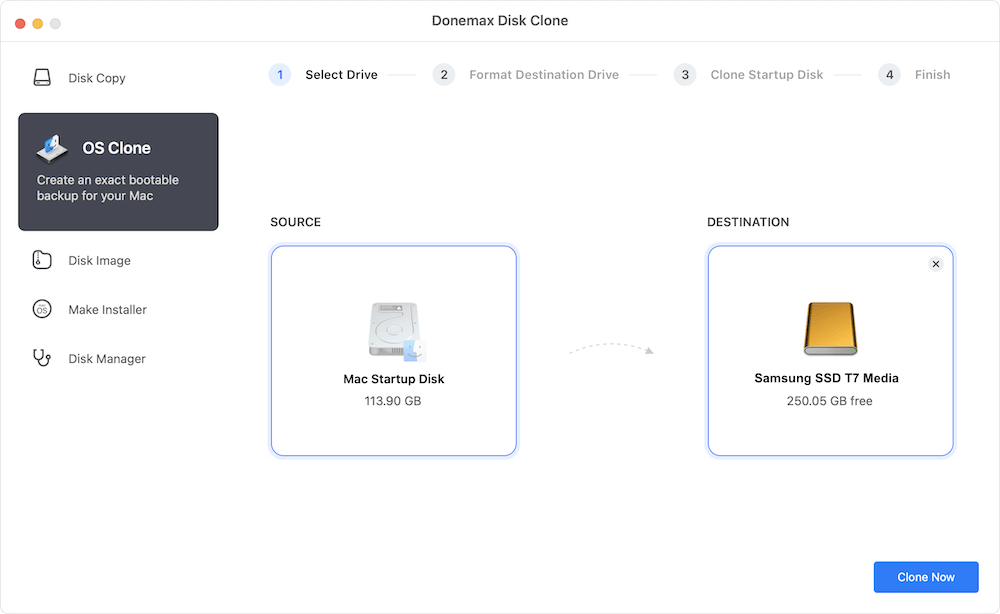
- Create a Bootable Clone: Using Donemax Disk Clone for Mac, you can clone your entire Mac hard drive to the T7. This allows you to plug your T7 into any Mac and boot into your personal desktop environment.
![clone Mac to Samsung portable SSD T7]()
FAQs about Samsung Portable SSD T7
Yes! The Samsung T7 works perfectly with all Apple Silicon Macs. Just use the included USB-C to USB-C cable.
Ensure you are using the original cable. If you use a cable designed only for phone charging, the data speeds will be significantly throttled. Also, ensure the drive is formatted as APFS for the best performance on macOS.
Yes. To do this, you should format the drive as exFAT. Alternatively, keep it as NTFS and use Donemax NTFS for Mac to maintain full compatibility without losing the security features of NTFS.
Only if you want to use the built-in hardware password encryption. For standard storage and backups, macOS's built-in Disk Utility is often more than enough.
Always right-click the drive icon on your desktop and select "Eject" before unplugging the cable. Unplugging it while data is being written can corrupt your files.
Conclusion
Learning how to use Samsung portable SSD T7 on Mac is a game-changer for your productivity. Whether you choose to format it to APFS for pure Mac speed or use Donemax NTFS for Mac for cross-platform flexibility, the T7 is a powerhouse tool.
By following the steps above, you've ensured your drive is healthy, fast, and fully compatible with your Apple ecosystem. Happy Computing!
Related Articles
- Jul 10, 2025How to Use WD Easystore on Mac: A Complete Guide
- Oct 09, 2025External Hard Drive/USB Drive Not Readable on macOS Tahoe, Fix It
- Jun 29, 2024Crucial Portable SSD Not Mounting on Mac, Fix It Now
- Mar 13, 2025How to Fix Seagate Backup Plus Not Showing Up on Windows? [9 Fixes]
- Feb 05, 2025How to Fix Failed Seagate External Hard Drive?
- Jan 08, 2024How to Format or Unformat Crucial X10 Pro Portable SSD on Windows/macOS?

Contributing Writer
Coco Lin
Coco has been a writer and a chief programmer at Donemax software since 2018. Over 10 years of experience of writing troubleshooting articles in the software industry, she is passionate about programming and loves to providing solutions to Windows and Mac users. Also she enjoys music and palying tennis in her free time.

Editor in chief
Gerhard Chou
In order to effectively solve the problems for our customers, every article and troubleshooting solution published on our website has been strictly tested and practiced. Our editors love researching and using computers and testing software, and are willing to help computer users with their problems