
Written byCharlesUpdated on Apr 15, 2026
Install macOS on Windows PC (Verified Guide)
Approved byGerhard Chou
PAGE CONTENT:
macOS is widely admired for its sleek interface, robust ecosystem, and powerful performance in creative workflows. Apple designed macOS to run exclusively on Apple hardware. However it's possible to install it on non-Apple PCs using a process known as "Hackintosh."
This guide will walk you through all the steps of installing macOS on a Windows PC. The steps includs gathering necessary tools, check configurations, and problem provent operations.
First, note that creating a Hackintosh involves bypassing Apple's hardware restrictions. The process may breach Apple's End User License Agreement (EULA). Additionally, this process requires significant technical expertise, patience, and hardware compatibility.
Hardware and Software Requirements for Hackintosh
Hardware Compatibility
Before attempting to install macOS, ensure your PC hardware is compatible. Apple uses specific hardware configurations, so your hardware must match these requirements.
Essential Components:
- Processor: Intel processors (7th Gen or newer) or AMD Ryzen (requires additional steps).
- Motherboard: Ensure UEFI support; Intel motherboards are easier to work with.
- Graphics Card: AMD GPUs (e.g., RX 500 series) work natively. For Nvidia cards, only older models (Pascal series or earlier) work.
- RAM: At least 8GB; 16GB is ideal.
- Storage: SSDs work best; an additional drive for macOS is ideal to avoid overwriting Windows data.
💡 Tip: Use tools like Hackintosh Compatibility Check to identify Hackintosh-compatible hardware.
Necessary Tools and Software
You'll need several tools and files to complete the installation:
- macOS Installer: Download from the App Store or use a pre-built image.
- Bootloader: OpenCore or Clover are popular options.
- Kexts: These are macOS drivers for non-Apple hardware.
- USB Flash Drive: Minimum 16GB capacity.
- Disk Utilities: Software like BalenaEtcher or Rufus to create bootable drives.
Preparing the Environment for Hackintosh Installation
Step 1: Backup Your Data
Installing Hackintosh will format drive and may cause possible errors. Back up critical data from your PC before proceeding. Use tools like Donemax Disk Clone or Windows Backup to secure your files.
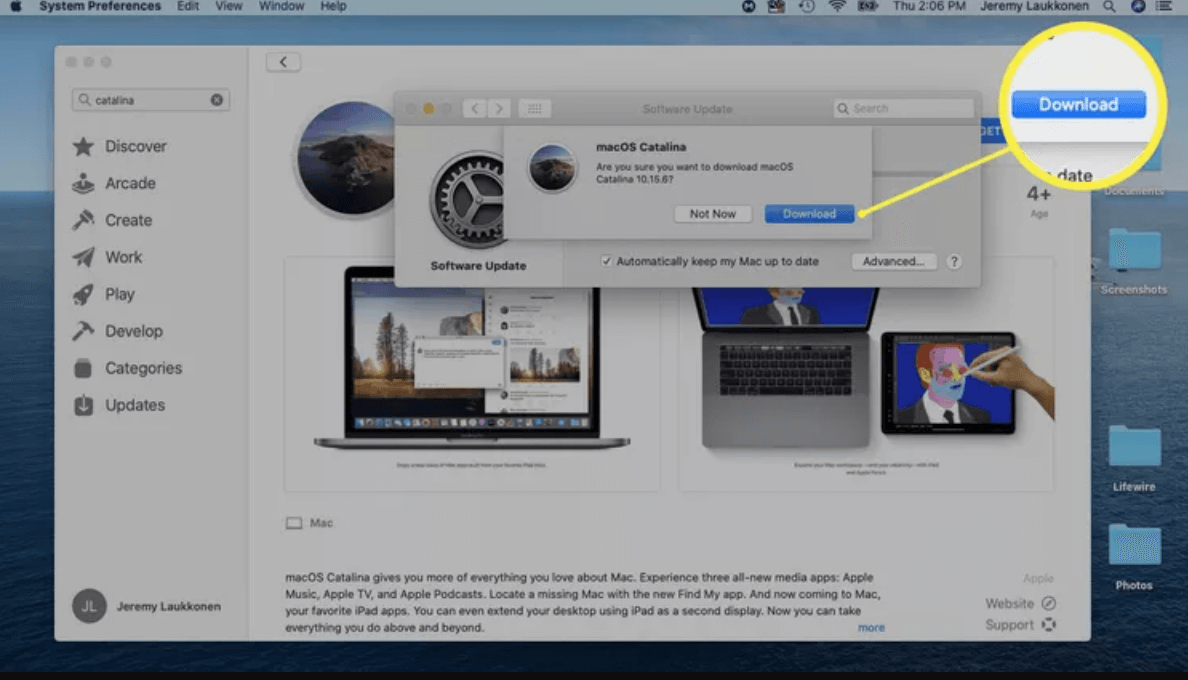
Step 2: Access macOS Files
- If you have access to a Mac, download macOS directly from the Mac App Store.
![installing macOS on a Windows PC]()
- Instead, use resources like Hackintosh Zone for pre-built images (use caution and verify sources).
Step 3: Create a Bootable USB Drive
- Format the USB Drive:
• On a Mac: Use Disk Utility to format the USB as Mac OS Extended (Journaled) with a GUID Partition Map.
• On Windows: Use tools like Rufus or BalenaEtcher.
- Set Up Bootloader:
• Download OpenCore or Clover bootloader.
• Follow their documentation to configure the EFI folder. This includes adding kexts, config.plist, and any required patches.
- Transfer macOS Installer:
• On macOS: Use Terminal to create a bootable USB:
sudo createinstallmedia --volume /Volumes/MyUSB --applicationpath /Applications/Install\ macOS.app
• On Windows: Mount the macOS image to the USB using third-party tools.
Step 4: Configure BIOS Settings
Access your PC's BIOS by pressing a key like F2, F10, or DEL during boot.
- Enable UEFI Boot.
- Disable Secure Boot and CSM (Compatibility Support Module).
- Set SATA Mode to AHCI.
- Enable VT-d and disable CFG-Lock if applicable.
Installing macOS on the Windows PC
Step 1: Boot from the USB Drive
Insert the USB drive and restart your PC. Enter the boot menu (usually F12 or similar) and select the USB drive.
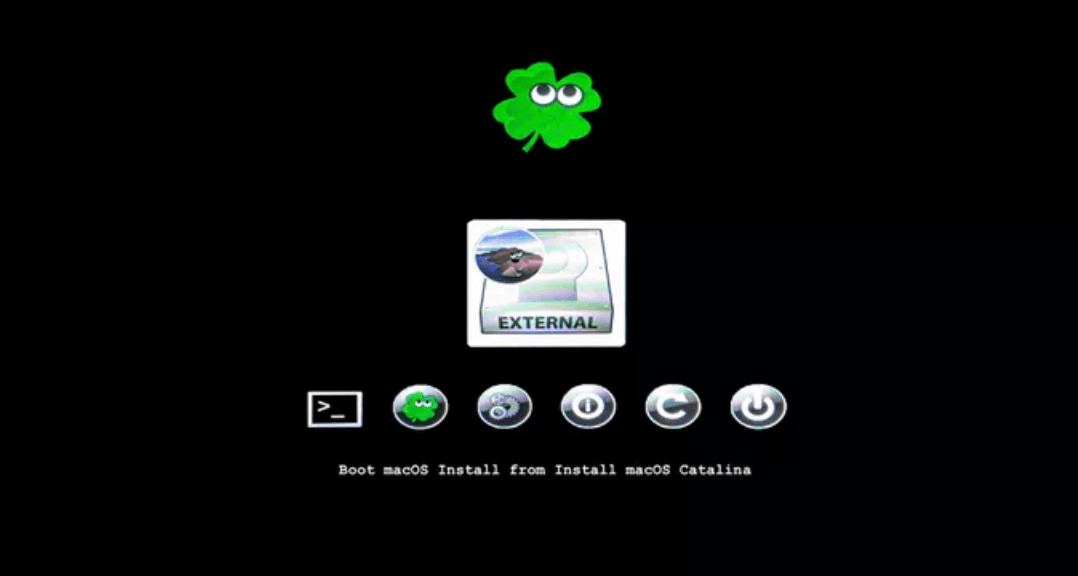
Step 2: Launch macOS Installer
- Open the bootloader menu and choose the macOS Installer.
![installing macOS on a Windows PC]()
- If the installer fails to load, troubleshoot using verbose mode (-v flag).
Step 3: Partition the Hard Drive
- Once in the macOS installer, open Disk Utility.
- Select your target drive and click Erase. Use the following settings:
• Format: APFS
• Scheme: GUID Partition Map
- Close Disk Utility and return to the installer.
Step 4: Install macOS
- Select the formatted partition and follow the on-screen instructions.
- The installation may restart the computer multiple times.
Post-Installation Configuration
You need to do somthig after successfully installing macOS on your Windows PC. You'll need to perform essential configurations to run macOS on Windows PC smoothly and reliably. This involves setting up the bootloader, installing necessary drivers, and optimizing system settings.
Step 1: Set Up macOS
Once macOS boots successfully, follow these steps to finalize the system setup:
- Language and Region:
• During the initial setup, macOS will prompt you to select a language and region. Be careful when choosing your settings carefully. The settings will change the keyboard layout and system default settings.
- Apple ID Login:
• Use an Apple ID to access the Mac App Store, iCloud, and other Apple services.
• You may don't want to use your primary Apple ID on a Hackintosh. Then you can create a separate account for this purpose.
- Privacy and Security Settings:
• macOS will ask for permission to enable services like Siri and location tracking. Configure these based on your preferences.
• Disable unnecessary features minimize resource usage.
- First Boot:
• After the setup wizard, you'll boot into macOS. At this stage, the system may lack full hardware functionality (e.g., no sound, limited graphics acceleration). You can solve the problem in the following steps.
Step 2: Install Drivers (Kexts)
Kexts (kernel extensions) are crucial for enabling macOS to interact with non-Apple hardware. Without these, key components such as audio, graphics, and network adapters may not function correctly.
Common Kexts to Install
- Lilu.kext:
• A essential kext required by many others to operate correctly.
• It serves as a bridge for hardware compatibility.
- WhateverGreen.kext:
• Enables proper GPU functionality, including hardware acceleration.
• Especially important for AMD GPUs and integrated Intel graphics.
- AppleALC.kext:
• Enables audio functionality on most motherboards.
• May require additional configuration based on your motherboard’s codec.
- IntelMausi.kext or RealtekRTL8111.kext:
• Provide Ethernet support for Intel and Realtek network cards.
- VirtualSMC.kext:
• Essential for system management, including power and temperature monitoring.
Installing Kexts
- Mount the EFI partition on your macOS drive using tools like EFI Mounter or MountEFI.
- Navigate to the /EFI/OC/Kexts folder (for OpenCore) or /EFI/Clover/kexts folder (for Clover).
- Copy the required kext files into this directory.
- Update your config.plist file to load these kexts during boot:
• Open the file using a plist editor like ProperTree.
• Add the kexts under the Kernel/Add section for OpenCore or the KextsToPatch section for Clover.
Step 3: Configure the Bootloader
The bootloader is a critical component of your Hackintosh, enabling the system to boot macOS and manage hardware configurations. You need to copy bootloader from USB drive to your macOS installation drive to make it permanent.
Steps to Install the Bootloader
- Mount the EFI partition of the macOS drive.
- Copy the EFI folder from the USB drive to the EFI partition of the macOS drive.
- Test the setup by restarting the system and booting macOS without the USB drive.
OpenCore Bootloader Optimization
- SMBIOS Configuration:
Use the OpenCore Configurator to generate a system definition (e.g., iMac19,1 or MacBookPro16,3) that matches your hardware.- This improves macOS compatibility and enables iCloud and App Store functionality.
- Boot Flags:
Adjust boot arguments in config.plist to optimize performance or troubleshoot issues. Common flags include:- -v for verbose boot (helps diagnose issues).
- nv_disable=1 for disabling unsupported Nvidia GPUs.
Clover Bootloader Configuration
- Similar to OpenCore, set the system definition and boot arguments rightly in the Clover Configurator.
Step 4: Test Hardware Functionality
After installing drivers and configuring the bootloader, test all hardware components to ensure proper functionality.
- Graphics:
• Open About This Mac and check if it lists the correct GPU.
• Test video playback and animations to verify hardware acceleration.
- Audio:
• Test your speakers and headphone jack for sound output.
• If audio doesn't work, use Hackintool to identify your motherboard's audio codec and adjust settings in config.plist.
- Network:
• Test Ethernet and Wi-Fi functionality (if applicable).
• For Wi-Fi, you may need additional hardware (e.g., a macOS-compatible PCIe Wi-Fi card).
- USB Ports:
• Plug in various USB devices to ensure all ports are functional.
• If some ports don't work, use tools like USBInjectAll.kext and create a custom USB map.
Step 5: Fine-Tune System Settings
Enable iCloud, iMessage, and FaceTime
- Open the OpenCore Configurator or Clover Configurator.
- Add a unique serial number, board ID, and UUID to your system settings.
- Verify the serial number on Apple’s website to avoid conflicts with genuine Macs.
Energy Management
- Use SSDT-EC.aml and SSDT-PMC.aml files in the EFI folder to optimize power management.
- Check that sleep, wake, and hibernation work correctly.
Monitor System Performance
- Use apps like Intel Power Gadget or iStat Menus to monitor CPU and GPU usage, temperatures, and fan speeds.
Step 6: Prepare for Updates and Maintenance
Keeping your Hackintosh updated is crucial but can introduce compatibility issues. Always proceed with caution when updating macOS.
- Backup Your EFI Folder:
• Before updating, create a backup of your EFI folder. This ensures you can restore your configuration if something breaks.
- Check Compatibility:
• Monitor Hackintosh forums for advice on new macOS versions.
• Update OpenCore, Clover, and kexts to their latest versions before upgrading.
- Test Updates:
• Apply updates on a test installation if possible. It can ensure if it's compatible before starting on the main system.
Dual-Booting macOS and Windows (Optional)
Step 1: Partition Your Drive
- Use Disk Management on Windows or Disk Utility on macOS to create separate partitions for both systems.
- Ensure the macOS partition uses APFS and the Windows partition uses NTFS.
Step 2: Configure Bootloader
- Add Windows to the OpenCore or Clover bootloader menu.
- Set up a timeout option to select the desired OS at startup.
Troubleshooting Common Issues
- Kernel Panics
• Check verbose logs for clues (-v flag in bootloader).
• Common causes: incorrect kexts or unsupported hardware.
- Bootloader Errors
• Verify the EFI folder configuration.
• Ensure config.plist settings match your hardware.
- No Audio or Network
• Confirm and install the correct kexts.
• Adjust config.plist to enable specific devices.
- Black Screen After Boot
• Often caused by GPU not configured rightly.
• Use WhateverGreen.kext and confirm framebuffer settings.
Maintaining and Updating Your Hackintosh
Once your Hackintosh is functional, keeping it updated is crucial to avoid compatibility issues.
System Updates
- Avoid updating macOS directly without ensuring compatibility.
- Check Hackintosh forums for guidance before applying updates.
Updating Drivers and Bootloader
- Update kexts, OpenCore, or Clover regularly.
- Use tools like Kext Updater for convenience.
Creating Backups
- Use Time Machine or tools like Donemax Disk Clone for Mac to create system backups.
Conclusion
Creating a Hackintosh is an exciting project that allows you to experience macOS without investing in Apple hardware. The process is a little complex and needs technical knowledge. But the reward is a powerful, DIY macOS system on your existing hardware. Always think about legal and ethical considerations and be ready to troubleshoot problems along the way.
By following this guide, you can successfully install macOS on your Windows PC. Enjoy the best of both operating systems.
Donemax Disk Clone for Mac
An award-winning disk cloning program to help Mac users clone HDD/SSD/external device. It also can create full bootable clone backup for Macs.
Related Articles
- Sep 18, 2025How to Unlock iPhone without Passcode or Face ID?
- Dec 18, 2025Full Guide to Install Windows OS on Apple Silicon Mac
- Sep 08, 2025An Unknown Error Occurred in iMessage on Mac, Fix It
- May 10, 2025How to Find BitLocker Recovery Key (Unlock Password)?
- Dec 28, 2024How to Format a USB Drive to FAT32 on Mac?
- Mar 22, 2024What Is NVRAM (Or PRAM)? How to Reset NVRAM/PRAM on Mac to Solve Problems?

Contributing Writer
Charles
Charles, who lives in Sydney, Australia, is an editor & writer of Donemax Team. He is good at writing articles related with Apple Mac computers, Windows operating systems, data recovery, data erasure, disk clone and data backup, etc. He loves reading and playing tennis in his spare time and is interested in testing new digital devices such as mobile phones, Macs, HDDs, SSDs, digital cameras, etc.

Editor in chief
Gerhard Chou
In order to effectively solve the problems for our customers, every article and troubleshooting solution published on our website has been strictly tested and practiced. Our editors love researching and using computers and testing software, and are willing to help computer users with their problems