The best iTunes alternative - reliable and easy-to-use iOS data transfer & data management software.
As your photo collection grows, you may find that Photos & Camera takes up most of your iPhone storage. At this point, moving all your pictures and videos to your computer for backup, then deleting them is a good option to free up iPhone storage space.
In the following guide, we will focus on how to transfer photos and videos from iPhone to Mac computers such as iMac, MacBook Pro/Air, Mac Mini, and Mac Pro in some easy ways.
Method 1: Use Airdrop to Take all iPhone Pictures to Mac
The secret to increased productivity with Apple devices is the tight integration between the iPhone (or iPad) and Mac. AirDrop is Apple's proprietary technology for quickly transferring files between two Apple devices (about 30 feet). Turn on Wi-Fi and Bluetooth on your iPhone and Mac before following the steps below.
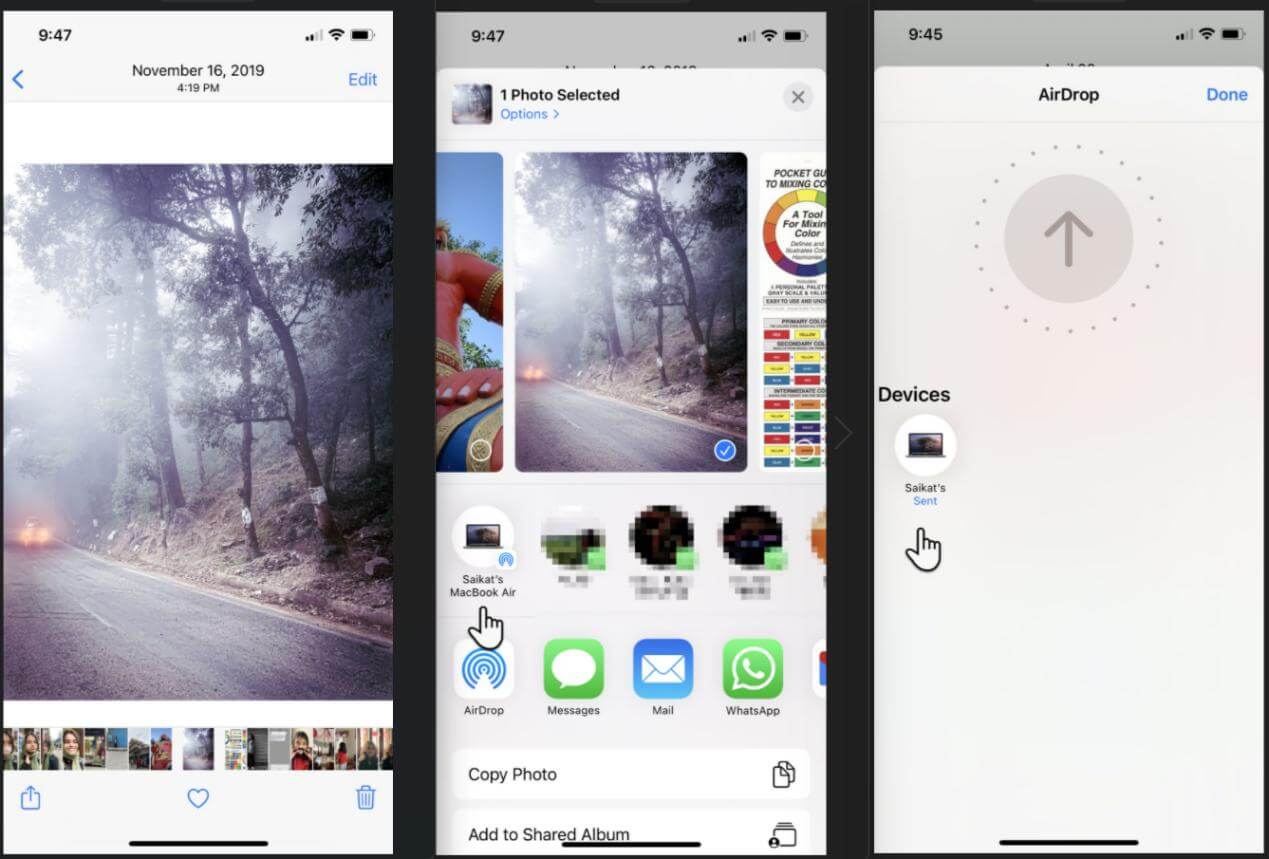
1. Open the Photos app on your iPhone.
2. Select the photos you want to transfer to your computer. Tap the share icon at the bottom of the screen.
3. Select AirDrop, the first icon on the share menu.
4. Select your computer name.
5. The iPhone will display a Sent message below your computer name to confirm that the transfer was successful
Note: To automatically save photos, you should have your iPhone and Mac computer signed in to the same iCloud account. If not, you will need to click "Save" when the file arrives on your computer.
Method 2: Use Photos App to Transfer iPhone Photos to Mac
1. Connect your iPhone, iPad, or iPod touch to your Mac with a USB cable.
2. Open the Photos application on your computer.
3. The Photos app displays an Import screen with all the photos and videos on your connected device. If the Import screen doesn't appear automatically, click the device name in the Photos sidebar.
4. If asked, use your passcode to unlock your iOS or iPadOS device if you see a prompt on your iOS or iPadOS device asking you to trust this computer, tap Trust to continue.
5. Select the location where you want to import the photos. Next to "Import to," you can select an existing album or create a new album.
6. Select the photos to import and click Import Selected Photos, or click Import All New Photos.

Method 3: Use iCloud Photos to Migrate Picture and Photos to Mac
With iCloud Photos, you can sync and view your photos on every Apple device you own. The only catch is the free but limited 5 GB of storage for all file sharing on iCloud. Since iCloud is a backup and sync service, it's easy to transfer photos from iPhone to Mac. Before you do this, check that iCloud Photos is enabled on all your devices.
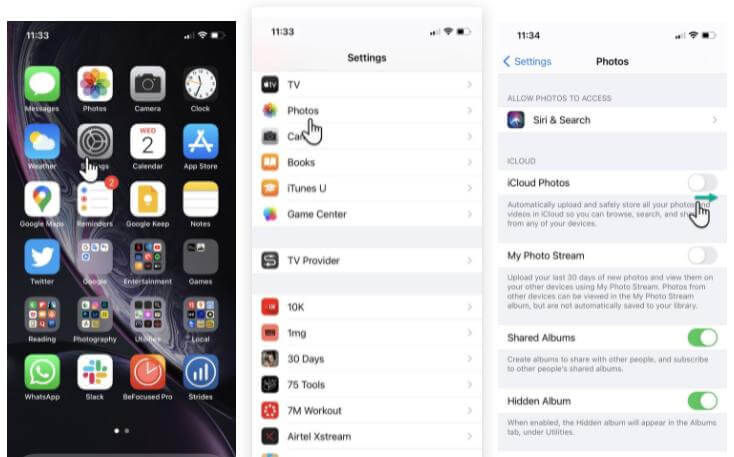
1. Open Settings on your iPhone.
2. Scroll down and tap Photos.
3. If the iCloud Photos switch disabled, toggle it to green
4. Launch the Photos app on your Mac.
5. Open Photos on your Mac.
6. Go to Photos > Preferences from the menu.
7. Tap iCloud
8. Check the box on iCloud Photos to enable it.
Method 4: Use Image Capture on Mac
The Image Capture application on macOS is designed to import pictures from digital cameras and scanners. But it can also be used to upload photos and videos from any other device like an iPhone connected to a Mac.
1. Connect your iPhone to your Mac with a cable and unlock your iPhone when prompted.
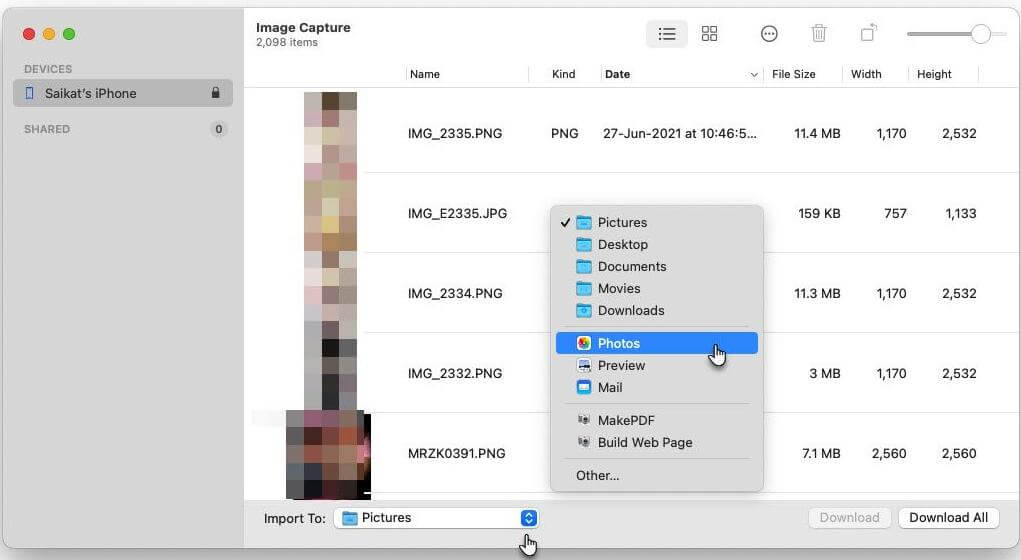
2. In the Image Capture app on your Mac, select a device in the Devices or Shared list.
3. Select the images you want to transfer to your Mac.
4. Open the Import To pop-up menu at the bottom of the window, and choose where to store the image. You can also use these images to create PDFs or web pages.
5. To transfer images to Photos, select Other, then Photos
Method 5: Use iPhone Pictures to Transfer Images/Photos to Mac
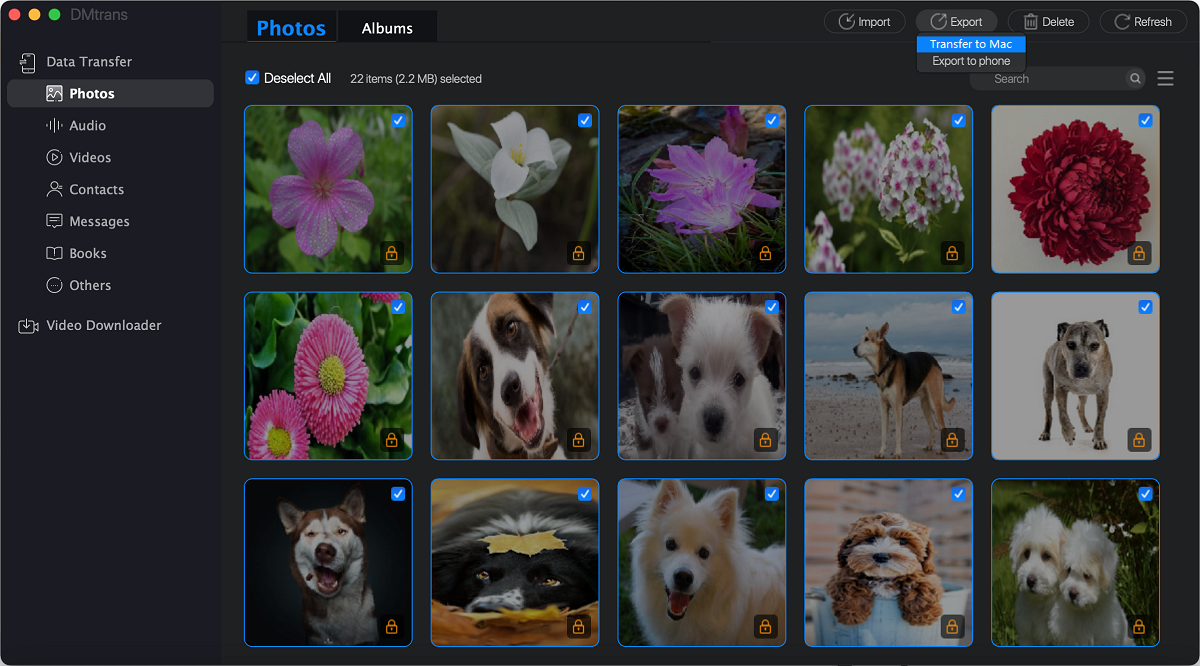
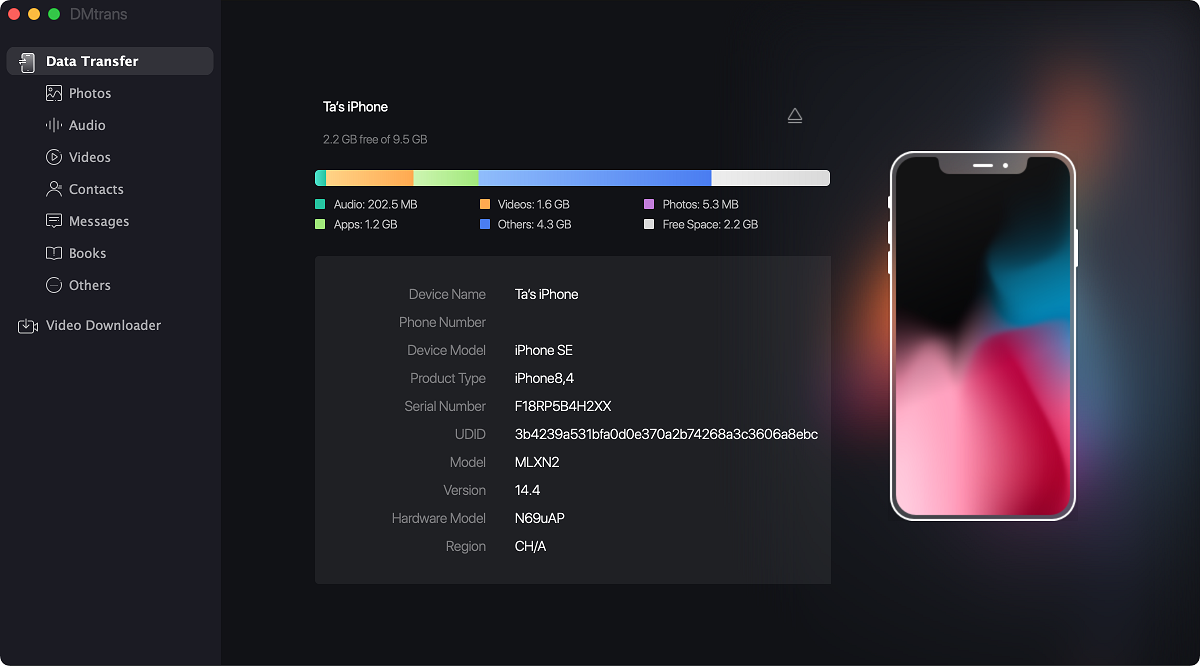
In addition to using Apple's tools, you can also use the professional transfer tool software - DMTrans to transfer photos to Mac. With this tool, you can transfer photos and music, ringtones, contacts, and Sub-types such as videos and books can be moved, backed up, and managed, which is simple, convenient, and fast. If you like this way, you can download DMTrans software. Let me introduce the process of how to transfer photos to Mac:
1. Download and install DMTrans on your Mac, run it, plug in your device:
2. Select Photos, select the photos you want to export, and click Transfer to Mac. It's that simple and convenient: