
Written byMariaUpdated on May 13, 2025
How to Recover Lost Data from a M1 Chip Mac?
Approved byGerhard Chou
Before we start: Donemax Data Recovery for Mac is fully compatible with Apple silicon M1, M1 Pro, M1 Max, M1 Ultra. It can recover permanently deleted files on M1 Mac, recover lost data from erased or formatted drive on M1 Mac, recover lost data from deleted disk volume/partition on M1 Mac, etc.
PAGE CONTENT:
- Understanding the M1 Chip Architecture and Its Impact on Data Recovery
- Common Causes of Data Loss on M1 Macs
- Precautionary Steps Before Data Recovery on M1 Mac
- Methods to Recover Lost Data from an M1 Chip Mac
- Tips for Data Recovery on M1 Mac
- Preventing Future Data Loss on M1 Macs
- Conclusion
- FAQs About M1 Mac Data Recovery
The Apple M1 chip, launched in late 2020, represents a significant shift in Mac architecture. Designed in-house by Apple, it integrates CPU, GPU, RAM, and Neural Engine on a single chip using ARM-based architecture. While the M1 chip brings performance and efficiency benefits, it also introduces new challenges for data recovery due to its advanced security features and unique file system integration. If you've lost data on an M1 Mac - whether through accidental deletion, formatting, or system corruption - this guide will help you recover it safely and effectively.
Understanding the M1 Chip Architecture and Its Impact on Data Recovery
The M1 chip changes the way Macs handle data. It integrates Apple's T2 security chip functionalities, including secure boot and full disk encryption by default. Additionally, M1 Macs run exclusively on macOS Big Sur or later, which use the APFS (Apple File System).
Some unique aspects that impact data recovery include:
- Secure Enclave and hardware-based encryption: Each file is automatically encrypted, and without proper credentials, recovery becomes much harder.
- System Integrity Protection (SIP): SIP prevents even root users from modifying certain system areas, which can limit some recovery methods.
- Sealed System Volume (SSV): Introduced in macOS Big Sur, SSV prevents tampering with the macOS partition, complicating recovery from internal drives.
Due to these layers of security and structure, traditional data recovery techniques used on Intel-based Macs may not work the same way on M1 Macs.
Common Causes of Data Loss on M1 Macs
Despite advanced technologies, M1 Macs are not immune to data loss. Here are some typical scenarios:
- Accidental Deletion: Files moved to Trash and emptied inadvertently.
- Drive Formatting: Reformatting a drive without backing up data.
- macOS Installation Errors: OS updates or reinstallation gone wrong can corrupt partitions or overwrite data.
- File System Corruption: APFS volumes can become unreadable due to corruption or bad sectors.
- External Device Issues: SD cards, USB drives, or external SSDs not mounting or being corrupted.
- Time Machine Failures: Incomplete or corrupted backups can lead to irrecoverable data.
Understanding the root cause can help you determine the most effective recovery method.
Precautionary Steps Before Data Recovery on M1 Mac
Before diving into recovery solutions, it's critical to take a few precautionary measures:
1. Stop Using the Affected Mac or Drive
The moment you realize data is missing, avoid saving any new files or installing software on the affected drive. This helps prevent overwriting lost data.
2. Do Not Install Recovery Software on the Internal Disk
If possible, perform recovery from an external bootable drive to avoid damaging existing data sectors.
3. Disable System Integrity Protection (SIP) (Optional)
Some third-party recovery tools may need SIP disabled to access the drive:
- Restart your Mac in Recovery Mode (hold down Power until "Loading startup options").
- Open Terminal from the Utilities menu.
- Run: csrutil disable
- Restart your Mac normally.
Note: SIP should be re-enabled after recovery is complete.
4. Prepare an External Drive
Having a separate drive ensures you have a secure location to save recovered files.
Methods to Recover Lost Data from an M1 Chip Mac
There are multiple avenues to recover lost data, depending on the situation. Let's explore them one by one.
Method 1. Use macOS Built-in Recovery Options for M1 Mac Data Recovery
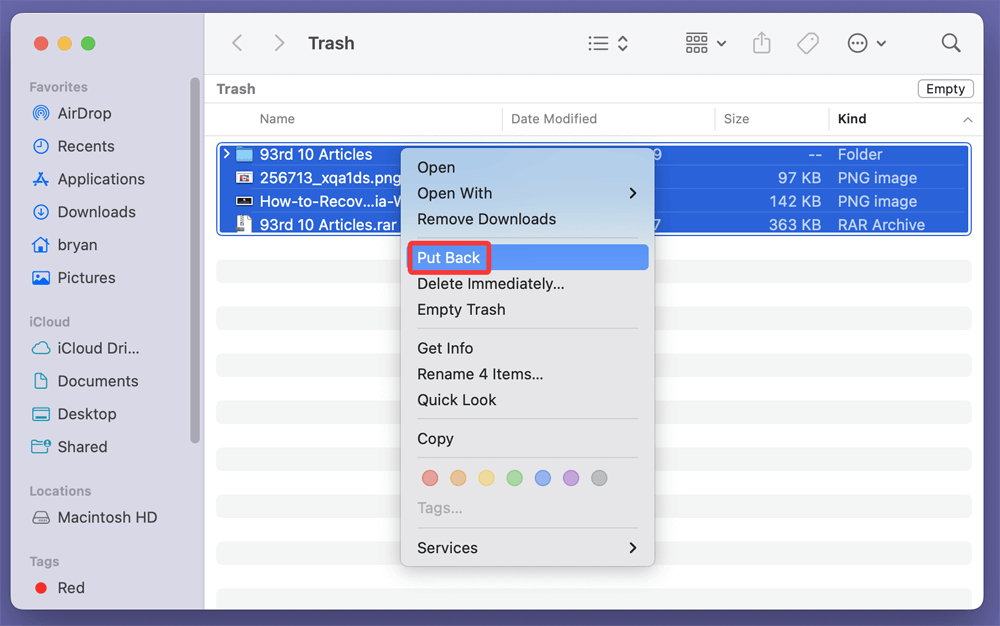
◾Check the Trash
The simplest recovery method is to open the Trash folder and restore deleted files. If they're still there, right-click and select Put Back.
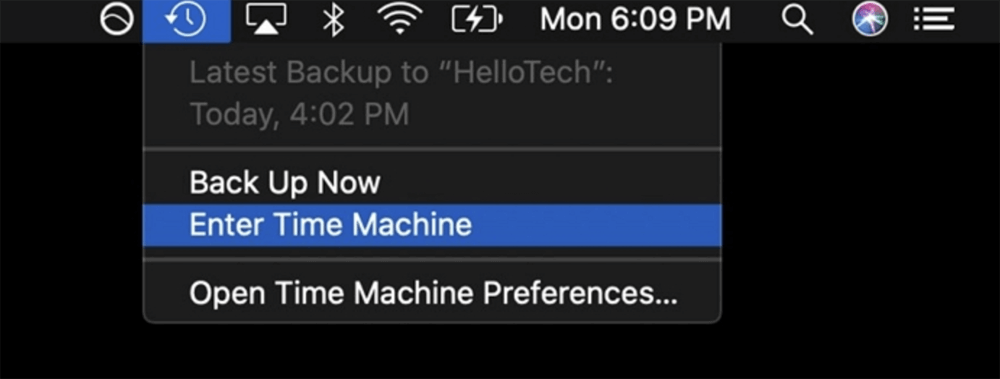
◾Restore with Time Machine
If you've set up Time Machine:
- Connect your Time Machine backup drive.
- Open the folder where the file was last seen.
- Launch Time Machine from the menu bar.
![Launch Time Machine from the menu bar]()
- Use the timeline to locate and restore the file.
![Use the timeline to locate and restore the file]()
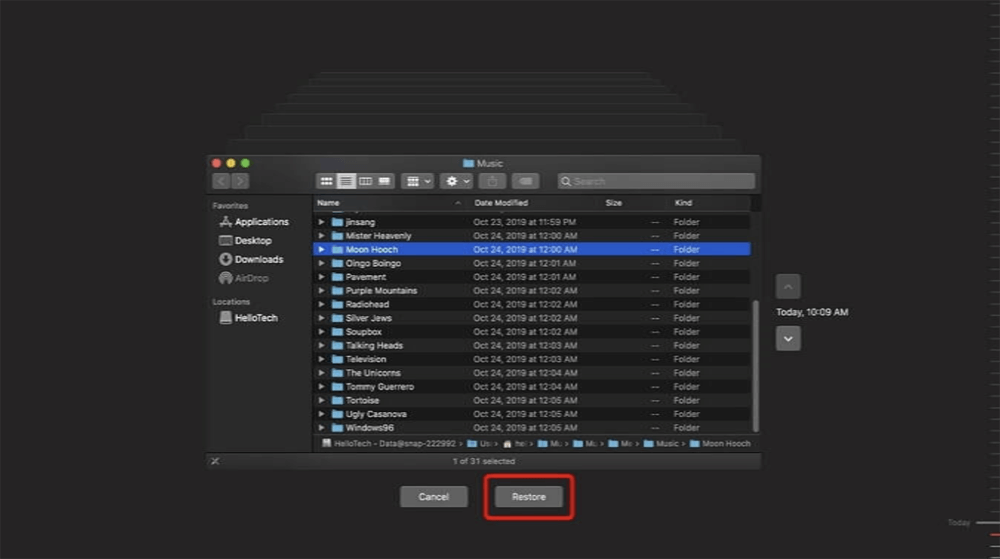
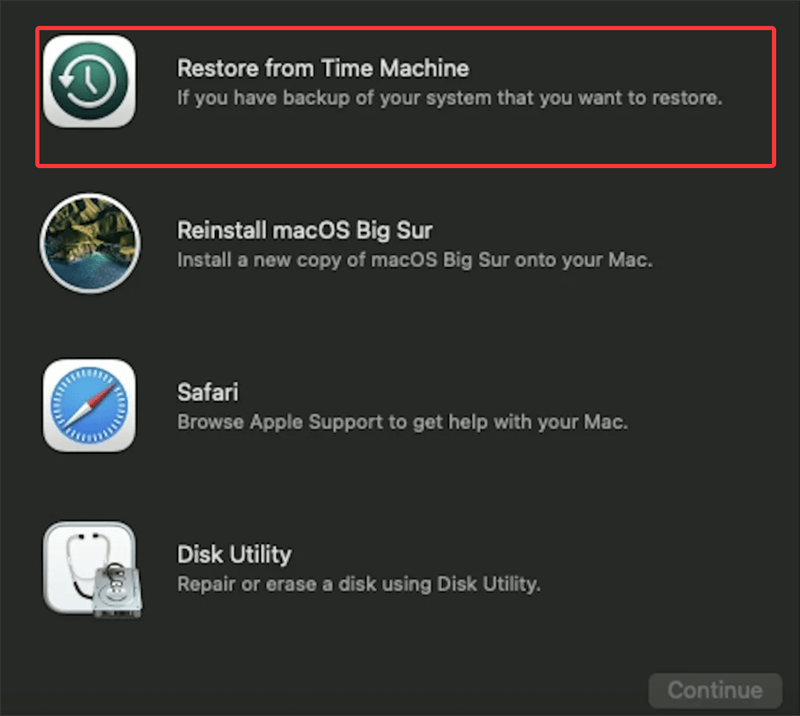
◾Restore from Time Machine Snapshot (macOS Recovery)
M1 Macs use APFS snapshots for quick recovery:
- Restart in macOS Recovery (Power > "Options").
- Select Restore from Time Machine.
![Restore from Time Machine Snapshot]()
- Choose a snapshot from before data loss occurred.
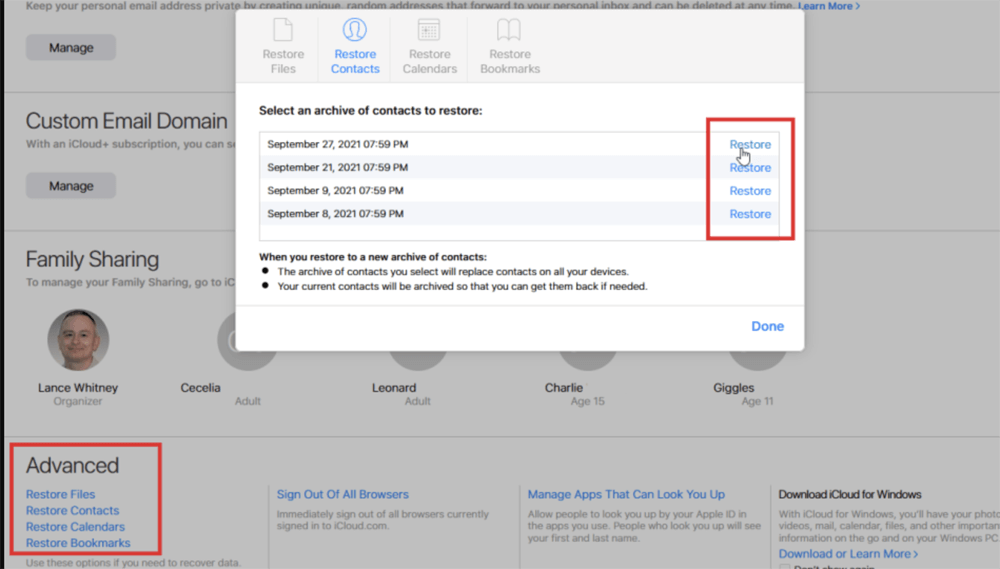
◾Recover via iCloud Drive or Cloud Services
If you use iCloud Drive, deleted files may be recoverable within 30 days:
- Go to iCloud.com.
- Sign in with your Apple ID.
- Click Account Settings > Advanced > Restore Files.
- Select the files and click Restore.
![Recover via iCloud Drive or Cloud Services]()
Third-party services like Google Drive, Dropbox, or OneDrive also offer similar restore functions.
Method 2. Recover Lost Data Using M1 Data Recovery Software
When built-in tools like Time Machine or iCloud are unable to restore your lost data, using third-party data recovery software becomes the most viable option - especially for complex data loss scenarios like accidental formatting, corrupted APFS partitions, or deleted volumes. However, with the Apple M1 chip's new architecture, not all traditional macOS data recovery tools work seamlessly. It's crucial to use software that's been updated to support Apple Silicon (M1/M2/M3/M4) natively without relying on Rosetta 2 emulation.
Donemax Data Recovery for Mac is fully compatible with M1 chips.
Donemax Data Recovery for Mac
- Recover permanently deleted files on M1 Mac.
- Recover formatted, erased or lost files on M1 Mac.
- Recover inaccessible, corrupted data on M1 Mac.
Here's how to recover data on M1 Mac using Donemax Data Recovery for Mac:
Step 1. Download and install Donemax Data Recovery for Mac on your M1 Mac, then open it. Choose the drive where you lose your files to start data recovery. If you want to recover lost data on M1 Mac, choose Macintosh HD.

Step 2. Click on Scan button, it will start with a quick scan, then perform a deep scan:
- Quick Scan retrieves recently deleted files.
- Deep Scan digs through raw file structures for older/lost files.

Step 3. After scanning, use the file preview feature to view documents, images, or videos before recovery. Select the files you want to restore and choose a safe recovery location - preferably an external drive.

Tips for Data Recovery on M1 Mac
1. Important Tips for Successful Software Recovery
- Act Quickly: The longer you use the Mac after data loss, the higher the chance that your data will be overwritten by new files.
- Don't Recover to the Same Drive: Always use a different volume to avoid overwriting recoverable data.
- Beware of Fake Tools: Stick to reputable software with good user reviews and M1-native support. Avoid cracked or pirated versions - they often contain malware.
- Scan Entire Disk When in Doubt: Sometimes files are buried deep or stored in temporary caches - deep scan helps recover more.
2. When Software Recovery May Fail
While recovery software is powerful, it has limitations in these cases:
- Severe hardware failure (e.g., dead SSD, failed controller).
- FileVault encryption without password or key - software cannot bypass this.
- Overwritten sectors - once the original data is replaced, it's unrecoverable.
In these situations, you may need to escalate to a professional data recovery service, especially if the data is mission-critical.
By using professional M1-compatible recovery tools with the right steps and precautions, you can often recover important files even in complicated scenarios. It's one of the most accessible methods for users who need more than what macOS offers but aren't ready for lab-based solutions.
3. Use Terminal for Recovery (Advanced Users)
macOS Terminal can sometimes retrieve files from mounted or unmounted volumes:
List connected volumes:
diskutil list
Mount a drive:
diskutil mount /dev/diskX
Copy files to an external drive:
cp /Volumes/DriveName/Users/yourname/Documents/file.txt /Volumes/ExternalDrive/
Note: This method is limited and won't recover deleted data - only accessible files from readable drives.
4. Seek Help from Professional Data Recovery Services
If your Mac won't boot, the SSD is physically damaged, or encrypted data is inaccessible, professional services are your best option.
What to Expect:
- Diagnostic evaluation
- NAND chip-level recovery
- APFS and T2/M1 decryption (only with proper authorization)
- Data returned on a new drive
Top Services:
- DriveSavers
- Ontrack
- Secure Data Recovery
Expect costs between $300–$1500 depending on severity and urgency.
Preventing Future Data Loss on M1 Macs
To avoid the hassle and cost of data recovery, it's essential to adopt preventive measures:
1. Enable Time Machine Backups
Connect an external drive and set up automatic backups via System Settings > General > Time Machine.
2. Use iCloud or Cloud Sync Services
Enable iCloud Drive, or back up important documents with Dropbox, Google Drive, or OneDrive.
3. Avoid Unnecessary Formatting
Before erasing or partitioning drives via Disk Utility, double-check that data is backed up.
4. Be Cautious with FileVault Encryption
While FileVault protects your data, it can also make recovery impossible without the password or recovery key.
5. Monitor SSD Health
Use apps like DriveDx or Smart Utility to monitor SSD lifespan and health status.
Conclusion
Recovering lost data from an M1 chip Mac is more complex than on older Intel Macs, but not impossible. The architecture and security features, while enhancing performance and data protection, can complicate recovery methods. However, using the right tools - whether it's Time Machine, iCloud, or professional-grade recovery software - can make the process manageable.
If all else fails, professional data recovery services can help retrieve even the most stubborn data from M1 Macs, especially when encryption or physical damage is involved.
As a golden rule, always back up regularly and take care with updates, formatting, or file management. A proactive approach will always be the best data recovery method.
FAQs About M1 Mac Data Recovery
1. How to recover permanently deleted files on M1 Mac?
Donemax Data Recovery for Mac is a powerful data recovery program. It can deeply scan drives on M1 Mac and find all recoverable files including the permanently deleted files. Then you can recover the files.
2. What is the best M1 Mac data recovery software?
Here are some top M1-compatible tools that are known for effectiveness and safety:
- Donemax Data Recovery for Mac
- Offers full native support for Apple Silicon.
- User-friendly interface with step-by-step guidance.
- Features like partition recovery, file preview, and disk repair.
- iBoysoft Data Recovery for Mac
- Specialized in recovering from APFS-formatted drives.
- Works well on macOS Monterey, Ventura, and newer versions.
- Allows recovery from internal drives on M1 after disabling SIP.
- Stellar Data Recovery for Mac
- Reliable for photo, video, and document recovery.
- Offers deep scan and disk image creation.
- Compatible with encrypted volumes and external drives.
- Magoshare Data Recovery for Mac
- Known for its simplicity and fast scanning.
- Supports M1 and APFS systems.
- Offers both quick scan and deep scan modes.
3. How to recover erased or formatted drive on M1 Mac?
Follow the steps to unformat a drive on M1 Mac:
- Download and install Donemax Data Recovery for Mac.
- Open this M1 Mac data recovery software.
- Select the formatted drive to start data recovery.
- Click on Scan button.
- Preview and recover files after scanning.
Donemax Data Recovery for Mac
Donemax Data Recovery for Mac is one of the best Mac data recovery software. It is easy-to-use and can help in recovering deleted, formatted, inaccessible or lost data from Mac HDD/SSD, external disk, USB drive, SD card, camera or other storage devices.
Related Articles
- Dec 16, 2025Solved: Hard Drive or External Device Not Showing Up on Mac
- Sep 25, 2025Solutions to Recover Deleted Files on macOS Tahoe
- Sep 03, 2025How to Recover Deleted Chrome Bookmarks on Mac?
- Jul 03, 20255 Methods to Recover Application Support Folder on mac
- Apr 18, 2025How to Recover Lost SR2 File on Mac – A Comprehensive Guide
- Jun 24, 2025Mac Trash Recovery: Recovering Deleted Files on Mac

Contributing Writer
Maria
Maria is one of the senior writers & editors of Donemax who lives and works in Sydney, Australia. She loves PC, Mac and Internet Technology. She has 6 years of writing articles about data recovery on PC/Mac, disk cloning solution, data eraser and computer OS optimization, etc. She is also interested in testing various software and digital products.

Editor in chief
Gerhard Chou
In order to effectively solve the problems for our customers, every article and troubleshooting solution published on our website has been strictly tested and practiced. Our editors love researching and using computers and testing software, and are willing to help computer users with their problems