
Written byStevenUpdated on Aug 15, 2025
How to Recover Lost WPS Office Documents on Mac?
Approved byGerhard Chou
Before we start: If you cannot find the missing WPS files from Trash, backups, or temporary folder, you can use Donemax Data Recovery for Mac to get back the lost WPS Office Documents on Mac.
PAGE CONTENT:
WPS Office is a popular alternative to Microsoft Office, widely used for word processing, spreadsheets, and presentations. Many Mac users rely on WPS Office for personal and professional tasks. However, losing critical documents can be problematic and stressful experience.

There are several reasons why WPS Office documents may go missing:
- Unintentional deletion – You might have unintentionally deleted the document.
- System crashes – A sudden Mac system crash could lead to unsaved work being lost.
- WPS Office crash – If the software crashes unexpectedly, it might not save the document properly.
- File corruption – A power outage or software error could corrupt the file.
- Hard drive or SSD failure – Storage device issues can result in data loss.
If you've lost a WPS Office document on your Mac, don't worry. This article will guide you through various methods to recover lost WPS Office documents on Mac efficiently.
1. Check the WPS Office Auto Backup Feature
What is WPS Office Auto Backup? WPS Office has a built-in auto-save and backup feature that can help retrieve lost documents. It lowers the chance of data loss by automatically saving your work at predetermined intervals.
How to Locate Auto-Saved Files in WPS Office? Follow these steps to check if WPS Office has saved a backup of your lost document:
- Open WPS Office.
- Click on Menu (three horizontal lines in the top-left corner).
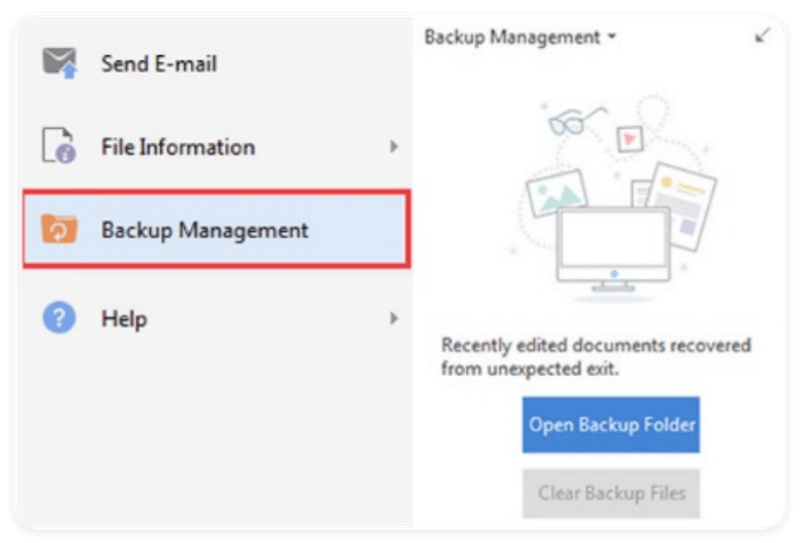
- Select Backup Management from the drop-down list.
- Look for recently saved versions of your document.
- If the file is listed, select it and click Restore.
This method works best if the document was unsaved due to a crash or accidental closure. However, if the file is not found in backup management, move on to the next solution.
2. Recover Lost WPS Office Documents from Trash
If you recently deleted your WPS Office document, it might still be in the Trash folder. The Trash keeps deleted files until they are permanently removed or the folder is emptied.
Steps to Restore a Deleted WPS Office Document from Trash:
- Click the Trash icon on the Dock to open it.
- Look for the lost document by checking filenames and timestamps.
- If found, right-click the document and select Put Back.
- The original location of the file will be restored.

If you emptied the Trash or the file is not there, don't worry—there are still more ways to recover your document.
3. Use Mac's Time Machine Backup
Time Machine is Mac's default backup system, which automatically saves copies of files. If you had Time Machine enabled before losing your WPS Office document, you can restore it from a previous backup.
How to Recover WPS Office Documents Using Time Machine:
- If your Time Machine backup drive is an external drive, connect it.
- Go to the Documents or Desktop folder where the lost file was last stored.
- Choose Browse Time Machine Backups after clicking on the Time Machine symbol in the menu bar.
- To access an earlier backup version, use the timeline on the right.
- Locate the lost WPS Office file and click Restore.

If you never set up Time Machine, skip to the next method.
4. Look in Temporary and Cache Folders
Sometimes, unsaved WPS Office files are stored in Mac's temporary or cache folders. These locations hold temporary versions of files before they are permanently saved.
How to check Mac's temporary folder for unsaved WPS Office files:
- Launch Terminal by pressing Command + Space, and then typing "Terminal," pressing Enter.
![recover lost WPS Office documents on Mac]()
- Type the below command and press Enter:
open $TMPDIR
![recover lost WPS Office documents on Mac]()
- This opens the Temporary Files directory.
- Look for a folder related to WPS Office (e.g., WPS Office Recovery, com.wps.office).
![recover lost WPS Office documents on Mac]()


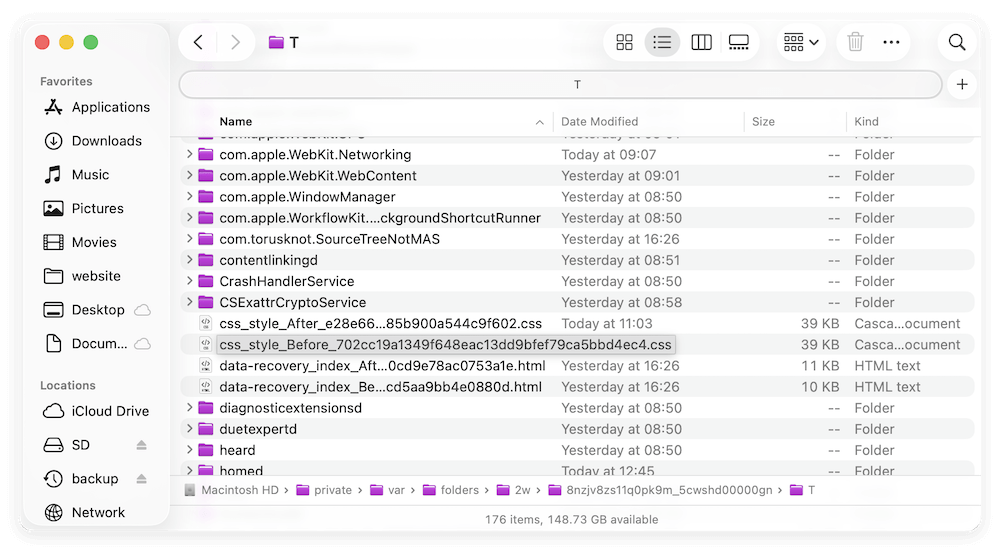
If you find any files with .wps or .docx extensions, copy them to a safe location and try opening them in WPS Office.
5. Use Data Recovery Software
If none of the previous methods worked, don't panic—your lost WPS Office document might still be recoverable using specialized data recovery software. These tools scan your Mac's storage for lost or deleted files, even if they were removed from Trash or affected by a system crash.
Best Data Recovery Software for Mac
There are many data recovery tools available, but here are some of the most effective options:
1. Donemax Data Recovery for Mac
Best for: Deep scan to recover lost documents.
Recovers files lost due to accidental deletion, system crashes, or formatting.
Supports over 2,000 file formats, including WPS Office documents (.wps, .et, .dps, etc.).
Provides a preview feature to check recoverable files before restoring them.
2. Disk Drill
Best for: Intuitive interface and deep scanning capabilities.
Offers a free version that allows recovery of up to 500MB of files.
Scans both internal and external drives for lost files.
Includes a Recovery Vault feature that helps prevent future data loss.
3. Stellar Data Recovery for Mac
Best for: Advanced recovery options, including corrupted file repair.
Recovers documents from formatted or corrupted drives.
Can retrieve files lost due to macOS updates or partition errors.
Offers a deep scan feature to find documents that regular scans miss.
4. Tenorshare 4DDiG Mac Data Recovery
Best for: Recovering files lost due to macOS crashes or accidental deletion.
Supports all major file systems, including APFS, HFS+, FAT, and NTFS.
Can recover files from USB drives, SD cards, and external hard drives.
Allows users to filter recovery results by file type for quicker searches.
Steps to start data recovery for WPS files on Mac
Here's a step-by-step guide using Donemax Data Recovery for Mac as an example. The process is similar for other tools like Disk Drill or Stellar Data Recovery.
Step 1: Download and Install the Software
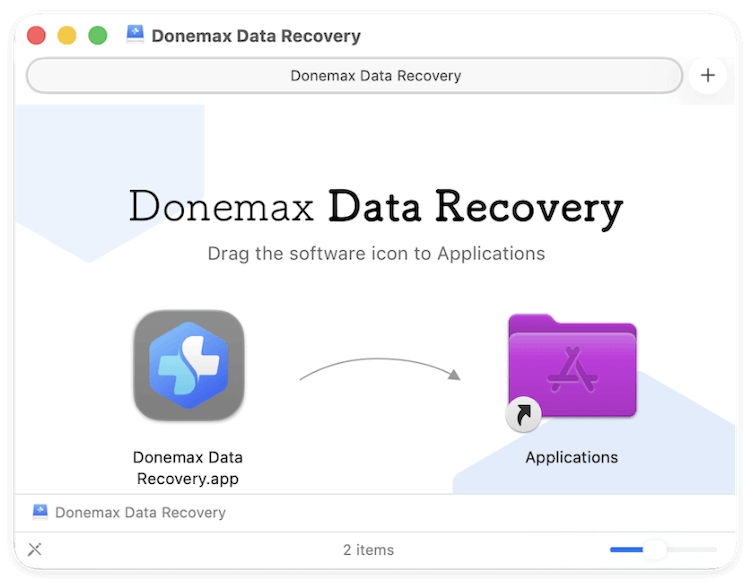
Visit the official Donemax website and download the Mac version of the software.
Install it by dragging the application to the Applications folder.
Step 2: Launch the Software and Select the Drive
Open Donemax Data Recovery for Mac. Choose the drive where your WPS Office document was last saved (e.g., Macintosh HD, an external drive, or a specific folder).

Step 3: Scan for Lost WPS Office Files
Click on Scan button to start searching for deleted or lost files. The software will perform a quick scan first, followed by a deep scan to locate more recoverable files. Depending on your drive size, the scan may take a few minutes to several hours.

Step 4: Locate the Lost WPS Document
Once the scan is complete, use the search bar to filter results by file type (e.g., .wps, .docx). You can also locate the files by path. If you find your lost WPS Office document, proceed to the next step.

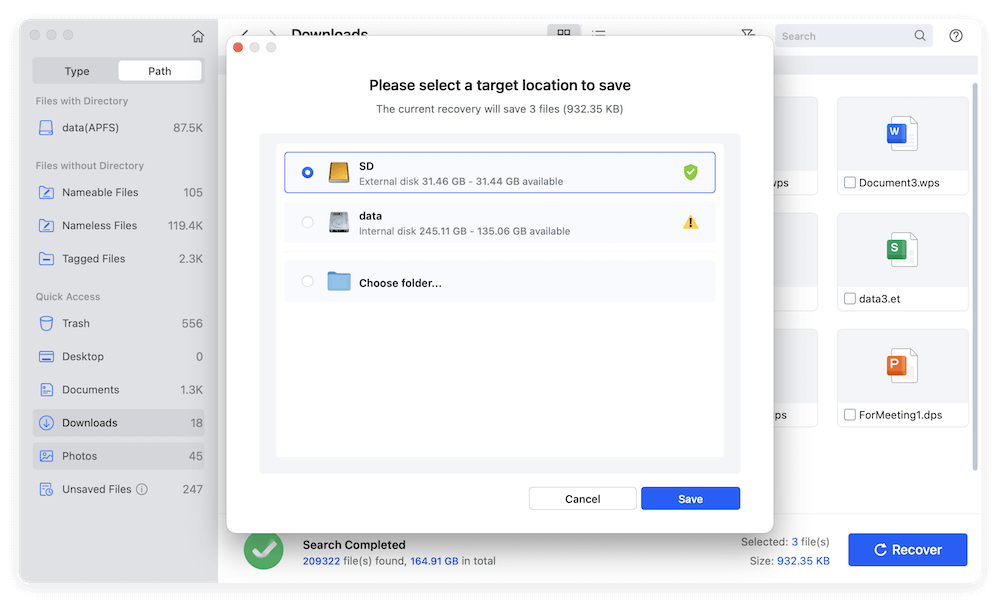
Step 5: Recover and Save the File
Select the document and click Recover button. Choose a new location to save the recovered file (avoid saving it to the same drive where it was lost to prevent overwriting).
After the data recovery is done, you can then go to the destination location of the recovered files. Open the recovered WPS Office documents in WPS Office to ensure they are intact.
Additional Tips for Using Data Recovery Software
❇️ Act Quickly: The longer you wait, the higher the chance of the lost file being overwritten by new data.
❇️ Use External Storage: If possible, install the recovery software on an external drive to avoid accidental data overwriting.
❇️ Try Multiple Methods: If one tool doesn't recover the file, try another, as different software uses varying recovery algorithms.
❇️ Enable Data Protection Features: Some tools, like Disk Drill, offer real-time data protection to prevent future data loss.
However, if the software doesn't detect your lost file, your last option is to seek professional data recovery services or contact WPS Office support for further assistance.
6. Contact WPS Office Support
If none of the above methods work, reaching out to WPS Office support is a good option. They may have additional solutions for recovering lost documents.
How to Contact WPS Office Support:
- Visit the WPS Office Support Center at https://www.wps.com/support.
- Look for troubleshooting guides related to lost files.
- Submit a support request explaining your issue.
- Join the WPS Office community forums to ask other users for help.
While waiting for a response, avoid making major changes to your Mac's storage, as this could further reduce recovery chances.
Bonus: Preventing Future Data Loss
To avoid losing important WPS Office documents in the future, follow these tips:
1. Enable Auto-Save in WPS Office - Go to Menu > Options > Save and enable Auto-Save to save your work at regular intervals.
2. Use Cloud Storage - Save your WPS Office documents in Google Drive, Dropbox, or OneDrive for automatic backups.
3. Regularly Backup Your Mac - Enable Time Machine to ensure all your files are backed up.
4. Avoid Overwriting Files - When editing important documents, save them under different names to keep previous versions intact.
5. Use File Recovery Software Immediately After Deletion - If you delete a file, avoid using your Mac heavily until you attempt recovery to prevent data overwriting.
Conclusion
Losing a WPS Office document on Mac can be frustrating, but recovery is possible using the right methods. Start by checking WPS Office Auto Backup and Trash. If that doesn't work, try Time Machine, temporary folders, or data recovery software. In critical cases, contacting WPS Office support may provide additional solutions.
To prevent future data loss, always enable Auto-Save, use cloud backups, and regularly create Time Machine backups. With these precautions, you can ensure your documents remain safe and recoverable in any situation.
Donemax Data Recovery for Mac
Donemax Data Recovery for Mac is one of the best Mac data recovery software. It is easy-to-use and can help in recovering deleted, formatted, inaccessible or lost data from Mac HDD/SSD, external disk, USB drive, SD card, camera or other storage devices.
Related Articles
- Oct 29, 2024How to Recover Deleted PNG/JPG Images on Mac?
- Aug 10, 2025Recover Lost Data from SanDisk G-DRIVE on Mac – Complete Guide
- Dec 23, 2025Best Mac Unformat Software for External Hard Drive
- May 27, 2026How to Recover Lost Data from Crashed M5 Max Mac: The Ultimate Guide
- Jul 11, 20235 Methods to Recover Lost Data after Upgrading to macOS Sonoma
- Sep 05, 2025Accidentally Clicked Don't Save in Excel on Mac? How to Restore File?

Contributing Writer
Steven
Steven has been a senior writer & editor of Donemax software since 2020. He's a super nerd and can't imagine the life without a computer. Over 6 years of experience of writing technical solutions and software tesing, he is passionate about providing solutions and tips for Windows and Mac users.

Editor in chief
Gerhard Chou
In order to effectively solve the problems for our customers, every article and troubleshooting solution published on our website has been strictly tested and practiced. Our editors love researching and using computers and testing software, and are willing to help computer users with their problems