
Written byChristinaUpdated on Jun 13, 2025
How to Restore Photo Library on Mac? [3 Proven Ways]
Approved byGerhard Chou
Before we start: It is easy to restore Mac Photos Library via Time Machine backup or iCloud backup. If you delete Photos Library file or photos and have emptied the trash, you can use Mac data recovery software - such as Donemax Data Recovery for Mac to recover deleted Photos Library and photos.
PAGE CONTENT:
Your Photos Library on Mac holds priceless memories - family moments, travel pictures, creative projects, and more. But what happens when it disappears, fails to open, or gets corrupted? Whether it's due to accidental deletion, system crashes, or macOS updates gone wrong, restoring your Photos Library is possible and often easier than you think.
In this comprehensive guide, we'll show you how to restore the Photos Library on Mac using various methods - Time Machine, iCloud, third-party tools, or external backups - and provide troubleshooting tips to ensure your images stay safe in the future.
Understanding the Photos Library on Mac
macOS organizes photos and videos using the Photos app, which stores all content in a special package called Photos Library.photoslibrary. This file is located by default in the ~/Pictures folder and includes not only media files but also metadata, albums, edits, and organization settings.
You can view it by going to:
Macintosh HD > Users > [YourUsername] > Pictures > Photos Library.photoslibrary
The .photoslibrary file is not a typical folder - it's a package that the Photos app manages internally. Tampering with it directly may lead to corruption, so accessing it through the Photos app is essential.
Common Reasons for Photo Library Loss or Damage
Before jumping into recovery methods, it's helpful to understand why the Photos Library might need to be restored:
- Accidental Deletion – You or someone else deleted the library or its content.
- Corruption – Power loss, force quitting, or software errors can corrupt the file.
- macOS Reinstallation – Fresh installs or upgrades may not retain local libraries.
- Hard Drive Failure – Especially on older Macs or without backups.
- Library Not Opening – Photos app freezes, crashes, or shows an error on launch.
- Migration to New Mac – The library didn't transfer properly during setup.
Knowing the cause helps in choosing the most effective recovery strategy.
Best 3 Methods to Restore Photo Library and Photos on Mac
If you can't restore the deleted photo library file or photos from trash, just try these methods.
Method 1: Restore Photo Library Using Time Machine
Time Machine is macOS's built-in backup tool that automatically saves snapshots of your system, including apps, system files, documents, and - crucially - your Photos Library. If your photo library has been deleted or corrupted, restoring it from a Time Machine backup is often the most straightforward and effective solution.
What You Need:
- A Time Machine backup drive that was regularly used before the data loss.
- macOS that can access that backup (on the same or another Mac).
- Enough free space to restore the library if needed to another location.
Steps:
- Connect the Time Machine backup drive to your Mac.
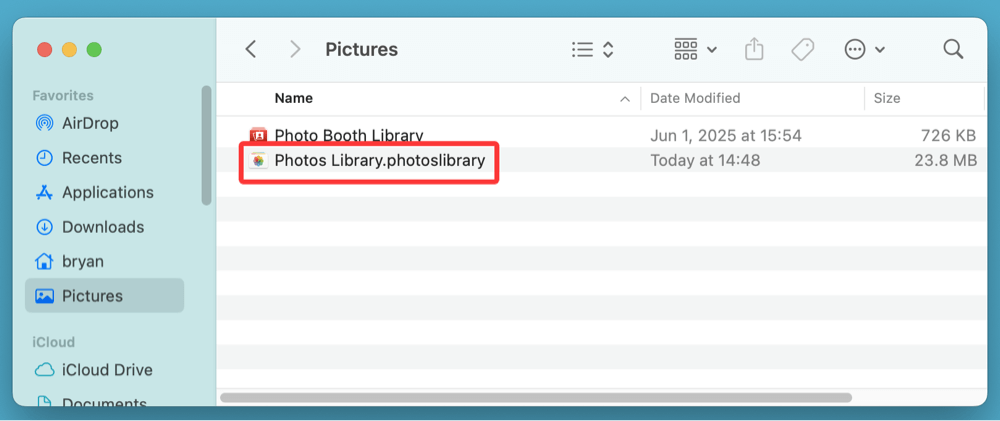
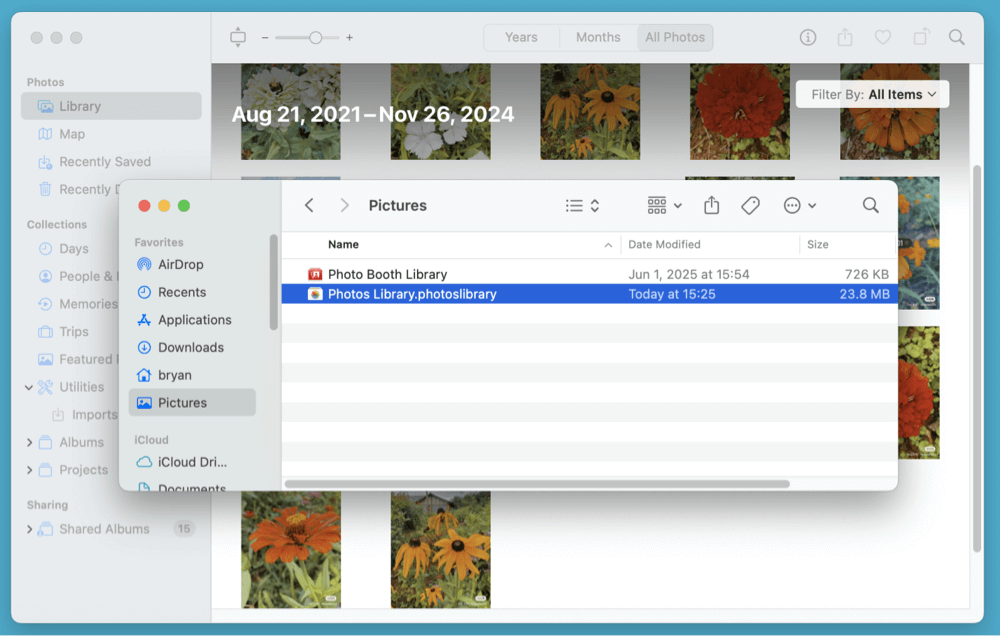
- Open the Pictures folder in Finder.
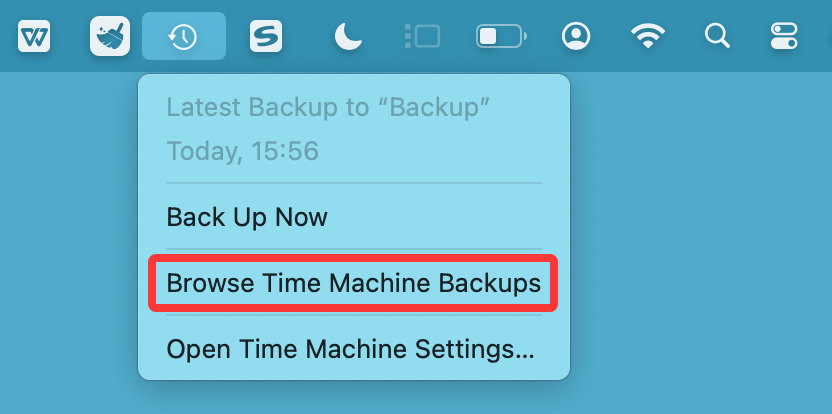
- Click the Time Machine icon in the menu bar and choose Enter Time Machine or Browse Time Machine Backups.
![restore the Photos Library on Mac]()
- Use the timeline on the right edge to navigate back to the date before the loss.
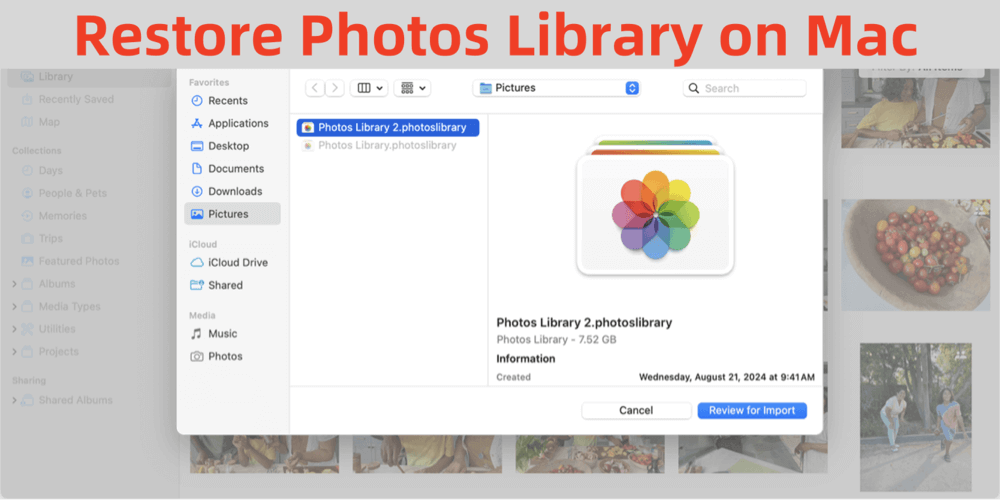
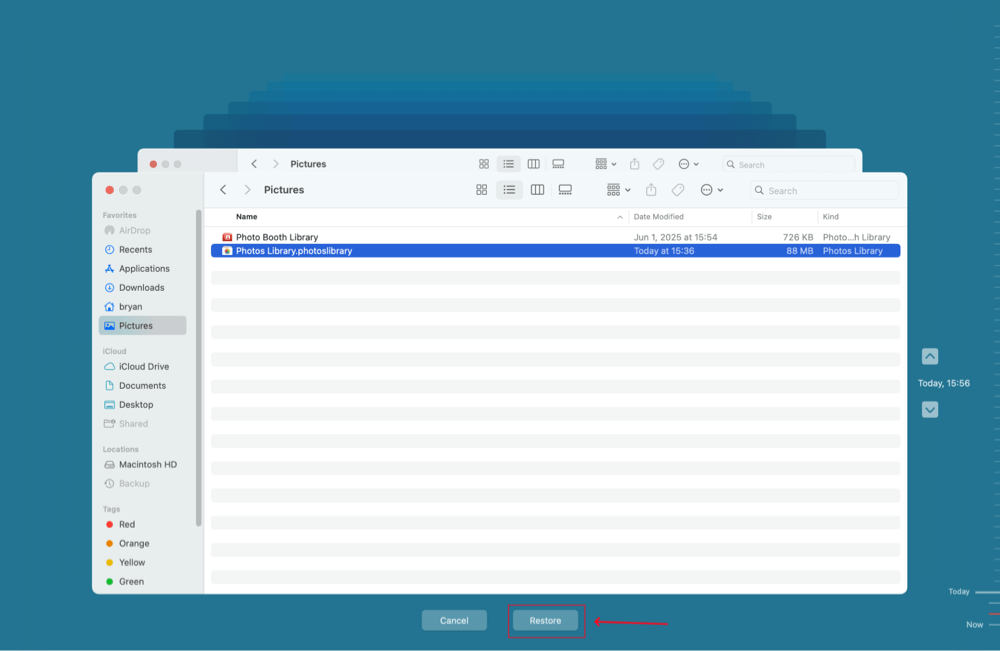
- Select the Photos Library.photoslibrary file and click Restore.
![restore the Photos Library on Mac]()
After restoration, double-click the file or open the Photos app to verify everything is intact.
★ Troubleshooting Tips:
- No Backups Found?
If the backup drive is unreadable, try using Disk Utility to verify and repair it. Make sure it's mounted correctly.
- Photos App Not Recognizing the Library?
Ensure the file ends in .photoslibrary. You may need to rebuild the library (see Section VII) if it's not opening.
- Multiple Versions of the Library in Time Machine?
Choose the one with the most recent date before the loss. You can even restore multiple versions if you're unsure which is complete.
- Limited Storage Space?
Restore the file to an external drive first. You can then transfer or merge its contents into your main library later.
★ Advanced Tip: Restore to a New Location for Comparison
If you're worried about overwriting your current library or just want to preview what's in an older backup:
- In Time Machine, right-click the Photos Library.photoslibrary and choose Restore to...
- Select a temporary location (like Desktop or external drive).
- Open it in Photos using the Option + Launch method to compare with your current library.
★ Why Time Machine Is Ideal for Photo Recovery
- Non-destructive: Restores entire file packages, not just individual images.
- Chronological Backups: Lets you go back to multiple restore points.
- Automated: Requires no technical expertise to set up or use.
- Integrated with macOS: Seamless operation and compatibility with native apps.
Method 2: Restore Photos from iCloud Photo Library
If you had iCloud Photos enabled, your entire photo collection might still be available in the cloud - even if it was removed locally.
How to Check and Restore:
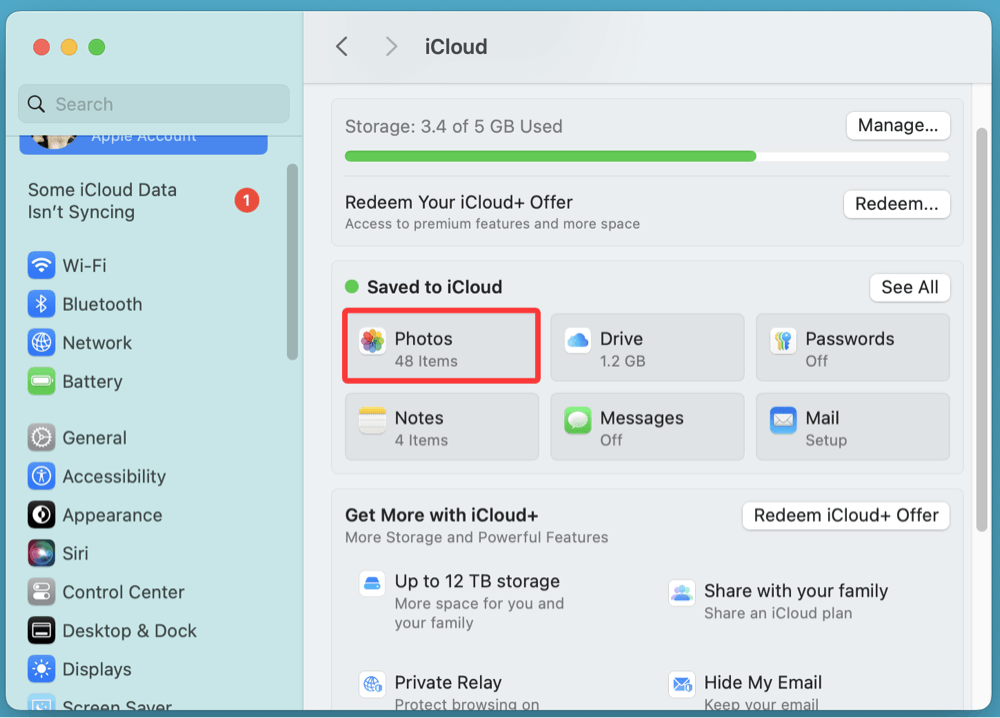
- Go to System Settings > Apple ID > iCloud > Photos.
![restore the Photos Library on Mac]()
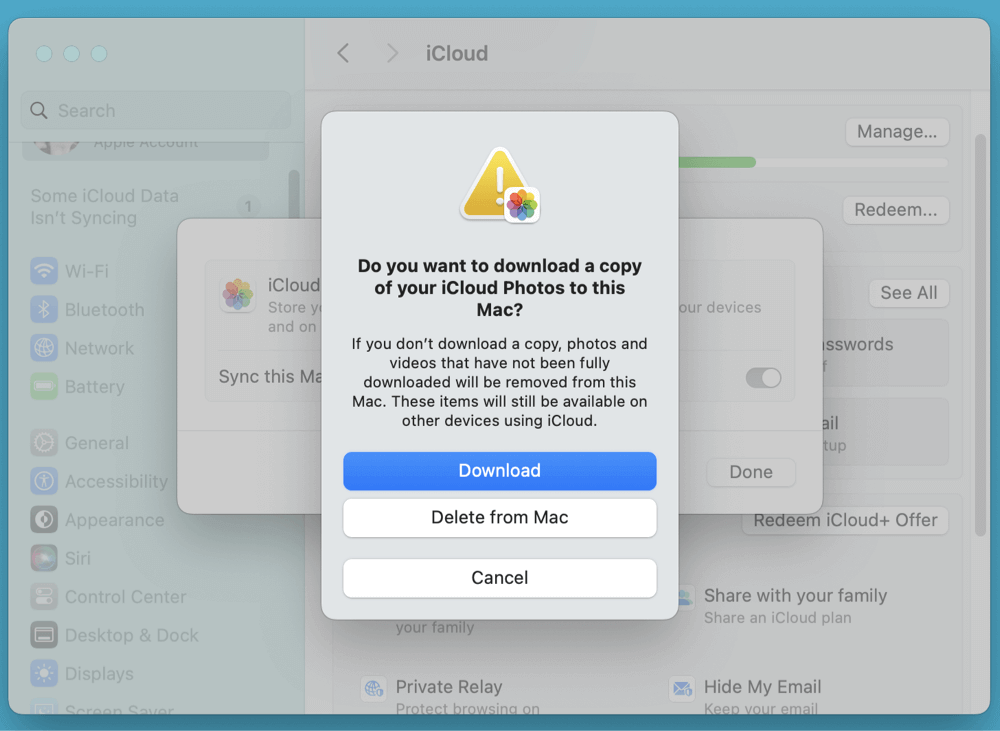
- Enable iCloud Photos and choose Download a copy of your iCloud photos to this Mac.
![restore the Photos Library on Mac]()
- Wait while your Mac syncs the entire photo library from iCloud.
You can also visit iCloud.com from any browser to check your photos online.
⚠️ Warning:
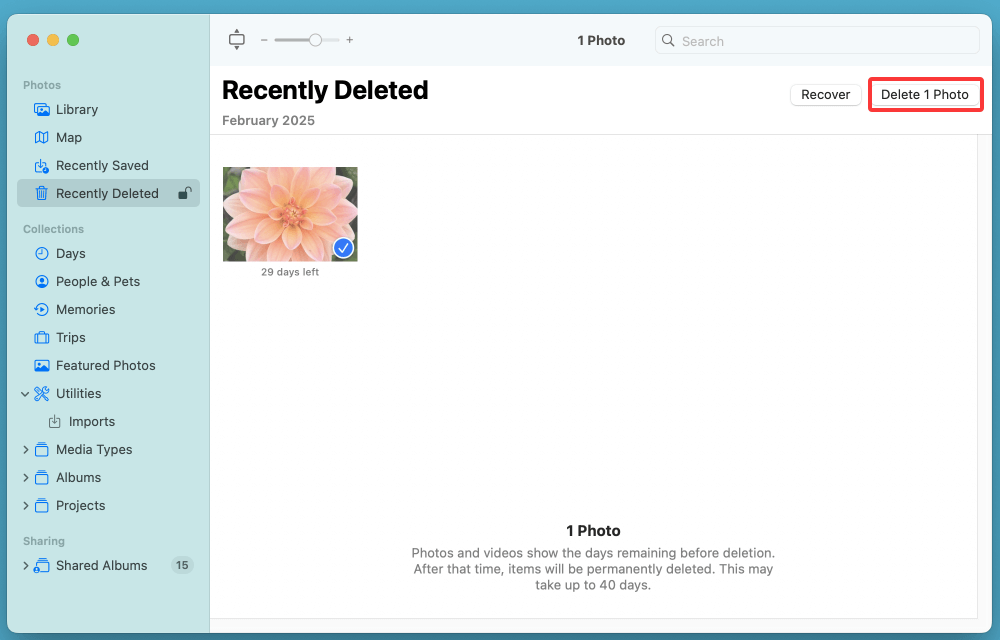
iCloud Photos mirrors deletions. If you deleted photos recently, you have only 30 days to restore them from the Recently Deleted album on iCloud.com or in the Photos app.
iCloud Photos mirrors deletions. If you deleted photos recently, you have only 30 days to restore them from the Recently Deleted album on iCloud.com or in the Photos app.
Method 3: Use a Data Recovery Tool (When No Backup Is Available)
If you didn't back up with Time Machine or iCloud, data recovery software may help retrieve your lost Photos Library or individual media files.
Donemax Data Recovery is an outstanding data recovery tool for macOS. It can easily recover deleted Photos Library.photoslibrary file and lost photos on Mac.
Recovery Process:
Step 1. Download and install the recovery tool - Donemax Data Recovery for Mac.
Step 2. Launch the software and select the drive (Apple SSD or Macintosh HD) where the library was stored.
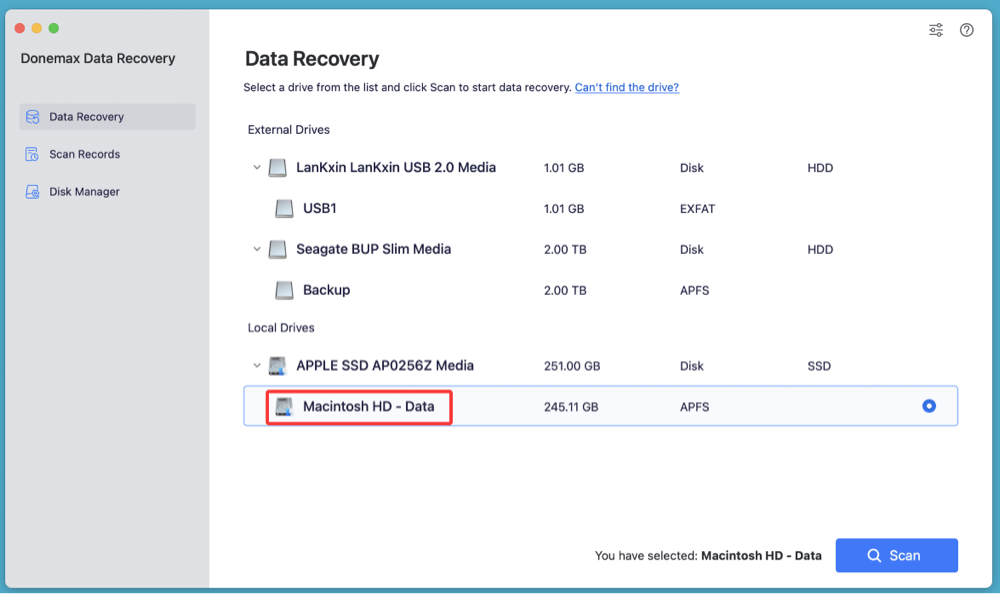
Step 3. Click on Scan button. Donemax Data Recovery for Mac will deeply scan the selected drive and find all deleted/erased/lost files.
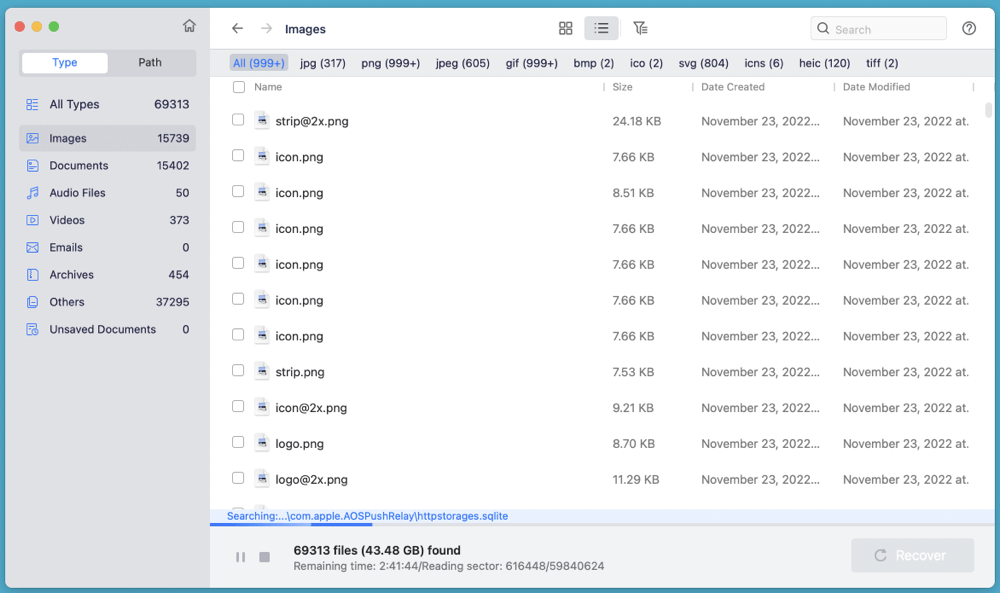
Step 4. Locate the deleted or corrupted Photos Library.photoslibrary or individual .jpg, .png, .mov files. Select the wanted files, click on Recover button.
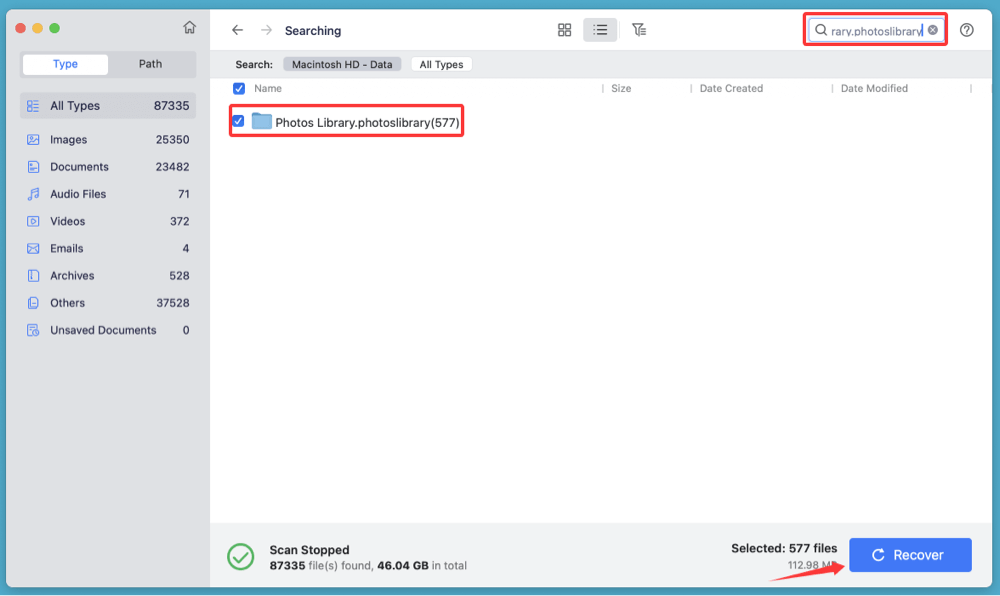
Recover files to a new location, preferably on an external drive.
If you recovered the full library, double-click it to open in Photos. Otherwise, manually re-import recovered images into a new Photos Library.
Limitations:
- Success rates vary depending on disk activity after deletion.
- The library file may be too large or fragmented for full recovery.
- Always preview recoverable files before purchasing the software license.
More Tips About Mac Photos Library Recovery
1. Restore Photos Library from Manual or External Backup
Many users back up their Mac data manually to external drives or cloud storage (Dropbox, OneDrive, etc.). If you've previously copied your Photos Library file:
Steps:
- Locate the .photoslibrary file on your external backup drive.
- Copy it to the ~/Pictures folder or another location.
- Hold down the Option key and open the Photos app.
- Click Other Library, select the restored library, and click Choose Library.
You can also set the restored file as your System Photo Library via:
Photos > Settings > General > Use as System Photo Library
2. Repair a Corrupted Photos Library
If the Photos Library file is present but won't open, try repairing it before restoring.
Steps:
- Quit the Photos app.
- Hold down Option + Command and open Photos.
- In the dialog box, click Repair.
macOS will scan and attempt to fix the library's internal structure. This may take time depending on library size.
💡 Note:
Make sure to back up the .photoslibrary file before running the repair tool.
Make sure to back up the .photoslibrary file before running the repair tool.
3. Troubleshooting After Restoration
Sometimes the restoration process brings back the Photos Library - but with minor issues. Here's how to fix them:
| Problem | Solution |
|---|---|
| Thumbnails not showing | Go to Photos > Preferences > Repair Library |
| Library slow to load | Ensure Optimize Mac Storage is disabled |
| Photos not in albums | Rebuild albums manually if metadata was lost |
| Duplicate photos | Use duplicate detection tools or clean up manually |
| iCloud syncing stuck | Sign out and sign back into iCloud, re-enable Photos |
How to Prevent Future Photo Library Loss on Mac?
Prevention is the best form of recovery. Follow these tips to protect your photo memories long-term:
1. Enable Time Machine
Set up automatic backups to an external drive or Time Capsule. It's built into macOS and very reliable.
2. Use iCloud Photos with Full Downloads
Under Photos > Settings > iCloud, choose "Download Originals to this Mac" to ensure you have full-resolution local copies.
3. Manual Backups
Periodically copy your Photos Library.photoslibrary file to an external SSD or cloud service like Google Drive or Dropbox.
4. Avoid Unsafe Actions
- Don't force quit Photos while importing.
- Avoid third-party apps that alter your library file.
- Keep macOS and Photos updated.
5. Split Large Libraries
If your library exceeds 100 GB, consider creating multiple libraries to reduce risk of corruption and improve performance.
Conclusion
Restoring your Photos Library on Mac doesn't have to be a nightmare. Whether you’re recovering from accidental deletion, system failure, or file corruption, methods like Time Machine, iCloud Photos, external backups, and data recovery tools can help you get your memories back safely.
If you haven't already, create a regular backup routine and enable cloud sync to safeguard your photo collection for the future. Because nothing is more valuable than a lifetime of moments captured in pictures - and with the right strategy, they’ll never be lost.
Donemax Data Recovery for Mac
Donemax Data Recovery for Mac is one of the best Mac data recovery software. It is easy-to-use and can help in recovering deleted, formatted, inaccessible or lost data from Mac HDD/SSD, external disk, USB drive, SD card, camera or other storage devices.
Related Articles
- Feb 22, 2024How to Recover Lost Data from External Hard Drive, USB Drive, SD Card on macOS Sonoma?
- Aug 15, 2025How to Recover Lost WPS Office Documents on Mac?
- Jan 05, 2025Files on Mac Desktop Disappeared: How to Recover Them? [4 Methods]
- May 06, 2024What Is RTF File? How to Recover Deleted RTF Files on Mac?
- May 18, 2024Mac Documents Folder Emptied or Missed Suddenly – How to Recover Lost Files?
- Dec 02, 2024Can't Find Deleted Files in Trash on Mac: How to Recover Them

Contributing Writer
Christina
Christina is the senior editor of Donemax software who has worked in the company for 4+ years. She mainly writes the guides and solutions about data erasure, data transferring, data recovery and disk cloning to help users get the most out of their Windows and Mac. She likes to travel, enjoy country music and play games in her spare time.

Editor in chief
Gerhard Chou
In order to effectively solve the problems for our customers, every article and troubleshooting solution published on our website has been strictly tested and practiced. Our editors love researching and using computers and testing software, and are willing to help computer users with their problems