
Written byMariaUpdated on Sep 28, 2025
Migrate Data from macOS Sequoia to macOS Tahoe
Approved byGerhard Chou
Before we start: Before upgrading and migrating data from macOS Sequoia to macOS Tahoe, you can use Donemax Disk Clone for Mac to make a full clone backup for your current macOS data. It can help you protect data in case of issues happen.
PAGE CONTENT:
Upgrading your Mac to a new version of macOS is always exciting. Apple's latest release, macOS Tahoe, introduces performance improvements, design refinements, and new security features that make it a strong successor to macOS Sequoia. But before you dive into exploring Tahoe, there's one critical step you need to take—migrating your data safely and efficiently.
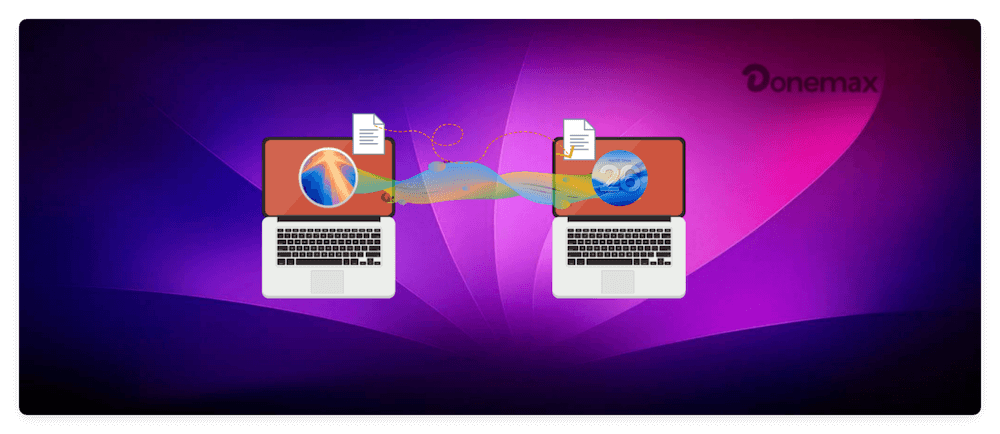
Whether you're moving from an older Mac running Sequoia to a new Mac pre-installed with Tahoe, or you've upgraded your existing Mac to Tahoe, ensuring that your files, apps, and settings make the journey without issues is essential. This guide walks you through multiple methods to migrate data from macOS Sequoia to macOS Tahoe, offers troubleshooting advice, and provides post-migration tips for a smooth transition.
Before Data Migration from macOS Sequoia to macOS Tahoe
Migrating data between two macOS versions may sound straightforward, but preparation ensures that you don't lose important files or run into compatibility issues. Here's what you need to do before starting the migration:
Check Hardware Compatibility
Not every Mac that runs Sequoia will support Tahoe. Visit Apple's official compatibility list to confirm that your device is eligible for the upgrade.
Update macOS Sequoia
Before migration, update Sequoia to its latest patch. Updates often improve Migration Assistant compatibility and fix bugs that could interfere with data transfer.
Back Up Your Mac
Always create a backup of your Sequoia system:
- Time Machine Backup – Connect an external drive and set up Time Machine.
- iCloud Backup – Store important documents, photos, and contacts in iCloud.
- External Storage – Copy critical files manually to a USB drive or SSD.
Ensure Internet & Power Stability
A stable internet connection is vital if you're using iCloud, while Migration Assistant may require both Macs to remain powered and connected for hours depending on data size.
Methods to Migrate Data from macOS Sequoia to macOS Tahoe
Apple offers several ways to migrate your data, each suited to different scenarios. Let's look at the most reliable options.
Method 1: Using Migration Assistant
Migration Assistant is Apple's built-in tool for transferring apps, settings, and files between Macs.
Migration Assistant is the most reliable way to move data from macOS Sequoia to macOS Tahoe. It transfers not just documents, but also user accounts, apps, and system settings, making your new Mac feel like your old one in no time. Here's a deeper look at the process:
Step 1: Prepare Both Macs
- Plug into power: Migration can take hours depending on data size, so keep both Macs connected to a power adapter.
- Update macOS: Make sure your Sequoia Mac is running the latest version of Sequoia. This minimizes compatibility issues with Tahoe.
- Free up space: Ensure the Tahoe Mac has enough storage to receive everything from the Sequoia Mac.
Step 2: Connect the Macs
You can connect the two Macs in different ways:
- Wired Connection (Recommended): Use a Thunderbolt or USB-C cable. This method offers the fastest and most stable transfer speed.
- Wireless Connection: Place both Macs on the same Wi-Fi network. It works fine but may be slower, especially with large files like videos.
💡 Pro Tip: If you're transferring hundreds of gigabytes of data, always use a cable instead of Wi-Fi.
Step 3: Launch Migration Assistant
- On both Macs, go to Applications > Utilities > Migration Assistant.
- On the Sequoia Mac (old), select "To another Mac."
![migrate data from macOS Sequoia to macOS Tahoe]()
- On the Tahoe Mac (new), select "From a Mac, Time Machine, or startup disk."
![migrate data from macOS Sequoia to macOS Tahoe]()

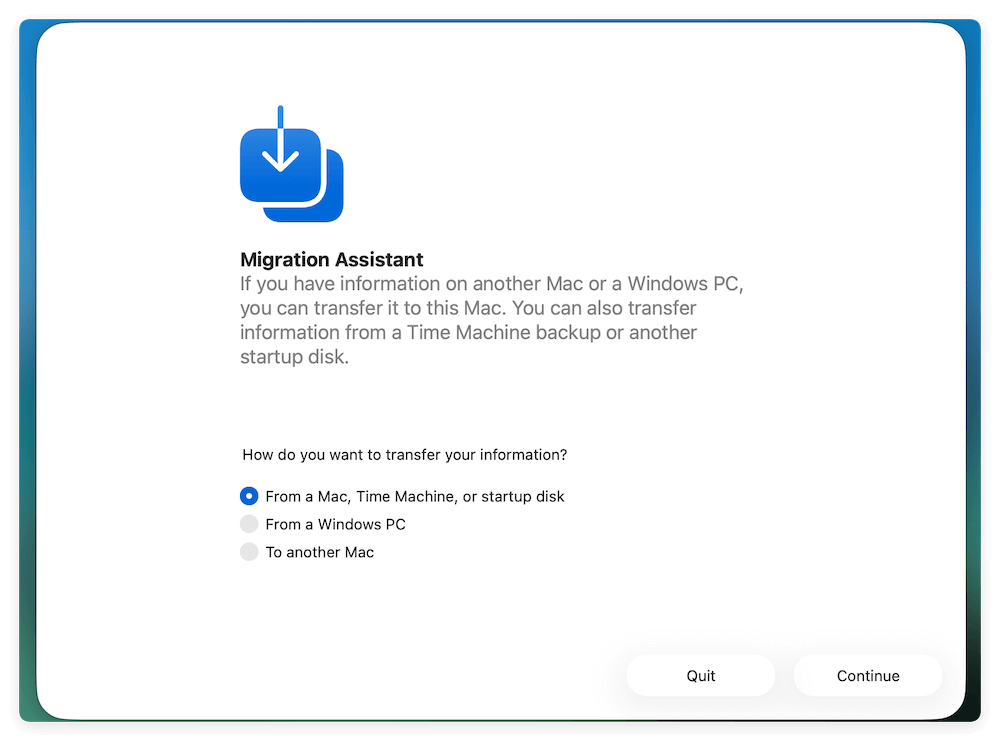
The Sequoia Mac should now appear on the Tahoe Mac's screen as a source device.
Step 4: Choose What to Migrate
Migration Assistant gives you several options:
- User Accounts – Transfers personal documents, desktop items, and user preferences.
- Applications – Moves your installed apps. (Some third-party apps may require reactivation or reinstallation later.)
- System Settings – Transfers Wi-Fi networks, accessibility options, language preferences, etc.
- Other Files and Folders – Copies shared files or additional data outside user accounts.
💡 Pro Tip: If you're moving from a heavily customized Sequoia setup, migrating system settings can save time. However, if you want a fresh start, migrate only user data and reinstall apps manually.
Step 5: Start the Migration
- Click Continue after selecting your migration options.
- The process may take anywhere from 30 minutes to several hours, depending on your data size.
- You'll see a progress bar on both Macs. Avoid interrupting the transfer.
Step 6: Complete Setup on macOS Tahoe
- Once the migration finishes, restart the Tahoe Mac.
- Log in with your transferred user account.
- Verify that your desktop, files, and applications appear as they did on the Sequoia Mac.
Best Practices for Migration Assistant
- Disable Firewalls & VPNs Temporarily – These can block Migration Assistant's network transfer.
- Close Other Apps – Running apps can slow down migration or cause file conflicts.
- Check Storage Beforehand – If your Tahoe Mac doesn't have enough free space, Migration Assistant will fail partway.
Pros
- Fast, complete, and reliable.
Cons
- Requires both Macs or a Time Machine backup.
Method 2: Using iCloud
If your data is primarily documents, photos, and mail, iCloud offers a simple way to sync everything across macOS versions.
- On your Sequoia Mac, ensure iCloud Drive, Photos, Mail, Contacts, and Calendar syncing are enabled.
- Upgrade or set up your Mac with Tahoe, then log in with the same Apple ID.
- Allow iCloud to sync all data to the new system.
Pros
- Automatic syncing, no cables required.
Cons
- Limited by iCloud storage plan (5GB free, more with subscription).
- Large files can take time depending on internet speed.
Method 3: Using Time Machine or External Drive
If you have a Time Machine backup, migration becomes simple.
- On the Sequoia Mac, create a fresh Time Machine backup.
- On the Tahoe Mac, open Migration Assistant and select "From a Time Machine backup."
- Connect the external drive and restore apps, settings, and files.
For manual migration, simply copy files from an external drive onto the Tahoe Mac.
Pros
- Reliable and independent of internet connection.
Cons
- Requires external storage and manual setup for apps.
Method 4: Using Third-Party Tools
Several third-party applications (like Donemax Disk Clone for Mac, Carbon Copy Cloner or SuperDuper!) allow you to clone your Sequoia system to a new Mac.
Donemax Disk Clone for Mac
- Most reliable disk cloning software for macOS Tahoe.
- Make an exact copy of data from your hard drive.
- Create bootable copy for the Mac system disk.
If you have a full clone for the macOS Sequoia, you can connect the cloned disk to the macOS Tahoe machine. Then check and copy the wanted data from the cloned backup to the macOS Tahoe drive manually.
Pros
- Advanced customization
- Full system clone.
Cons
- May not always work seamlessly with newer macOS versions.
- Additional cost.
Post-Migration Checklist
Once the transfer completes, don't assume everything is perfect—take time to verify.
- Check user accounts – Ensure all accounts are accessible.
- Verify files and folders – Open important documents, photos, and project files.
- Reinstall critical apps – Some third-party applications may need a fresh installation.
- Reconnect accounts – Re-add email accounts, cloud services, and VPNs.
- Check peripherals – Test printers, scanners, Bluetooth devices, and external drives.
- Run updates – Update apps from the App Store and run system updates in macOS Tahoe.
Tips for a Smooth Transition
- Keep backups handy – Don't delete your Sequoia backups immediately. Hold onto them for at least a week or two.
- Optimize storage – Use Tahoe's storage management tools to free space.
- Learn new features – Explore Tahoe's new functionalities like redesigned apps, privacy enhancements, or system optimizations.
- Test performance – Monitor CPU and memory usage to ensure your Mac is running smoothly post-migration.
Troubleshooting Migration Issues
Even with careful preparation, you may encounter hiccups. Here are solutions to common migration problems:
- Migration Assistant Stuck: Restart both Macs and try again using a wired connection. Disable any firewall or antivirus temporarily.
- Missing Files or Apps: Check iCloud for unsynced files or manually copy missing folders. Some apps may need reinstallation.
- Incompatible Applications: Older apps from Sequoia may not run on Tahoe. Visit the developer's website for an updated version.
- Slow Transfer Speeds: Switch to a direct cable connection instead of Wi-Fi for faster results.
Conclusion
Migrating data from macOS Sequoia to macOS Tahoe doesn't have to be stressful. With tools like Migration Assistant, iCloud syncing, or a Time Machine backup, you can ensure a seamless transition while keeping your files, apps, and preferences intact.
The key is preparation — back up your Mac data, verify compatibility, and choose the migration method that suits your needs. By following the steps outlined in this guide, you can safely enjoy macOS Tahoe's new features and performance enhancements without worrying about losing your valuable data.
Donemax Disk Clone for Mac
An award-winning disk cloning program to help Mac users clone HDD/SSD/external device. It also can create full bootable clone backup for Macs.
FAQs about Migrating Data from macOS Sequoia to macOS Tahoe
1. Can I migrate data wirelessly between Sequoia and Tahoe Macs?
Yes. Migration Assistant supports wireless transfer over Wi-Fi, though a wired Thunderbolt connection is faster.
2. Will my apps remain compatible after migration?
Most apps will work, but older 32-bit apps may not. Always check for updates before migration.
3. How long does migration usually take?
It depends on data size—small transfers may take under an hour, while large photo or video libraries can take several hours.
4. Do I need an Apple ID for migration?
You don't need it for Migration Assistant, but you'll need one for iCloud syncing and App Store re-downloads.
Related Articles
- Jun 15, 2023How to Clone A Hard Drive on Mac?
- Jun 08, 2024Time Machine Backup Could Not Be Completed, Fix This Issue
- Oct 08, 2023How to Create A Clone on macOS Sonoma?
- Jun 08, 2026Can Time Machine Create Bootable Clone for Mac? Fully Explained
- Jan 22, 2026How to Clone Disk on Mac OS X 10.11 El Capitan?
- Feb 25, 2024How to Make A Backup or Bootable Clone for M3-chip Mac?

Contributing Writer
Maria
Maria is one of the senior writers & editors of Donemax who lives and works in Sydney, Australia. She loves PC, Mac and Internet Technology. She has 6 years of writing articles about data recovery on PC/Mac, disk cloning solution, data eraser and computer OS optimization, etc. She is also interested in testing various software and digital products.

Editor in chief
Gerhard Chou
In order to effectively solve the problems for our customers, every article and troubleshooting solution published on our website has been strictly tested and practiced. Our editors love researching and using computers and testing software, and are willing to help computer users with their problems