Written byStevenUpdated on Jul 27, 2025
How to Customize Dock on Mac, How to Hide Dock on Mac?
Approved byGerhard Chou
PAGE CONTENT:
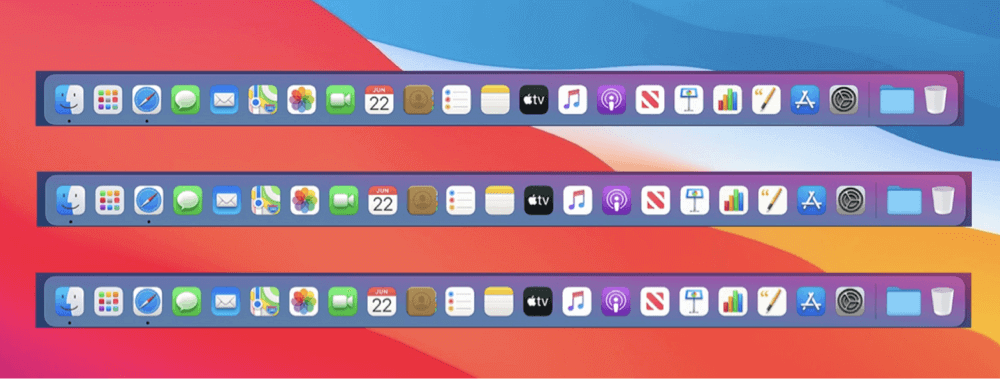
The Dock is a signature feature of macOS, giving users quick access to their favorite apps, folders, and minimized windows. While it's functional out of the box, customizing the Dock can improve workflow efficiency and give your desktop a personal touch. Whether you want to tweak its size, position it on a different screen edge, or hide it entirely when not in use, macOS gives you several built-in customization options. This comprehensive guide walks you through everything you need to know about customizing and hiding the Dock on a Mac.
What is the Dock on macOS?
The Dock is a bar typically located at the bottom of the screen that shows shortcuts to apps, folders like Downloads, open applications, and the Trash. It's one of macOS's most recognizable and used interface elements, streamlining the way users launch apps and manage open windows.
Since macOS Mojave and continuing through macOS Sonoma, Sequoia, and macOS Tahoe 26, the Dock has remained consistent in function but gained more flexible settings, allowing for deeper customization.

How to Customize the Dock on Mac?
1. Change Dock Size and Magnification
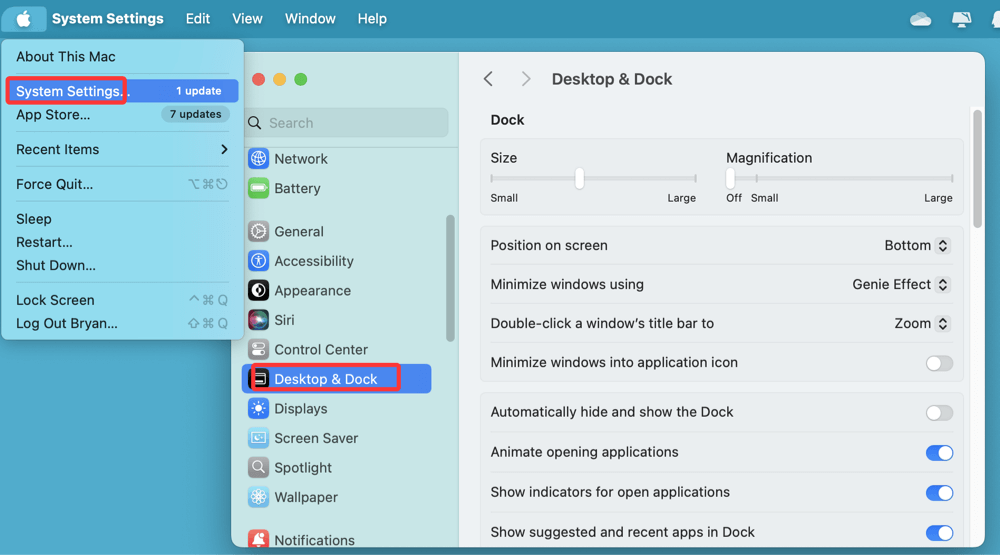
To start customizing, open System Settings > Desktop & Dock.
- Dock Size:
Adjust the slider under "Size" to make the Dock icons smaller or larger. A smaller Dock gives you more screen space, while a larger Dock makes app icons easier to click.
- Magnification:
Enabling magnification causes icons to grow as your cursor hovers over them. Use the "Magnification" slider to set how much they expand. This can be visually appealing and helpful for quick identification.
2. Change Dock Position (Bottom, Left, Right)
By default, macOS places the Dock at the bottom center of your screen, which works well for most users. However, depending on your workflow, screen size, or personal preference, you might benefit from relocating it to the left or right edge of the screen.
Why Change the Dock Position?
Relocating the Dock is more than just a cosmetic adjustment. It can improve your daily macOS usage in several ways:
- Maximize Vertical Space:
If you work with documents, code editors, or web browsers that benefit from more vertical real estate, moving the Dock to the left or right edge can free up crucial pixels on your display. This is especially helpful on MacBooks, where screen height is limited.
- Ultrawide Monitor Optimization:
Users with ultrawide or dual-monitor setups often prefer vertical Docks (left/right) because the horizontal space is abundant, while vertical space is more limited. Placing the Dock on the side allows you to better utilize that screen width.
- Ergonomic Preference for Left-Handed Users:
Left-handed individuals may find it more natural to interact with the Dock on the left side of the screen, especially when using a trackpad or mouse with the left hand.
- Better App Arrangement for Designers and Developers:
Creative professionals using Adobe tools (like Photoshop or Premiere) or IDE software (like Xcode or Visual Studio Code) often prefer side Docks so their toolbars and panels aren’t obstructed. It keeps the central workspace free of distractions.
How to Change Dock Position on Mac?
Changing the Dock’s location is easy and takes just a few clicks:
Using System Settings (macOS Ventura and Later):
- Click the Apple menu in the top-left corner of your screen.
- Go to System Settings > Desktop & Dock.
- Scroll down to find the section labeled "Position on screen."
![customizing and hiding the Dock on a Mac]()
- Choose from the three available options:
- Bottom (default)
- Left
- Right
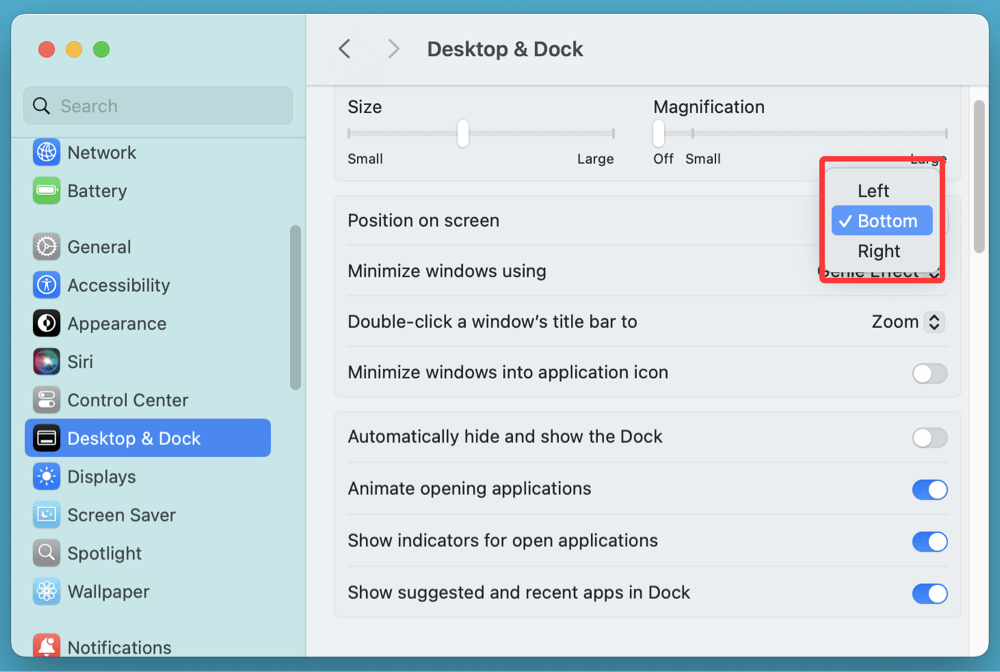
Your Dock will immediately shift to the selected edge of the screen.
Using System Preferences (macOS Monterey and Earlier):
- Go to System Preferences from the Apple menu.
- Select Dock & Menu Bar.
- Look for "Position on screen" and select Left, Bottom, or Right.
Drag-and-Drop Shortcut (macOS Trick)
There's also a quicker method using the mouse or trackpad:
- Move your cursor to the Dock separator line (the vertical line between app icons and the Trash).
- Hold down the Shift key, then click and drag the Dock to the left or right side of the screen.
- Release the mouse or trackpad to set the new position.
This is a lesser-known trick that can save time when you're already working in the Dock area.
3. Customize Minimize Effect
macOS offers two window minimization effects:
- Genie Effect: A stretching animation that mimics a genie being sucked into a lamp.
- Scale Effect: A simpler and faster animation that scales the window down.
To change this:
- Go to System Settings > Desktop & Dock.
- Select your preferred option under "Minimize windows using".
![customizing and hiding the Dock on a Mac]()
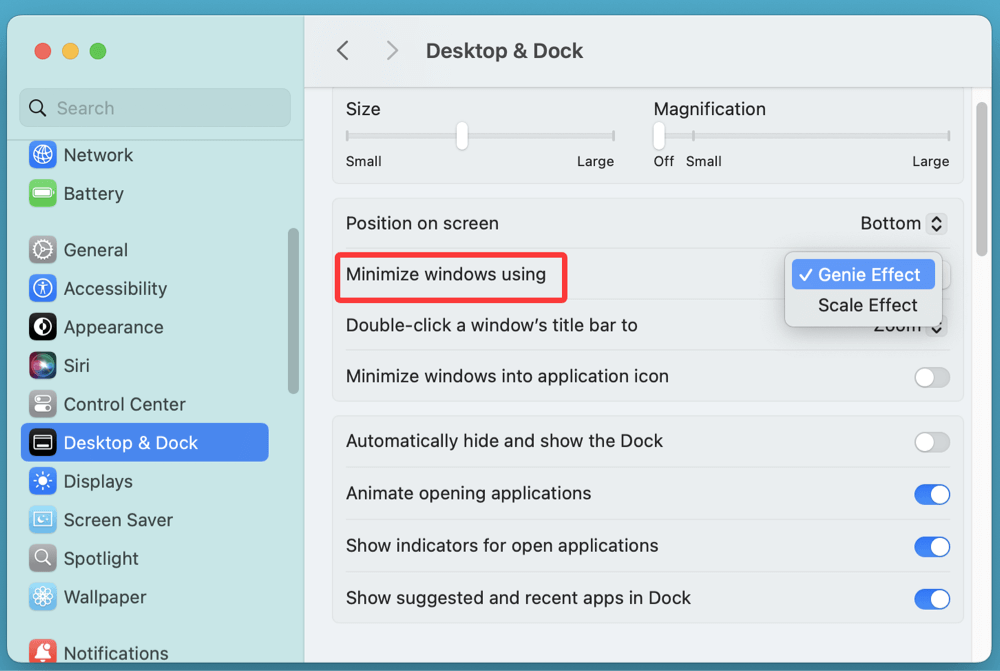
The Scale effect is faster and more efficient, especially on older Macs.
4. Enable or Disable Recent Applications in Dock
By default, macOS shows recently used apps in a separate section of the Dock. If you prefer a cleaner layout, you can disable this.
- Go to System Settings > Desktop & Dock.
- Toggle off "Show suggested and recent apps in Dock."
![customizing and hiding the Dock on a Mac]()
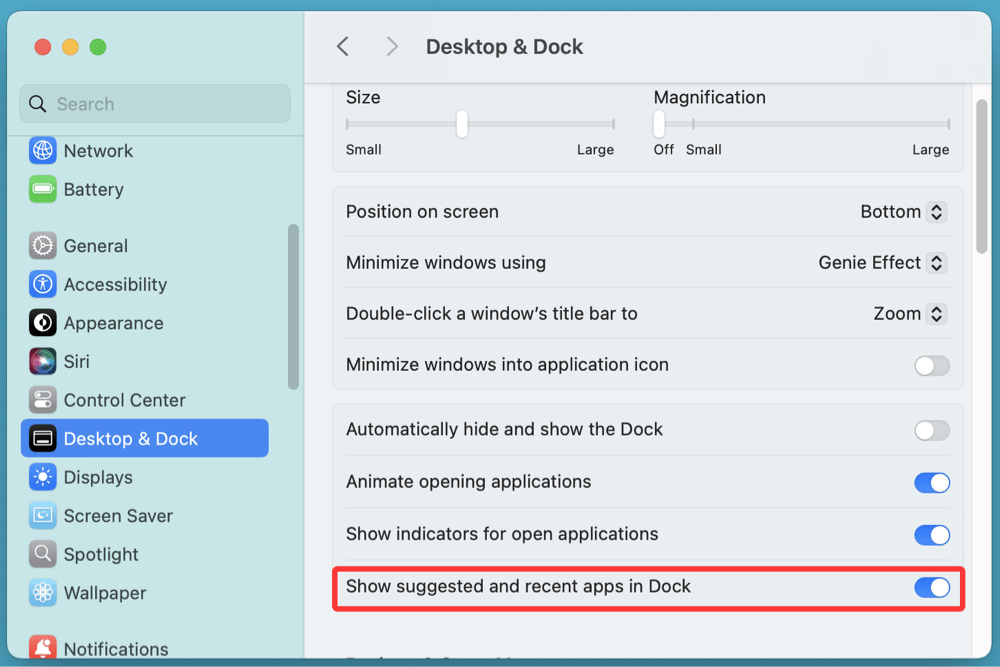
This declutters the Dock, especially if you already keep your frequently used apps pinned.
5. Show or Hide Indicators for Open Applications
macOS places a small dot below icons to indicate they are currently running.
To toggle this:
- Open System Settings > Desktop & Dock.
- Scroll to "Show indicators for open applications" and toggle on or off.
![customizing and hiding the Dock on a Mac]()
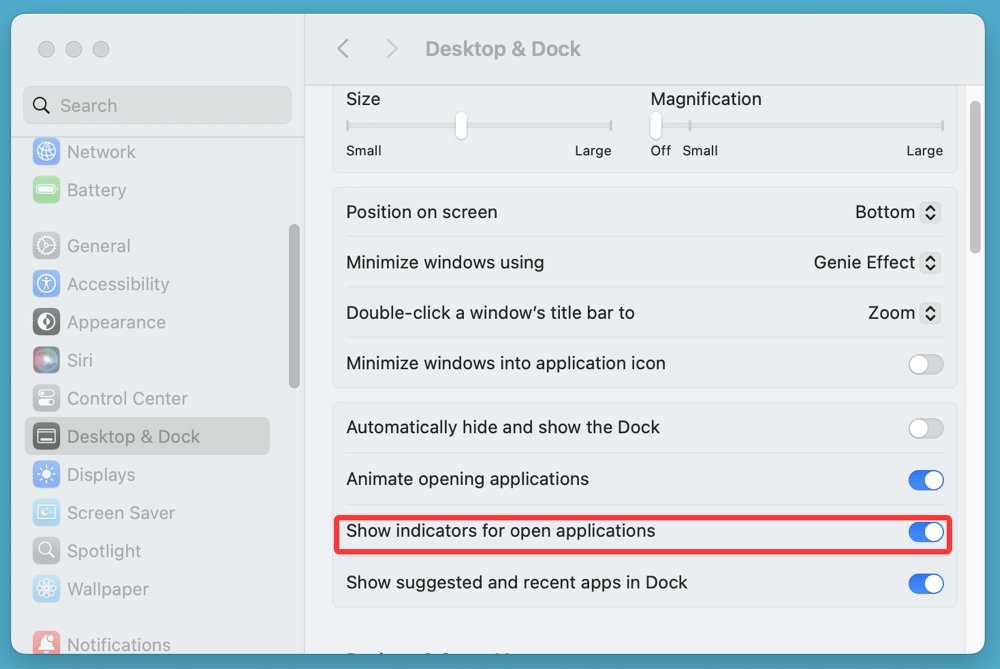
If you like a minimalist Dock, turning off indicators may be desirable. However, indicators help track running apps more easily.
6. Add or Remove Apps and Folders
To Add:
- Drag an app or folder from the Applications folder or Finder and drop it onto the Dock.
To Remove:
- Drag the item out of the Dock until a "Remove" or Trash icon appears, then release.
💡 Note: Removing an app from the Dock doesn't uninstall it - it just removes the shortcut.
7. Use Stacks to Organize Folders
Stacks automatically arrange folder contents by kind, date added, or tags.
To enable Stacks:
- Right-click (or Control + click) on a folder in the Dock.
- Select "Use Stacks".
Stacks are perfect for managing downloads or organizing screenshots in the Dock.
How to Hide the Dock on Mac?
Some users prefer a cleaner desktop or need more screen space for creative work. Here’s how to hide the Dock entirely or make it appear only when needed.
1. Enable Auto-Hide
This is the easiest and most commonly used method.
Steps:
- Go to System Settings > Desktop & Dock.
- Turn on the toggle for "Automatically hide and show the Dock."
![customizing and hiding the Dock on a Mac]()
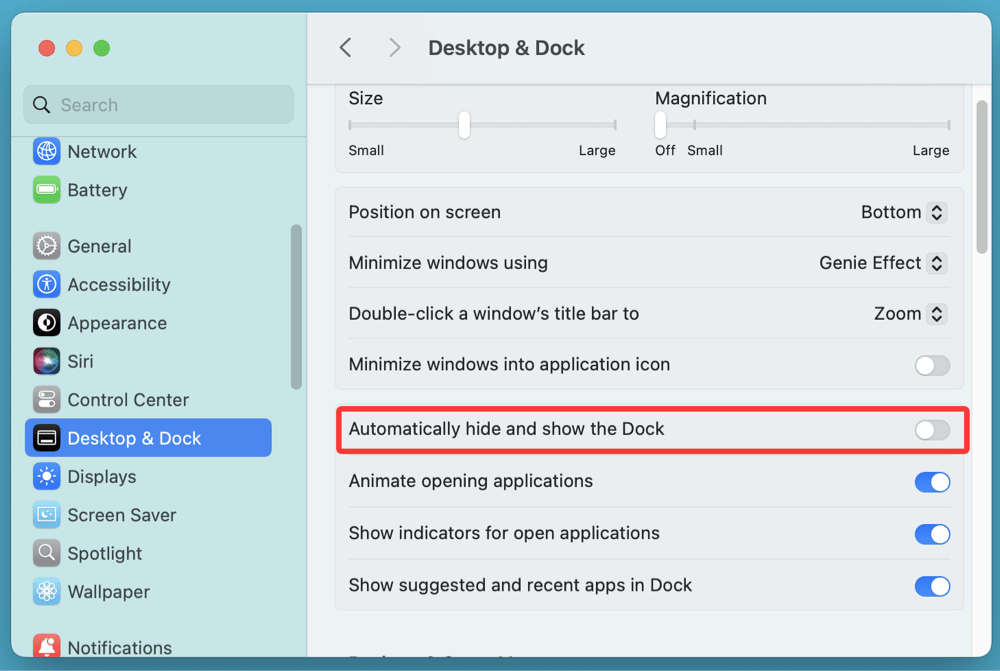
Alternatively, use the shortcut:
- Press Command (⌘) + Option + D to toggle hide/show instantly.
When enabled, the Dock disappears and reappears only when you move your cursor to the edge of the screen where the Dock is placed.
2. Customize Hide/Show Delay (Advanced Users)
By default, the Dock has a slight delay when auto-showing. You can reduce or remove this delay using Terminal.
To remove the delay:
- Open Terminal.
- Type the following command:
defaults write com.apple.dock autohide-delay -float 0
killall Dock
This removes the delay entirely.
To restore the delay:
defaults delete com.apple.dock autohide-delay
killall Dock
💡 Note: Use Terminal with care. Small changes can impact macOS behavior.
3. Temporarily Reveal the Dock
If the Dock is hidden:
- Move your cursor to the bottom, left, or right edge of the screen (depending on Dock position).
- It will slide into view and disappear when you move your mouse away.
This is perfect for distraction-free work while keeping apps accessible.
Additional Dock Tips and Tricks
1. Use Third-Party Tools for More Customization
Apple's built-in options are sufficient for most users, but power users may want more.
Recommended Tools:
cDock
- Offers theme changes, transparency control, spacing between icons, and more.
![customizing and hiding the Dock on a Mac]()

- Hide or unhide Dock on Mac.
- Optimize Mac operating system.
![customizing and hiding the Dock on a Mac]()
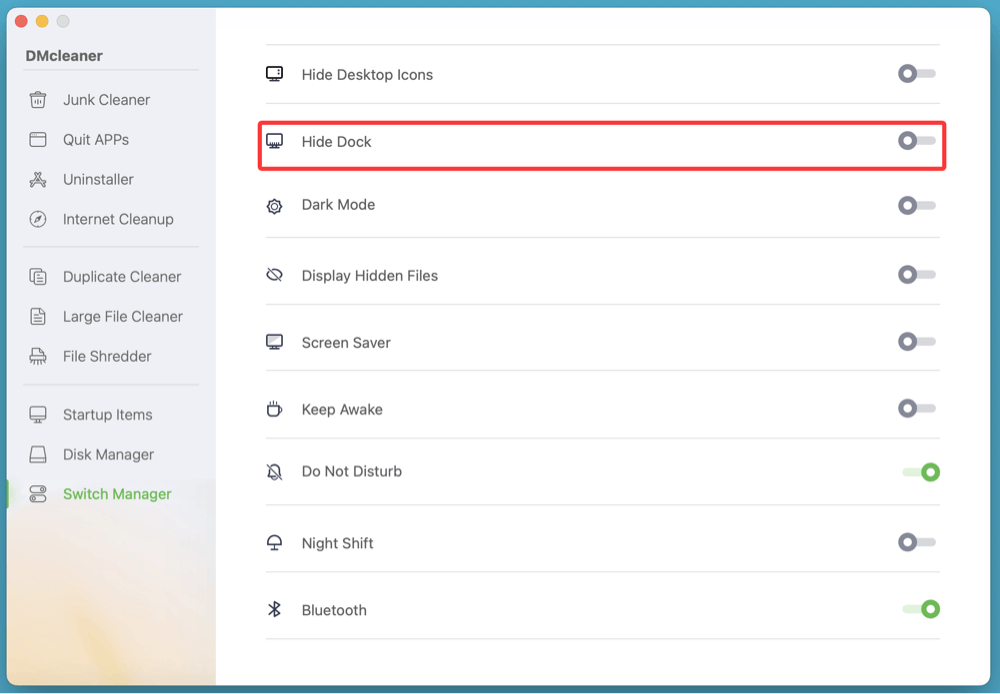
Always download third-party apps from trusted sources to avoid malware.
2. Customize with Terminal (Advanced)
Terminal offers additional tweaks that System Settings don’t expose.
Example Terminal Tweaks:
- Set icon size limit:
defaults write com.apple.dock tilesize -int 36
killall Dock - Disable bouncing icons for notifications:
defaults write com.apple.dock no-bouncing -bool TRUE
killall Dock - Reset Dock to default settings:
defaults delete com.apple.dock
killall Dock
Use these commands if you want a clean slate or wish to reverse previous tweaks.
Troubleshooting Dock Issues
Sometimes the Dock may not behave as expected. Here’s how to troubleshoot:
1. Dock Not Hiding or Showing
- Ensure auto-hide is enabled in System Settings > Desktop & Dock.
- Restart Dock:
killall Dock
2. Icons Missing or Apps Not Staying in Dock
- Re-add them manually.
- Ensure Dock preferences are not corrupted:
defaults delete com.apple.dock
killall Dock
3. Dock Freezes or Lag
- Restart your Mac.
- Run Activity Monitor, force quit the Dock if it's consuming high CPU.
Conclusion
The Dock on macOS is a powerful yet customizable feature. Whether you want a minimalist desktop, faster workflows, or a stylish Dock tailored to your taste, macOS provides plenty of native options - and even more through Terminal and third-party apps.
From resizing icons and repositioning the Dock to enabling auto-hide and advanced Terminal tweaks, you now have complete control over how the Dock behaves and looks. Small customizations can lead to significant improvements in both productivity and visual appeal. So, go ahead - experiment, personalize, and streamline your macOS experience today.
DMcleaner for Mac
Donemax DMcleaner for Mac is an award-winning Mac cleanup & maintenance application. It offers 10+ tools to help Mac users clean up junk data on Mac, uninstall unwanted apps & delete leftovers, shred files, delete duplicate files, free up disk space, speed up slow Mac, etc. It is also a smart switch manager for Mac, a powerful disk manager for Mac.
Related Articles
- Nov 07, 2024Downgrade from macOS Sequoia to macOS Sonoma or Earlier Versions
- Jul 03, 20267 Ways to Fix File System Verify or Repair Failed -69716 Error
- Jul 20, 2026How to Reinstall macOS Sequoia (Clean Install & Recovery Guide)
- Feb 06, 2025[7 Fixes] Fix Volume Hash Mismatch Error on Mac Without Losing Data
- Jan 12, 2025Fix First Aid Found Corruption That Needs to Be Repaired Without Losing Data on Mac
- Apr 15, 2025Accidentally Deleted Macintosh HD? Fix It Now

Contributing Writer
Steven
Steven has been a senior writer & editor of Donemax software since 2020. He's a super nerd and can't imagine the life without a computer. Over 6 years of experience of writing technical solutions and software tesing, he is passionate about providing solutions and tips for Windows and Mac users.

Editor in chief
Gerhard Chou
In order to effectively solve the problems for our customers, every article and troubleshooting solution published on our website has been strictly tested and practiced. Our editors love researching and using computers and testing software, and are willing to help computer users with their problems