PAGE CONTENT:
In this modern world, data is one of our most valuable assets. Whether it's cherished family photos, crucial work documents, or irreplaceable creative projects, losing data can be devastating. Fortunately, macOS users have a powerful tool at their disposal: Time Machine. This built-in backup feature provides an easy way to create regular backups of your Mac. In this article, we'll explore how to effectively restore macOS using a Time Machine backup, ensuring you're equipped to recover your data whenever needed.
What Is Time Machine Backup?
What Does Time Machine Back Up:
Time Machine is meant to automatically back up your complete system, including your operating system, apps, settings, and data. It captures snapshots of your data hourly, daily, and weekly, ensuring you have multiple restore points to choose from. This means that if you accidentally delete a file or your system crashes, you can easily revert to a previous version of your data.
How to Back Up Mac with Time Machine
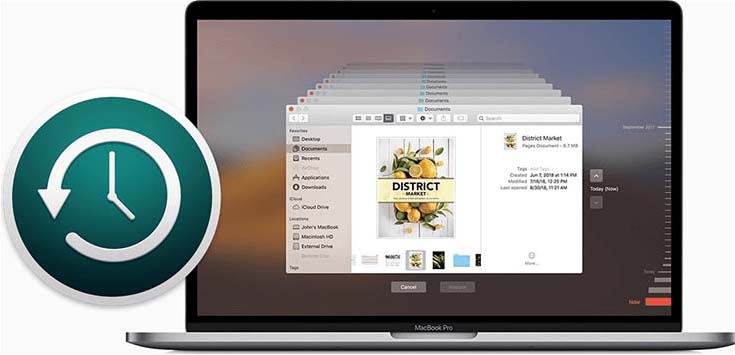
Connect an external hard drive to your Mac, set it as the backup disk. Time Machine will back up data from your Mac to the external hard drive automatically.
How Time Machine Works:
Time Machine only saves changes made since the last backup since it does incremental backups. This method gives you complete security while preserving storage space. Time Machine takes a complete system snapshot when you first set it up. Subsequent backups only include changes, making the process efficient and quick.
Requirements for Using Time Machine:
You require an external storage device, such as a network-attached storage (NAS) system or an external hard drive, in order to use Time Machine. Your backup drive should have enough capacity to store your data, typically at least double the size of the data being backed up. Additionally, ensure that your macOS is updated to the latest version for optimal compatibility and features.
Ensuring Your Time Machine Backup Is Up-to-Date:
Before restoring your system, it’s crucial to verify that your Time Machine backup is current. By selecting "Enter Time Machine" from the menu bar after clicking the Time Machine symbol, you may see the date of the most recent backup. This will allow you to see the most recent backup and confirm that it contains the files you need.
Preparing for Restoration macOS With Time Machine Backup
When to Consider Restoring:
There are several scenarios in which you might need to restore your macOS from a Time Machine backup. These include a system crash, accidental deletion of files, or when transitioning to a new Mac. Recognizing the right time to restore is crucial for minimizing data loss and ensuring a smooth recovery.
Verifying Your Time Machine Backup Drive:
Ensure that your Time Machine backup drive is attached and operating correctly before beginning the restoration process. Open Finder, locate the Time Machine drive, and check for any error messages or issues. If you encounter problems, resolve them before proceeding to avoid complications during the restoration process.
Safeguarding Recent Files:
If you have created or modified files since the last backup, consider saving them elsewhere before initiating the restoration. You can copy these files to a USB drive, cloud storage, or another external drive to ensure they remain safe during the restoration process.
Choosing Between Partial Restoration and Full System Recovery:
Decide whether you want to perform a full system recovery or restore specific files. A full recovery will revert your entire system to a previous state, while a partial restoration allows you to retrieve only certain files or folders. Understanding your needs will help you select the appropriate restoration method.
Ensuring Power Supply:
Depending on the size of the backup and the speed of the storage device, restoring macOS may take some time. Make sure your Mac is connected to a power source to prevent interruptions during the process.
With everything prepared, it's time to initiate the restore process.
How to Restore macOS Using Time Machine Backup?
The restoration process itself is fairly straightforward, thanks to Apple's user-friendly recovery system. Below are the detailed steps.
Step 1. Boot Into macOS Recovery.
You must boot into macOS Recovery mode in order to begin the restore procedure. This is how you do it:
- Shut Down Your Mac: In the upper-left corner of your screen, click the Apple logo, then choose "Shut Down."
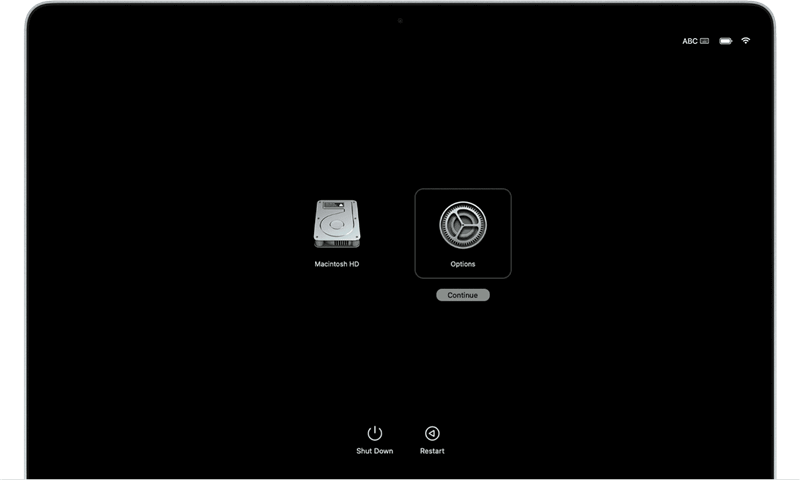
- Turn On Your Mac and Boot Into Recovery: Start up your Mac while holding down either Command + R (for Intel Macs) or just hold the power button (for Apple silicon Macs) until you see the startup options screen, then choose Options and click Continue button.
![choose Options and click Continue button]()
- Select macOS Recovery Mode: Once the macOS Utilities or Recovery app window appears, you are now in Recovery mode.
Step 2. Select the Time Machine Backup.
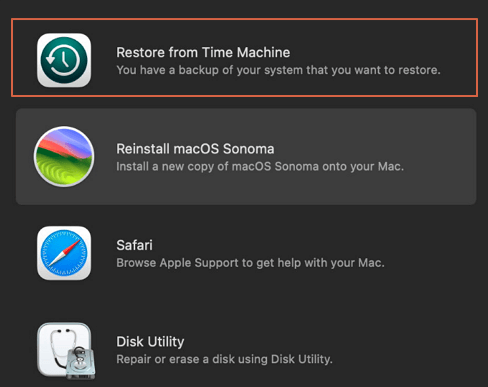
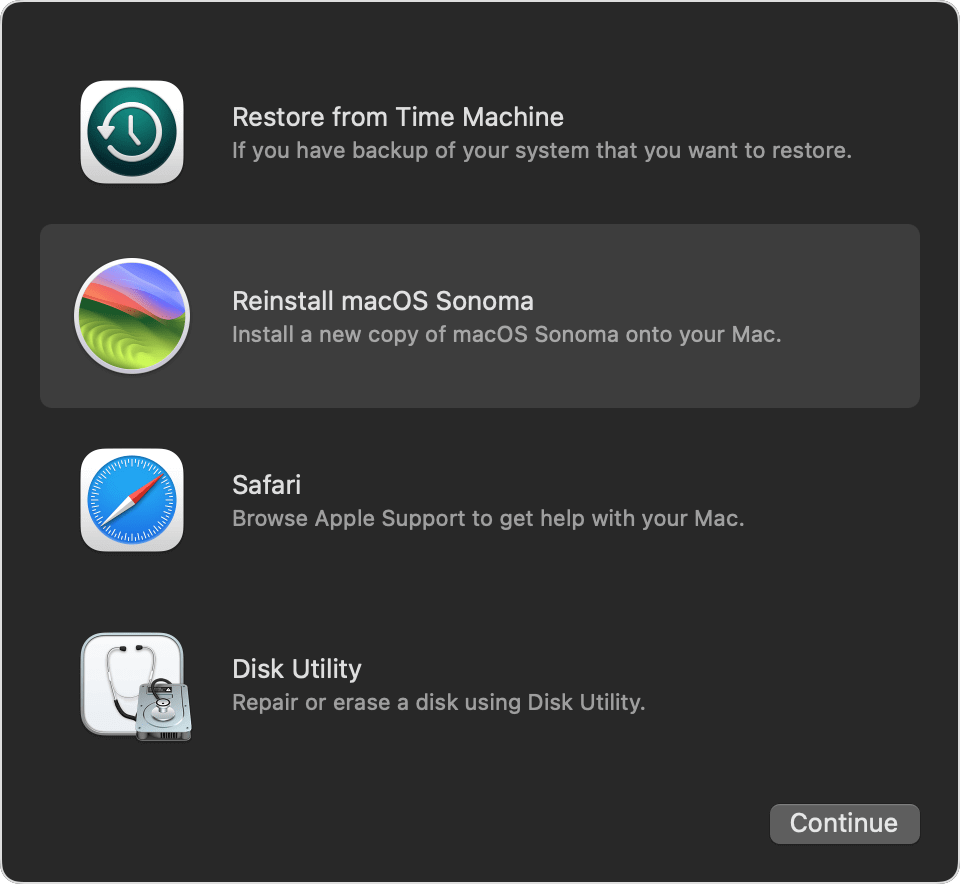
Once you've successfully entered Recovery mode, you will be presented with a few options. Choose "Restore from Time Machine" and follow these steps:
- Connect Your Time Machine Backup Drive: If your backup is stored on an external drive, make sure it's connected to your Mac.
- Select Your Time Machine Backup: The macOS Recovery window will list all available Time Machine backups. Select the drive that contains your Time Machine backup and click "Continue."
![Select Your Time Machine Backup]()
- Select the Backup to Restore: After selecting the backup drive, you will be prompted to choose a specific backup based on date and time. Select the most recent one, or the one that contains the data you need.
- Choose the Target Disk: Once the backup is selected, you'll be asked to choose the target disk (where macOS will be restored). This will usually be your Mac's internal drive.
Step 3. Begin the Restore Process.
The restoration procedure will start as soon as you choose the target disk and your Time Machine backup. This might take many hours or a few minutes, depending on the amount of your backup and the speed of the storage devices.
During the process:
- Do not turn off your Mac or disconnect it from power.
- If the restore takes a long time, be patient. It's crucial not to interrupt the process, as doing so could corrupt the system or data.
Once the restore is complete, your Mac will reboot, and you'll be taken to the familiar login screen. From here, everything should appear exactly as it was at the time of the backup - your apps, settings, and files will all be restored.
💡Using the Time Machine Interface within Finder
- Go to the original location of the deleted file in the folder.
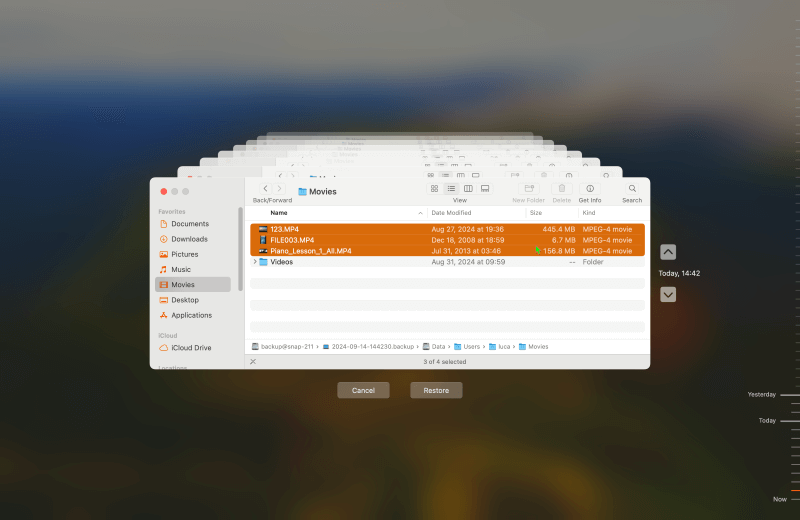
- Select "Enter Time Machine" or "Browse Time Machine Backups" after clicking the Time Machine symbol in the menu bar.
- To find the version of the file or folder you want to restore, navigate through the timeline on the right side of the screen.
- After locating the required file, pick it and press "Restore." The file will go back to where it was.
![Using the Time Machine Interface within Finder]()
💡Replacing vs. Keeping Both Versions of Files
If you attempt to restore a file that already exists on your system, macOS will ask if you want to replace the existing file or keep both versions. Choose according to your needs - if you want to retain the most recent version alongside the restored one, select "Keep Both."
Post-Restoration Tasks
Verifying the Restoration:
Making sure everything is working properly is crucial after the restoration procedure. Verify that all of your settings, programs, and files are still there. Open essential applications and files to ensure they operate as expected.
Troubleshooting Common Issues:
Sometimes, users encounter problems post-restoration, such as missing files or applications not functioning properly. If you notice any discrepancies, consider re-checking your Time Machine backups to see if they were properly saved. You can also access Time Machine again to restore additional files that may not have been included in the initial restoration.
Resetting Up Peripherals, Apps, and System Settings:
Depending on the extent of the restoration, you may need to reset some peripheral devices (like printers or external monitors) and reconfigure certain application settings. Make a list of any peripherals or apps you frequently use and ensure they are correctly set up after restoration.
Common Pitfalls and How to Avoid Them
Not Having a Recent or Reliable Backup:
One of the most significant pitfalls is not having a recent backup. To avoid this, set up Time Machine to back up automatically, and regularly check that your backups are successful. Schedule periodic reviews of your backup settings and storage capacity.
Issues with the External Drive:
Sometimes, users encounter issues with their Time Machine backup drives, such as corruption or disconnection. To prevent this, regularly check the health of your backup drive, and consider using multiple backup solutions for added redundancy.
What to Do If Time Machine Backup Is Corrupted or Not Working:
If you discover that your Time Machine backup is corrupted or not functioning, do not panic. First, try to verify the backup by accessing it through Finder. If the backup is indeed corrupted, you may need to consider alternative recovery options, such as third-party recovery software or restoring from a different backup method.
💡Alternative Methods to Restore macOS
While Time Machine is an excellent solution for restoring macOS, there are other methods available for recovery:
Using macOS's Built-in Recovery Without Time Machine:
If you don't have a Time Machine backup, you can still restore your Mac using macOS Recovery. This method involves reinstalling macOS from the internet or recovery partition. To do this, boot into Recovery Mode, select "Reinstall macOS," and follow the on-screen prompts. Note that this will install a fresh copy of macOS, and you may lose personal files unless they are backed up elsewhere.
Other Third-Party Tools or Cloud Backup Services:
In addition to Time Machine, consider utilizing third-party backup solutions or cloud services, such as Backblaze or Carbonite. These options often provide continuous backup capabilities and additional features for managing your data. They can serve as a supplementary method to protect your information.
Conclusion
Restoring macOS using Time Machine is a straightforward process that can save you from data loss and system issues. By understanding how Time Machine works, preparing for restoration, and following the procedures described in this article, you can quickly recover your system and data when needed. Remember to maintain regular backups and stay proactive about your data security. With Time Machine as part of your backup strategy, you can enjoy peace of mind knowing that your valuable files are safe and accessible whenever you need them.
Related Articles
- Jun 12, 2025Factory Reset macOS Catalina: Step-by-Step Guide
- Oct 18, 2024How to Upgrade to macOS Sequoia (for Intel-based/T2/Apple silicon Macs)?
- Nov 20, 2024How to Clean Install macOS Big Sur -Step-by-step Guide
- Aug 19, 2025How to Delete Installed Windows OS on Mac?
- Dec 26, 2024How to Format an NTFS Drive to APFS, HFS+, ExFAT, or FAT32 on Mac?
- Nov 18, 2025How to Compress Files on Mac – Guide 2025

Christina
Christina is the senior editor of Donemax software who has worked in the company for 4+ years. She mainly writes the guides and solutions about data erasure, data transferring, data recovery and disk cloning to help users get the most out of their Windows and Mac. She likes to travel, enjoy country music and play games in her spare time.

Gerhard Chou
In order to effectively solve the problems for our customers, every article and troubleshooting solution published on our website has been strictly tested and practiced. Our editors love researching and using computers and testing software, and are willing to help computer users with their problems
