
Written byStevenUpdated on Aug 19, 2025
How to Delete Installed Windows OS on Mac?
Approved byGerhard Chou
Before we start: Before deleting Windows OS from Mac, it's better to back up your data. If you removed Windows from Mac without backing up data, you can use the software Donemax Data Recovery for Mac to get back the missing files.
PAGE CONTENT:
Installing Windows on a Mac using Apple's Boot Camp Assistant offers the best of both worlds—macOS for creative and productivity tasks, and Windows for games or specific software. But as your storage fills up or your needs change, you may decide it's time to reclaim that disk space. Whether you no longer need Windows or want to clean up your Mac's hard drive, removing the Windows partition must be done carefully to avoid losing macOS data.
In this comprehensive guide, you'll learn multiple ways to delete installed Windows OS on Mac, including using Boot Camp Assistant, Disk Utility, and even third-party tools when needed.
Why Delete Windows from Mac?
There are several legitimate reasons to remove Windows from a dual-boot Mac setup:
- Free up storage space: The Windows partition can consume over 50GB or more.
- No longer needed: You've stopped using Windows-only apps.
- Performance optimization: Fewer partitions can mean better disk performance.
- System cleanup: Planning to reinstall or reconfigure Boot Camp.
Before proceeding, ensure that you don't need anything from the Windows partition—once deleted, the data is unrecoverable unless previously backed up.
How Boot Camp Works on Mac
Apple's Boot Camp Assistant helps users partition their disk and install Windows on Intel-based Macs. It creates a separate NTFS-formatted partition, typically named BOOTCAMP, where the Windows operating system resides.
macOS and Windows remain completely separate—Boot Camp is not virtualization. At startup, you can choose which OS to boot into.
Deleting Windows means removing the Boot Camp partition and merging the space back into the macOS partition.
Backup Important Windows Data First
Before doing anything, back up any data stored on the Windows side:
- Use an external USB or cloud storage.
- Transfer important files like documents, game saves, or downloaded media.
- Deactivate licenses of Windows-only software if needed.
Once the Windows partition is removed, the data is gone for good.
Methods to Remove Windows from Mac
Method 1: Remove Windows Using Boot Camp Assistant
If you installed Windows on your Mac using Boot Camp Assistant, the best and safest way to remove it is by using the same tool that created it. Boot Camp Assistant is a built-in macOS utility that helps partition your Mac's internal drive and guides you through Windows installation. Thankfully, it also offers a straightforward process to reverse it.
Why This Method Is Recommended
Boot Camp Assistant automates the entire removal process. It:
- Deletes the Windows (BOOTCAMP) partition safely.
- Merges the freed-up space back into your main macOS partition.
- Avoids risky disk modifications or use of third-party apps.
- Requires no technical knowledge, making it ideal for most users.
💡 Tips: This method is only available on Intel-based Macs. If you're using an Apple Silicon Mac, you likely used virtualization software (like Parallels) instead, and Boot Camp will not be available.
Here are the steps:
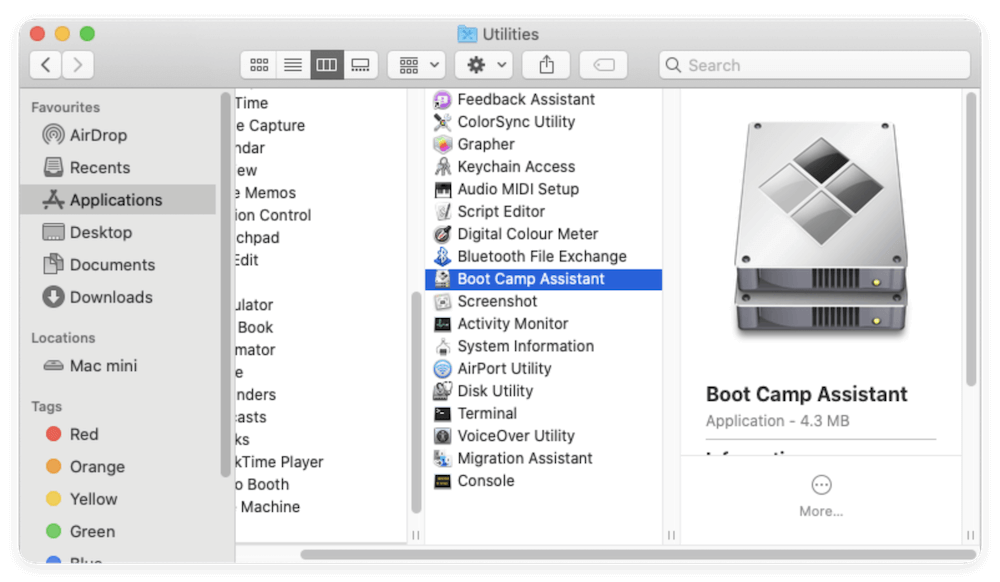
- Open Boot Camp Assistant. Go to Boot Camp Assistant from Utilities via Applications.
![delete Windows from Mac]()
- Choose the "Remove Windows" Option. Boot Camp will detect the Windows partition and ask if you want to remove it.
![delete Windows from Mac]()
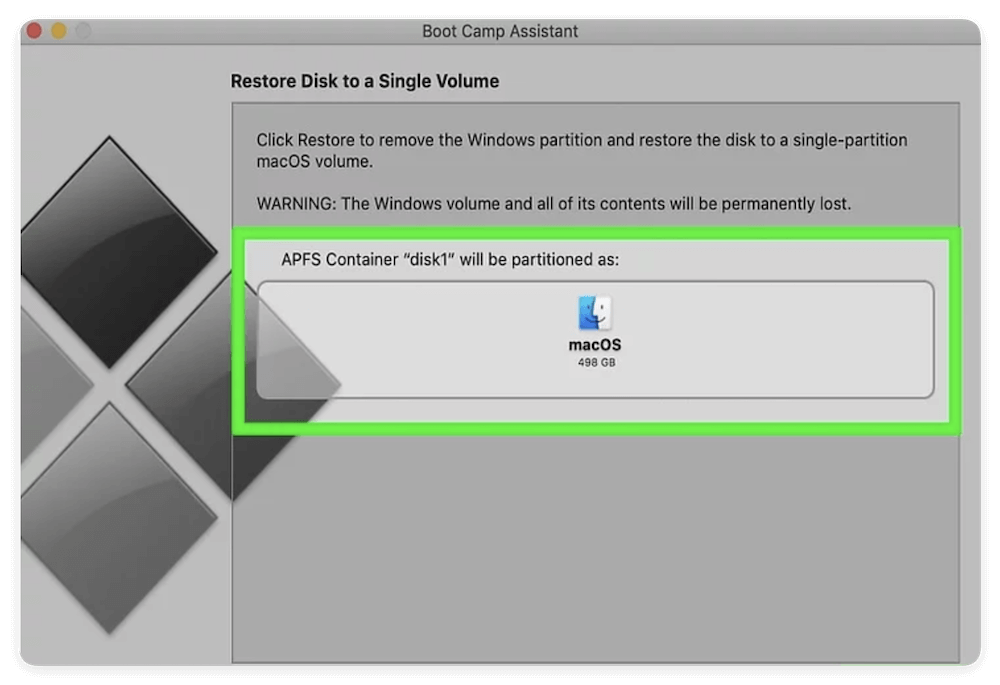
- Click Continue and you'll be prompted to remove the Windows partition and restore the disk to a single macOS partition.
![delete Windows from Mac]()
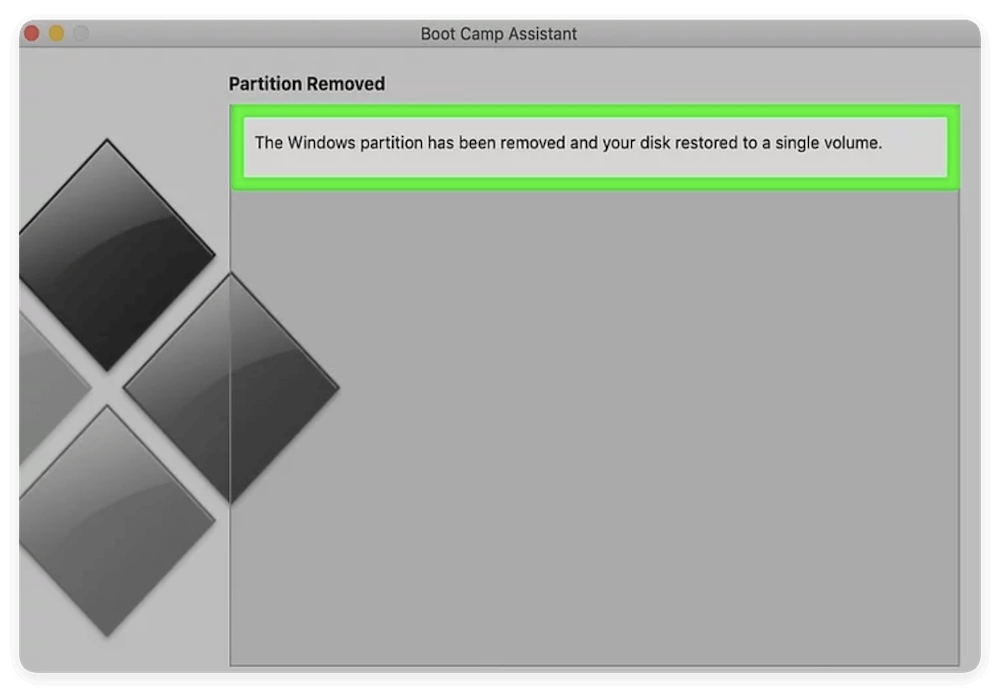
- Wait for completion. The process may take several minutes. Once finished, your Mac will be back to having only macOS installed.
![delete Windows from Mac]()

Benefits:
- Safe and automatic partition merging.
- No risk of deleting macOS data.
- No need for Terminal or complex disk operations.
What If Boot Camp Assistant Doesn't Show the Option?
Sometimes Boot Camp Assistant may not recognize your Windows installation, or the "Remove Windows" button may be grayed out.
This can happen due to:
- Modified partitions using third-party tools.
- A corrupted BOOTCAMP partition.
- macOS version incompatibility or system file issues.
If this happens:
- Run First Aid in Disk Utility to fix partition issues.
- Try restarting your Mac and re-opening Boot Camp Assistant.
- If the problem persists, you'll need to resort to other methods.
Post-Boot Camp Removal Tips:
After removal, it's a good idea to:
- Restart your Mac to ensure only macOS boots.
- Open Disk Utility and verify your disk has a single partition.
- Run First Aid on your main volume to check for minor file system inconsistencies.
When Boot Camp Assistant Doesn't Work
Common issues and solutions:
Problem 1: "Restore Disk to a Single Volume" is Grayed Out
Cause: Corrupt partitions or third-party modifications.
Fix:
- Run Disk Utility and use First Aid.
- Manually delete partitions.
- Use Terminal to inspect disk with diskutil list.
Problem 2: Boot Camp Assistant Won't Open
Cause: Missing system files or unsupported Mac.
Fix:
- Reinstall macOS utilities using macOS Recovery.
- Update macOS.
Problem 3: "Startup Disk is Full"
Fix: Free up space or use external storage to complete partition removal.
Method 2: Manually Remove Windows Partition Using Disk Utility
If Boot Camp Assistant isn't working or the "Remove Windows" option is unavailable, you can manually delete the Windows partition using Disk Utility.
🎈 Warning: This method carries higher risk. Proceed with caution and back up your Mac beforehand.
Here are the detail steps:
- Open Disk Utility: Navigate to Disk Utility from Utilities via Applications.
- Identify the Windows Partition: Look for a partition named BOOTCAMP or labeled as MS-DOS (FAT32) or ExFAT.
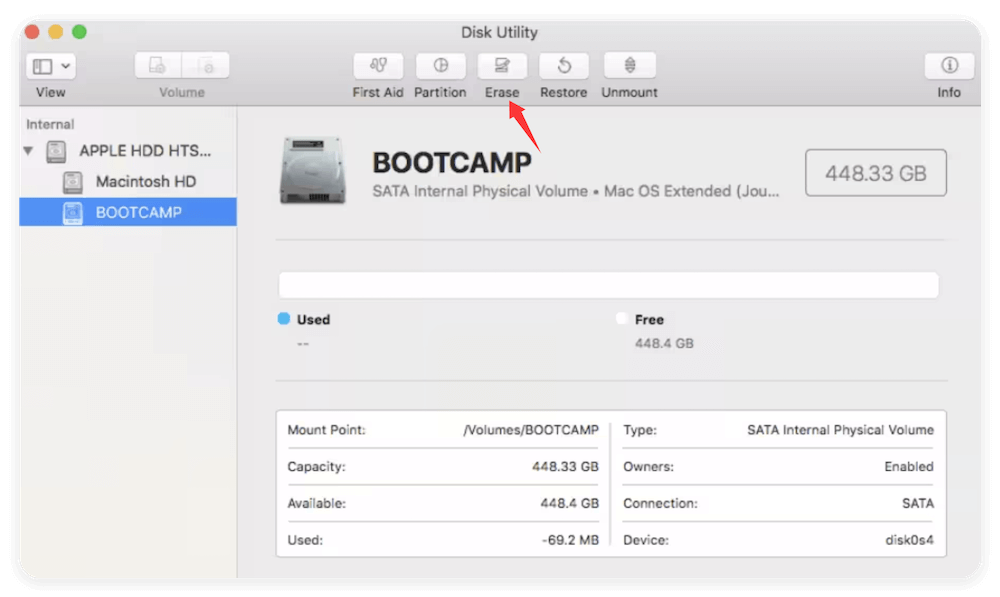
- Delete the Partition: Select the Windows volume. Click the Erase or Delete Volume button.
![delete Windows from Mac]()
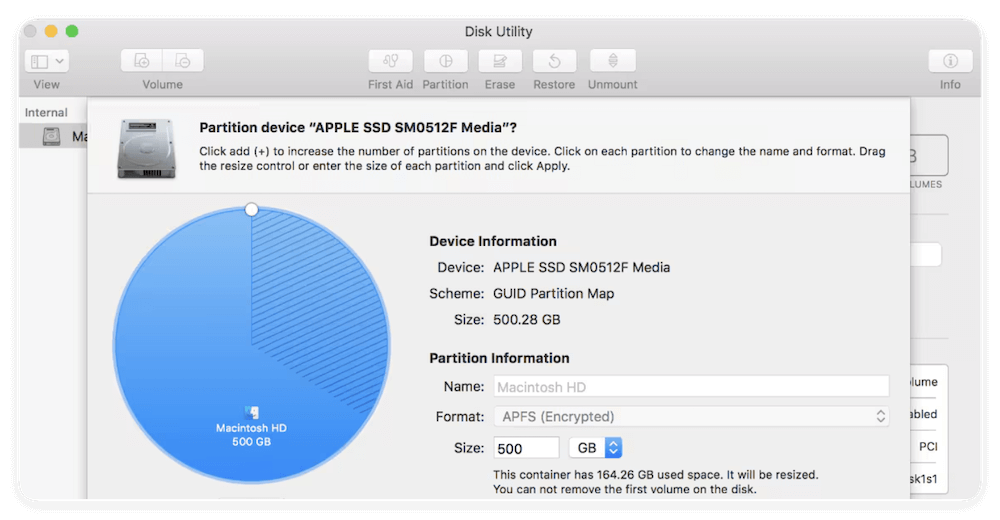
- Reclaim the Space: Select the macOS partition (typically named "Macintosh HD"). Click Partition or Resize and extend it to take over the free space left by Windows.
![delete Windows from Mac]()
- Apply Changes: Click Apply to commit the changes. The macOS partition will then use the full space of the disk after the resizing operation is done.
![delete Windows from Mac]()

Troubleshooting Tips:
- If resizing fails, use Terminal with diskutil commands.
- If Disk Utility greys out the partition, you may need to boot into macOS Recovery Mode (Command + R on startup).
Method 3: Use Terminal (Advanced Users Only)
If Disk Utility isn't working or showing errors, Terminal offers command-line precision. This should be a last resort for experienced users.
Here is how to do it step by step:
- Launch Terminal: Found in Terminal from Utilities via Applications.
- List All Disks: Use the command diskutil list to identify the disk and partition ID for Windows (e.g., disk0s4).
![delete Windows from Mac]()
- Delete the Windows Partition: Using the command sudo diskutil eraseVolume free none /dev/disk0s4
![delete Windows from Mac]()
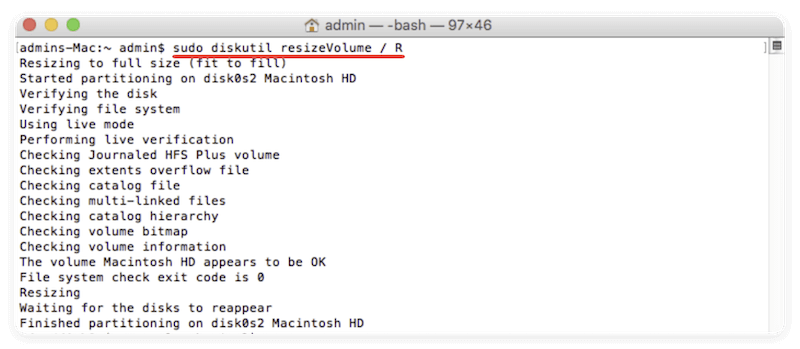
- Merge Free Space into macOS Partition: First, get the macOS disk ID, then run the command: sudo diskutil resizeVolume R. This will resize the Volume at / (Macintosh HD) to the maximum (R).
![delete Windows from Mac]()


One wrong command could delete macOS. Double-check everything before pressing Enter.
Method 4. Use Third-Party Disk Tools (If Necessary)
If all else fails, third-party tools can help manage or delete problematic partitions.
Top Recommendations:
- Paragon Hard Disk Manager for Mac: Professional-grade disk management tool with a graphical interface.
- GParted Live USB: A Linux-based partition editor. Advanced users can boot from a USB and edit partitions.
Use only trusted tools from official websites. Backup before using third-party apps.
Post-Removal Steps
After deleting the Windows partition:
- Restart Your Mac: Boot normally and check that Windows is no longer a boot option.
- Check Available Storage: Go to Apple Menu > About This Mac > Storage to confirm reclaimed space.
- Run First Aid in Disk Utility: Verifies and repairs the disk structure after changes.
- Reinstall macOS (Optional): If you encounter boot issues or corruption, reinstall macOS using Recovery Mode.
Recover Lost Files after Deleting Windows from Mac
If data loss happened while removing the installed Windows on Mac, you can still try to get back the files by using the professional data recovery software. First, stop writing new data to the disk once you find files are missing. Second, use a reliable recovery tool, like Donemax Data Recovery for Mac, to recover data.
Recover lost files is easy with Donemax Data Recovery. You can quickly get back missing data within a few clicks. Here is how:
Step 1. Launch the data recovery software. Then choose the disk where you lose data. As for the deleted Windows, you can select the system disk of Mac.

Step 2. After clicking the Scan button, the software will start to deeply scan the disk and search for any possible missing files.

Step 3. At last, check and locate the wanted files once the scan is finished. You can also preview the files before recovering. Then choose the files and click Recover button to save the files to another drive.

FAQs about Deleting Windows from Mac
🇶1: Will deleting Windows also delete Boot Camp Assistant?
No. Boot Camp Assistant remains part of macOS and can be used later to reinstall Windows.
🇶2: Can I reinstall Windows in the future?
Yes. Just launch Boot Camp Assistant again and repeat the installation process.
🇶3: Does this affect macOS data or settings?
Not if done correctly. Always use Boot Camp Assistant or follow partitioning steps carefully.
🇶4: Will deleting Windows void my warranty?
No. Removing or adding partitions using Apple tools does not void your warranty.
🇶5: Can I delete Windows from M1/M2 Macs?
Apple Silicon Macs (M1/M2/M3) do not support Boot Camp. They use virtualization (e.g., Parallels) instead.
Conclusion
Deleting an installed Windows OS from your Mac is a straightforward process when using Boot Camp Assistant, and only slightly more complex when done via Disk Utility or Terminal. Always start with Boot Camp if possible—it's the safest method. Manual partition management should only be used when Boot Camp is unavailable or fails.
Key Takeaways:
- Backup Windows data before deleting.
- Use Boot Camp Assistant whenever available.
- Carefully merge the partition back into macOS.
- Don't rush—partition changes are sensitive.
By following the instructions in this guide, you can safely reclaim disk space, improve your Mac's performance, and return to a macOS-only setup without complications.
Donemax Data Recovery for Mac
Donemax Data Recovery for Mac is one of the best Mac data recovery software. It is easy-to-use and can help in recovering deleted, formatted, inaccessible or lost data from Mac HDD/SSD, external disk, USB drive, SD card, camera or other storage devices.
Related Articles
- Feb 09, 2025[7 Solutions] Fix Storage System Verify or Repair Failed 69716 Error on Mac
- Apr 17, 20267 Ways to Fix XProtectService High CPU Usage on Mac (2026)
- Jun 09, 2025How to Open a BitLocker Encrypted USB Drive/External Disk/SD Card on Mac?
- May 22, 2026How to Use SD Card on Mac – A Complete Guide
- Jun 10, 2026Fix: Disk Utility Erase Button Greyed Out When Erasing Disk
- Jun 06, 2025Sabrent Rocket External SSD Not Mounting on Mac, Fix It Now

Contributing Writer
Steven
Steven has been a senior writer & editor of Donemax software since 2020. He's a super nerd and can't imagine the life without a computer. Over 6 years of experience of writing technical solutions and software tesing, he is passionate about providing solutions and tips for Windows and Mac users.

Editor in chief
Gerhard Chou
In order to effectively solve the problems for our customers, every article and troubleshooting solution published on our website has been strictly tested and practiced. Our editors love researching and using computers and testing software, and are willing to help computer users with their problems