
Written byCharlesUpdated on Jun 04, 2025
How to Upgrade My Computer SSD to WD Black SN850X?
Approved byGerhard Chou
Before we start:: To upgrade computer SSD to WD Black SN850X smoothly and ensure the cloned drive will be bootable, download and try the professional disk copy tool Donemax Disk Clone.
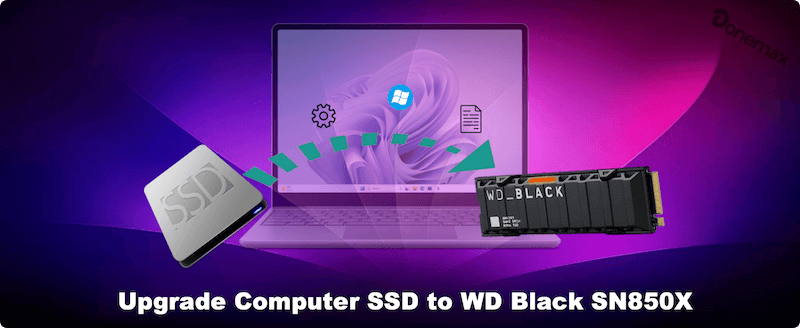
Upgrading your SSD is one of the most meaningful ways to boost your computer's performance. Whether you're a gamer looking to reduce load times or a creative professional managing large files, the right storage upgrade can significantly improve your workflow. The WD Black SN850X, Western Digital's high-performance NVMe SSD, stands out as one of the best choices for those seeking speed, reliability, and cutting-edge features. In this guide, we'll walk you through how to upgrade your current SSD to the WD Black SN850X step-by-step.
Why Upgrade Computer SSD to the WD Black SN850X?
The WD Black SN850X is engineered for extreme performance and is particularly popular among gamers, content creators, and power users. Here's why it's worth considering:
- Blazing Fast Speeds: With read speeds up to 7,300 MB/s and write speeds up to 6,600 MB/s (on Gen4 platforms), it dramatically reduces boot times, game loading, and file transfer delays.
- PCIe Gen4 Interface: Offers double the bandwidth of Gen3 NVMe SSDs.
- Thermal Management: Comes with an optional heatsink to prevent thermal throttling under heavy loads.
- WD Black Dashboard: Software for drive monitoring, firmware updates, and performance tuning.
- Reliability: Endurance up to 1,200 TBW (terabytes written), ensuring long-term durability.
Step 1: Check Compatibility with WD Black SN850X
Before purchasing or installing the WD Black SN850X, confirm that your system supports it.
1. Motherboard Support
Your system must have an M.2 slot that supports PCIe NVMe SSDs, not just SATA-based M.2 drives. Ideally, the motherboard should support PCIe Gen4 x4 to fully benefit from the SN850X's speed.
Check your motherboard's manual or specifications to verify:
- M.2 slot size (2280 format is standard and supported by SN850X)
- NVMe protocol support
- PCIe version (Gen3 is compatible, but Gen4 is ideal)
2. BIOS/UEFI Compatibility
Ensure your BIOS/UEFI supports booting from NVMe devices. You might also need to update your BIOS to the latest version for optimal compatibility and stability.
3. Operating System Compatibility
- Windows 10/11 natively supports NVMe drives.
- macOS support is limited to specific models and may require workarounds.
- Linux generally supports NVMe out-of-the-box, but driver updates may be needed.
Step 2: Prepare for the Upgrade from SSD to WD Black SN850X
Once you've confirmed compatibility, it's time to prepare your system for the upgrade.
1. Backup Your Data
Before making any hardware changes, back up your important files. Use built-in tools like Windows Backup or third-party software.
If you're cloning your current SSD to the WD SN850X, a backup serves as an essential safeguard in case anything goes wrong.
2. Create Installation or Recovery Media
If you plan on performing a fresh install of your operating system, create bootable media:
- Windows: Use the Media Creation Tool from Microsoft's official website.
- macOS: Use the Terminal createinstallmedia command.
- Linux: Use tools like Rufus or balenaEtcher to create a bootable USB.
3. Gather Required Tools and Software
- Small Phillips-head screwdriver
- Thermal pad or heatsink (if not included)
- M.2 NVMe enclosure or adapter (for cloning)
- WD Dashboard software (for updates and monitoring)
Step 3: Clone Your Existing Computer SSD to WD Black SN850X
You have two main options:
- Clone your current drive (preserves data, OS, and apps)
- Fresh install (starts from scratch with a clean system)
Here we will use the first option. It can help you easily and quickly migrate the system, installed programs and all other personal files to the WD Black SN850X without reinstalling everything.
1. Recommended Cloning Software
Donemax Disk Clone: The software is widely used and reliable. With simple UI, the tool is very easy to use for beginners. It's professional at disk cloning and can ensure to create a bootable and full clone backup for system drive.
Donemax Disk Clone
- Top disk and partition clone software.
- Effective to make an exact of your hard drive.
- Create bootable copy for the system disk.
2. How to Clone
- Connect the SN850X via an M.2 USB enclosure or PCIe adapter and launch the cloning software Donemax Disk Clone.
- Select your current computer SSD as source drive and select (WD Black SN850X) as target drive.
![upgrade computer SSD to WD Black SN850X]()
- Preview and modify the disk layout on WD Black SN850X if necessary. Also, enable the option "Check the option if the destination is SSD."
![upgrade computer SSD to WD Black SN850X]()
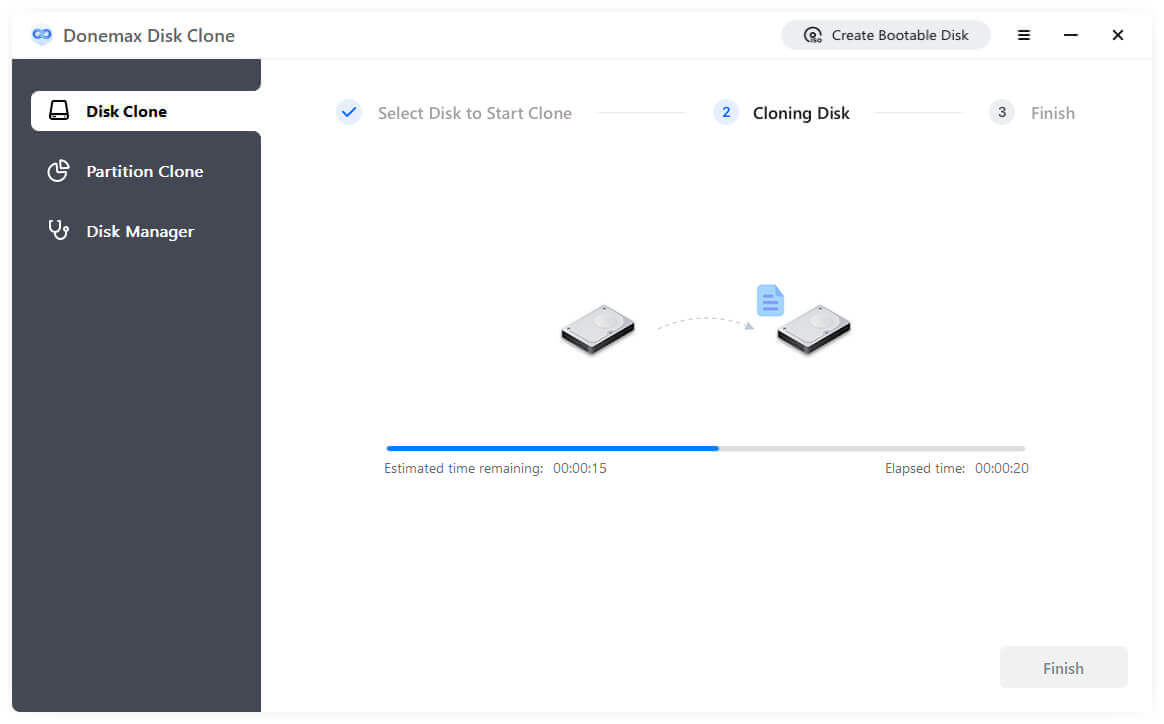
- Perform the clone and wait for the process to complete. It will start to move everything from the old SSD to the WD Black SN850X and make it bootable.
![upgrade computer SSD to WD Black SN850X]()


Step 4: Install the Cloned WD Black SN850X
1. Power Off and Open the Case
- Shut down your PC or laptop.
- Disconnect power and all cables.
- Ground yourself to prevent static damage.
2. Locate the M.2 Slot
Consult your motherboard or laptop manual. On desktops, M.2 slots are typically near the CPU socket. On laptops, they may be under a cover panel.
3. Insert the Drive
- Insert the SN850X at a 30-degree angle.
- Gently push it into the slot until fully seated.
- Use the screw to secure the opposite end.
- Apply a thermal pad or heatsink if required.
4. Close the Case and Power On
Reassemble your system and reconnect all cables. Boot the system.
Step 5: Configure BIOS and Boot from Cloned WD Black SN850X
Once your WD Black SN850X is physically installed, you need to ensure your system is correctly configured to boot from it. Whether you've cloned your old drive or plan to install your operating system from scratch, these BIOS/UEFI settings are critical to the drive's performance and functionality.
1. Enter BIOS/UEFI Settings
As soon as you power on your system, you'll need to access the BIOS or UEFI interface to configure boot settings. This is usually done by pressing a key such as DEL, F2, F10, or ESC during the initial POST screen. Look for on-screen prompts like "Press DEL to enter setup."
Once inside the BIOS:
- Navigate using the arrow keys or mouse (depending on your BIOS version).
- Switch to Advanced Mode if you're in a simplified UI, often using the F7 key.
2. Set Boot Priority
The boot priority determines which drive the system loads the operating system from.
If you cloned your drive:
- Go to the Boot tab in BIOS.
- Locate the list of boot devices.
- Set the WD Black SN850X as the first boot device (you may see it listed by its model number or capacity).
- Save and exit (usually F10) and allow the system to boot.
If your system boots into the wrong OS or gives a boot error, verify that the clone was successful and that all necessary partitions (EFI System, Recovery, etc.) were copied.
If you're doing a fresh install:
- Insert your OS installation media (USB or DVD).
- Set the USB device as the first boot option.
- Save and exit.
- The system should boot into the OS setup environment.
- Select the WD Black SN850X as the installation target during OS setup.
Tip: If your old drive is still connected during OS installation, make sure not to install the OS to the wrong drive. It's often wise to temporarily disconnect any other storage drives during this step.
3. Enable NVMe and PCIe Gen4 Settings (Optional)
To take full advantage of the SN850X's top-tier speed, ensure the M.2 slot it's installed in is configured for PCIe Gen4 x4 (if your motherboard supports it). This setting may be found under:
- Advanced > PCIe Configuration
- Chipset Settings
- M.2 Configuration
Options may include:
- PCIe Speed: Auto / Gen3 / Gen4 – set this to Gen4 if supported.
- NVMe Mode: Make sure NVMe or Auto is selected.
Note: On many systems, the default is already set to maximize performance, but it's worth confirming.
4. Enable AHCI Mode (Advanced Host Controller Interface)
AHCI mode ensures proper communication between your storage controller and SSD for optimal speed and TRIM support.
To enable AHCI (if not already set):
- Navigate to SATA Mode or Storage Configuration.
- Set it to AHCI, not RAID or IDE.
- If you change this after Windows is installed, you may need to perform a registry tweak or the OS might fail to boot.
5. Secure Boot and TPM Settings (Optional)
These are advanced features mostly relevant to Windows 11 or systems concerned with security.
- Secure Boot: Can be enabled for secure OS environments. Make sure the OS was installed in UEFI mode.
- TPM (Trusted Platform Module): Required for Windows 11. Usually under Security > TPM.
6. Save and Exit BIOS
Once all settings are configured:
- Press F10 to save changes and exit.
- The system should reboot.
- If you cloned your OS, it should boot directly into your desktop.
- If doing a fresh install, you'll proceed to OS installation.
If the system doesn't detect the drive after rebooting, re-enter BIOS to check if the SN850X is listed. If not, reseat the drive and ensure it's fully inserted into the M.2 slot.
Step 6: Optimize and Test Performance
1. Install WD Dashboard
Available on Western Digital's official website.
Use it to:
- Update firmware
- Monitor drive temperature and health
- Enable game mode for better performance
2. Benchmark Performance
Use tools to confirm you're getting expected speeds:
- CrystalDiskMark
- AS SSD Benchmark
- ATTO Disk Benchmark
Expected benchmarks (Gen4 system):
- Sequential Read: ~7,000–7,300 MB/s
- Sequential Write: ~6,000–6,600 MB/s
3. Enable TRIM and AHCI
- TRIM ensures that deleted files are properly wiped for SSD longevity. It is enabled by default in Windows.
- AHCI mode is necessary for optimal SSD performance—verify it's enabled in BIOS.
Troubleshooting Tips
1. Drive Not Detected
- Check physical installation and connections.
- Make sure the M.2 slot is NVMe compatible.
- Update BIOS and chipset drivers.
2. Boot Issues
- Recheck BIOS boot order.
- If cloning, verify the clone was successful and partitions are correct.
- If the OS doesn't boot, perform startup repair or reinstall.
3. Lower Than Expected Speeds
- Ensure your M.2 slot supports PCIe Gen4 and is not limited to Gen3.
- Check if thermal throttling is occurring; apply heatsinks or fans.
- Update NVMe and chipset drivers.
Conclusion
Upgrading to the WD Black SN850X is one of the most effective ways to supercharge your computer. Its high-speed performance, reliability, and modern NVMe interface make it a solid investment for anyone looking to optimize their system for gaming, creative work, or daily multitasking.
By following this step-by-step guide, you can safely transition from your existing storage solution to one of the fastest consumer SSDs available today. Whether you choose to clone your drive or start fresh, the SN850X will significantly improve your system's responsiveness and speed.
Donemax Disk Clone
An award-winning disk cloning program to help Windows users and Mac users clone HDD/SSD/external device. It also can create full bootable clone backup for Windows PCs and Macs.
Related Articles
- Sep 19, 2023Clone A Hard Drive With Bad Sectors
- Jul 11, 2023How to Copy Hard Drive to SSD with Everything, Including the OS, Installed Programs and Data
- Feb 28, 2024How to Migrate Windows 11 OS to An External SSD?
- Feb 11, 2024How to Clone Only OS to A SSD?
- Jun 21, 2025What is the 3-2-1 Backup Rule? How to Back Up Data?
- Jun 09, 2025How to Clone Windows 11/10/8/7 to NVMe SSD?

Contributing Writer
Charles
Charles, who lives in Sydney, Australia, is an editor & writer of Donemax Team. He is good at writing articles related with Apple Mac computers, Windows operating systems, data recovery, data erasure, disk clone and data backup, etc. He loves reading and playing tennis in his spare time and is interested in testing new digital devices such as mobile phones, Macs, HDDs, SSDs, digital cameras, etc.

Editor in chief
Gerhard Chou
In order to effectively solve the problems for our customers, every article and troubleshooting solution published on our website has been strictly tested and practiced. Our editors love researching and using computers and testing software, and are willing to help computer users with their problems