
Written byCharlesUpdated on Jul 27, 2025
WD Elements Not Mounting on Mac? Fix It Now
Approved byGerhard Chou
Before we start: If the WD Elements portable hard drive has been pre-formatted to NTFS file system, it may not mount on your Mac. Here are effective solutions for mounting WD Elements on Mac, including mounting NTFS WD Elements drives by using third-party NTFS for Mac tool - Donemax NTFS for Mac.
PAGE CONTENT:
WD Elements is a popular line of portable and desktop external hard drives by Western Digital. They are widely used for backing up large amounts of data, transferring files, or expanding the limited storage capacity of Macs. However, it can be frustrating when you connect your WD Elements drive to your Mac and it doesn't mount or show up.
In this detailed guide, we’ll explore why your WD Elements drive might not be mounting on macOS, and walk you through a variety of proven solutions - from basic troubleshooting steps to more advanced recovery methods. Whether you're using macOS Tahoe, Sequoia, Sonoma, Ventura, or an earlier version, this guide has you covered.
What Does Not Mounting Mean on a Mac?
In macOS, "mounting" refers to the process of making a drive accessible to the operating system. When a drive is mounted, it appears in Finder and on your Desktop, and you can open and use it.
If your WD Elements drive is not mounting:
- It might appear in Disk Utility but not on the desktop.
- The "Mount" button may be grayed out in Disk Utility.
- The drive may not be visible at all.
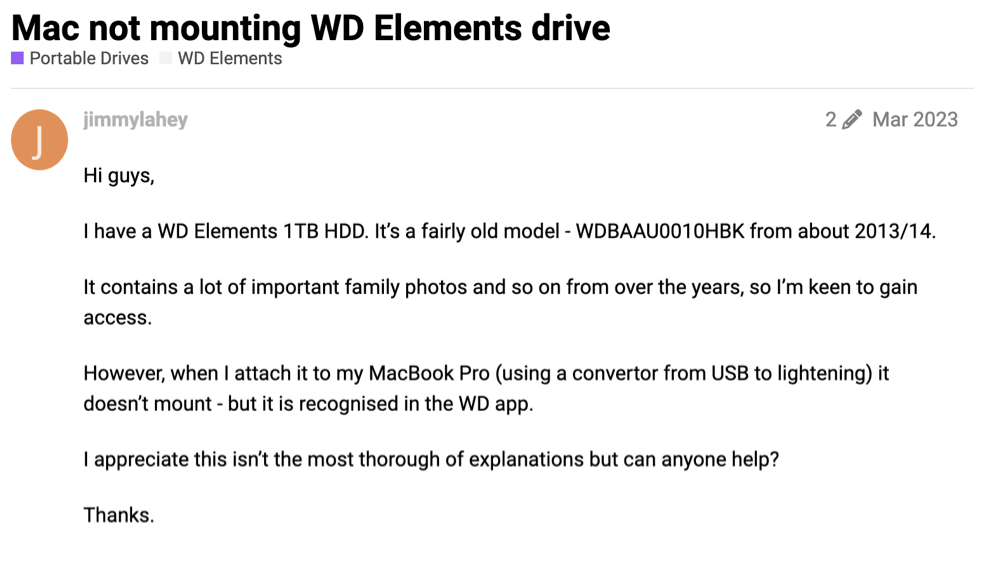
There are many users encountering WD Elements not mounting on Mac issue. A user in WD Community said that his 1TB WE Elements HDD couldn't mount on his MacBook Pro at all.
Why Your WD Elements Drive Might Not Mount on Mac?
Several issues can cause your external drive to not mount:
- Corrupted or unsupported file system (e.g., NTFS)
- Damaged partition table or disk errors
- Outdated macOS or incompatible WD software
- Faulty USB cable, port, or power supply
- Drive is physically damaged
Identifying the root cause will help determine the appropriate fix.
How to Fix WD Elements Not Mounting on Mac?
#1 Start with Preliminary Checks
Before diving into advanced solutions, make sure to rule out any physical or system-level issues:
🔹 Try Different USB Ports or Cable
Sometimes the issue isn't the drive but the USB port or cable. Try:
- Switching to a different USB port (preferably USB 3.0 or higher).
- Using another USB cable (preferably original or certified).
- Connecting the drive directly, avoiding USB hubs (unless it's a powered hub).
🔹 Check on Another Mac
Plug the WD Elements drive into another Mac. If it mounts there, your current Mac may have a system or permission issue.
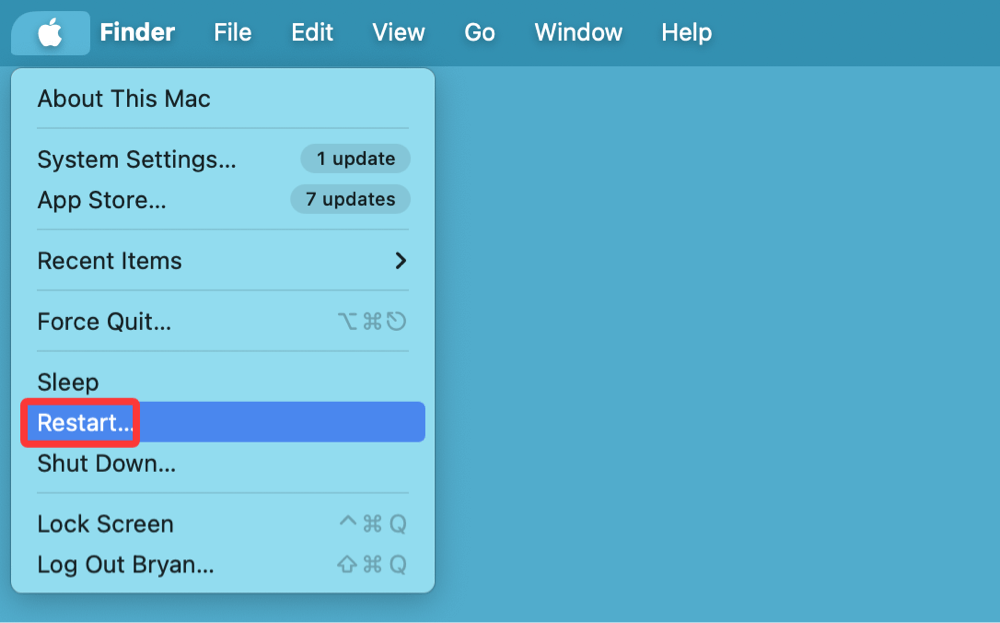
🔹 Restart Your Mac
It sounds basic, but a simple reboot often resolves temporary glitches in the system's USB and storage handling.
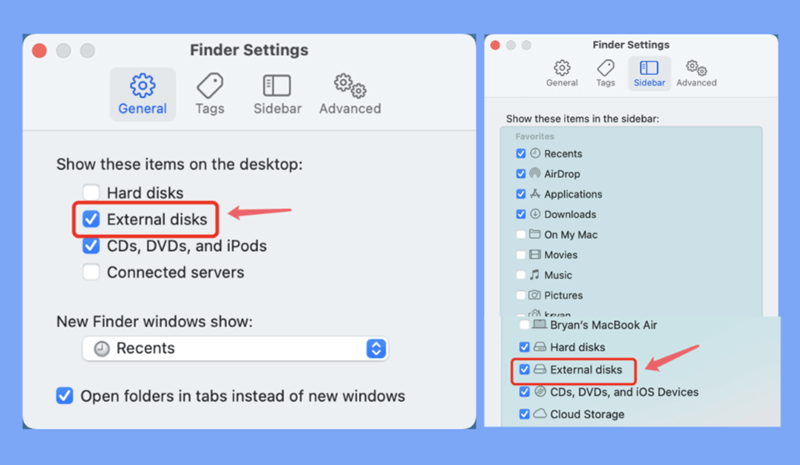
🔹 Enable External Drives in Finder
- Go to Finder > Settings > General.
- Make sure "External disks" is checked under "Show these items on the desktop."
Also, under Finder > Settings > Sidebar, make sure "External disks" is enabled.
#2 Use Disk Utility to Mount the Drive
Disk Utility is macOS's built-in tool for managing disks and volumes.
Steps to Manually Mount:
- Open Disk Utility from Utilities via Applications.
- Locate your WD Elements drive under "External."
- If the drive appears but is grayed out, select it and click "Mount."
![WD Elements not mounting on Mac]()
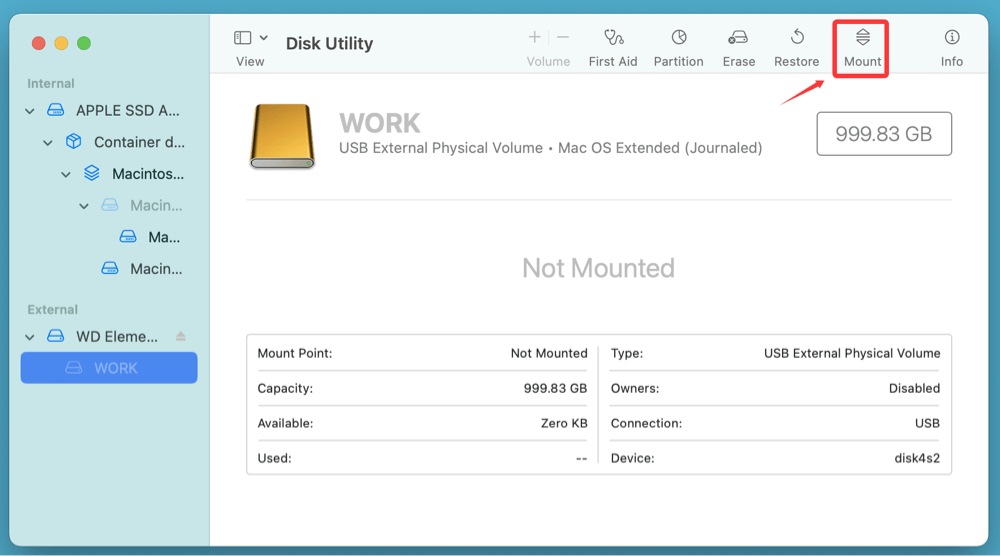
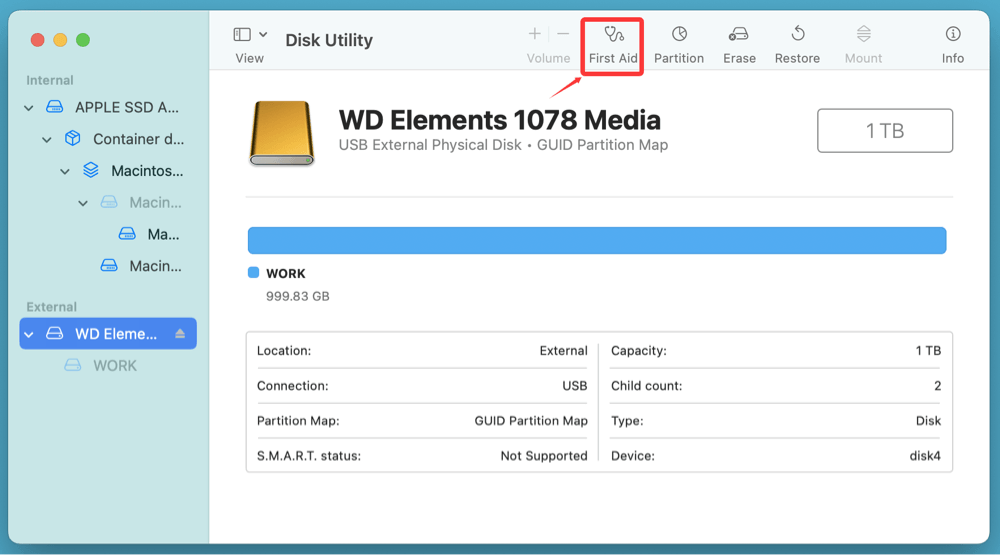
If the "Mount" button is grayed out or nothing happens:
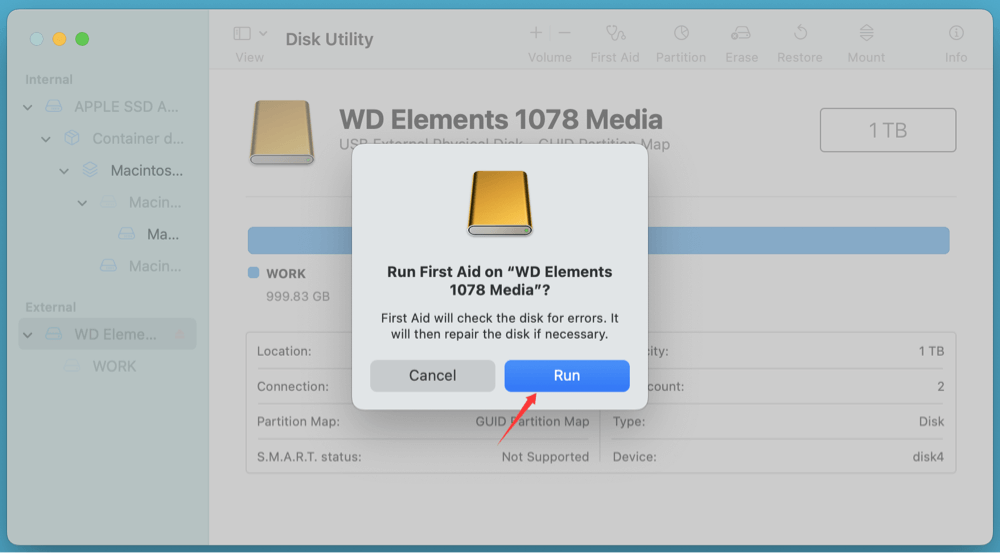
- Click First Aid to check and repair minor disk issues.
![WD Elements not mounting on Mac]()
- If the repair completes successfully, try mounting again.
![WD Elements not mounting on Mac]()
#3 Use Terminal to Mount the Drive
If Disk Utility doesn't work, try mounting the drive through Terminal.
Steps:
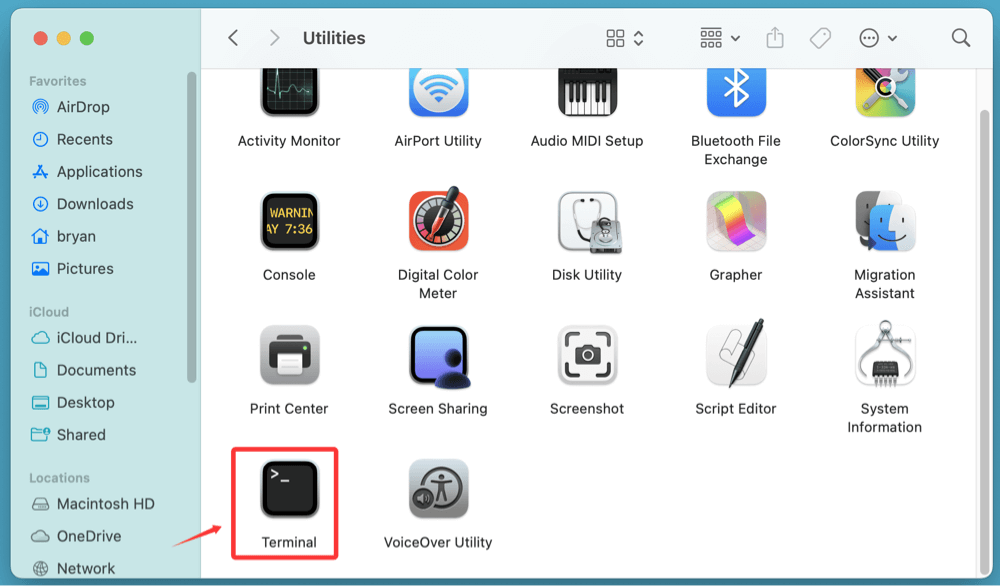
- Open Terminal from Utilities via Applications.
![WD Elements not mounting on Mac]()
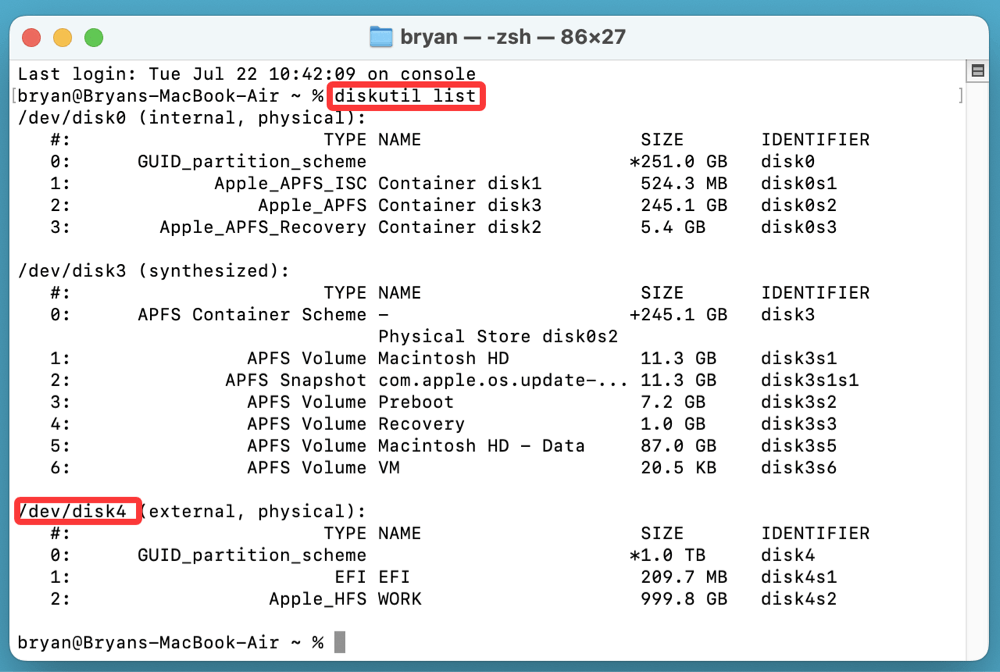
- Type:
diskutil list
![WD Elements not mounting on Mac]()
Identify your WD drive (look for external, physical).
Note the identifier, e.g., disk4s2.
- Then mount it manually:
diskutil mount /dev/disk4cs2
![WD Elements not mounting on Mac]()

If successful, the drive will now appear on your Desktop or in Finder.
#4 Update macOS and WD Software
An outdated macOS or incompatible WD software can interfere with mounting.
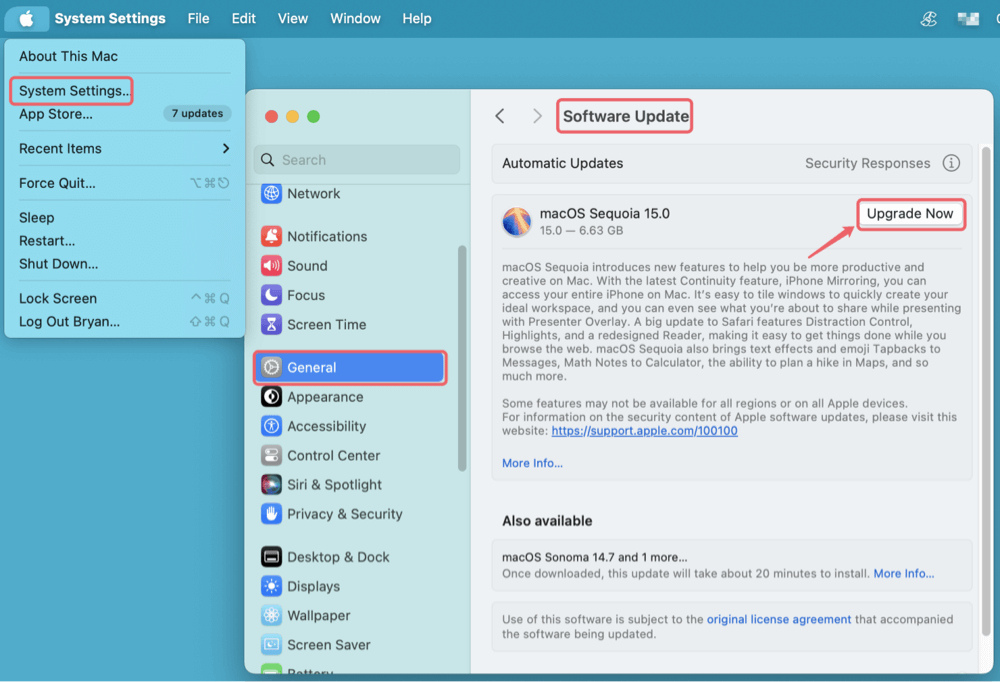
🔹 Update macOS:
- Go to System Settings > General > Software Update.
- Install any available updates.
![WD Elements not mounting on Mac]()
🔹 Update or Remove WD Utilities:
Older versions of WD Drive Utilities or SmartWare may cause conflicts.
- Visit Western Digital's Support Site to check for updates.
- If you’re not using features from these utilities, consider uninstalling them.
#5 Check for File System Compatibility
If your drive is formatted as NTFS (common for Windows users), your Mac can read the drive but not write to it - and sometimes it might not mount at all.
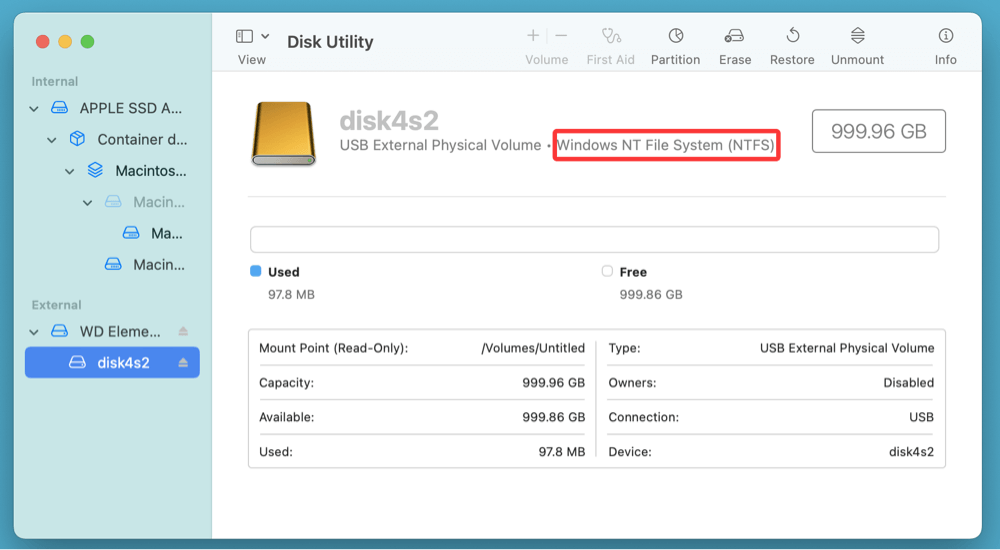
Identify File System:
- Go to Disk Utility.
- Select the WD Elements drive.
- Look the file system under the disk's name (e.g., NTFS, APFS, exFAT).
![WD Elements not mounting on Mac]()
Solutions if the file system is NTFS:
Solution 1: Using NTFS for Mac Tool
Use a third-party NTFS driver like Donemax NTFS for Mac:
Step 1. Download and install Donemax NTFS for Mac tool.
Step 2. Open Donemax NTFS for Mac, select the NTFS WD Elements drive, click on Mount button.
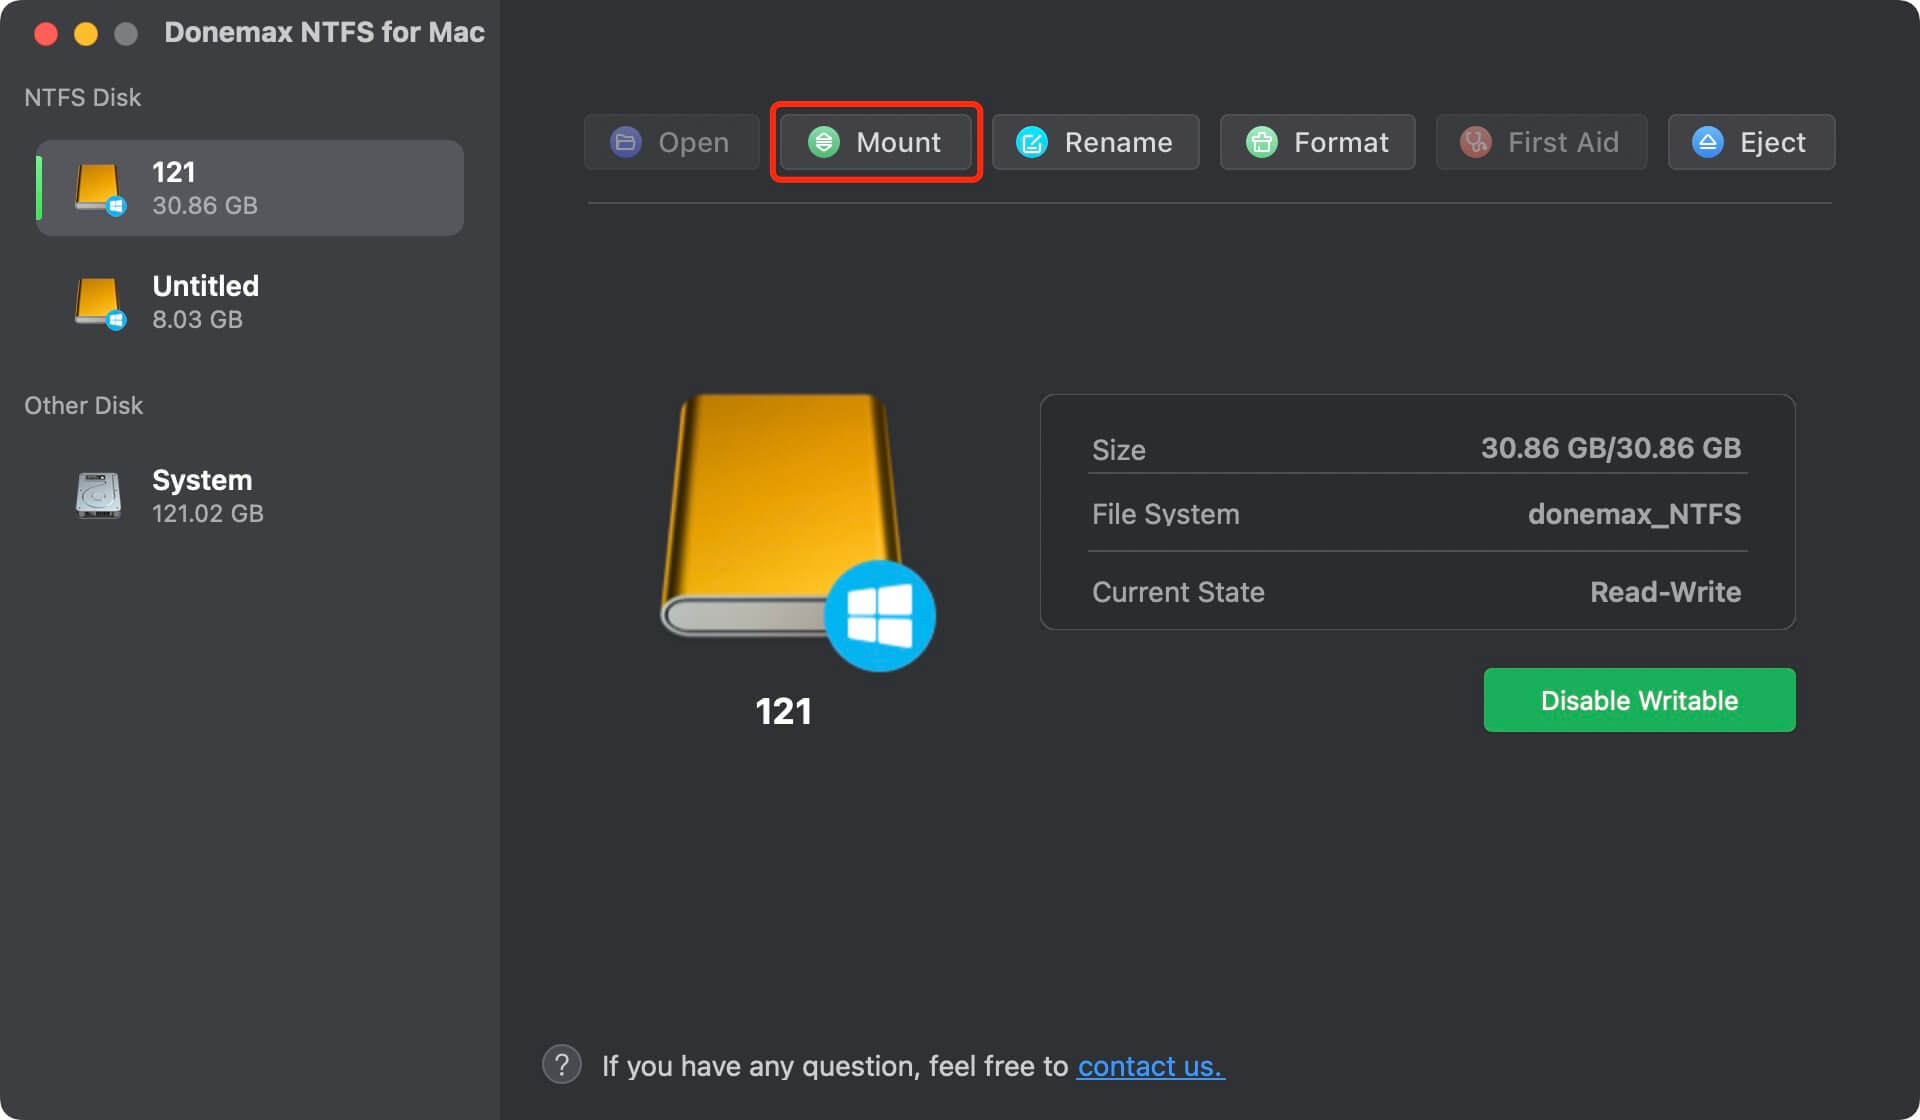
Step 3. To write data to the NTFS drive, click on Enable Writable button.

Solution 2: Reformatting the WD Elements Drive
Or back up your data and reformat to a Mac-compatible format like ExFAT or APFS.
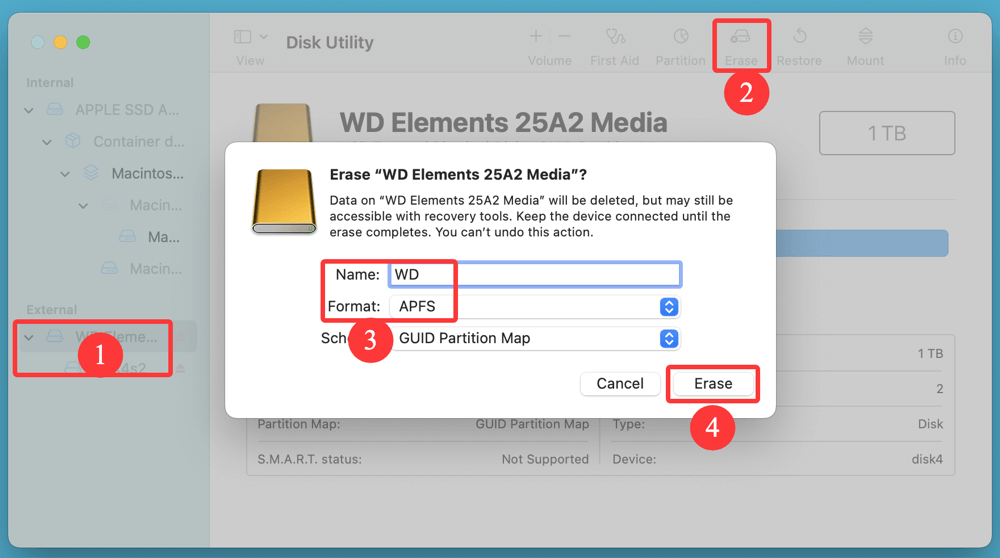
How to Reformat Your WD Elements Drive:
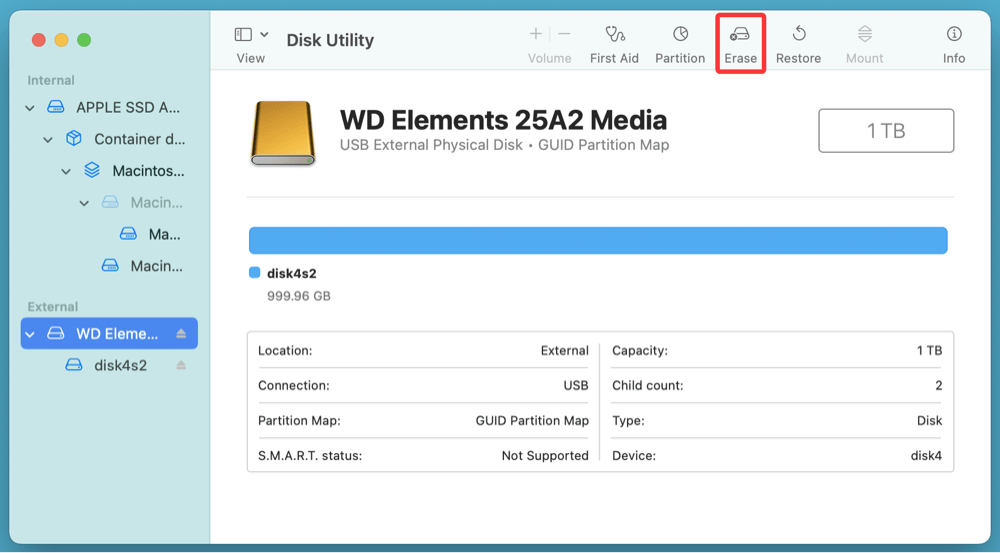
- Open Disk Utility.
- Select the top-level name of the drive (not the volume underneath).
- Click the Erase button at the top.
- Choose:
- Name: (e.g., "WD")
- Format: exFAT, APFS, or Mac OS Extended (Journaled)
- Scheme: GUID Partition Map
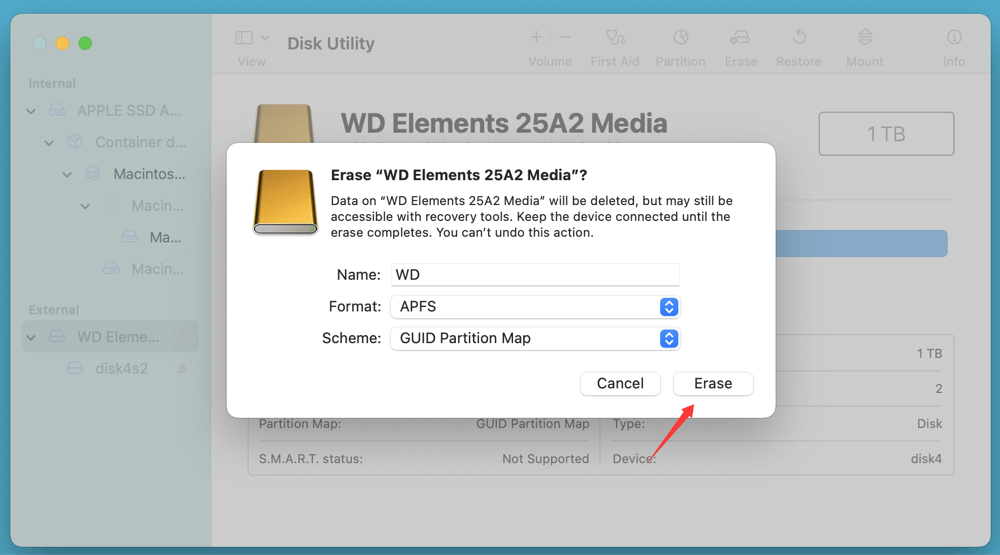
- Click Erase and wait for the process to complete.
![WD Elements not mounting on Mac]()
Once formatted, the drive should mount automatically.
💡 Note: If you have lost data due to reformatting WD Elements drive on Mac, you can use Mac data recovery software - such as Donemax Data Recovery for Mac to recover the lost files.
Why NTFS Can Cause Mounting Issues?
While macOS can read NTFS volumes, sometimes the drive may not mount due to:
- Improper shutdown of the drive on Windows (volume marked as "dirty").
- Damaged NTFS journal or Master File Table (MFT).
- Permission or ownership issues with folders/files.
If you're planning to switch between Mac and PC often, ExFAT is the safest format, as it avoids these limitations.
★ Pro Tip: Use Terminal to Check File System
If Disk Utility doesn't display the file system clearly, you can run this command in Terminal:
diskutil info /dev/diskX
Replace /dev/diskX with the identifier of your WD Elements drive (found using diskutil list). This will show detailed information about the file system, mount point, and more.
Understanding your drive's file system is essential for resolving mounting issues. NTFS, while common for Windows users, introduces read-only limitations and potential mounting failures on macOS. Reformatting to ExFAT or using an NTFS driver resolves most compatibility issues. Before formatting, always ensure your data is backed up or recovered safely using data recovery tools.
#6 Reformat the Drive (Last Resort)
If the drive still doesn't mount and data recovery isn't needed, you can reformat it. Warning: This will erase all data.
Steps to Reformat in Disk Utility:
Step 1. Open Disk Utility.
Step 2. Select the WD Elements drive (not the volume, but the whole drive).
Step 3. Click Erase.
Step 4. Choose:
- Name: WD Elements (or your custom name)
- Format: exFAT (compatible with Mac & Windows) or APFS (for Mac-only use)
- Scheme: GUID Partition Map
Step 5. Click Erase to confirm.
After formatting, the drive should mount automatically.
Recover Files from Unmounted or Formatted WD Elements Drive on Mac
If you need the data and can't mount the drive, consider using professional-grade data recovery software.
Donemax Data Recovery for Mac is one of the best data recovery software. It can easily and completely recover files form unmounted or formatted WD Elements drive on Mac.
Step 1. Download and install Donemax Data Recovery for Mac on your Mac and connect your WD Elements drive to the same Mac.
Step 2. Open Donemax Data Recovery for Mac, select the WD Elements drive.

Step 3. Click on Scan button. Donemax Data Recovery for Mac will deeply scan the WD Elements drive and find all recoverable files.

Step 4. After scanning, you can preview all recoverable files. Then select the wanted files, click on Recover button to save them.

When to Contact a Professional
If none of the above methods work and:
- The drive makes clicking, beeping, or grinding noises.
- The drive doesn't appear in Disk Utility or Terminal.
- The LED light does not turn on at all.
Then you might be dealing with hardware failure.
Options:
- Contact WD support (if under warranty)
- Use a data recovery service such as DriveSavers, Ontrack, or Secure Data Recovery
- Visit an Apple Authorized Service Provider
Tips to Avoid Future WD Elements Mounting Issues
- Always eject drives safely: Use the Eject button in Finder before unplugging.
- Avoid physical damage: Use padded cases and avoid sudden movement while plugged in.
- Keep macOS and WD utilities up to date.
- Use drives formatted in exFAT if sharing between Windows and Mac systems.
Conclusion
A WD Elements drive not mounting on your Mac doesn't necessarily mean it's dead. Most of the time, the issue is related to macOS permissions, disk errors, file system incompatibility, or physical connection problems.
We've covered everything from basic checks to advanced troubleshooting, including Terminal commands and reformatting. In cases where data is critical, don't rush to erase or reformat - use data recovery tools or services first.
Taking a systematic approach will save you time, protect your data, and get your WD Elements drive working again on macOS.
Related Articles
- Mar 13, 2025How to Fix Seagate Backup Plus Not Showing Up on Windows? [9 Fixes]
- Feb 05, 2025Fix/Repair Unallocated External Hard Drive without Losing Data
- Oct 17, 2024How to Format a RAW Drive to NTFS on Mac?
- Dec 18, 2024External Hard Drive Works on Windows, but Not Working on Mac: 7 Solutions to Fix It
- Dec 03, 2024Fix External Drive, USB Drive, SD Card Not Mounting on macOS Sequoia
- Jun 29, 2023How to Format A Hard Drive to NTFS on Mac?

Contributing Writer
Charles
Charles, who lives in Sydney, Australia, is an editor & writer of Donemax Team. He is good at writing articles related with Apple Mac computers, Windows operating systems, data recovery, data erasure, disk clone and data backup, etc. He loves reading and playing tennis in his spare time and is interested in testing new digital devices such as mobile phones, Macs, HDDs, SSDs, digital cameras, etc.

Editor in chief
Gerhard Chou
In order to effectively solve the problems for our customers, every article and troubleshooting solution published on our website has been strictly tested and practiced. Our editors love researching and using computers and testing software, and are willing to help computer users with their problems