Written byChristinaUpdated on Jul 10, 2025
How to Use WD Easystore on Mac: A Complete Guide
Approved byGerhard Chou
Before we start: Do you want to use WD Easystore portable HDD on Mac? Follow the guide to use WD Easystore on Mac easily. If WD EasyStore drive uses NTFS file system, you can use NTFS for Mac tool to enable writable access for NTFS drive. Then you can read-write WD Easystore on Mac without any limitation.
PAGE CONTENT:
External hard drives like the WD Easystore are popular for managing storage, backups, and file transfers. If you're a Mac user, you're in luck - WD Easystore drives are compatible with macOS. It can easily extend your storage size and keep your important files secure. In this guide, we'll walk you through everything you need to know about using WD Easystore on Mac, from setup to troubleshooting.
WD Easystore Portable Drive Overview
WD Easystore is a popular external hard drive series. The drive is great for users who need reliable, large-capacity storage at an affordable price. These drives are useful to back up large files, store media libraries, and increase your storage size.
By using the external drives, you don't need to upgrade your Mac's internal storage. If be compatible with macOS, these drives make it easy for you to back up data through Time Machine. Or you can use them as a manual file storage solution.
However, even though WD Easystore works with Macs, there are a few setup steps and tips you'll need to follow to optimize its performance. In this guide article, we will explore how to connect, format, and manage your WD Easystore on your Mac. Also we offers the methods to solve some common issues.
How to Use WD EasyStore on Mac
1. Unboxing and Connecting WD Easystore to Mac
What's in the Box:
When you purchase a WD Easystore external hard drive, it usually comes with:
- The WD Easystore external drive itself.
- A USB cable (USB 3.0 or USB-C depending on the model).
- A quick start guide.
Most WD Easystore drives are in the exFAT file system, which makes them compatible with both macOS and Windows out of the box. To improve performance, especially if you're planning to use the drive on with your Mac, considering format it. Use a macOS-friendly file system.
How to Connect the WD Easystore to Your Mac:
- Check your ports: Depending on the age of your Mac, it might have USB-A or USB-C ports. If you have a MacBook with USB-C ports, you'll need an adapter. You will need it for a USB-A to USB-C connection unless your drive already comes with a USB-C cable.
- Plug it in: Simply connect the WD Easystore drive to one of the USB ports on your Mac.
- Wait for the drive to appear: Once the drive is connected, it should appear in Finder under "Devices" or "Locations." If it doesn't show up, check your cables and ensure that the drive is properly powered.
2. Initial Setup of WD Easystore on Mac
Before using the WD Easystore drive, it's important to format it correctly for your specific needs.
Checking If It's Compatible:
Macs can read and write to exFAT-formatted drives. Take full advantage of features like Time Machine or better performance, just format the drive to one of the macOS file systems. You can choose the file system as APFS (Apple File System) or Mac OS Extended (HFS+).
3. Reformatting the WD Easystore Drive for macOS
Why Reformat?
Reformatting the drive is a good idea if you're planning to use the WD Easystore exclusively with your Mac. Time Machine, Apple's built-in backup utility, works best with APFS or Mac OS Extended formats. Also, formatting the drive can improve the drive for macOS performance.
Steps to Reformat Using Disk Utility:
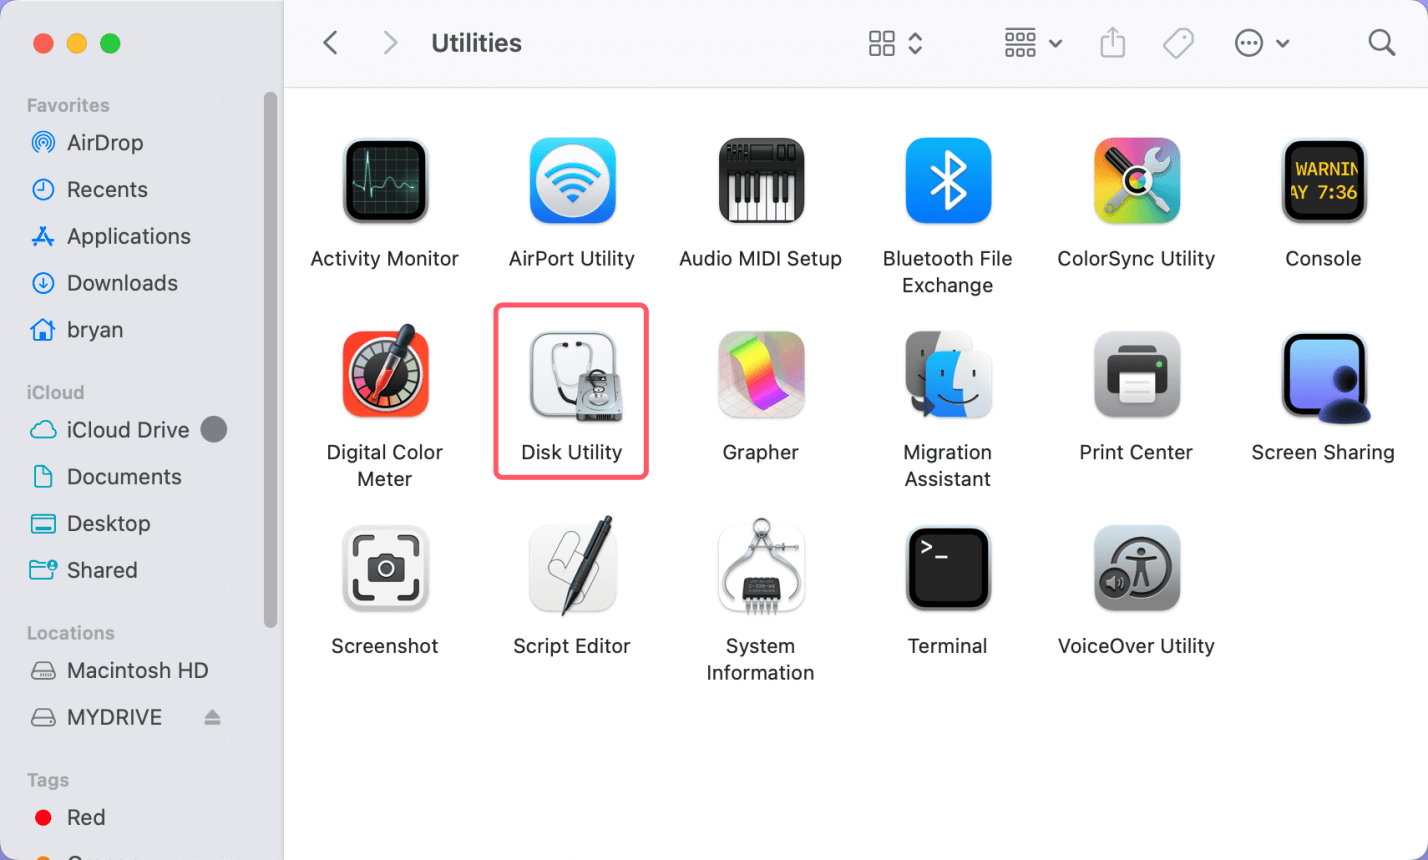
- Open Disk Utility: Disk Utility is located by searching in Spotlight or going through Utilities via Applications.
![Open Disk Utility]()
- Select the WD Easystore drive: In the left sidebar, locate the WD Easystore drive under the External section.
![Select the WD Easystore drive]()
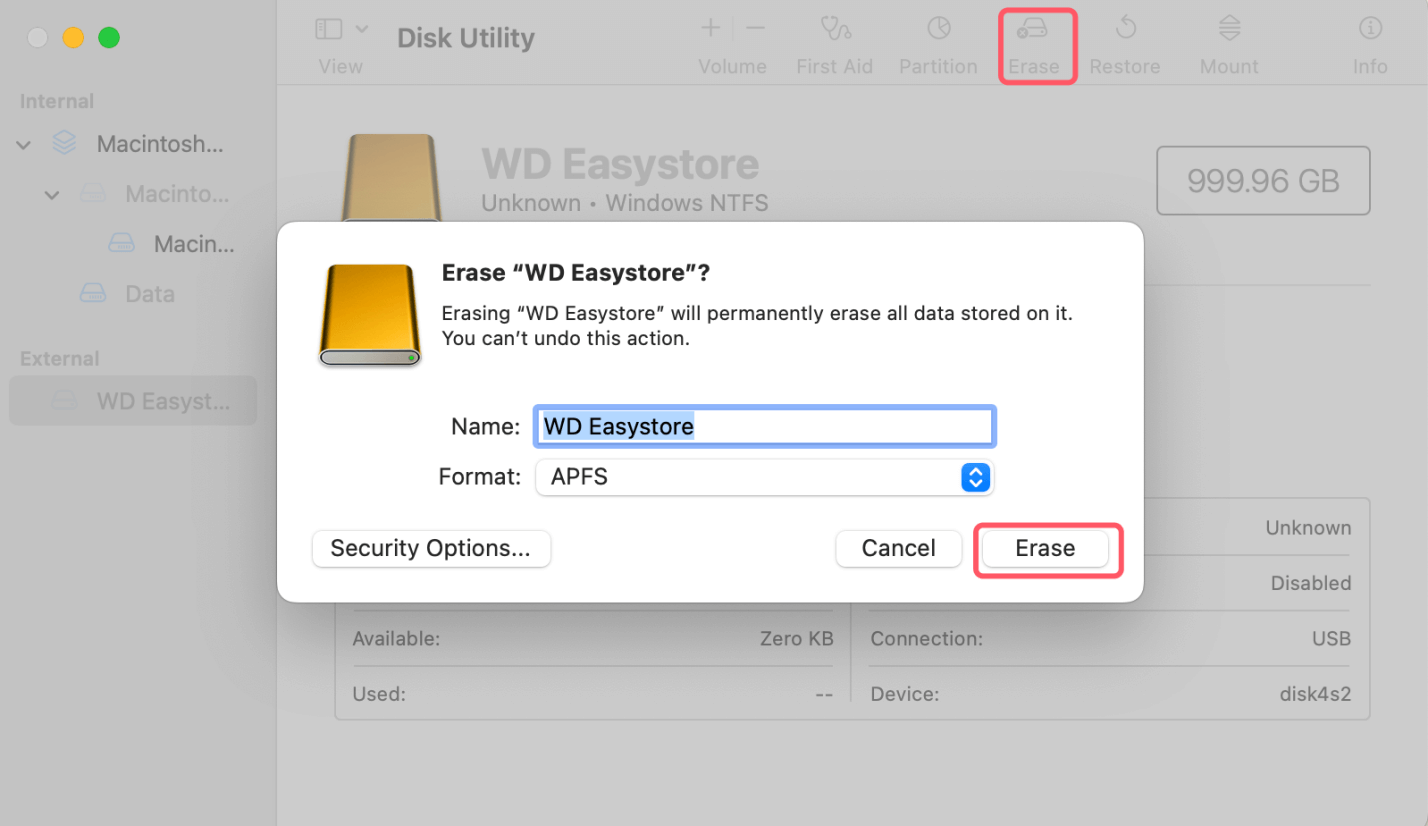
- Click Erase: The Disk Utility window's top will display this choice.
- Choose a Format:
● If you're using the drive for Time Machine backups, choose APFS or Mac OS Extended (Journaled).
● To use the drive for general file storage or you have macOS High Sierra or later, you can format it to APFS. Great for faster performance.![Choose a Format]()
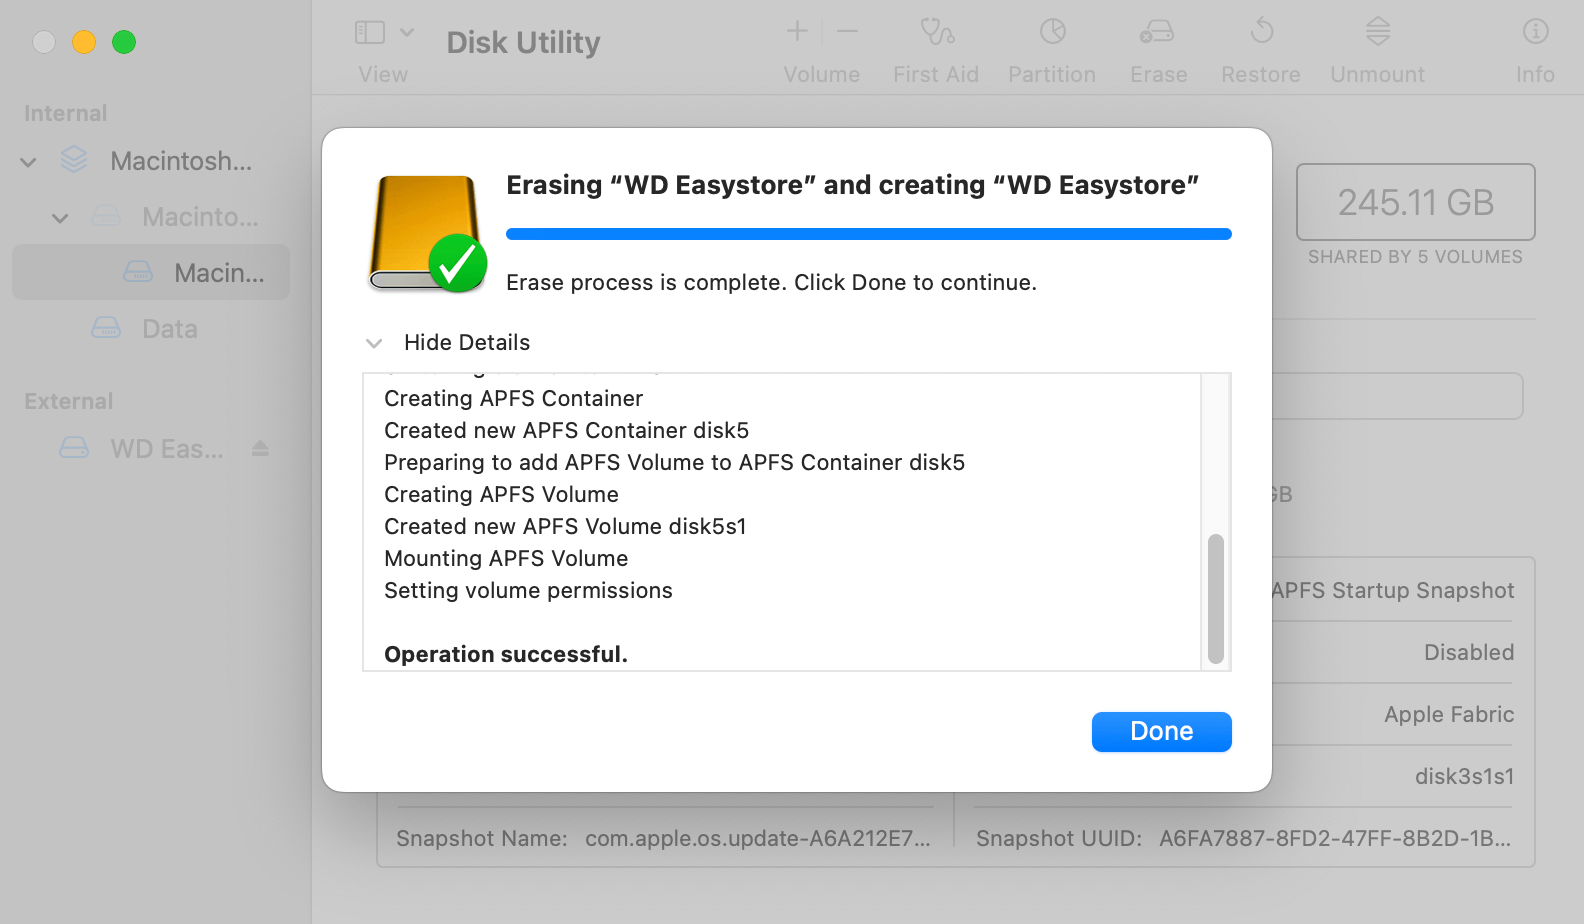
- Name the drive and click "Erase" to begin the formatting process. Once the reformat is complete, the drive will be ready for use on your Mac.
![Name the drive]()

💡 Note: If you have lost data because of formatting WD Easystore drive, you can use Mac data recovery software to get lost files back.
🔗 Related article: how to recover lost data from WD Easystore HDD on Mac.
4. Using WD Easystore with Time Machine for Backup
Time Machine is an incredibly useful feature for Mac users. WD Easystore is an ideal external drive to use with Time Machine. To restore your Mac in case of data loss, Time Machine automatically backs up your whole Mac. Time Machine will back up system files, applications, and personal data.
Enabling Time Machine with WD Easystore:
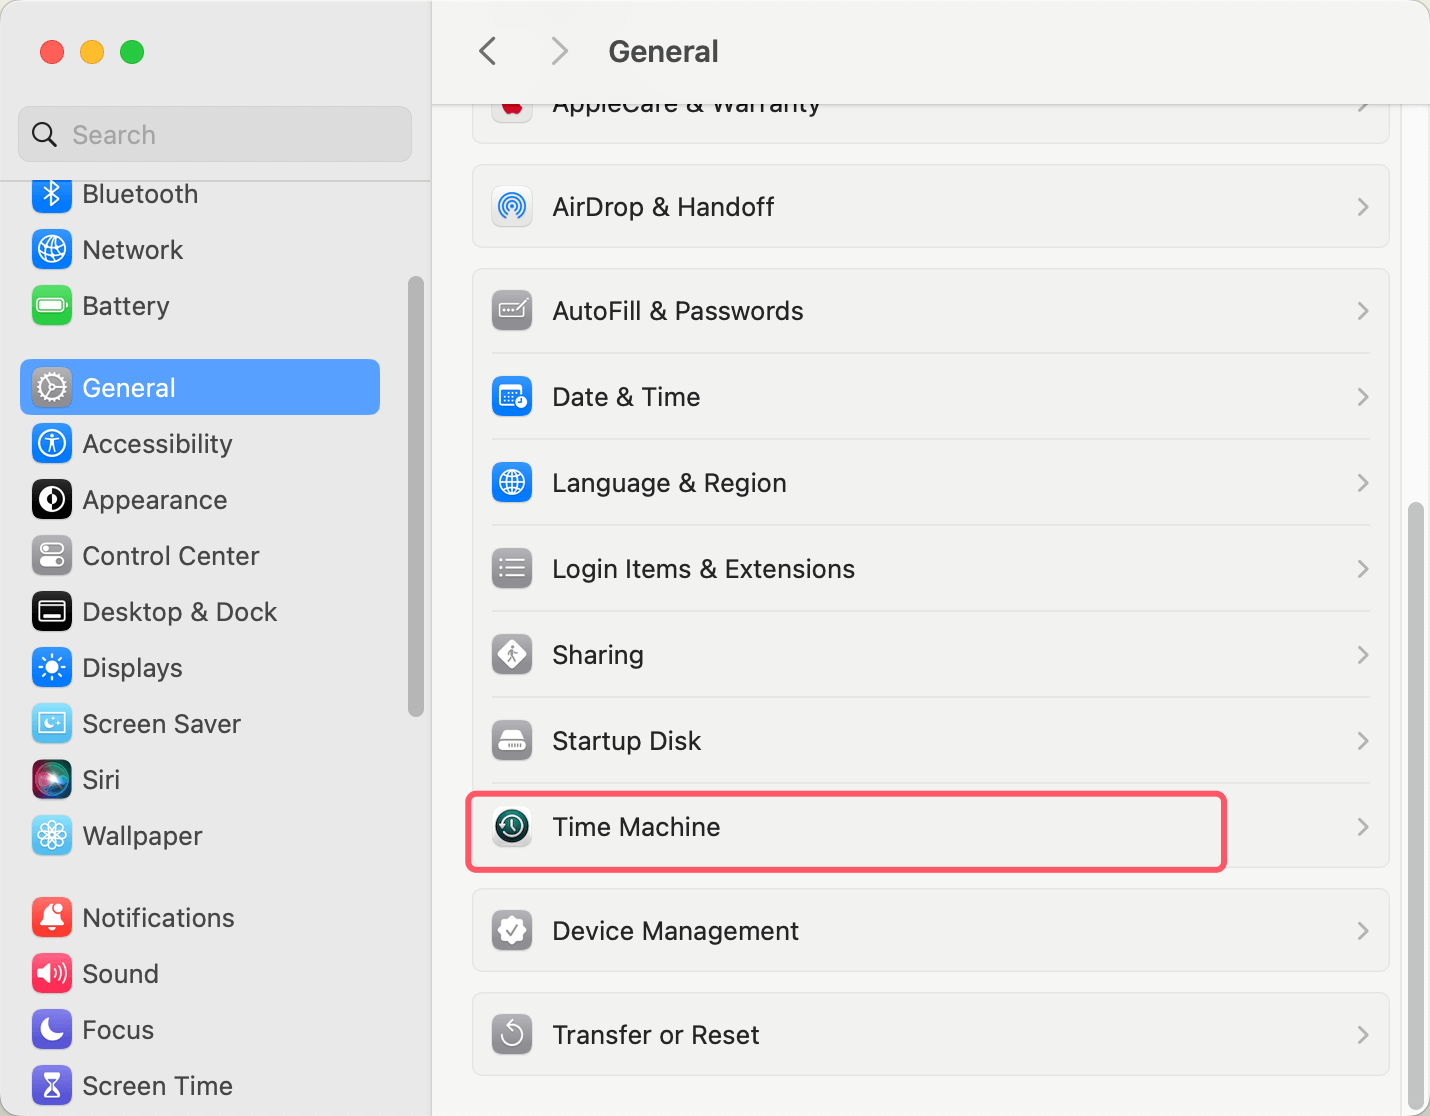
- Go to System Settings: Open System Settings from the Apple menu and select General > Time Machine.
![Enabling Time Machine with WD Easystore]()
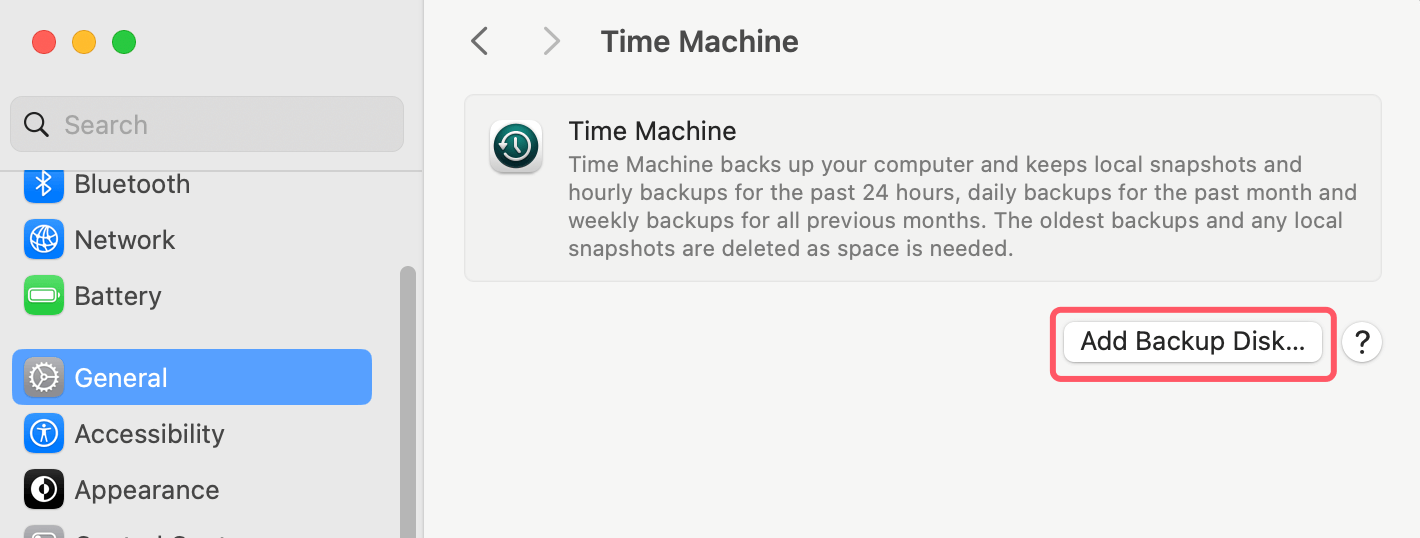
- Select Backup Disk: Click the "Add Backup Disk" button, and a list of available drives will appear.
![Enabling Time Machine with WD Easystore]()
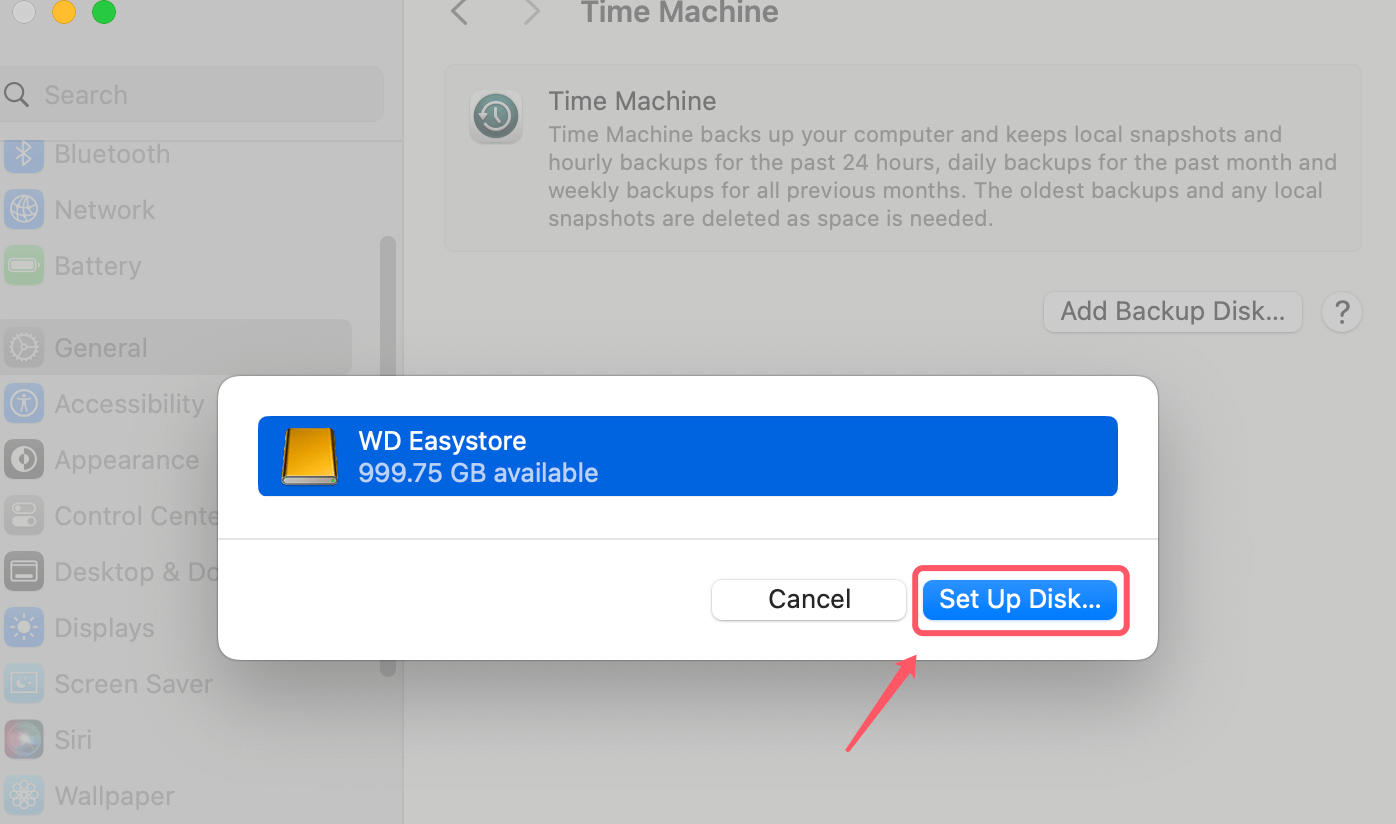
- Choose WD Easystore: Select the WD Easystore drive and click "Set Up Disk." If prompted, choose to erase and reformat the drive for Time Machine.
![Enabling Time Machine with WD Easystore]()
- Automatic Backups: Time Machine will now begin automatically backing up your Mac at regular intervals.
Configuring Time Machine Settings:
You can customize Time Machine by:
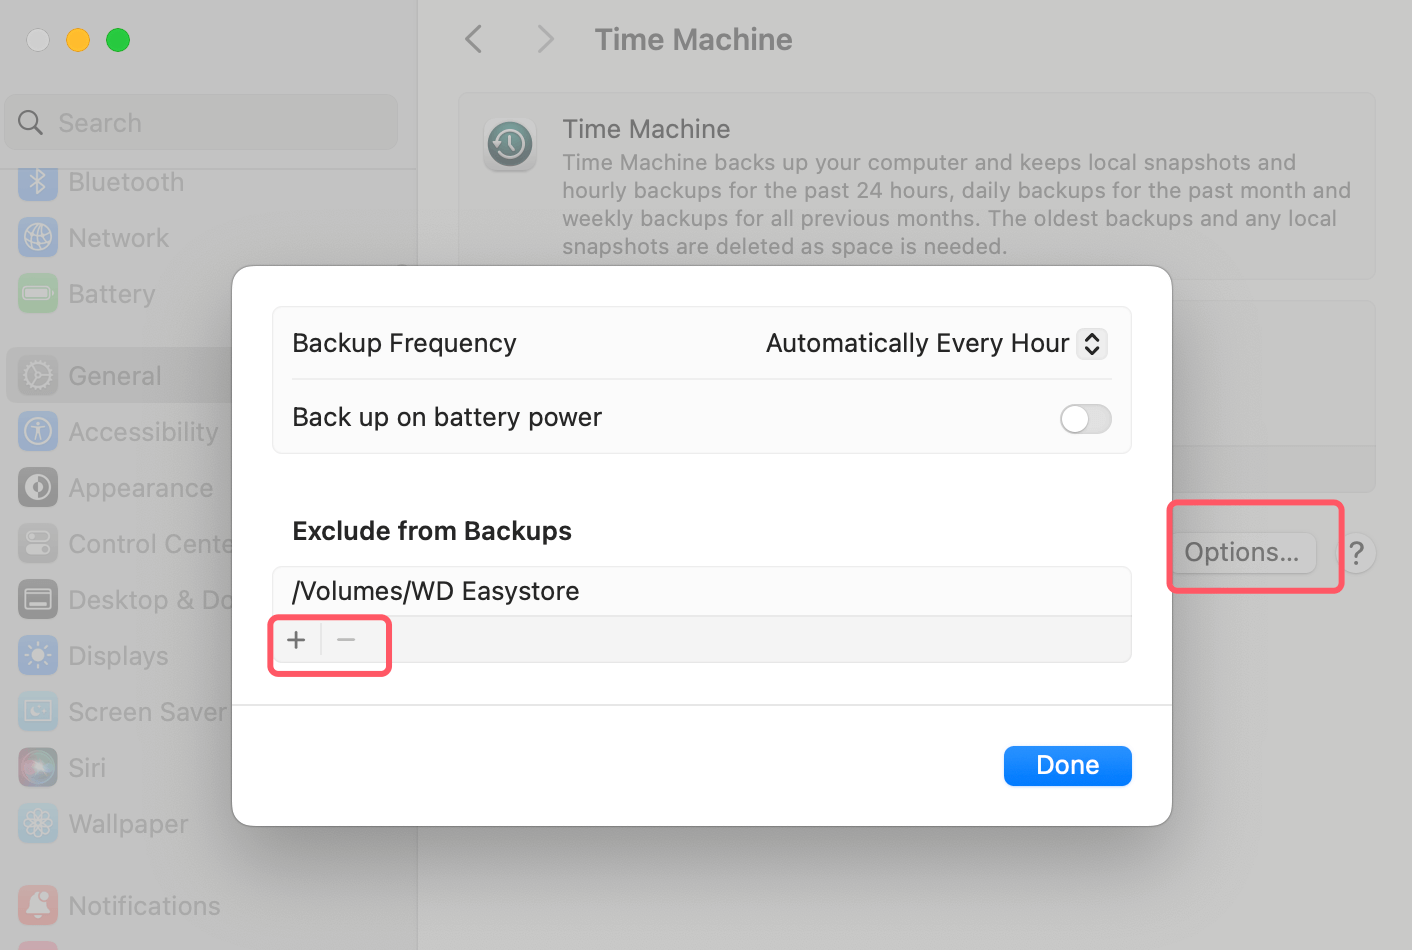
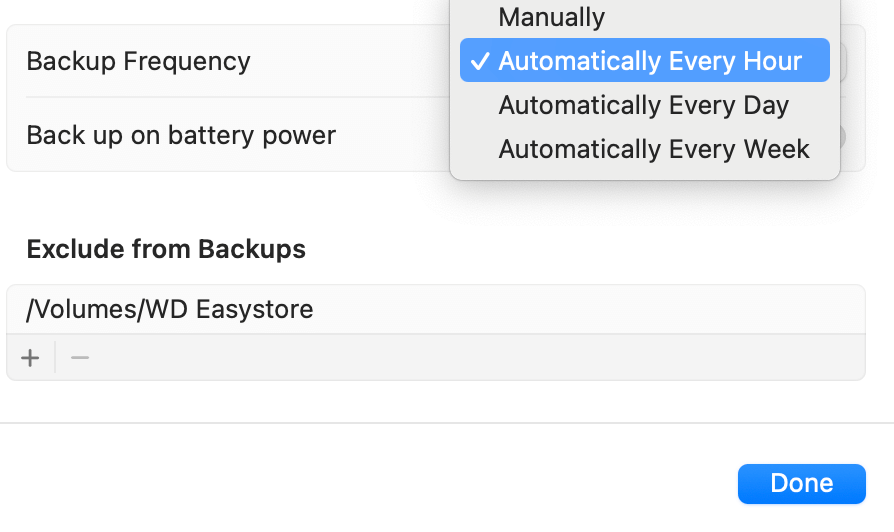
- Excluding folders or files: If you don't want to back up certain files or folders, you can click "Options" to exclude them.
![Configuring Time Machine Settings]()
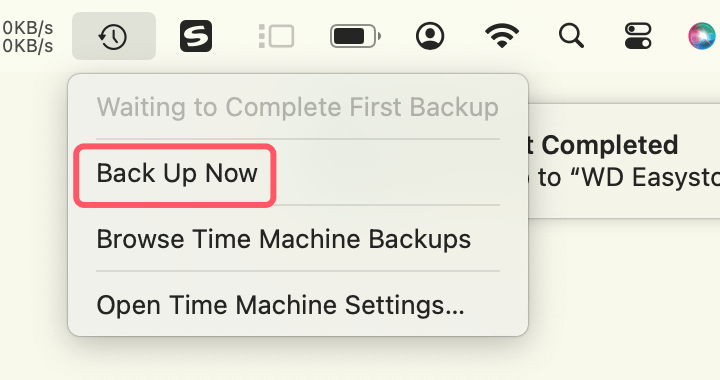
- Manual backups: You can force a manual backup at any time. Click the Time Machine icon in the menu bar and selecting "Back Up Now."
![Configuring Time Machine Settings]()
- Backup scheduling: Time Machine backs up automatically, but you can adjust the frequency by clicking Options.
![Configuring Time Machine Settings]()
5. Manual File Transfer and Storage
In addition to using Time Machine, WD Easystore is great for manually storing files. You can use the drive to store media libraries, documents, and project files.
How to Manually Transfer Files:
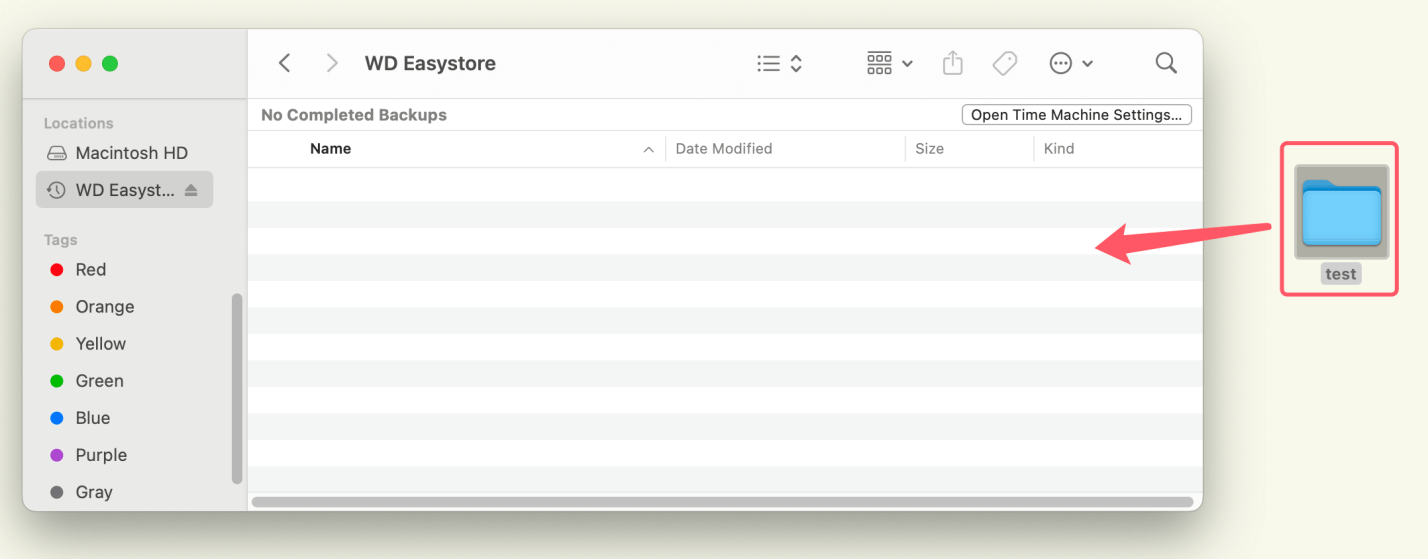
- Open Finder: Locate the WD Easystore drive under "Devices" or "Locations" in the Finder sidebar.
- Drag and Drop Files: Simply drag and drop files and folders from your Mac into the WD Easystore drive.
![Manual File Transfer and Storage]()
Organizing Files Efficiently:
Always organize your files into folders to keep everything easy to find. For example:
- Media: Store music, movies, and photos in separate folders.
- Work: Create folders for work-related documents, presentations, and spreadsheets.
- Backups: If you're manually backing up certain files, create a designated "Backups" folder to keep things organized.
File System Considerations:
If you frequently switch between a Mac and a Windows PC, keep the drive formatted as exFAT. This will allow you to read and write files on both operating systems. However, if you use the drive only with your Mac, APFS or HFS+ is better. These two file systems work well and are compatible with macOS.
6. Ejecting and Disconnecting WD Easystore Safely
Importance of Safely Ejecting External Drives:
Before physically disconnecting your WD Easystore drive from your Mac, it’s important to eject it properly first. The operation can avoid file corruption or damage to the drive.
Steps to Safely Eject the Drive:
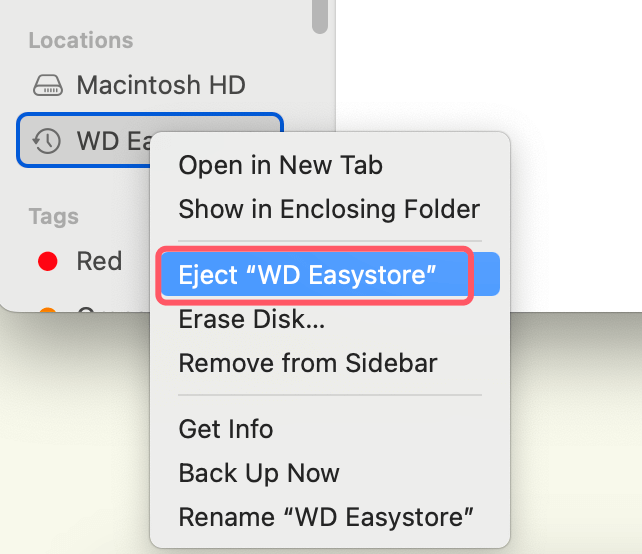
- Eject via Finder: In the Finder sidebar, click the eject icon next to the WD Easystore drive under "Locations."
![Steps to Safely Eject the Drive]()
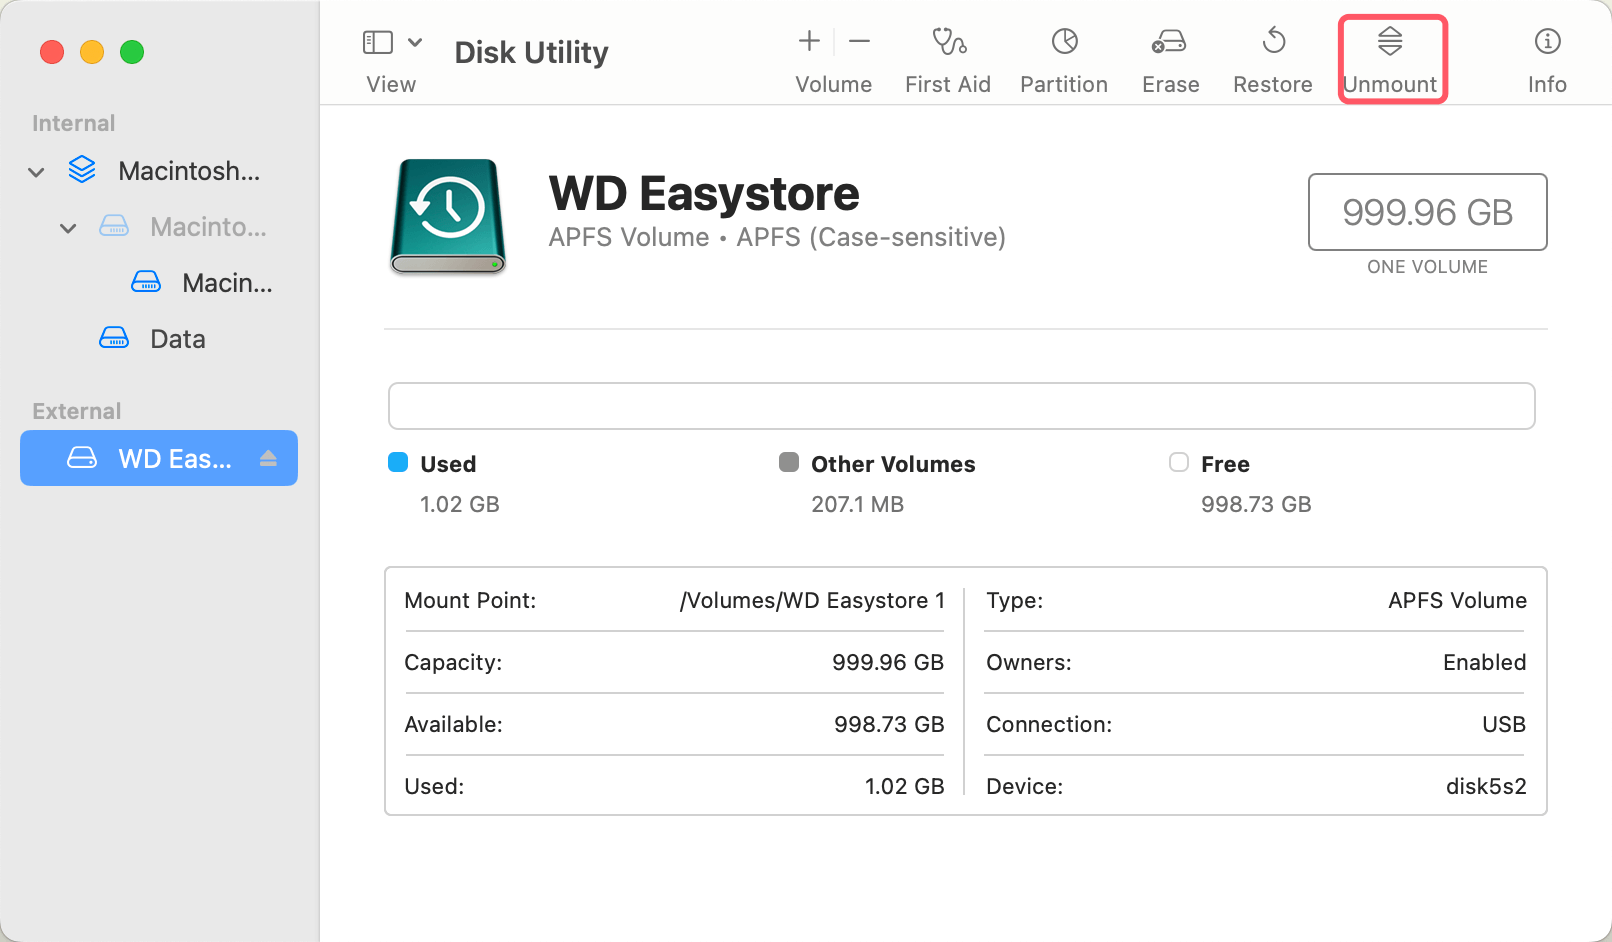
- Using Disk Utility: In Disk Utility, you can also click the Unmount button at the top of the window.
![Steps to Safely Eject the Drive]()
- Eject from the Desktop: If your external drive appears on the desktop, you can right-click on it and select "Eject."
![Steps to Safely Eject the Drive]()

Troubleshooting Ejection Issues:
If your Mac says the drive is still in use and won't eject, try the following:
- Close open files: Ensure that all files from the external drive are closed.
- Quit applications: Some applications might still be using the drive. Quit any apps that may be accessing the drive and try ejecting again.
- Force eject: If all else fails, you can force eject the drive by holding down the "Option" key and selecting "Force Eject."
Fixing WD Easystore Read-only on Mac Issue
If you use NTFS WD EasyStore portable SSD on mac, you will find it's impossible to write to the drive. It means you can't write data to it or modify data. To solve this issue without reformatting the drive, download and install a Microsoft NTFS driver on your Mac.
Step 1. Download and install Donemax NTFS for Mac on your Mac, then connect the NTFS WD Easystore drive to your Mac.
Step 2. Open Donemax NTFS for Mac, then select the NTFS WD Easystore drive, click on Enable Writable button. Then you can read-write any NTFS drive on your Mac without any limitation.

Maintaining WD Easystore Drive on Mac
Like any other external drives, WD EasyStore drive needs regular health checking to ensure its performance.
Checking Drive Health Using Disk Utility:
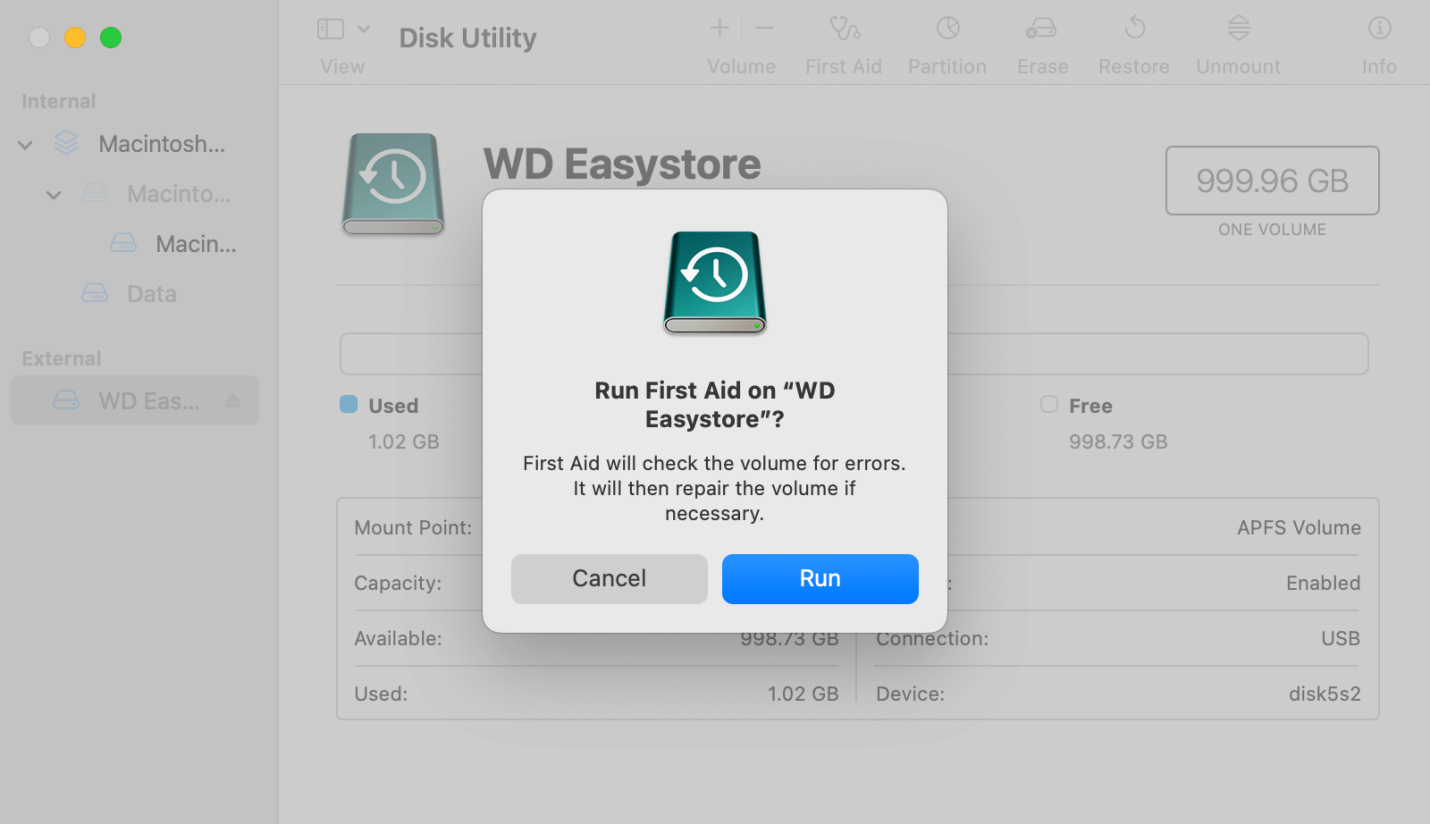
You can check the drive's health by running First Aid in Disk Utility:
- Open Disk Utility.
- Select the WD Easystore drive in the sidebar.
- Click the First Aid button and follow the prompts. This will check file system and repair errors.
![Checking Drive Health Using Disk Utility]()
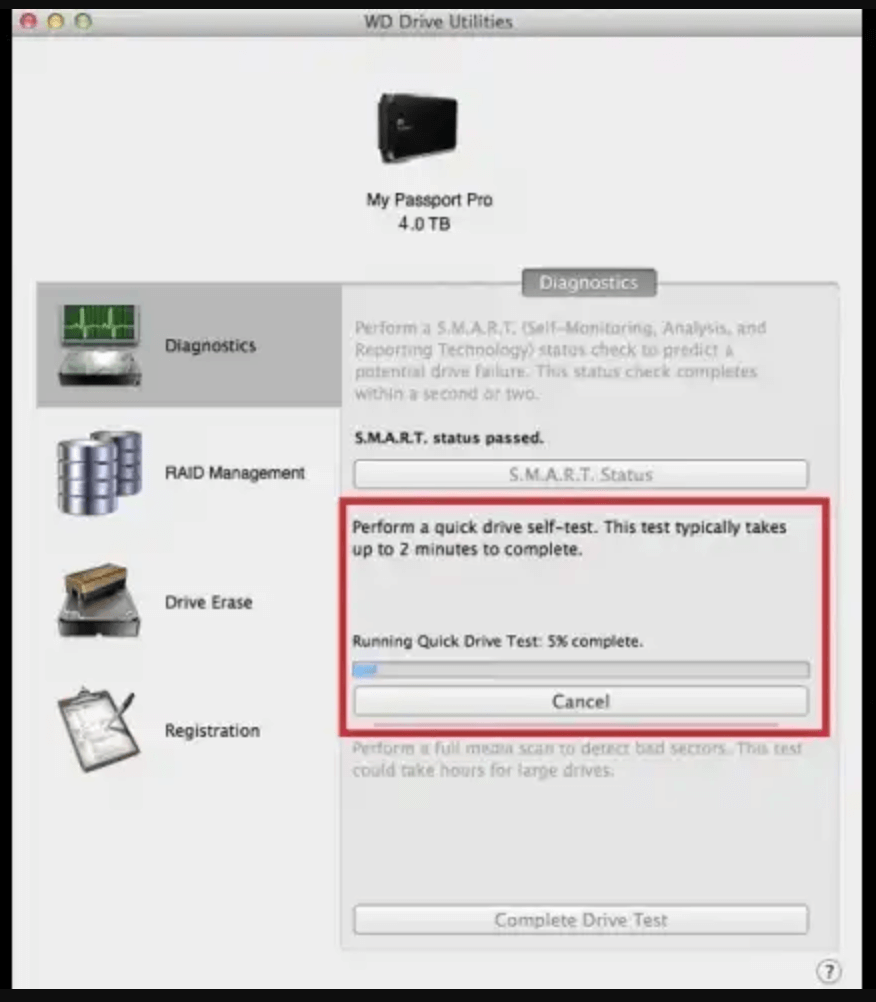
WD Drive Utilities Software:
Western Digital provides free software called WD Drive Utilities. The tool allows you to run diagnostics, manage drive settings, and check drive health. Download from the official WD website for additional control over your drive’s maintenance.
Troubleshooting Common WD Easystore Issues on Mac
Drive Not Mounting or Recognized:
If your WD Easystore isn't appearing on your Mac, try these steps:
- Check the cable: Make sure the USB cable is securely connected.
- Try a different port: Switch to another USB port on your Mac.
- Restart your Mac: Sometimes a simple reboot can resolve mounting issues.
- Reset SMC or PRAM: For persistent problems, resetting the System Management Controller (SMC) or PRAM might help.
File Transfer Issues:
If you encounter issues transferring files, such as permission errors or you cannot write to the drive:
- Check permissions: Right-click the drive in Finder, select "Get Info," and ensure that you have permission to read and write to the drive.
- Check format: Make sure the drive is formatted in a file system that allows write access (APFS, HFS+, or exFAT).
Conclusion
Using WD Easystore on Mac is good to manage your data, increase storage, and create regular backups. WD Easystore is versatile for Mac users. You can format it correctly to use Time Machine for automated backups. Or set up the drive for manually transferring files.
Taking care of your drive is important. Follow these tips to keep it in good shape. This will help ensure your important files are safe for a long time. By following the steps in this article, you can use your WD Easystore external drive on Mac.
Related Articles
- Mar 11, 2025How to Format a Seagate Backup Plus Drive on Windows or macOS?
- Jul 17, 2023What to Do If An USB Flash Drive Not Working on Mac?
- Jun 06, 2025Restore USB Drive to Full Capacity: A Complete Step-by-Step Guide
- Mar 31, 2025[11 Fixes] Fix Seagate External Hard Drive Not Recognized by Mac – Guide 2025
- Jul 27, 20256 Methods to Fix External Hard Drive Not Mounting on macOS Tahoe 26
- Jun 25, 2026How to Format a MBR Disk to GPT or GPM on Mac?

Contributing Writer
Christina
Christina is the senior editor of Donemax software who has worked in the company for 4+ years. She mainly writes the guides and solutions about data erasure, data transferring, data recovery and disk cloning to help users get the most out of their Windows and Mac. She likes to travel, enjoy country music and play games in her spare time.

Editor in chief
Gerhard Chou
In order to effectively solve the problems for our customers, every article and troubleshooting solution published on our website has been strictly tested and practiced. Our editors love researching and using computers and testing software, and are willing to help computer users with their problems