
Written byStevenUpdated on Apr 25, 2025
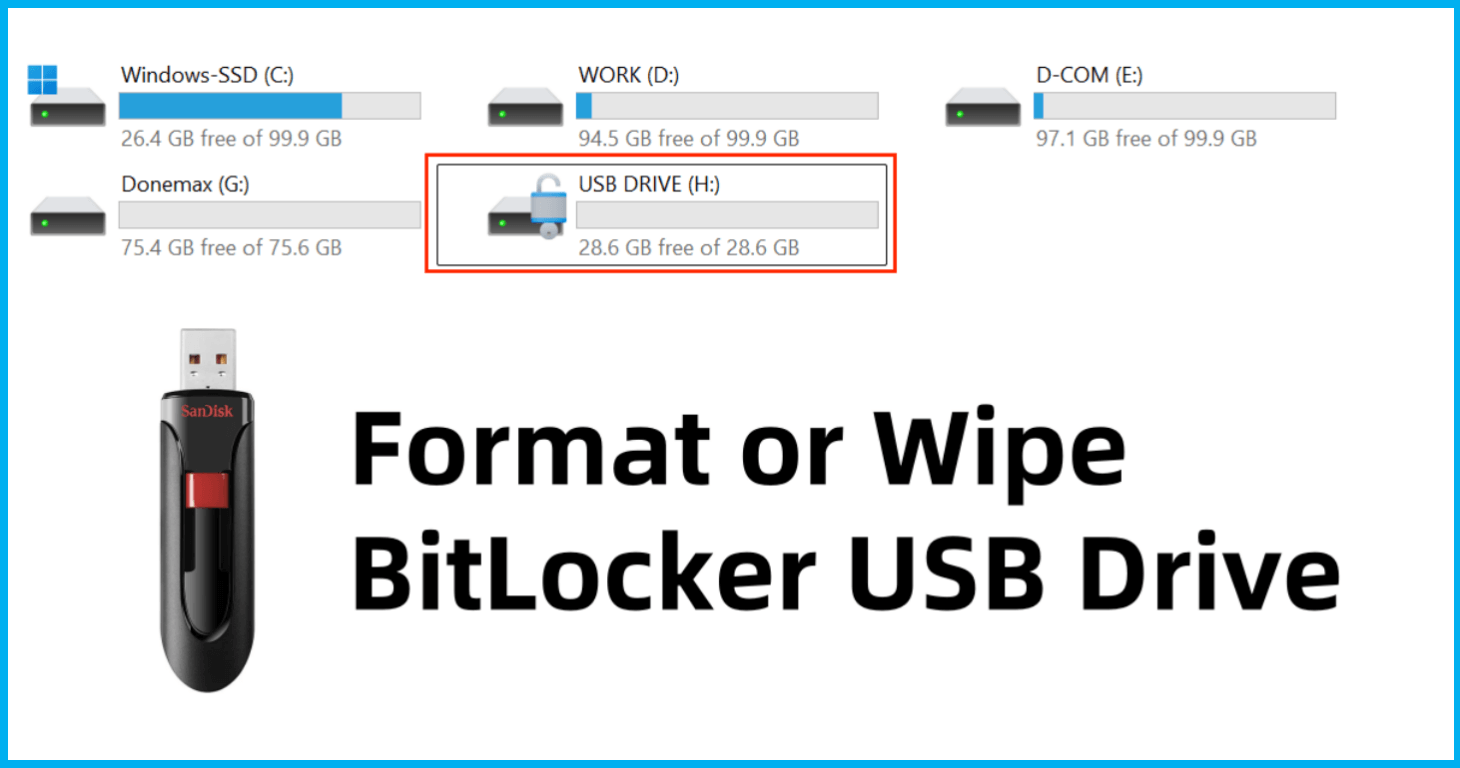
Format a BitLocker Encrypted USB Drive
Approved byGerhard Chou
Before we start: If you will sell, donate or dispose of your old BitLocker USB drive, you can use Donemax Data Eraser to wipe it. It can securely wipe a BitLocker encrypted USB drive without password and permanently erase all data from the drive, making data recovery be impossible.
PAGE CONTENT:
BitLocker encryption is a robust security feature available on Windows operating systems that protects data by encrypting the contents of hard drives, including USB drives. While encryption adds a layer of protection to sensitive files, there are times when a user may need to format a BitLocker-encrypted USB drive. Formatting a USB drive is a process of erasing all its data and preparing it for reuse, but when a BitLocker encryption is applied, it adds complexity.
In this article, we will explore the process of formatting a BitLocker-encrypted USB drive. We'll cover various methods depending on the situation and give you essential precautions to take before formatting. By the end, you will understand how to format your BitLocker USB drive safely, whether it’s unlocked or locked, and what to do if you don't have the recovery key.
What is BitLocker Encryption?
BitLocker is a disk encryption program included with Windows. It is designed to protect the integrity of the data stored on a drive by making it unreadable without a valid key. BitLocker encrypts the entire drive, making it impossible for unauthorized users to access the contents of the disk unless they provide the correct credentials, such as a password or recovery key.
BitLocker To Go is the version of BitLocker that applies encryption to portable drives, such as USB flash drives and external hard drives. This allows users to carry sensitive data securely on a portable medium. BitLocker uses either a password or a recovery key for access, ensuring that even if someone finds the USB, they cannot access the files without proper authorization.
While BitLocker provides enhanced security, it can be a bit tricky when you need to format or make changes to the USB drive. The following sections will explore different ways to format a BitLocker USB drive based on whether it’s locked or unlocked.
Precautions Before Formatting BitLocker USB Drive
Before proceeding with formatting your BitLocker-encrypted USB drive, it is significant to comply some safety measures:
- Backup Important Data: Formatting a drive erases all its data. Ensure that you’ve backed up any essential files stored on the drive before proceeding.
- Ensure Access to the BitLocker Password or Recovery Key: If the USB drive is encrypted and locked, you will need the BitLocker password or recovery key to unlock it before formatting. Without this key, you will lose access to the drive's contents.
- Verify the Reason for Formatting: Ensure that you have a clear reason for formatting your drive, such as repurposing the drive, removing a virus, or fixing performance issues. Formatting a BitLocker USB drive is often a last resort for fixing problems.
- Understand the Consequences of Formatting: Once a BitLocker USB drive is formatted, it is essentially wiped clean. Any data on the drive will be lost unless it has been backed up.
Methods to Format a BitLocker USB Drive With or Without Recovery Key
Method 1: Format BitLocker USB Drive After Unlocking It
If you have access to the password or recovery key, unlocking the BitLocker USB drive is the first step. Once it's unlocked, you can easily format the drive through the File Explorer.
Steps to Format an Unlocked BitLocker USB Drive:
- Insert the USB Drive: Plug the BitLocker-encrypted USB drive into your computer.
- Unlock the Drive: If prompted, enter the BitLocker password or recovery key to unlock the drive.
- Access the Drive in File Explorer: You can access it by pressing Windows + E. The unlocked USB drive should be visible under "This PC."
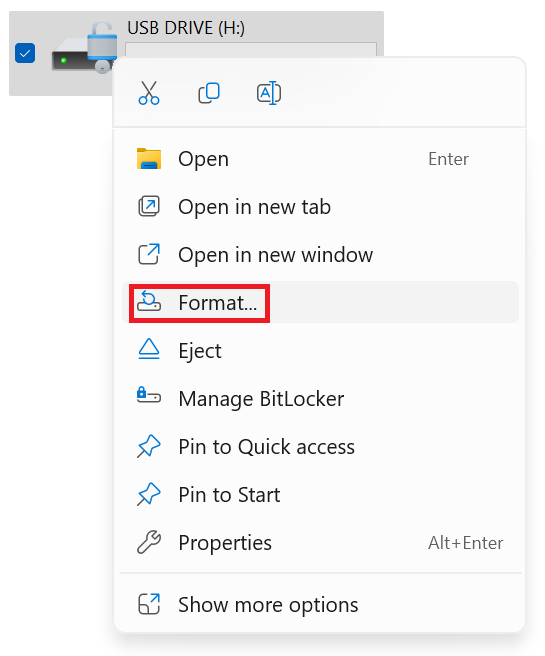
- Format the Drive:
- From the context menu, choose Format after performing a right-click on the USB drive.
![formatting a BitLocker-encrypted USB drive]()
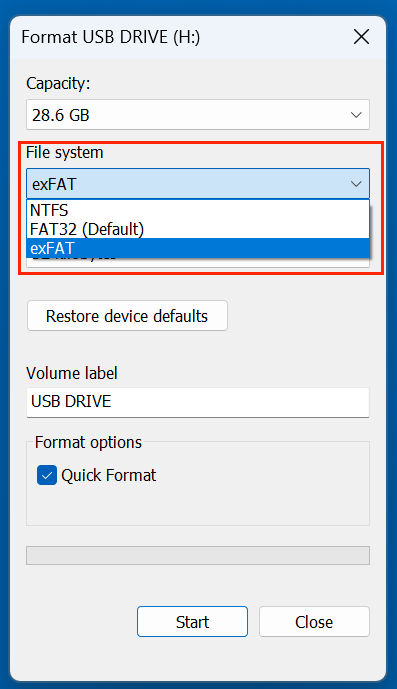
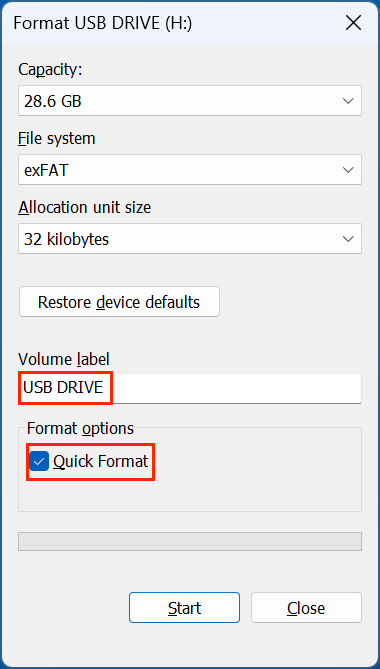
- Opt the file system you want for the USB drive. Options typically include NTFS, exFAT, or FAT32 (depending on the size of the drive).
![formatting a BitLocker-encrypted USB drive]()
- You can also assign a name to the drive under the Volume Label field.
- Uncheck Quick Format if you want to perform a full format, which will take longer but may help with issues like corrupted sectors.
![formatting a BitLocker-encrypted USB drive]()
- To start the formatting process, click Start. The fact that all data will be deleted will be indicated with a notice. Click OK to confirm.
- From the context menu, choose Format after performing a right-click on the USB drive.
- Finish: After formatting is finished, the USB drive will be empty and ready for use. You can now safely store new data on it.
Pros and Cons of This Method:
- Pros: Quick and straightforward if you have access to the password or recovery key.
- Cons: Requires that the drive is unlocked, which may not be the case for everyone.
Method 2: Format BitLocker USB Drive Using Command Prompt
If you prefer a more technical approach or if the File Explorer method fails, you can use Command Prompt to unlock and format the BitLocker USB drive.
Steps to Format a BitLocker USB Drive Using Command Prompt:
- Unlock the Drive Using manage-bde:
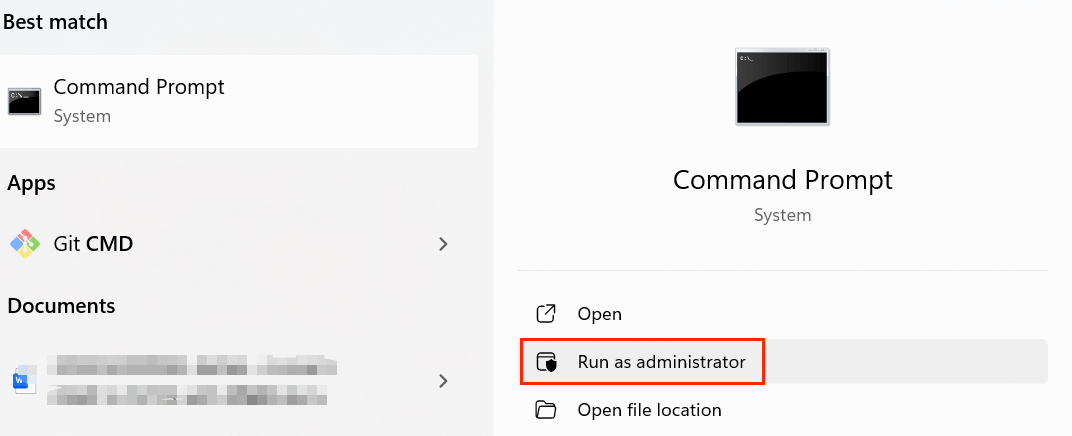
- Use the Start menu to find "cmd," then right-click and choose "Run as administrator" to launch Command Prompt as an administrator.
![formatting a BitLocker-encrypted USB drive]()
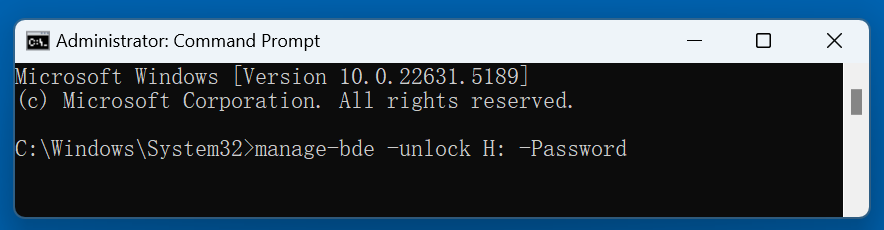
- To unlock the drive, type the below command:
manage-bde -unlock H: -Password
![formatting a BitLocker-encrypted USB drive]()
Replace H: with the letter of your USB drive, and enter your BitLocker password when prompted.
- Use the Start menu to find "cmd," then right-click and choose "Run as administrator" to launch Command Prompt as an administrator.
- Remove BitLocker Encryption:
- Once the drive is unlocked, you may choose to disable BitLocker entirely by running the following command:
manage-bde -off H:
- This will decrypt the drive. Depending on the size of the drive and the amount of data, the decryption process may take some time.
- Once the drive is unlocked, you may choose to disable BitLocker entirely by running the following command:
- Format the Drive:
- After decryption is complete, you can format the drive using the diskpart command. In the same Command Prompt window, type:
diskpart
- Then type:
list disk
This will show a list of all the disks connected to your computer.
- Identify the number of the BitLocker USB drive (e.g., Disk 1) and type:
select disk 1
- To clean the disk, type:
clean
- Finally, to create a new partition and format the drive, type:
create partition primary
format fs=exFAT quick or format fs=exFAT
Assign![formatting a BitLocker-encrypted USB drive]()
- After decryption is complete, you can format the drive using the diskpart command. In the same Command Prompt window, type:
- Finish: Your USB drive will now be formatted and free of encryption.

Pros and Cons of This Method:
- Pros: More control over the formatting process, especially if you need to do it from the command line.
- Cons: More complex, especially for those who aren’t familiar with command-line tools.
Method 3: Format a Locked BitLocker Drive
If you don't have access to the BitLocker password or recovery key, you may be unable to unlock the USB drive through standard methods. In this case, you have limited options, and formatting the drive might not be possible without the proper credentials.
Options for Locked Drives:
- Using Third-Party Tools: Some third-party tools claim to be able to bypass BitLocker encryption or force format a locked drive. However, these tools often require advanced technical skills and may not work in all cases.
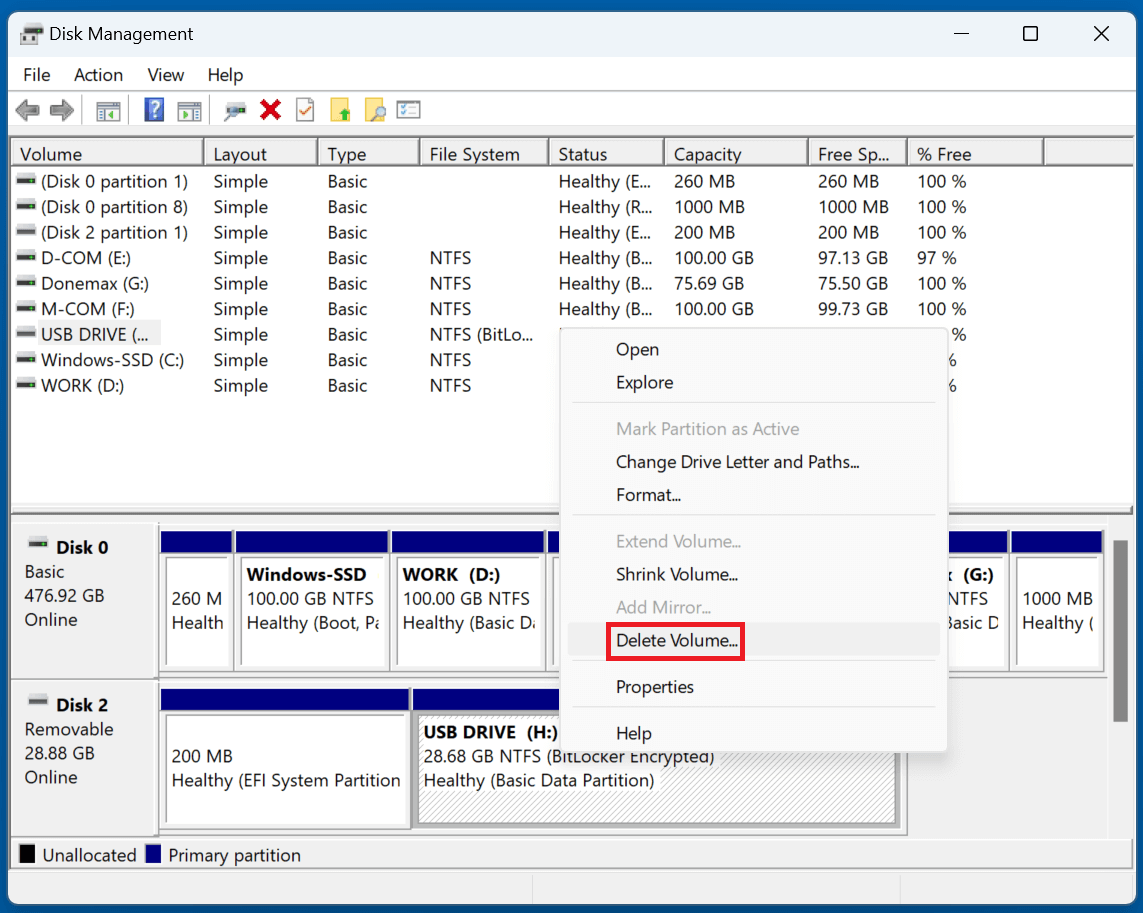
- Erase the Drive Using Disk Management: In some instances, you can try to erase the drive using Disk Management:
- Choose Disk Management by performing a right-click on the Start button.
- Locate the BitLocker-encrypted USB drive, right-click, and select Delete Volume.
![formatting a BitLocker-encrypted USB drive]()
- This may wipe the drive clean, but you will still need the password or key to fully decrypt the contents.
How to Disable BitLocker Before Formatting?
If you prefer to completely remove BitLocker encryption from your USB drive before formatting, you can decrypt the drive. Disabling BitLocker before formatting ensures that the drive can be used without restrictions after the process.
Steps to Disable BitLocker:
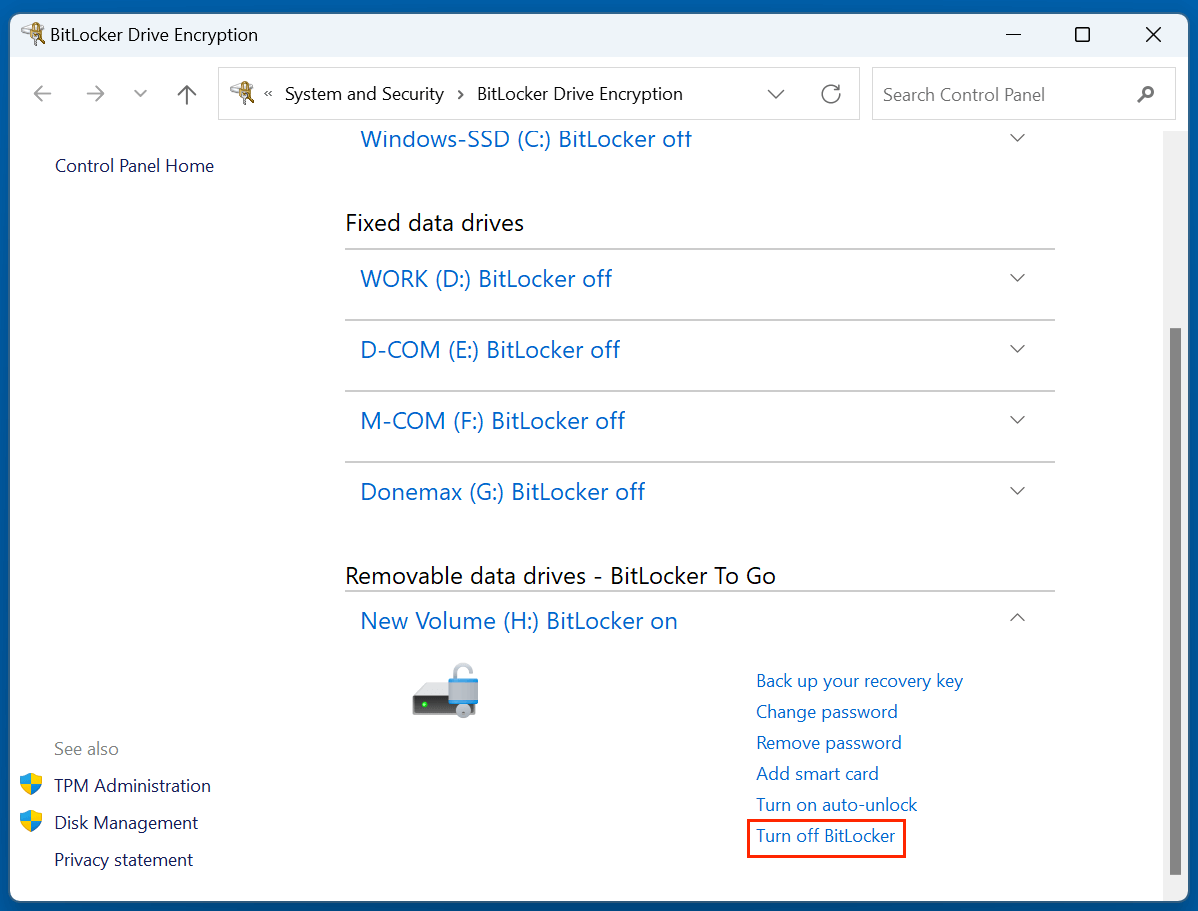
- Go to System and Security in the Control Panel, then select BitLocker Drive Encryption.
- Locate your USB drive and select Turn off BitLocker.
![formatting a BitLocker-encrypted USB drive]()
- Follow the instructions on the screen to decrypt the drive. This may take a while, depending on the size of the drive and the amount of data stored on it.
- Once the drive is decrypted, you can follow the steps from Method 1 or Method 2 to format the drive.
Common Issues and Troubleshooting
While formatting a BitLocker USB drive, you may encounter a few common issues:
- Access Denied Error: If you're unable to format the drive due to permission issues, ensure you have administrative rights, and check if any security software is blocking the action.
- Drive Not Showing in File Explorer: If the USB drive is not showing up in File Explorer, try checking if it appears in Disk Management or Device Manager.
- Write-Protection Errors: Some USB drives may be write-protected, preventing formatting. If you encounter this issue, you may need to disable the write protection via the hardware switch on the drive or using the diskpart tool.
- Formatting Stuck: If formatting is stuck or fails, try running chkdsk or checking for disk errors before retrying.
Recover Lost Data After Formatting Your BitLocker USB Drive
If you've lost data due to reformatting the BitLocker USB drive, you can use data recovery program to unformat the drive and get all erased/deleted data back.
Step 1. Download and install Donemax Data Recovery on your computer.
Step 2. Open Donemax Data Recovery and select the formatted USB drive to start data recovery.

Step 3. Click on Scan button to deeply scan the formatted USB drive and find all deleted/formatted/lost files.

Step 4. Once the scanning process gets finished, you can preview all recoverable files. Then select the wanted files, click on Recover button to save them.

How to Wipe a BitLocker USB Drive Without Password?
If you will sell, donate or dispose of an old BitLocker USB drive, you can use disk wipe software - such as Donemax Data Eraser to wipe it.
Step 1. Download and install Donemax Data Eraser on your computer and open it.
Step 2. Open Donemax Data Eraser on your computer, choose Erase Hard Drive mode. Then select the BitLocker USB drive, click on Erase Now button.

It will format and wipe the BitLocker USB drive. All data stored on the drive will be erased permanently.
Conclusion
Formatting a BitLocker USB drive is a process that requires careful consideration, especially because the drive is encrypted. Whether you are unlocking the drive to format it or dealing with a locked USB without the recovery key, there are several methods available.
If you have access to the password or recovery key, the process is simple and can be completed quickly through File Explorer or Command Prompt. However, if the drive is locked and you don't have the recovery key, your options are more limited, and you may need to use third-party tools or force delete the volume.
Prior to formatting, always remember to create backup of your data, as formatting will erase everything on the drive. By complying the process in this article, you can ensure that your BitLocker-encrypted USB drive is formatted safely and efficiently.
Donemax Data Eraser
One of the best data erasure programs for permanently erase data from PC, Mac, HDD, SSD, USB drive, digital camera and other devices. Once the data is erased, it is lost for good, cannot be recovered by any method.
Related Articles
- Mar 27, 2025How to Use BitLocker on Windows 11?
- Nov 26, 2025How to Access and Get Files Off An Old Hard Drive?
- Feb 11, 2025How to Show Hidden Files on a USB Flash Drive?
- Feb 21, 2024How to Remove Stubborn Files from PC?
- Sep 08, 2025An Unknown Error Occurred in iMessage on Mac, Fix It
- Sep 09, 2025How to Delete A Partition on SSD without Losing Data?

Contributing Writer
Steven
Steven has been a senior writer & editor of Donemax software since 2020. He's a super nerd and can't imagine the life without a computer. Over 6 years of experience of writing technical solutions and software tesing, he is passionate about providing solutions and tips for Windows and Mac users.

Editor in chief
Gerhard Chou
In order to effectively solve the problems for our customers, every article and troubleshooting solution published on our website has been strictly tested and practiced. Our editors love researching and using computers and testing software, and are willing to help computer users with their problems