
Written byStevenUpdated on Dec 16, 2025
Transfer Photos from Sony Digital Camera to Mac
Approved byGerhard Chou
PAGE CONTENT:
Transferring photos from Sony digital camera to Mac doesn't have to be complicated. Whether you're working with high-resolution RAW files from a Sony Alpha series or vacation shots from a Cyber-shot camera, macOS offers multiple ways to access and manage your images.
In this guide, we'll walk you through five effective methods to get your photos safely onto your Mac: using USB cable, macOS apps, SD card reader, Sony software, and Wi-Fi. We'll also cover troubleshooting steps, camera settings, and organization tips to help streamline the entire process.
Preparing Your Sony Camera and Mac Before Photos Transfer
Before transferring files, make sure everything is ready:
- Charge your camera: A low battery may interrupt the transfer process.
- Check your USB cable: Use the original Sony USB or a high-quality compatible cable (USB-A, USB-C, or Micro USB depending on your model).
- Update macOS: Ensure your Mac is running the latest version for best compatibility.
- Unlock the camera (if needed): Some models require you to enable file sharing or select a connection mode.
Depending on your camera model (Sony Alpha, Cyber-shot, ZV series, etc.), there may be different connectivity options. Refer to your camera's user manual for USB mode settings, typically found under Setup > USB Connection.
Methods to Transfer Photos from Sony Digital Camera to Mac
There are a few ways to transfer the photos or images from Sony digital camera to a Mac. Here we will introduce the methods one by one in detail.
Method 1: Transfer via USB Cable and the macOS Photos App
The Photos app is a built-in application on macOS that detects most digital cameras automatically.
Here are the steps:
- Connect the camera to your Mac using a USB cable.
- Power on the camera and choose "Mass Storage" or "MTP" mode when prompted.
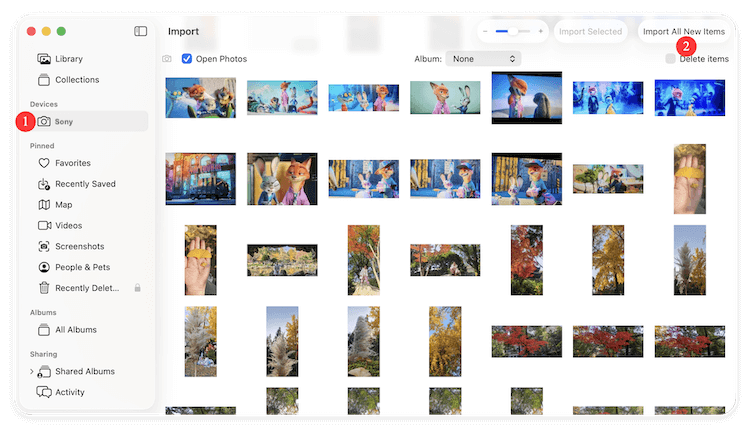
- The Photos app should open automatically. If not, launch it manually from the Applications folder.
- Your Sony camera will appear in the left sidebar.
- You'll see a thumbnail view of all the photos stored on the camera.
- Click Import All New Items or manually select images to import.
Advantages:
- No extra software installation required.
- Easy preview and sorting of images.
- Automatically adds photos to your system library.
Limitations:
- Limited control over file naming or destination folders.
- RAW image handling may be limited depending on macOS version.
Method 2: Use the Image Capture App (Native macOS Tool)
If you want more control over where your photos are saved and don't want to use the Photos app, Image Capture is a great alternative.
Here is how:
- Connect your Sony camera via USB.
- Launch Image Capture from Applications.
- Your device will show up in the Devices section.
- Set the destination folder at the bottom (e.g., Desktop or a custom folder).
- Select photos or click "Download All".

Advantages:
- Greater flexibility in file management.
- Works with most digital cameras and smartphones.
- Supports drag-and-drop file transfers.
Limitations:
- No advanced editing or automatic organization.
- Interface is simple and lacks visual polish.
Method 3: Use Sony Imaging Edge Desktop Software
Sony offers a specialized suite of tools called Imaging Edge Desktop, which provides additional features like remote shooting, RAW image editing, and more.
Just follow the steps:
- Go to the Sony Imaging Edge Desktop website and download the software.
- Install the package on your Mac.
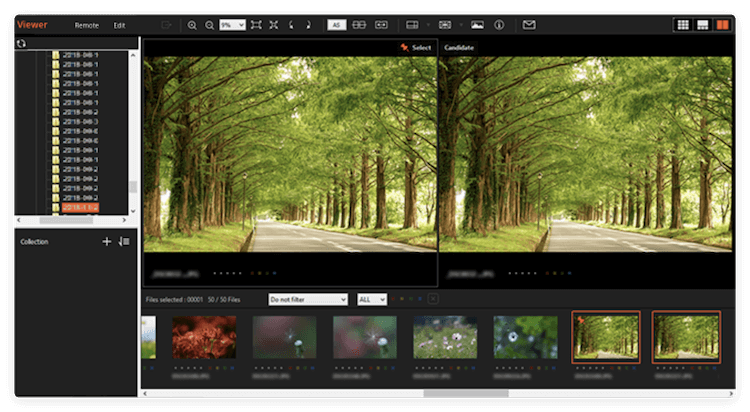
- Launch Imaging Edge Desktop.
- Connect your camera via USB and turn it on.
- The software will automatically detect your camera and allow you to import photos.
Advantages:
- Supports RAW image conversion.
- Offers remote camera control and live shooting via tethering.
- Good for professionals working with large photo libraries.
Limitations:
- Slightly steeper learning curve.
- May require specific camera firmware or macOS version.
Method 4: Use an SD Card Reader
This is perhaps the fastest and most convenient method, especially if you regularly shoot hundreds of images.
Do as following steps:
- Turn off the camera and remove the SD card.
- Insert the SD card into your Mac's built-in SD card slot (if available) or use a USB-C/USB-A card reader.
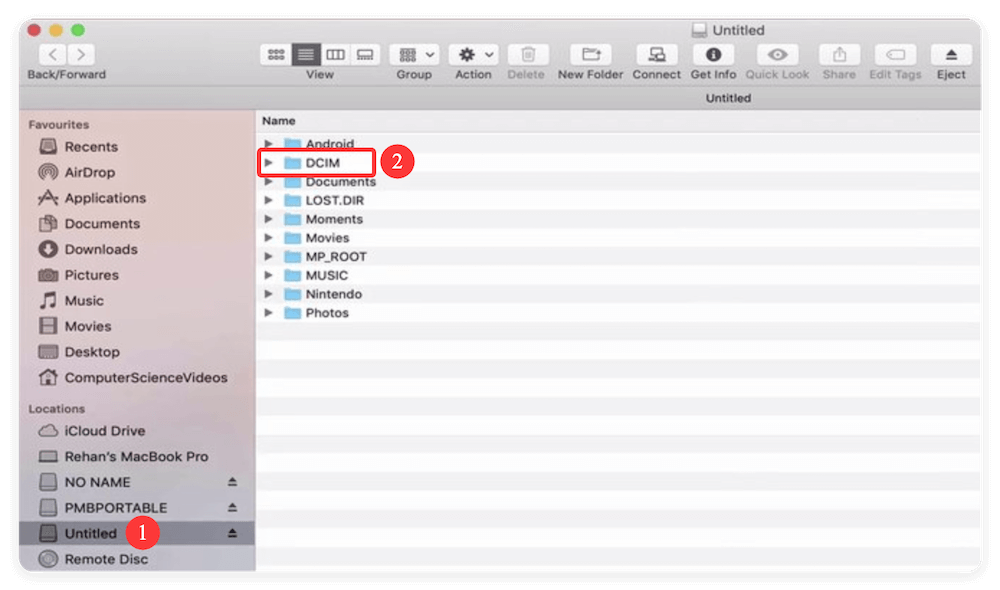
- The SD card will appear as a drive in Finder.
- Open the folder (usually labeled DCIM) and manually copy files to your desired location.
Advantages:
- Faster transfer speeds compared to USB.
- No software or camera needed once the card is removed.
- Ideal for bulk transfers.
Limitations:
- Requires a card reader if your Mac lacks an SD slot.
- Potential for card corruption if not ejected properly.
Method 5: Wireless Transfer via Wi-Fi
Wireless transfer is a convenient, cable-free method to move photos from your Sony camera to your Mac. This is especially useful when you're traveling or working in a location where plugging in cables isn't practical. Many modern Sony cameras—such as the Alpha (A6000, A7 series), RX100, and ZV series—support wireless transfer through Wi-Fi, NFC, or Bluetooth, depending on the model.
There are two main wireless transfer methods:
- Transfer via Imaging Edge Mobile app to your smartphone, then to Mac
- Transfer directly to your Mac over Wi-Fi using FTP or network sharing
Option A: Imaging Edge Mobile + Phone to Mac Transfer
This is the easiest wireless route and involves using your smartphone as an intermediary.
What You'll Need:
- A compatible Sony camera with built-in Wi-Fi
- A smartphone (iOS or Android)
- Sony's Imaging Edge Mobile app (available on the App Store or Google Play)
- AirDrop or iCloud access on your Mac
Steps to transfer the photos:
- Install Imaging Edge Mobile on your smartphone.
- Connect your camera to the phone via QR code or SSID/password.
- Transfer photos to the mobile device.
- Use AirDrop or iCloud to move files to your Mac.
Option B: Transfer Directly to Mac via Wi-Fi (if supported)
Some high-end Sony cameras support direct Wi-Fi file transfer to a computer using FTP (File Transfer Protocol) or network sharing. This method is a bit more technical but offers a powerful workflow for professionals.
What You'll Need:
- Sony camera with FTP/Wi-Fi Direct capability
- Mac connected to the same Wi-Fi network
- FTP server setup on your Mac (e.g., via System Preferences or a third-party app like FileZilla Server)
Steps to move the images:
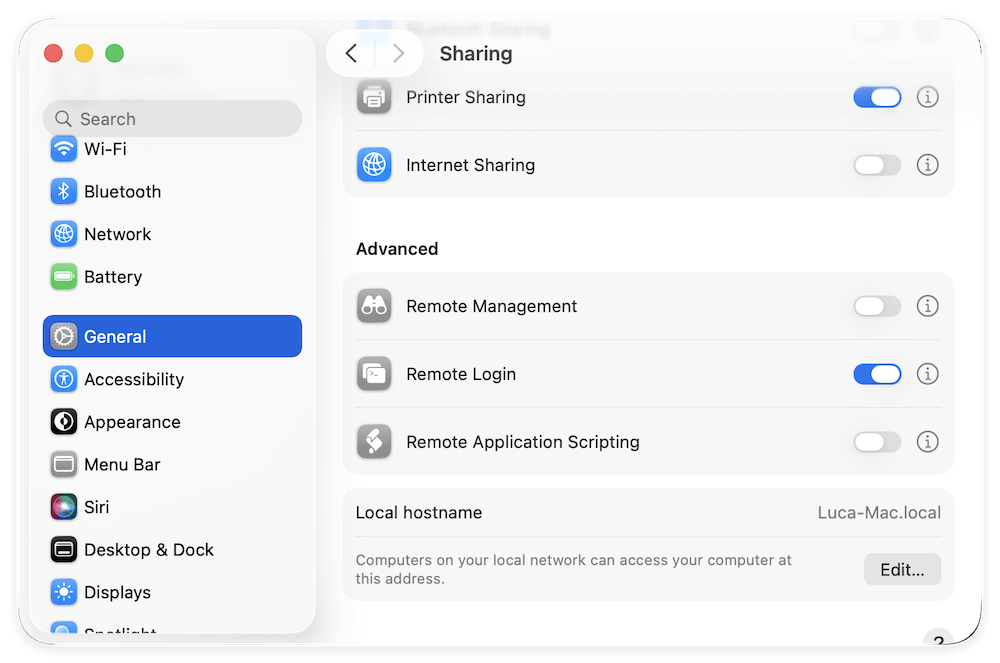
- Open System Settings > Sharing. Turn on Remote Login or use third-party FTP software to run an FTP server.
![transfer photos from Sony digital camera to Mac via Wifi]()
- Note your Mac's local IP address (e.g., 192.168.1.20).
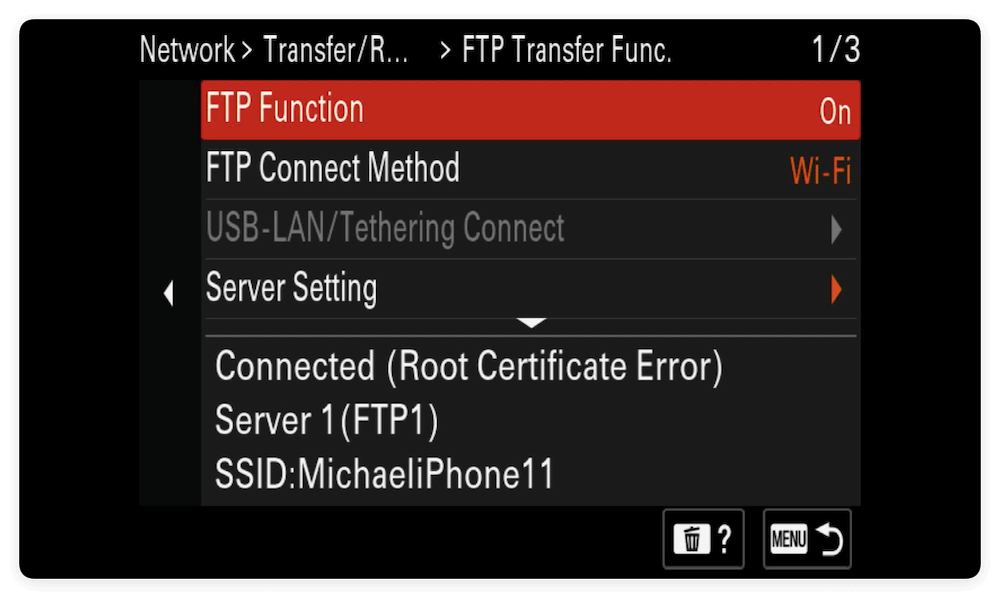
- On your Sony camera, go to Network Settings > FTP Transfer Function > FTP Settings.
![transfer photos from Sony digital camera to Mac via Wifi]()
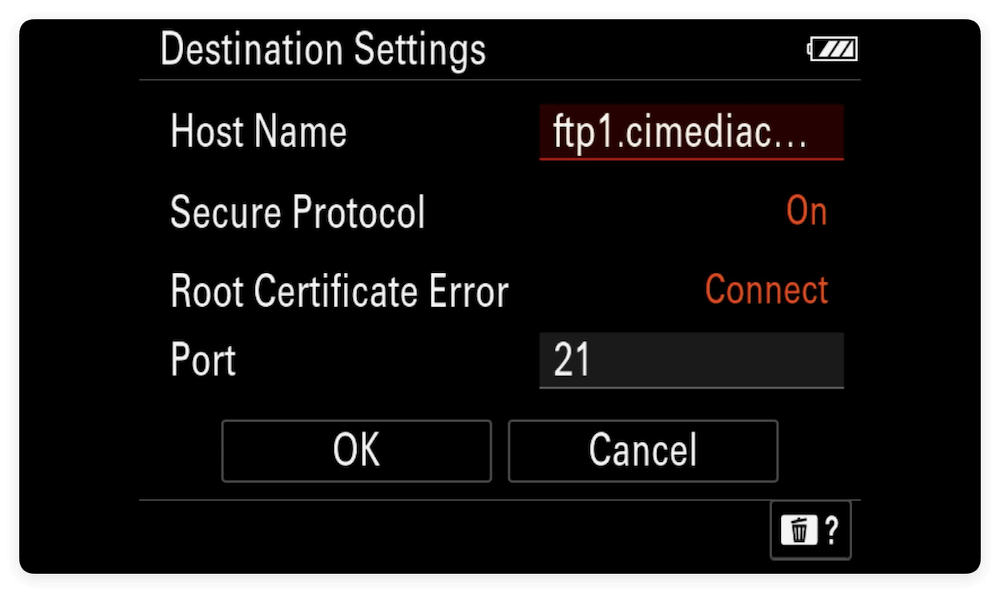
- Enter the IP address of your Mac, FTP port (usually 21), and login credentials.
![transfer photos from Sony digital camera to Mac via Wifi]()
- Go to the image playback mode. Select Send via FTP or Auto FTP Transfer depending on your preference.
![transfer photos from Sony digital camera to Mac via Wifi]()
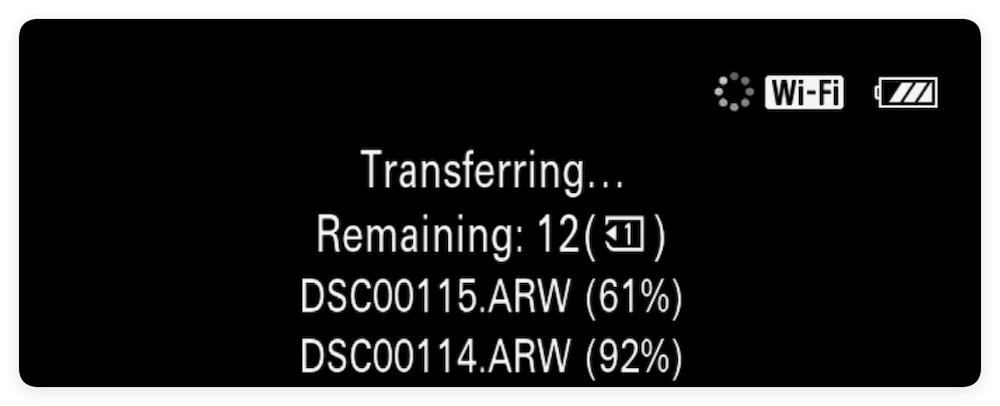
- Files will begin uploading to the shared destination folder on your Mac.
![transfer photos from Sony digital camera to Mac via Wifi]()
- Open Finder or your FTP server folder to access the transferred images.

Advantages:
- No cables or readers needed.
- Great for travel or quick sharing.
- Enables live previews or remote control from your phone.
Limitations:
- Slower than USB or SD card transfer.
- Not all Sony cameras support full wireless transfer to Mac.
- Setup process may be complex for first-time users.
Which Method Should You Choose?
|
Method |
Best For |
|---|---|
|
USB + Photos App |
Beginners, casual users |
|
Image Capture |
Manual file management |
|
Imaging Edge Desktop |
Professionals, RAW image workflows |
|
SD Card Reader |
Fast, large transfers |
|
Wireless Transfer |
Quick shares on the go |
Troubleshooting Common Issues While Moving Photos
Even with the best equipment, you might encounter some hiccups. Here's how to solve the most common ones:
Camera Not Recognized by Mac
- Try a different USB port or cable.
- Restart both devices.
- Switch the USB connection mode on the camera.
- Check System Information > USB to see if the device is detected.
SD Card Not Showing Up
- Open Disk Utility and check if the card is mounted.
- Use another card reader or Mac port.
- Try the SD card on another device to rule out damage.
Slow Transfer Speeds
- Use USB 3.0 or newer ports.
- Prefer SD card transfer for bulk files.
- Avoid transferring while charging the camera.
File Format Compatibility
- macOS supports JPEG and many RAW formats.
- For unsupported formats, use Imaging Edge or Adobe Lightroom.
Tips for Managing and Organizing Imported Photos
Once you've imported your photos, keeping them organized is key for easy access and editing.
Use Folders and Tags
- Create folders by date, event, or location.
- Use Finder tags or Photo Album labels.
Enable iCloud Photos
- Sync photos across all your Apple devices.
- Provides cloud backup and editing from any device.
Backup Your Images
- Use Time Machine, Dropbox, or external drives.
- Consider multiple backups for professional work.
Use Editing Software
- Basic editing: Preview, Photos app.
- Advanced editing: Adobe Lightroom, Photoshop, or Capture One.
Your choice depends on your usage level, preferred workflow, and available tools.
Conclusion
Transferring photos from your Sony digital camera to a Mac can be simple and flexible with the right approach. Whether you use the built-in Photos app, a direct SD card reader, Sony's Imaging Edge Desktop, or even wireless transfers, macOS offers something for every skill level.
For professional photographers, SD card readers and Imaging Edge Desktop are likely the most efficient. Casual users might find USB and the Photos app more intuitive. And if you're always on the move, wireless methods can be a convenient, cable-free option.
Regardless of the method you choose, regularly backing up and organizing your photos ensures your memories and creative work stay safe and accessible.
Related Articles
- Feb 23, 2024How to Format and Unformat Sony SD Card on Windows & macOS?
- Apr 29, 2026How to Initialize SSD on Windows 11/10: Ultimate 2026 Guide
- Nov 20, 2024How to Clean Install macOS Catalina?
- Feb 11, 2025How to Show Hidden Files on a USB Flash Drive?
- Feb 03, 2026Windows 11 Data Recovery: Top 5 Proven Methods
- Apr 18, 2025How to Format a Drive to exFAT by Using CMD (Command Prompt - diskpart)?

Contributing Writer
Steven
Steven has been a senior writer & editor of Donemax software since 2020. He's a super nerd and can't imagine the life without a computer. Over 6 years of experience of writing technical solutions and software tesing, he is passionate about providing solutions and tips for Windows and Mac users.

Editor in chief
Gerhard Chou
In order to effectively solve the problems for our customers, every article and troubleshooting solution published on our website has been strictly tested and practiced. Our editors love researching and using computers and testing software, and are willing to help computer users with their problems